
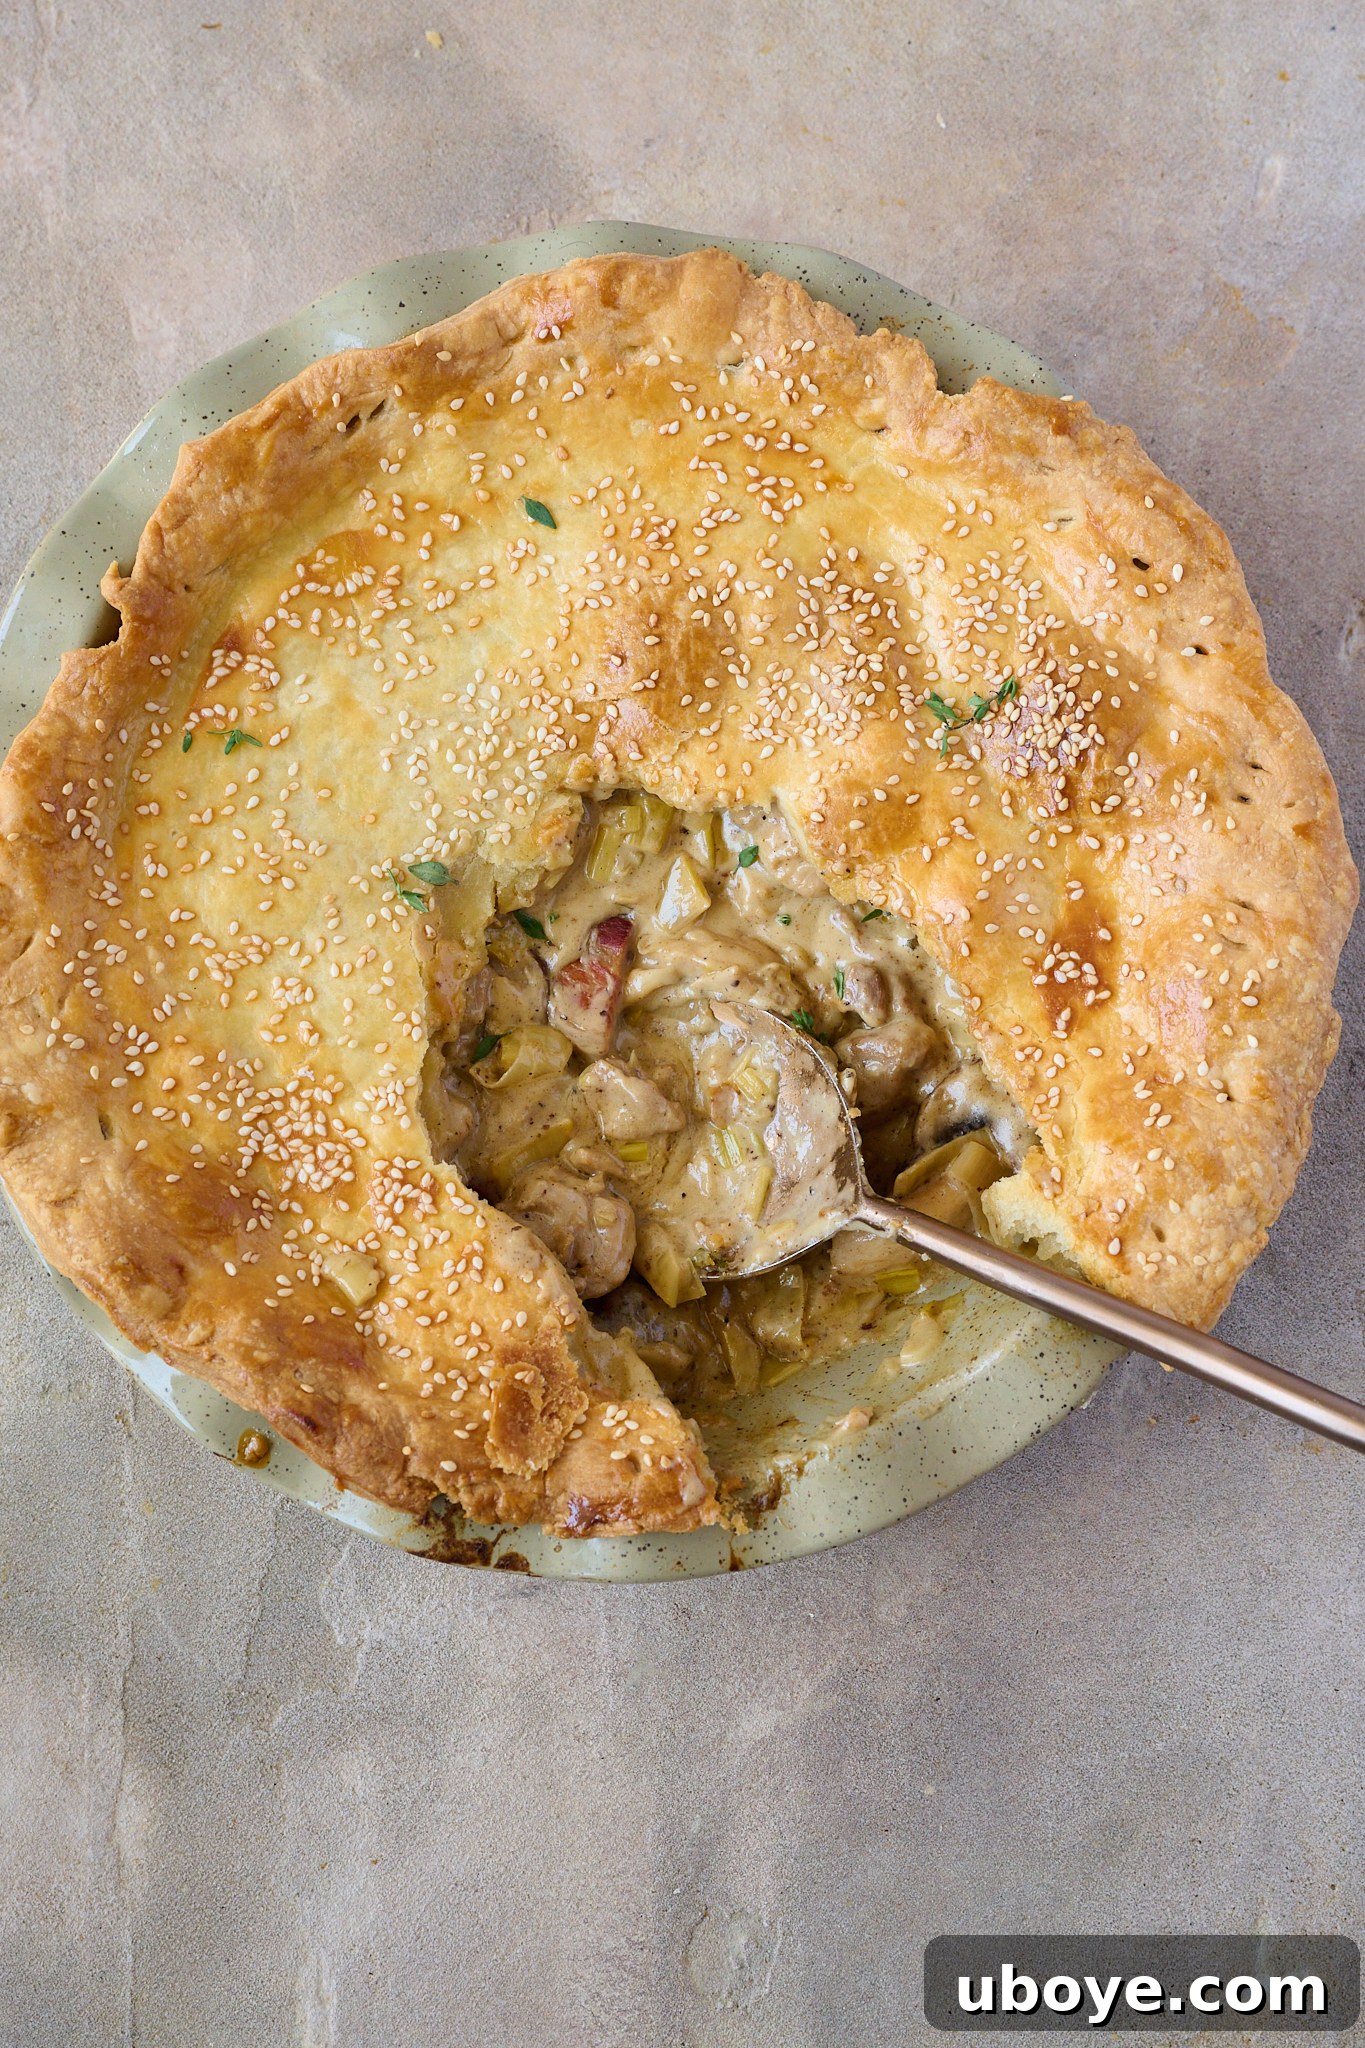
The Ultimate Creamy Chicken, Mushroom & Bacon Pot Pie
If you’re searching for a hearty and comforting chicken pot pie recipe that will undoubtedly become a cherished family favorite, look no further. This Creamy Chicken, Mushroom & Bacon Pot Pie delivers an unparalleled culinary experience. The rich, savory filling is brimming with succulent chicken, earthy mushrooms, and crispy bacon, all enveloped in a luscious, silky sauce. Capped with an impossibly flaky and crisp sour cream puff pastry, this pie is the epitome of cozy indulgence. Whether you choose to embark on the rewarding journey of making the pastry from scratch or opt for the convenience of store-bought, you are guaranteed a deeply satisfying and gloriously golden dinner that warms the soul.
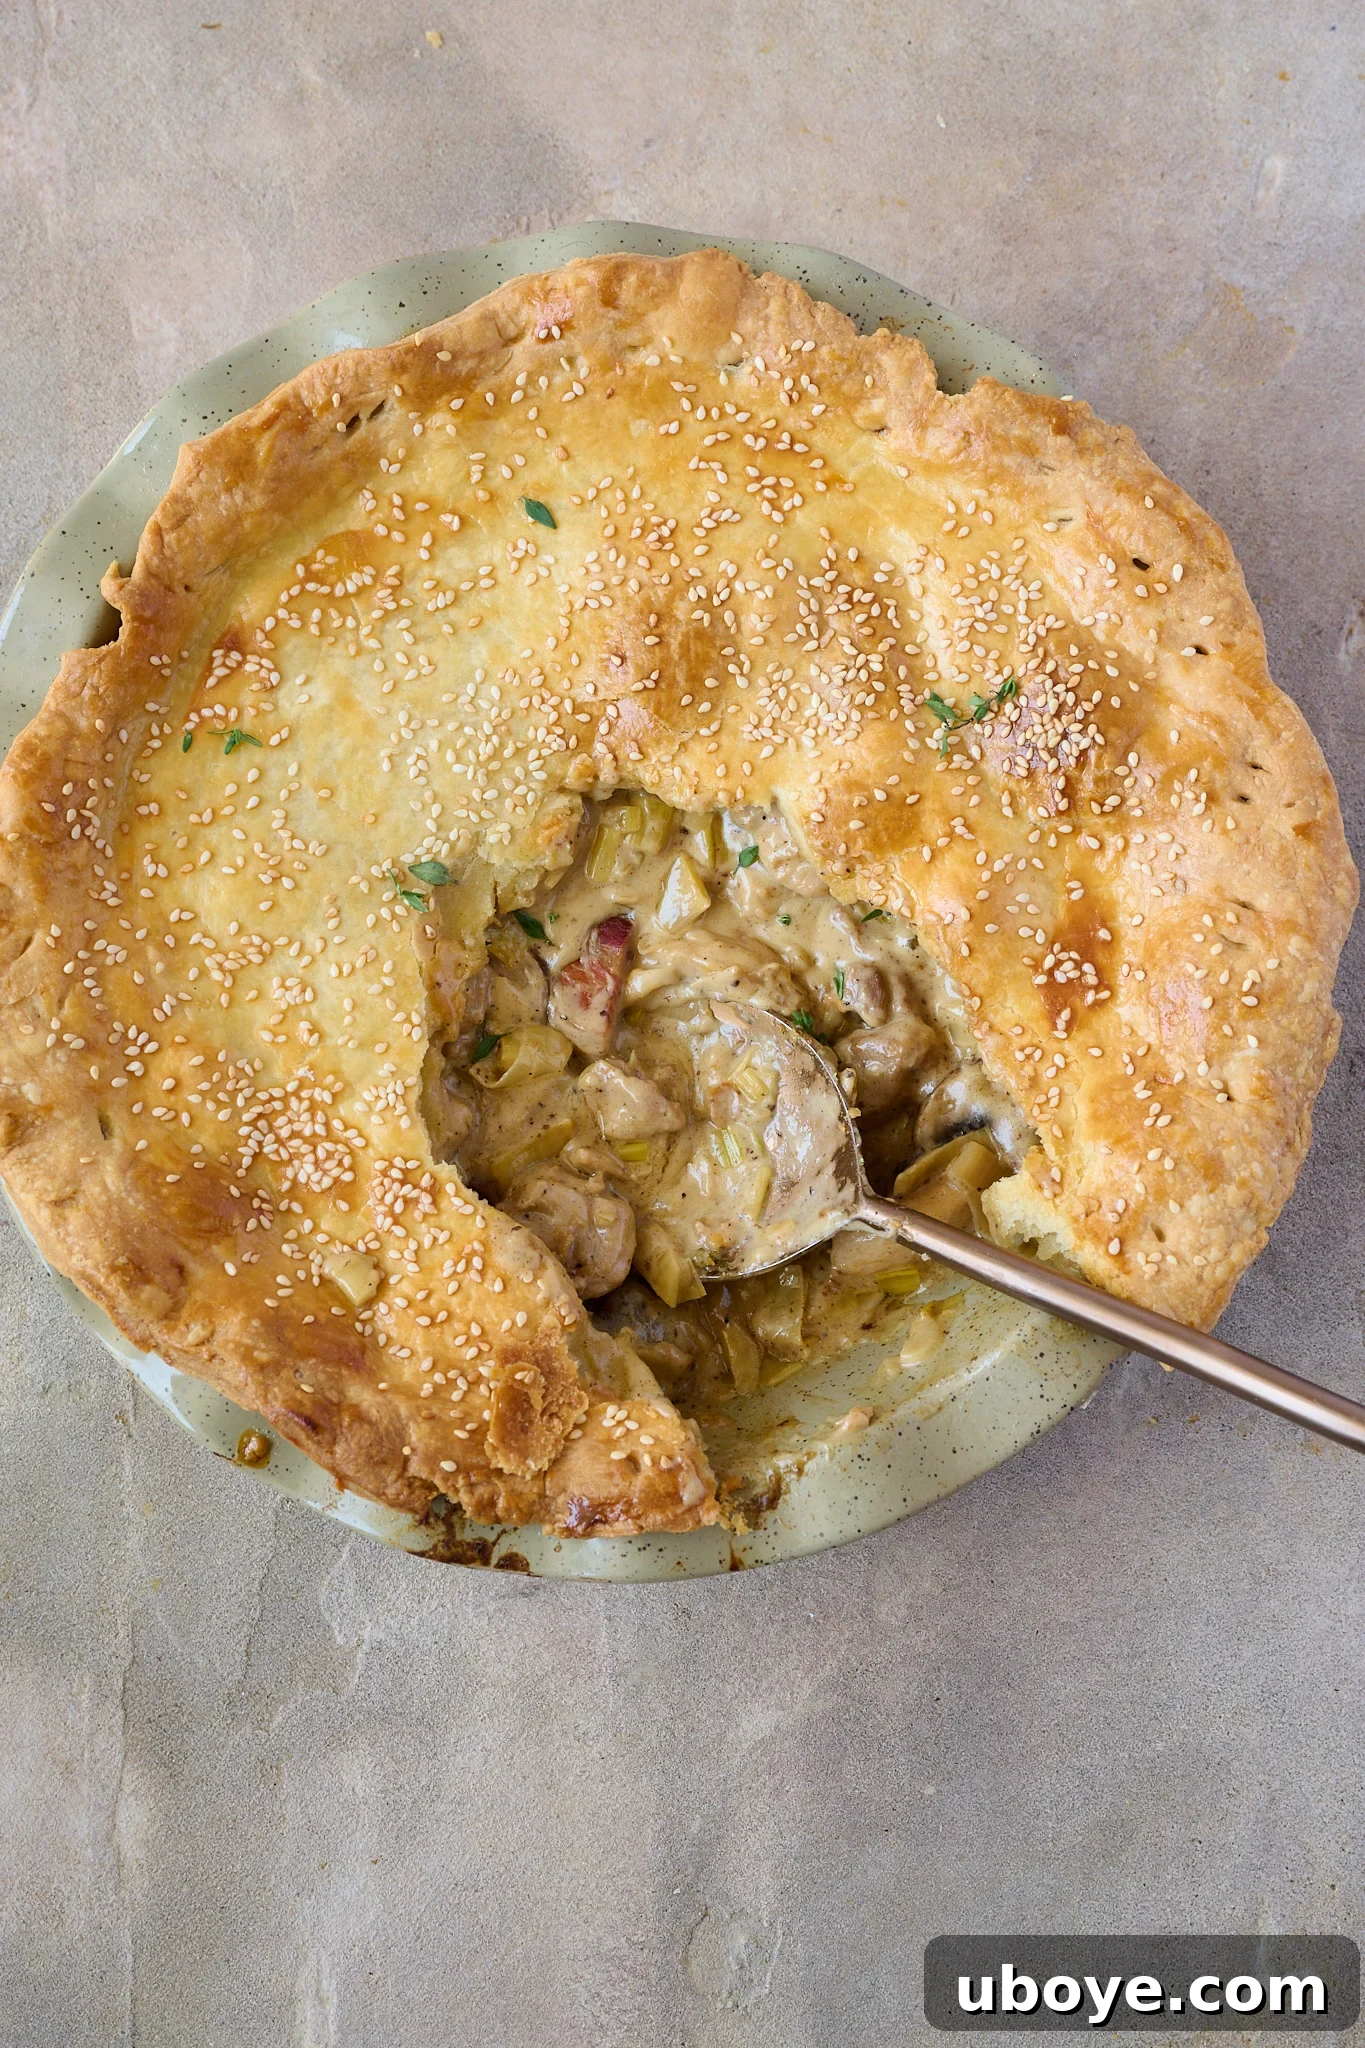
Why This Chicken, Mushroom & Bacon Pot Pie Will Be Your New Favorite Comfort Food

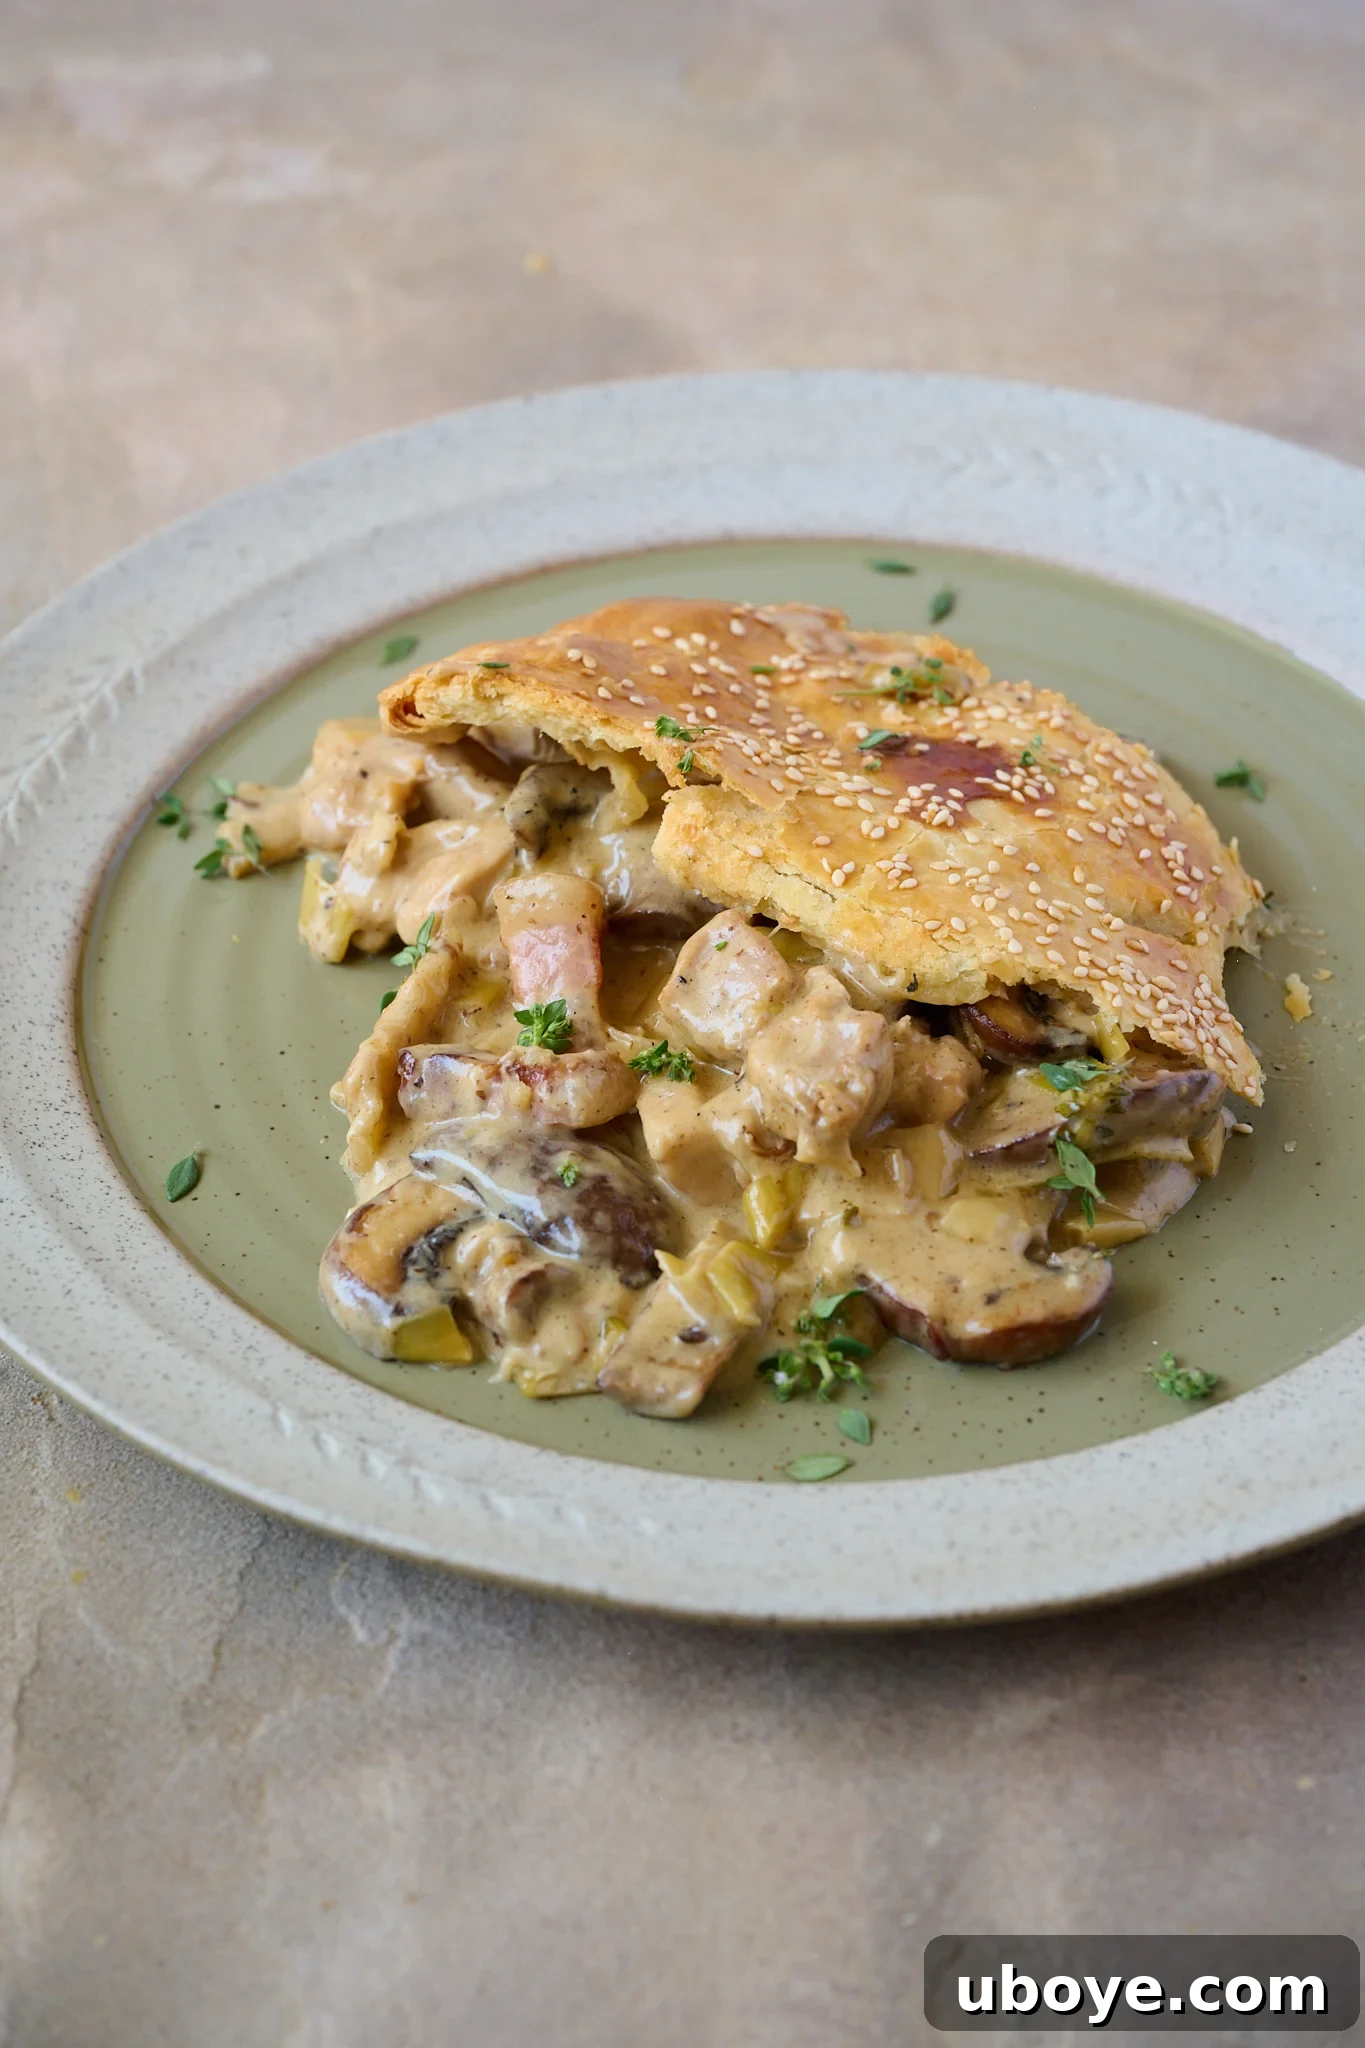
Prepare to fall in love with this chicken, mushroom, and bacon pot pie for countless reasons. It perfectly encapsulates everything we crave in a truly comforting and satisfying meal. Each bite offers a harmonious blend of textures and flavors: the irresistibly rich and creamy filling, the delightful crunch of golden and crispy bacon (or savory pancetta), the tender, perfectly cooked chicken, and the deep, earthy notes of sautéed mushrooms. All of this deliciousness is lovingly tucked beneath a cap of beautifully flaky, golden-brown pastry.
The magic of this pot pie lies in its ability to evoke that same heartwarming feeling as other beloved comfort classics, like our creamy mushroom pasta, the vibrant creamy Tuscan chicken pasta, or a slow-cooked beef short rib ragu. Whether you dedicate the time to craft the exquisite sour cream puff pastry from scratch – a step that truly elevates the dish – or choose the simple elegance of a high-quality store-bought pastry, the result is consistently superb. You’ll pull from the oven a golden, bubbling masterpiece, promising a deeply satisfying and memorable dinner experience for everyone at the table.
Unveiling the Layers of Flavor: What Makes This Pot Pie Irresistible
Beyond the primary ingredients, it’s the meticulous balance and preparation that makes this pot pie stand out. The careful rendering of bacon fat creates a foundational layer of flavor that permeates the entire filling. The inclusion of leeks, with their sweeter and milder profile than onions, adds a nuanced depth without overpowering the other elements. A splash of white wine for deglazing captures all those precious browned bits from the pan, infusing the sauce with even more complexity. Fresh thyme brings a fragrant, herbaceous counterpoint to the richness, while a touch of lemon zest or juice brightens the entire composition, ensuring the creamy filling is never heavy but always vibrant. This thoughtful layering of ingredients and techniques transforms a simple concept into an extraordinary meal.
Essential Ingredients For Crafting Your Creamy Chicken, Mushroom & Bacon Pot Pie
While the complete ingredient list for this creamy chicken, mushroom, and bacon pot pie might appear extensive, especially if you’re venturing into making the sour cream puff pastry from scratch, rest assured that each component plays a crucial role in building layers of rich, comforting flavor. Every ingredient is carefully selected to contribute to the ultimate taste and texture of this family-favorite dish.
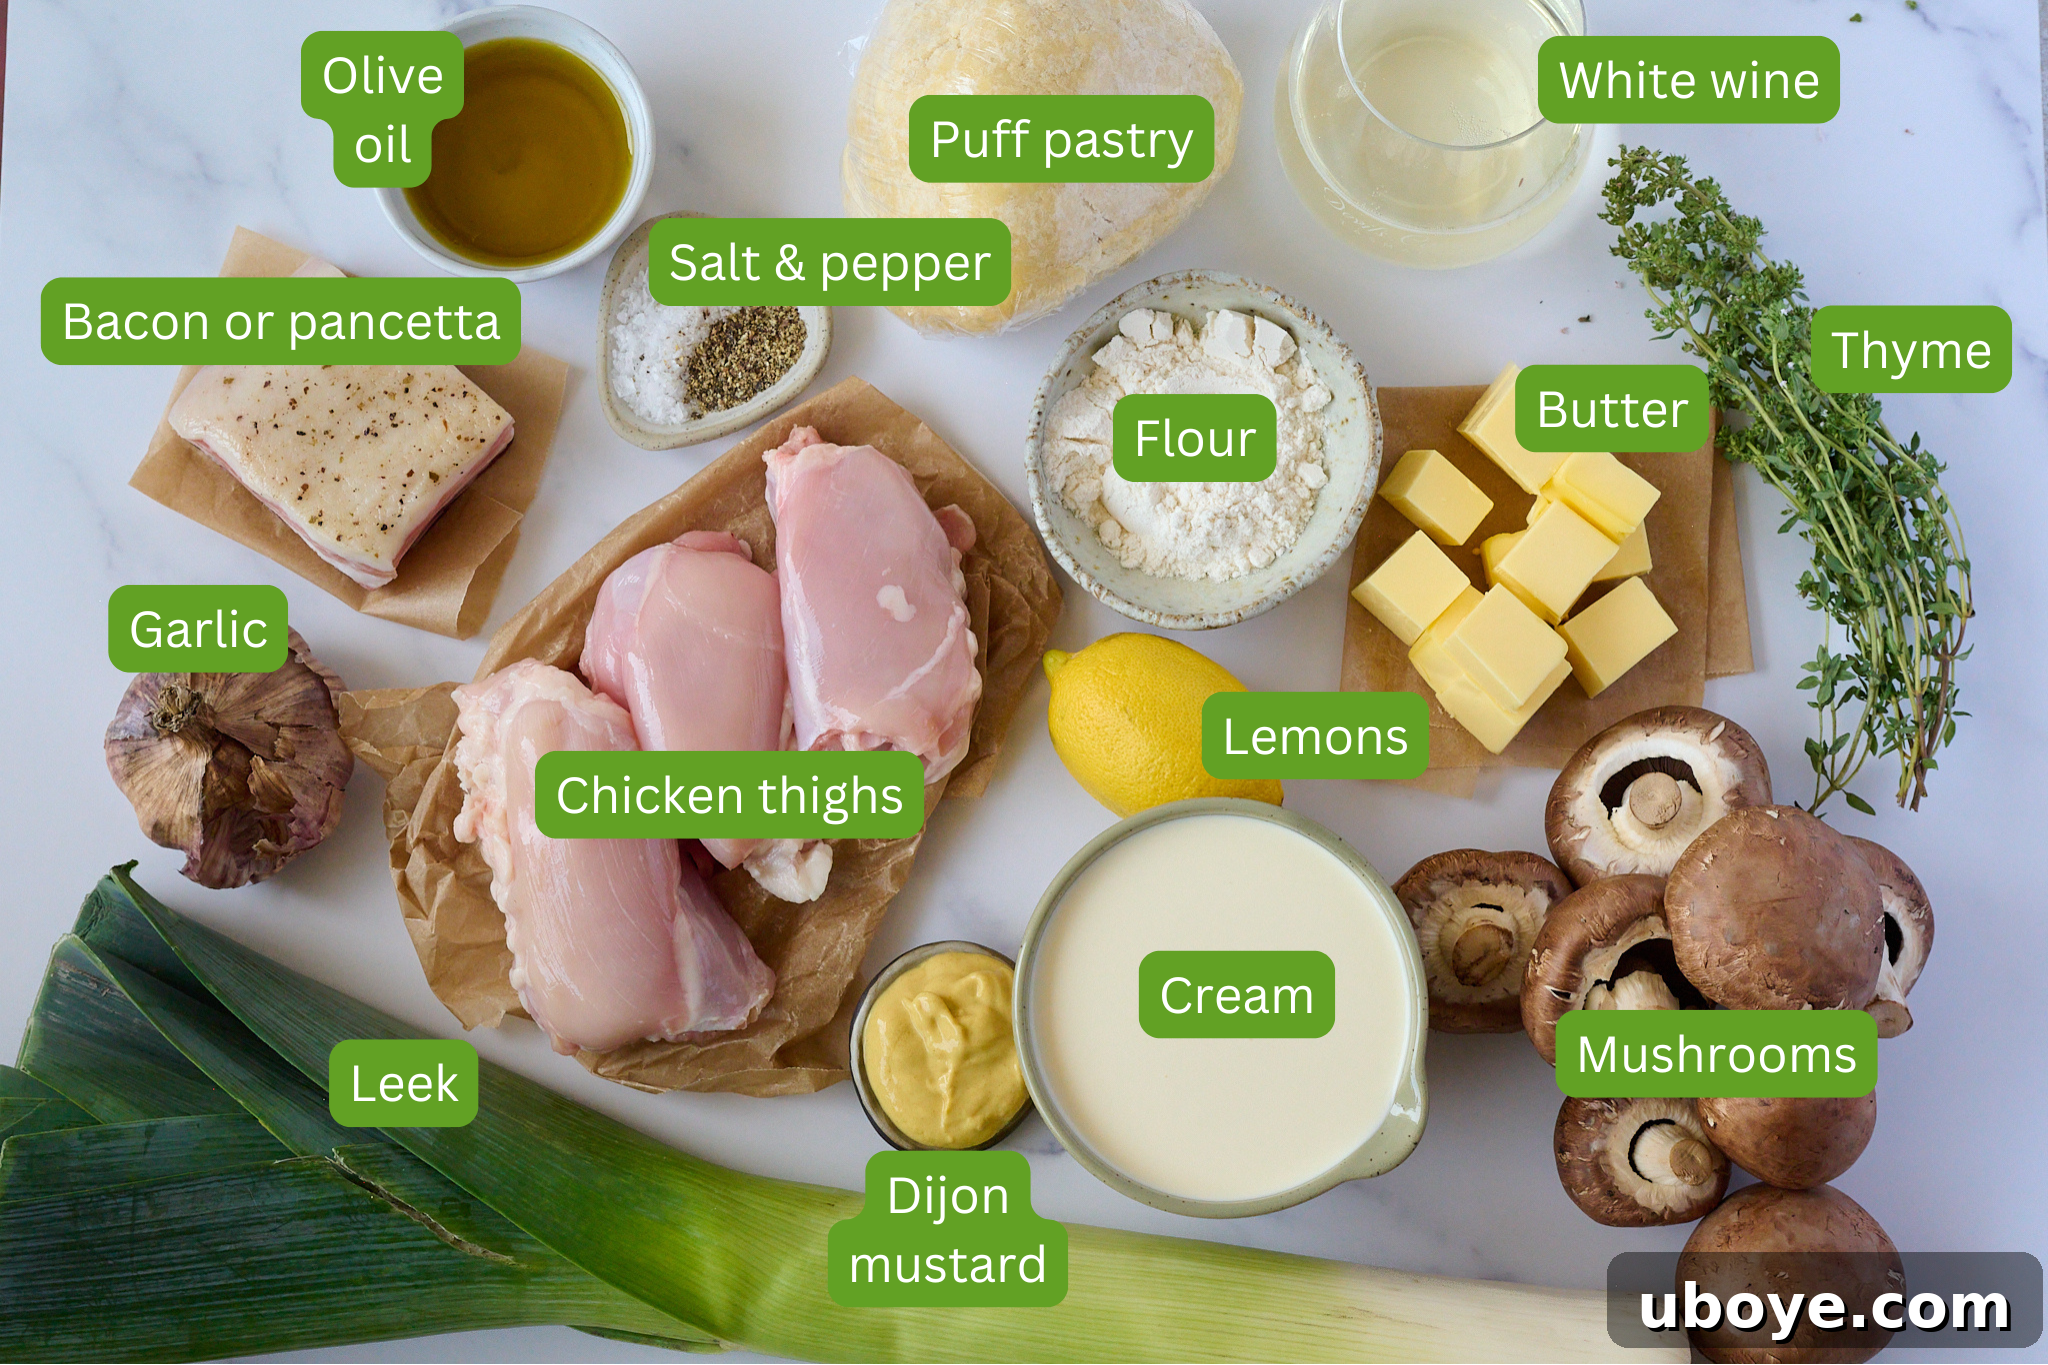
- Pancetta or Bacon: Our recipe leans into the exquisite fattiness and savory depth of pancetta, which crisps beautifully and renders flavorful fat. However, a good quality, thick-cut bacon is an excellent and readily available substitute, offering a similar salty and smoky foundation to the pie.
- Leek: Valued for its delicate, slightly sweeter, and softer flavor compared to traditional onions, leek melts seamlessly into the sauce. It adds a gentle depth and aromatic complexity without overwhelming the other ingredients, ensuring a balanced and refined taste.
- Brown Swiss Mushrooms: These mushrooms are prized for their deeper, earthier, and more robust flavor profile, which perfectly complements the chicken and bacon. While Brown Swiss is our preference, any mushroom variety will yield delicious results. Feel free to use classic button mushrooms, meaty portobello, or a delightful mix of your favorite fungi to customize the earthy notes of your pie.
- Chicken Thighs: We specifically recommend boneless, skinless chicken thighs for their ability to remain incredibly tender, juicy, and flavorful throughout the cooking process. Their slightly higher fat content contributes to a richer filling. For those who prefer a leaner option, chicken breast is a perfectly fine substitute; just be mindful not to overcook it to maintain its tenderness.
- Thickened Cream (Heavy Cream): This is the secret to achieving that luscious, velvety, and incredibly rich sauce that defines a truly great pot pie. Thickened cream adds body and a luxurious mouthfeel, binding all the savory elements together.
- Fresh Thyme: The fragrant, woody notes of fresh thyme are indispensable for adding an aromatic, herbaceous lift to the rich filling. If fresh thyme isn’t available, dried thyme can be used, though you might need slightly less as its flavor is more concentrated.
- Lemon Zest or Juice: Just a small amount of lemon is a game-changer. Its bright, zesty acidity cuts through the richness of the cream and bacon, lifting the entire filling and providing a crucial balance of flavors, preventing the pie from tasting too heavy.
- Other Essential Flavor Builders: Do not forget the unsung heroes like butter for sautéing, minced garlic for its aromatic base, white wine for deglazing and depth, all-purpose flour for thickening, and, of course, salt and freshly ground black pepper to season generously at every stage.
A full list of ingredients with precise measurements can be found in the detailed recipe section below.
Mastering the Art of Making This Creamy Chicken, Mushroom & Bacon Pot Pie
Crafting this chicken, mushroom, and bacon pot pie is a labor of love that takes a little time, but every single step is immensely rewarding and contributes to an unforgettable culinary experience. The journey from raw ingredients to a golden, bubbling pie is a delightful process. If you’re looking to save some time and effort without compromising on flavor, simply opt for a high-quality store-bought puff pastry and dedicate your focus to creating the rich, creamy, and deeply savory filling that is the heart of this dish. For those who enjoy the artisanal touch, making the sour cream puff pastry from scratch elevates this pot pie to an extraordinary level.
Step-by-Step Guide to Homemade Sour Cream Puff Pastry
The secret to an exceptionally flaky pot pie lies in the pastry. Our sour cream puff pastry recipe adds a subtle tang and incredible tenderness. Here’s how to achieve perfect layers:
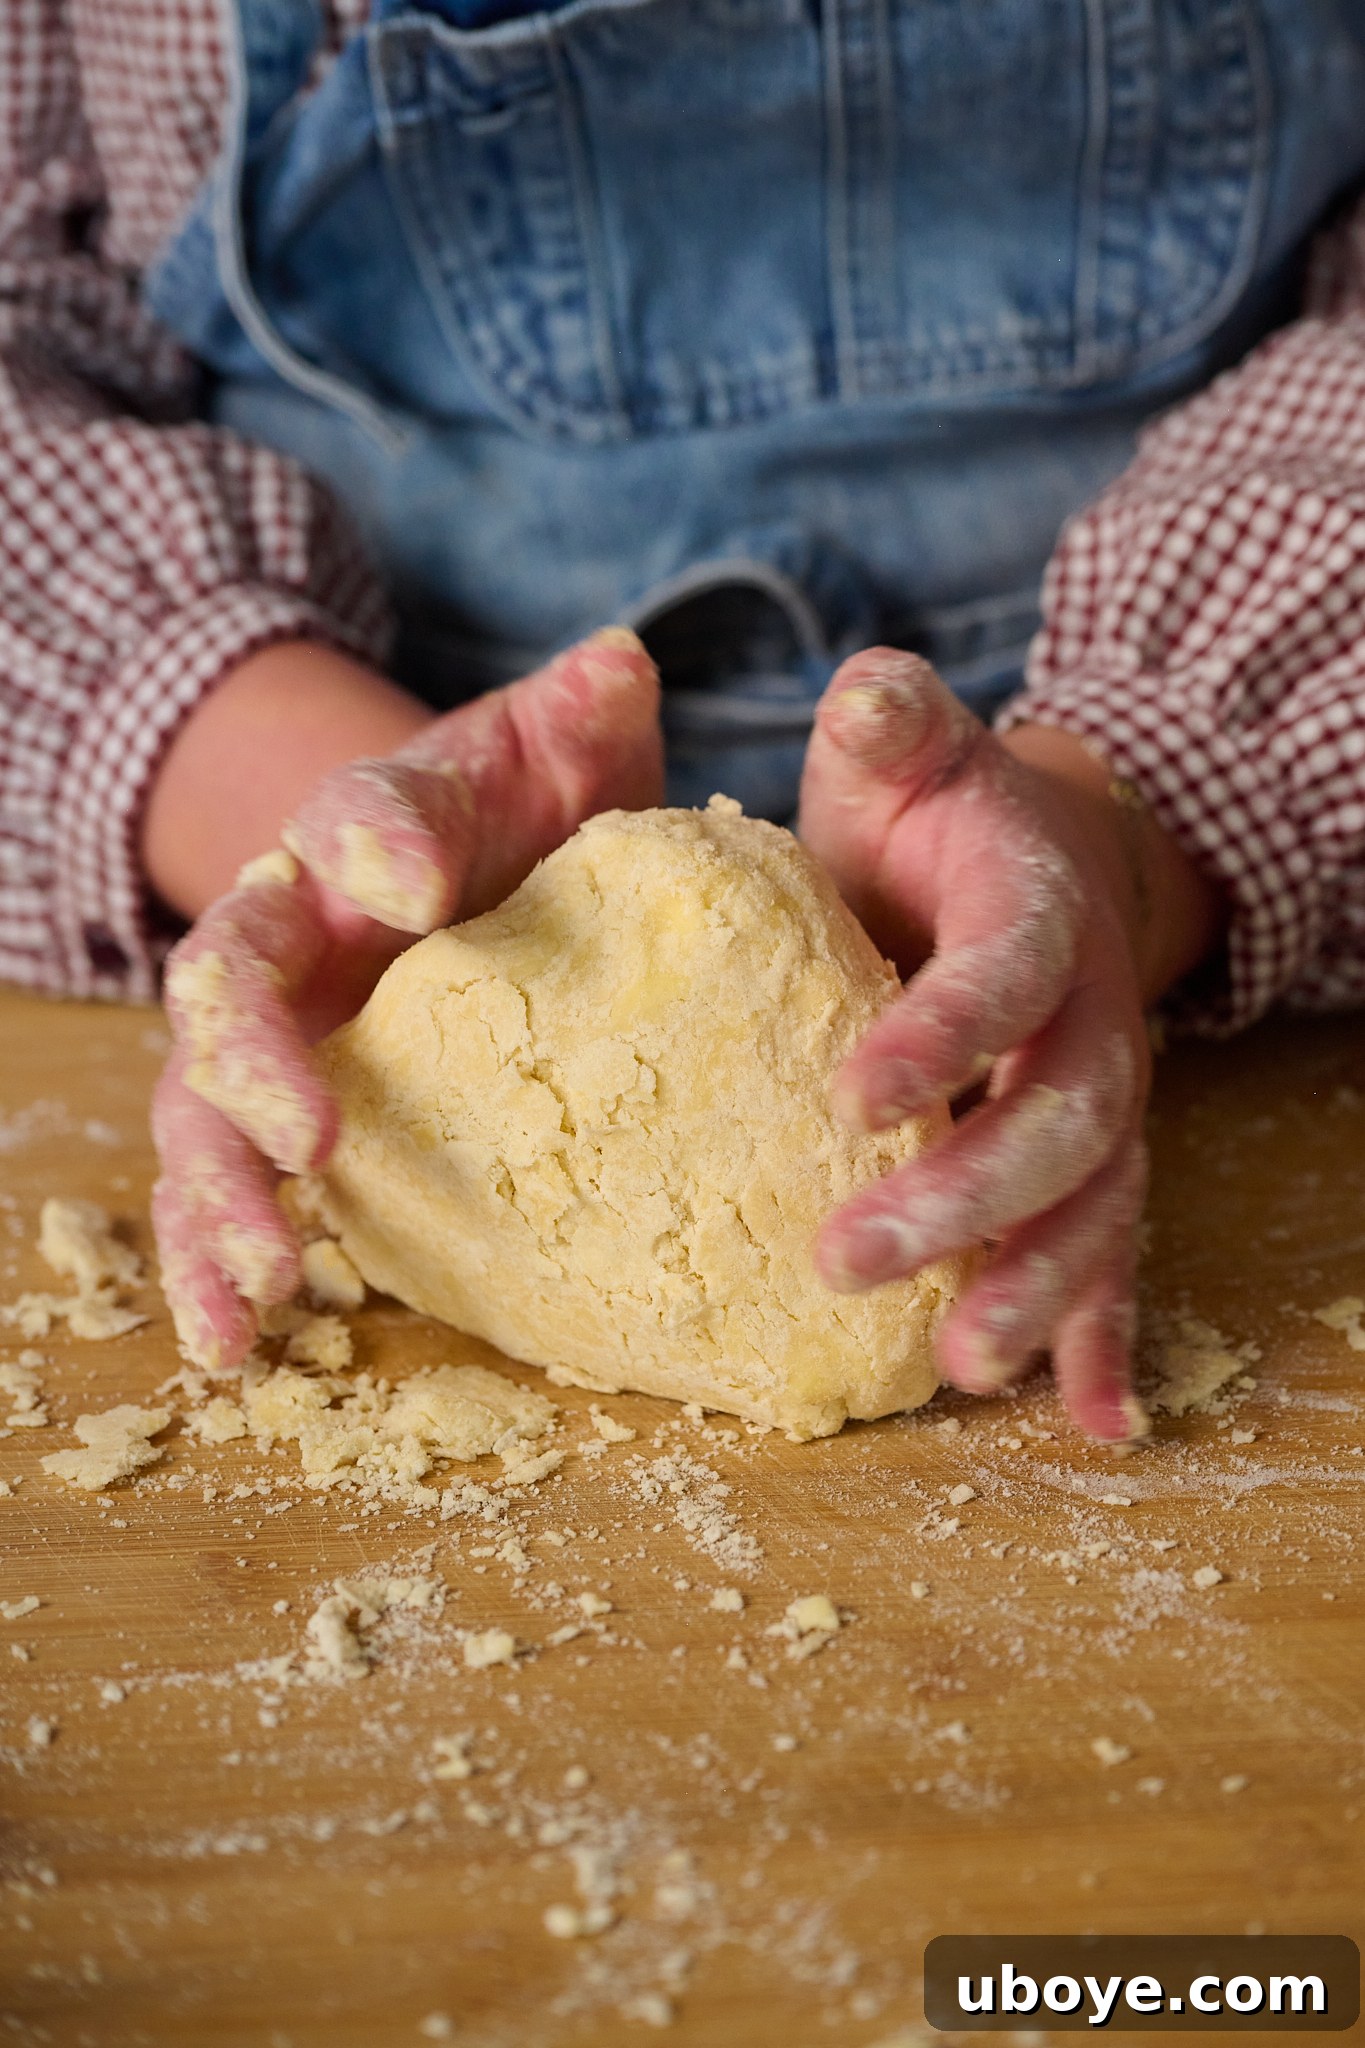
Step 1: Preparing Your Pastry Foundation. Begin by chilling your tools and ingredients. Place a large mixing bowl, a box grater, and your salted butter in the freezer for a full 20 minutes. This crucial step ensures the butter remains as cold as possible, which is essential for creating flaky layers. While those are chilling, whisk together the all-purpose flour and sea salt flakes in your now-chilled bowl. Using the cold grater, grate the firm, cold butter directly into the flour mixture. Gently rub the butter into the flour using your fingertips, aiming for a pebble-like, crumbly texture. This technique prevents the butter from melting and coats it evenly with flour. Next, create a well in the center of the mixture and add the sour cream. Using a fork, carefully mix the flour into the sour cream until the dough just begins to come together, maintaining that distinctive pebble-like texture. On a lightly floured surface, gently shape the dough into a disc. Wrap it tightly in plastic wrap and refrigerate for 1 to 2 hours, or for best results, ideally overnight. This resting period allows the gluten to relax and the butter to firm up completely.
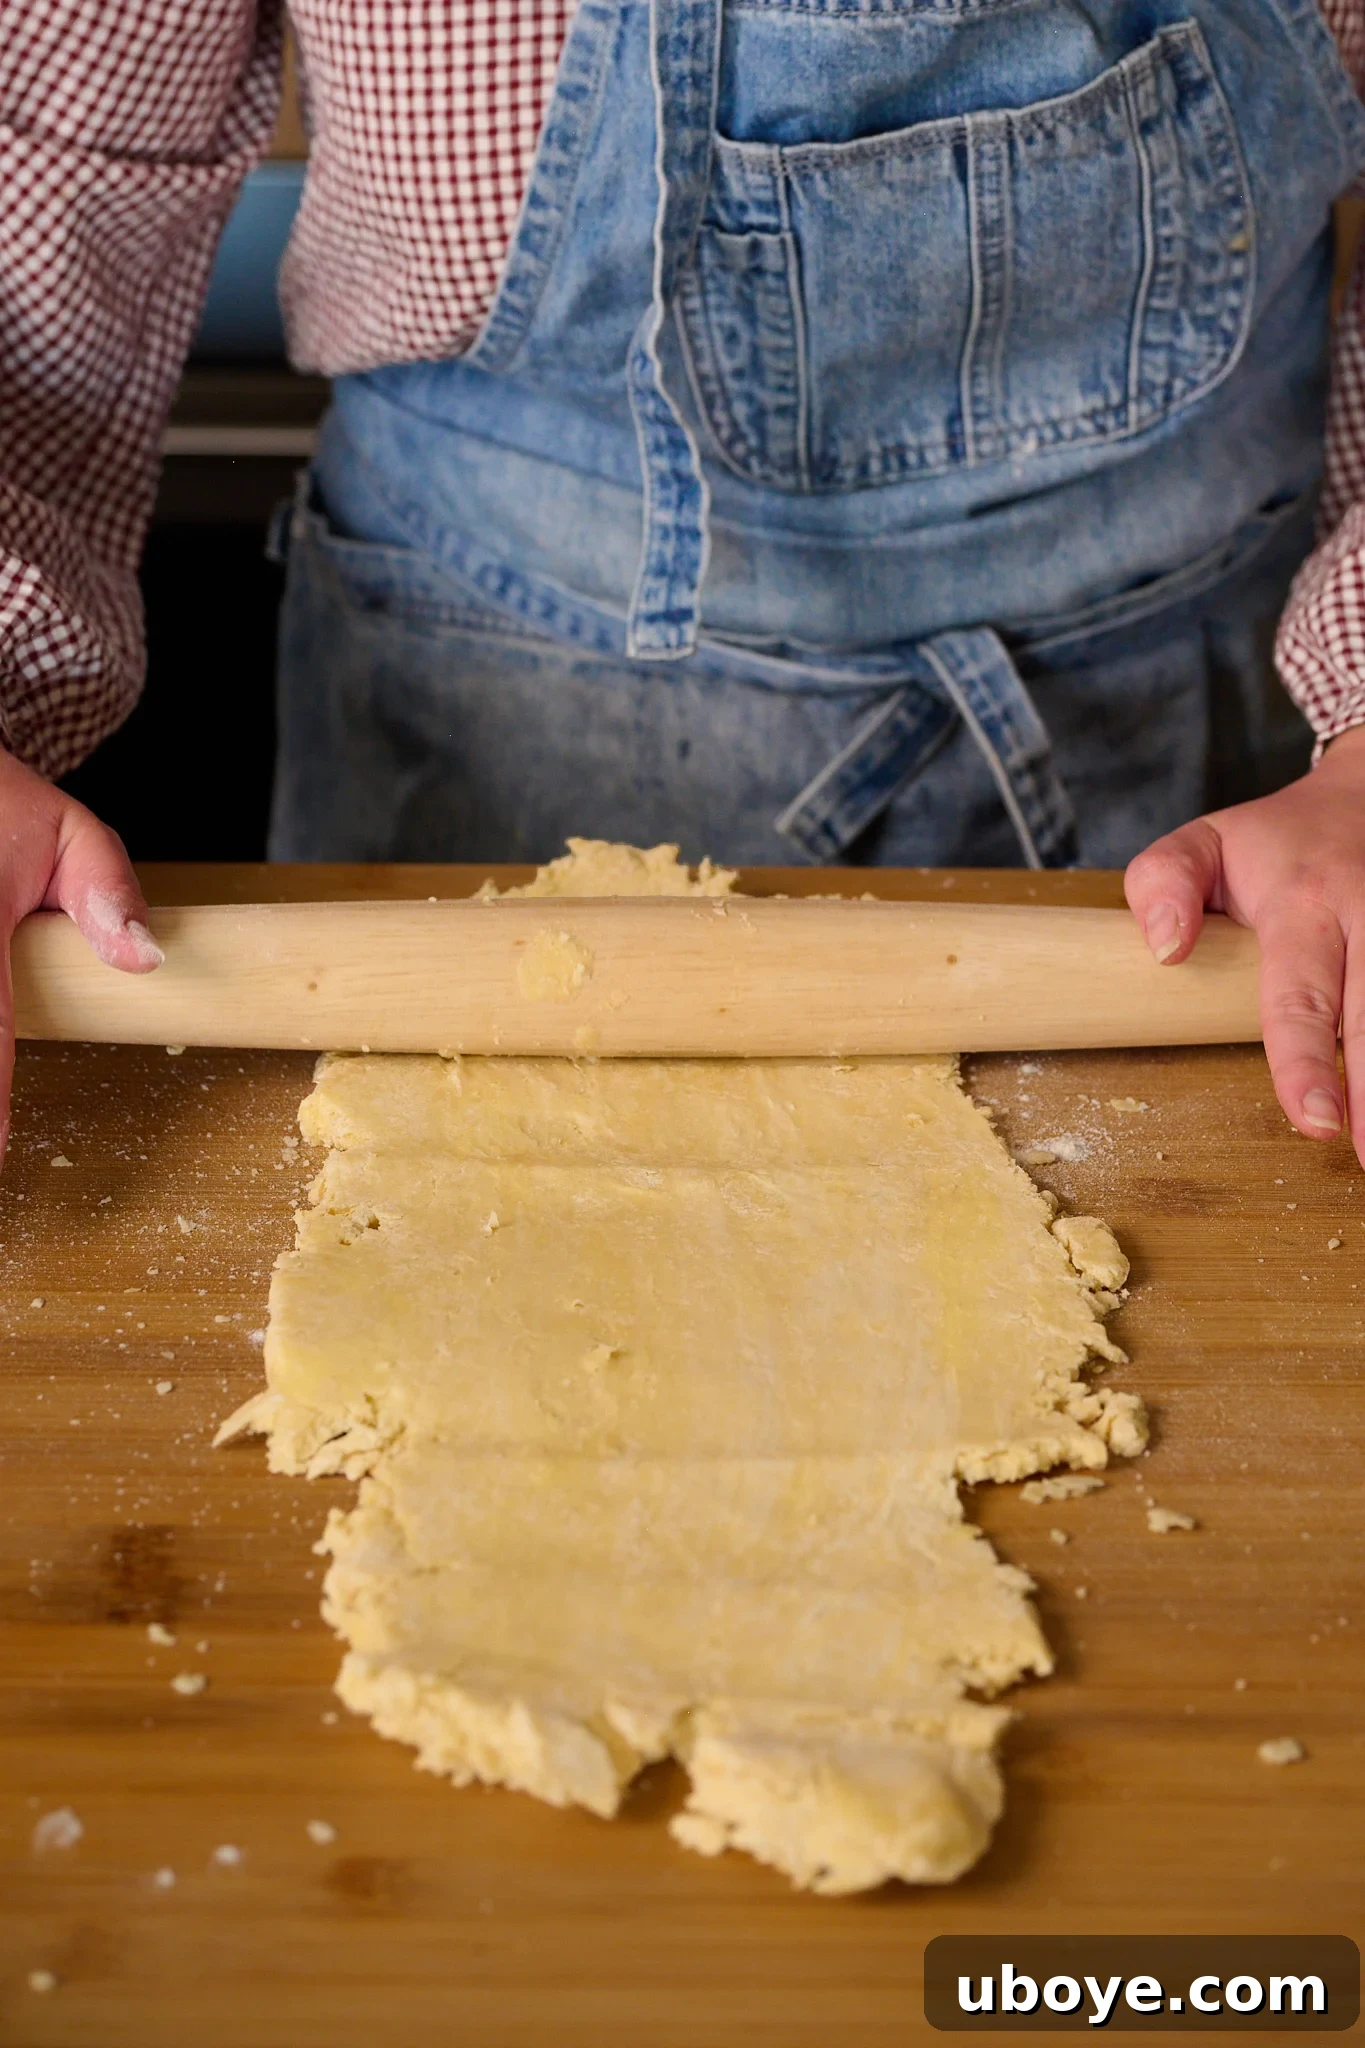
Step 2: Initial Roll for Lamination. Once the dough is thoroughly chilled and rested, lightly flour your work surface and your rolling pin. Take one disc of dough and carefully roll it out into a rectangle, approximately 2 cm (0.8 inches) thick and relatively long. The exact dimensions aren’t as important as achieving an even thickness, which is vital for consistent layers.
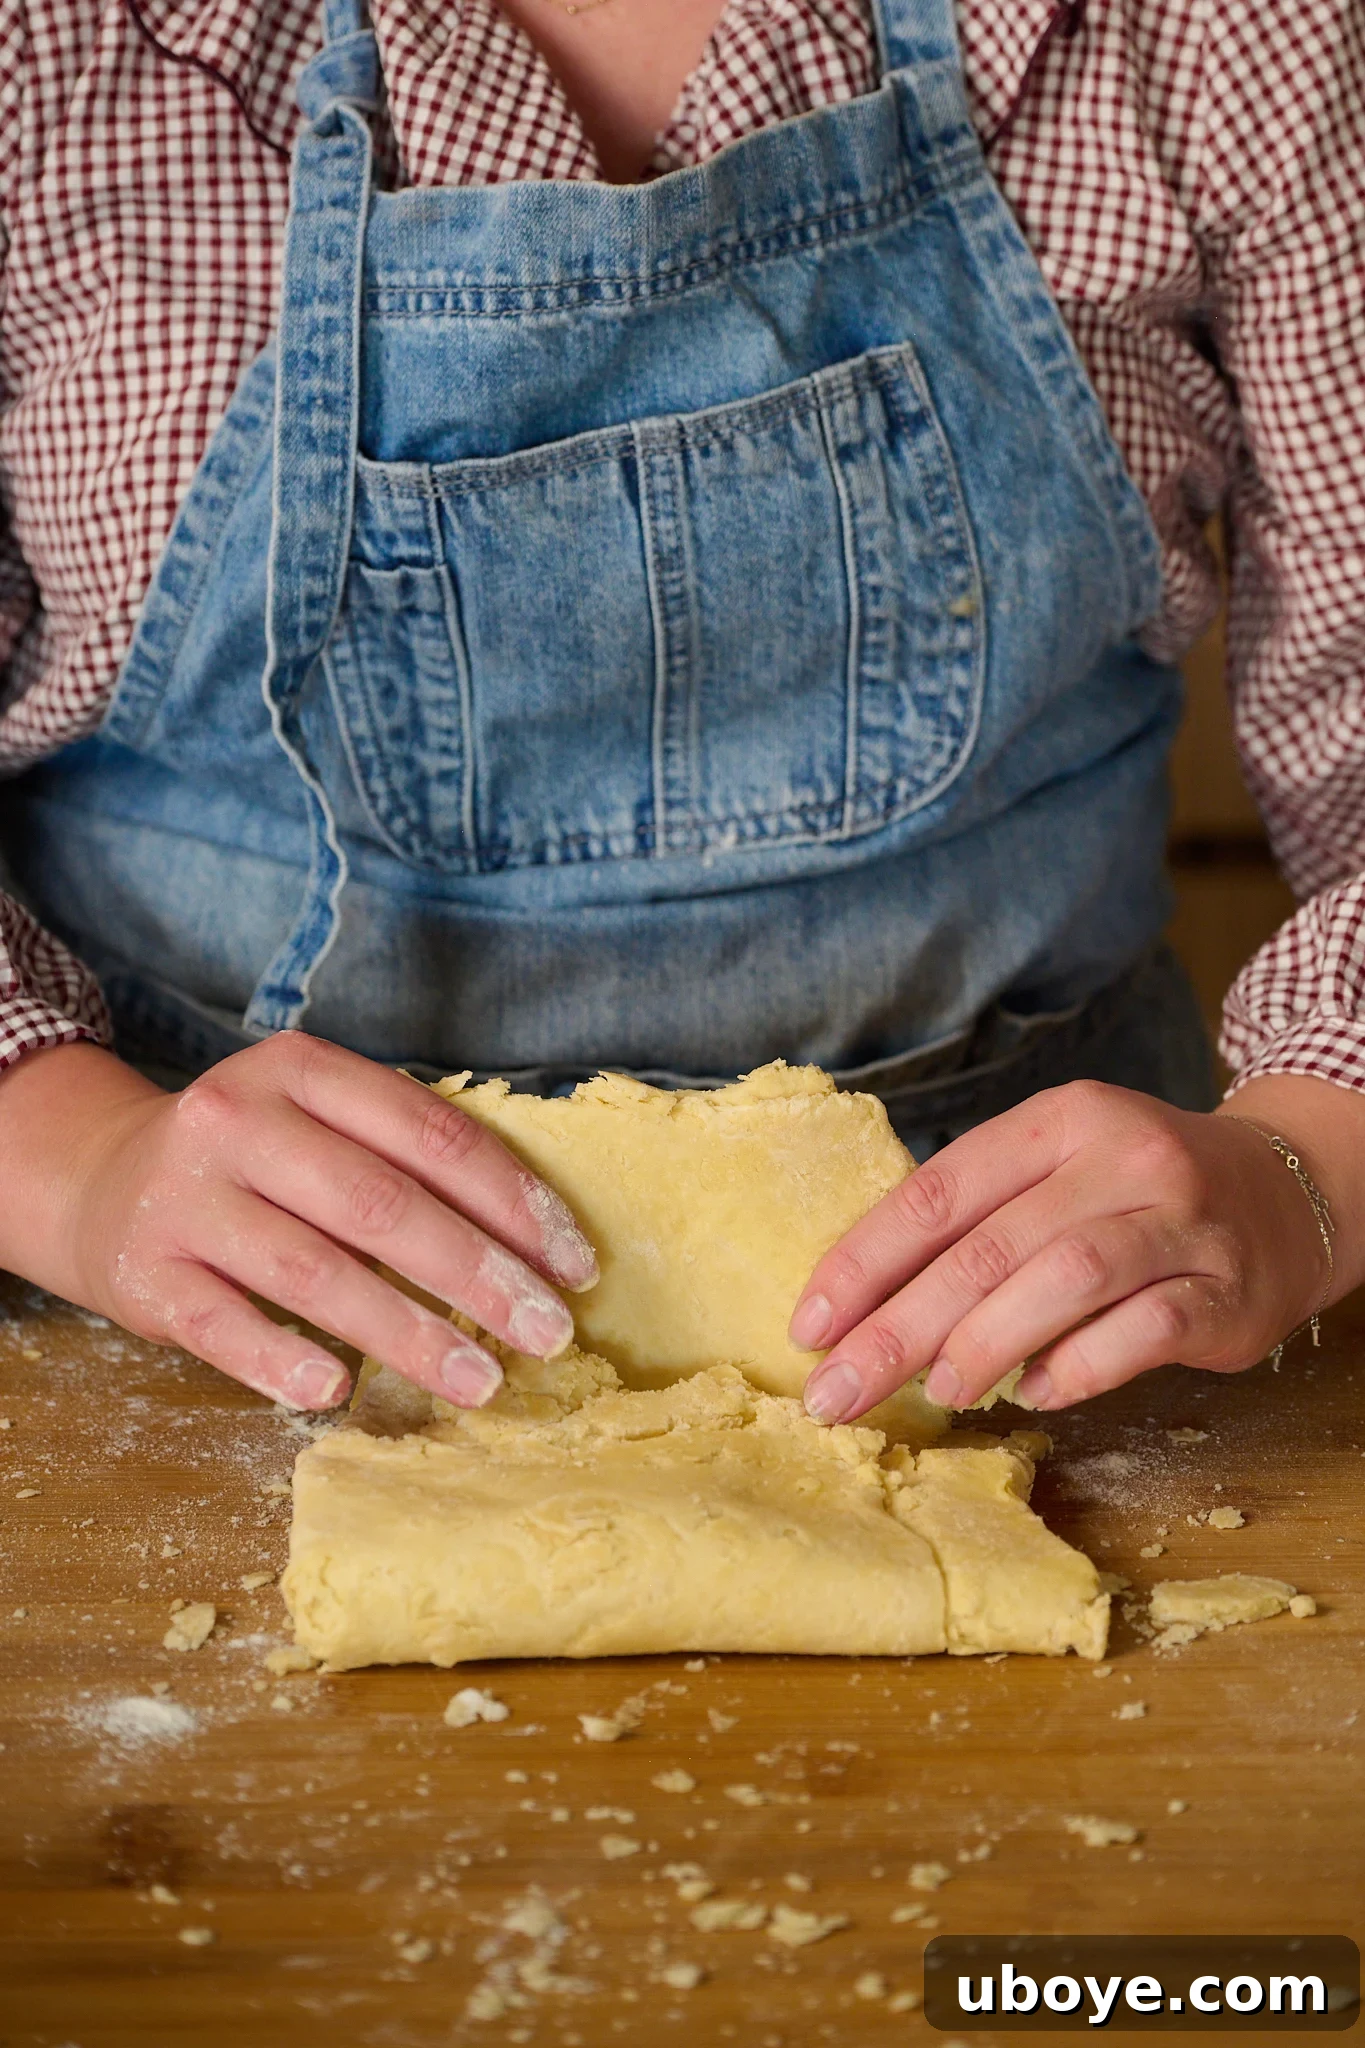
Step 3: The First Fold. Carefully fold the rolled-out dough into thirds. Imagine folding a letter to fit into an envelope – bring one end into the middle, then fold the other end over it. This creates the first set of layers, crucial for puff pastry’s characteristic flakiness.
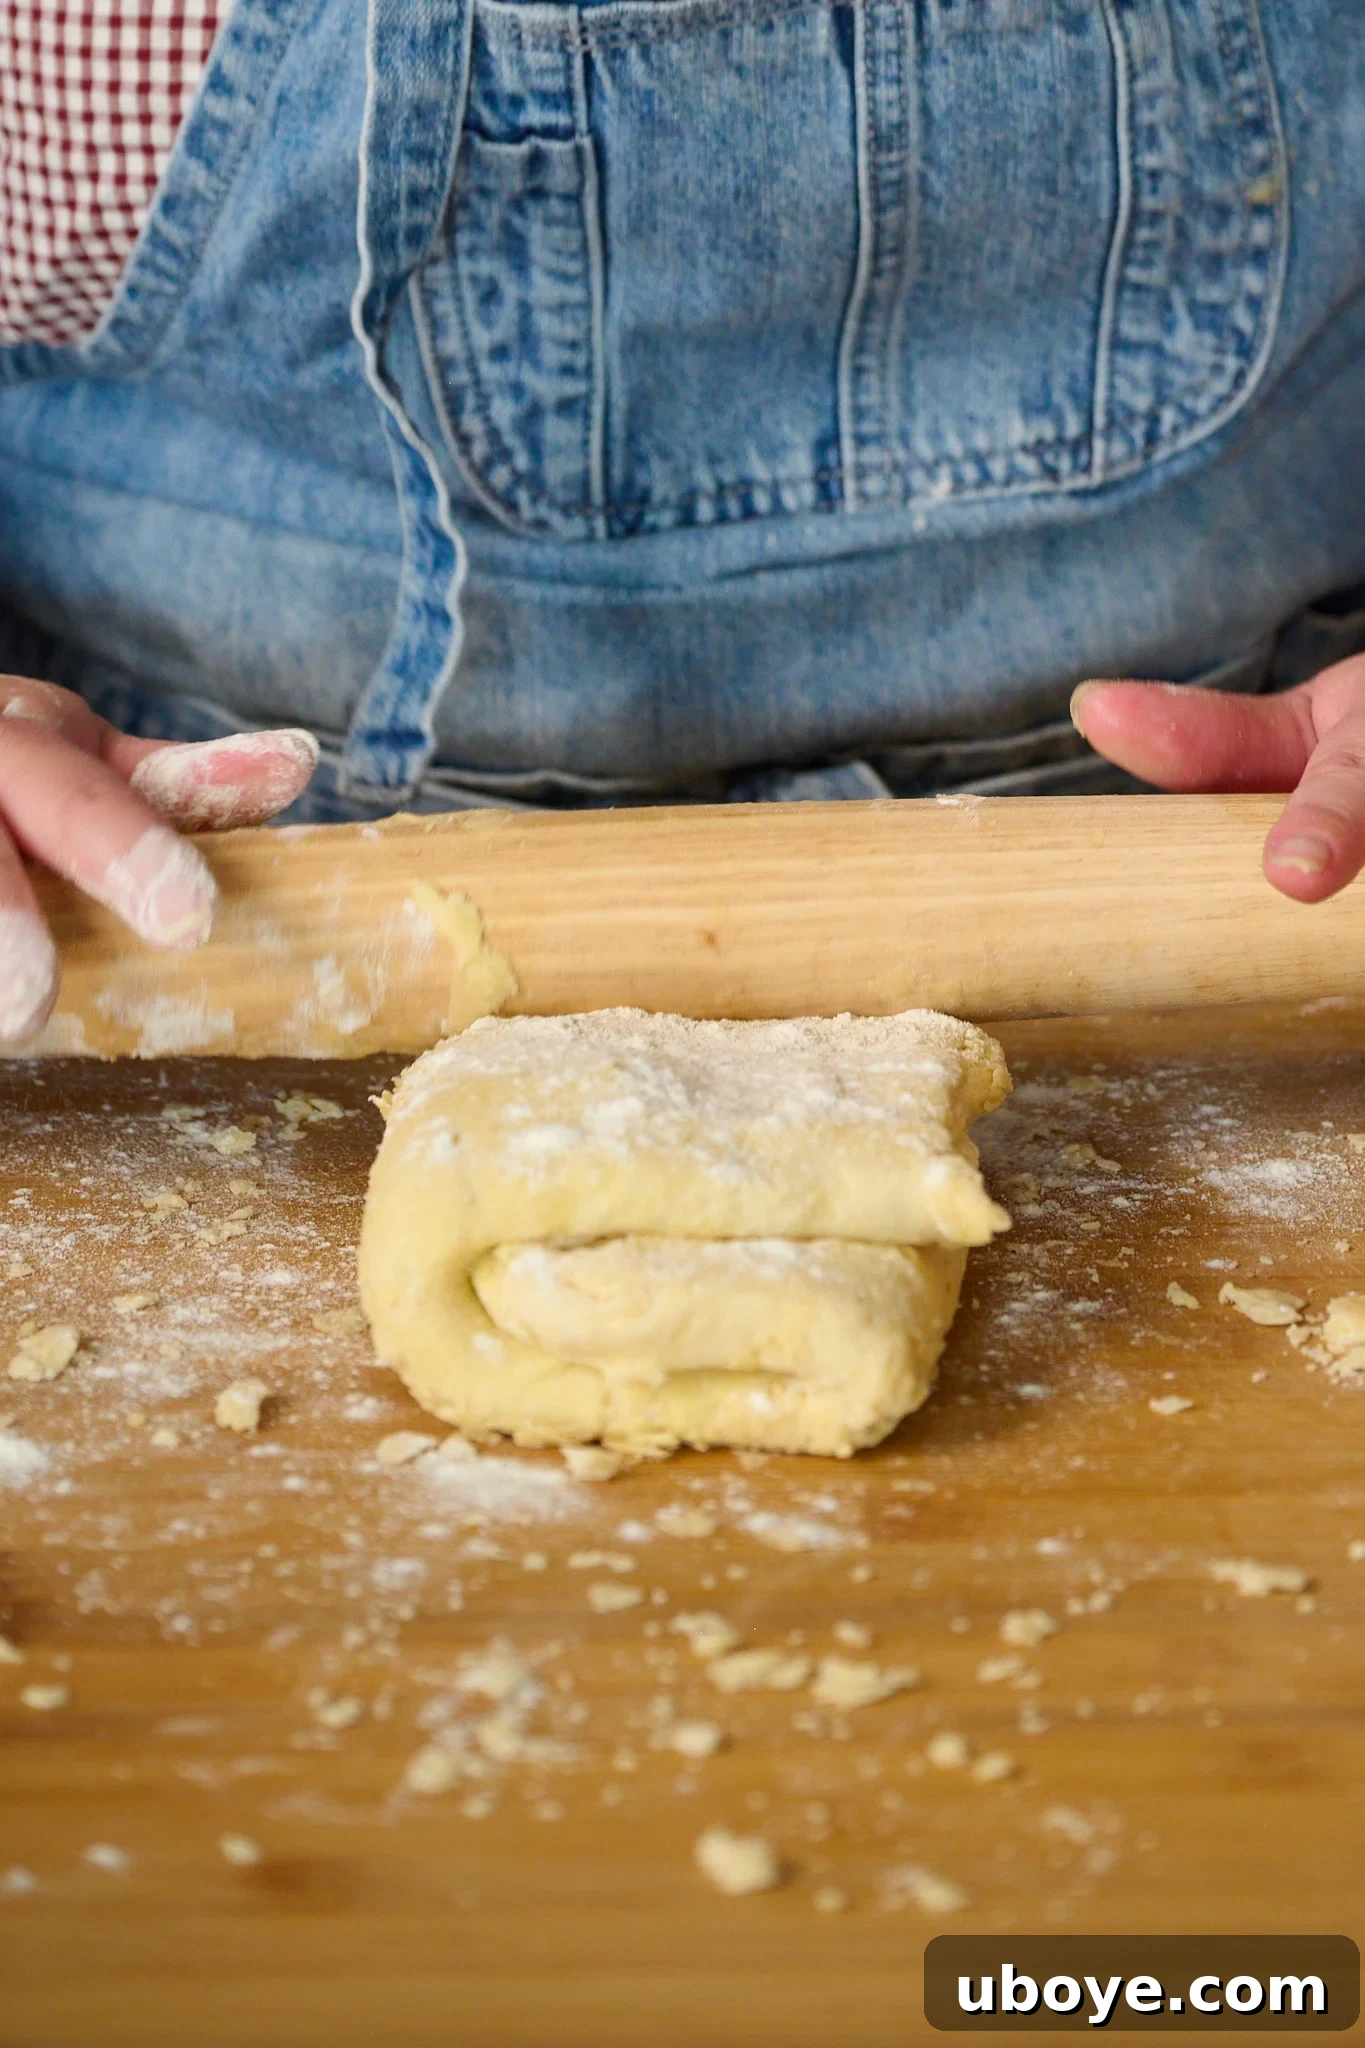
Step 4: Repeating the Lamination Process. Turn the folded dough clockwise by 90 degrees. This reorients the dough, allowing for even rolling and layering. Roll it out again into a 2 cm thick rectangle. Repeat this folding and turning process a total of six times. With each repetition, you are creating progressively more layers of butter and dough, resulting in a beautifully smooth, elastic dough with countless potential flakes. After the final fold, the dough should feel noticeably smoother and more pliable.
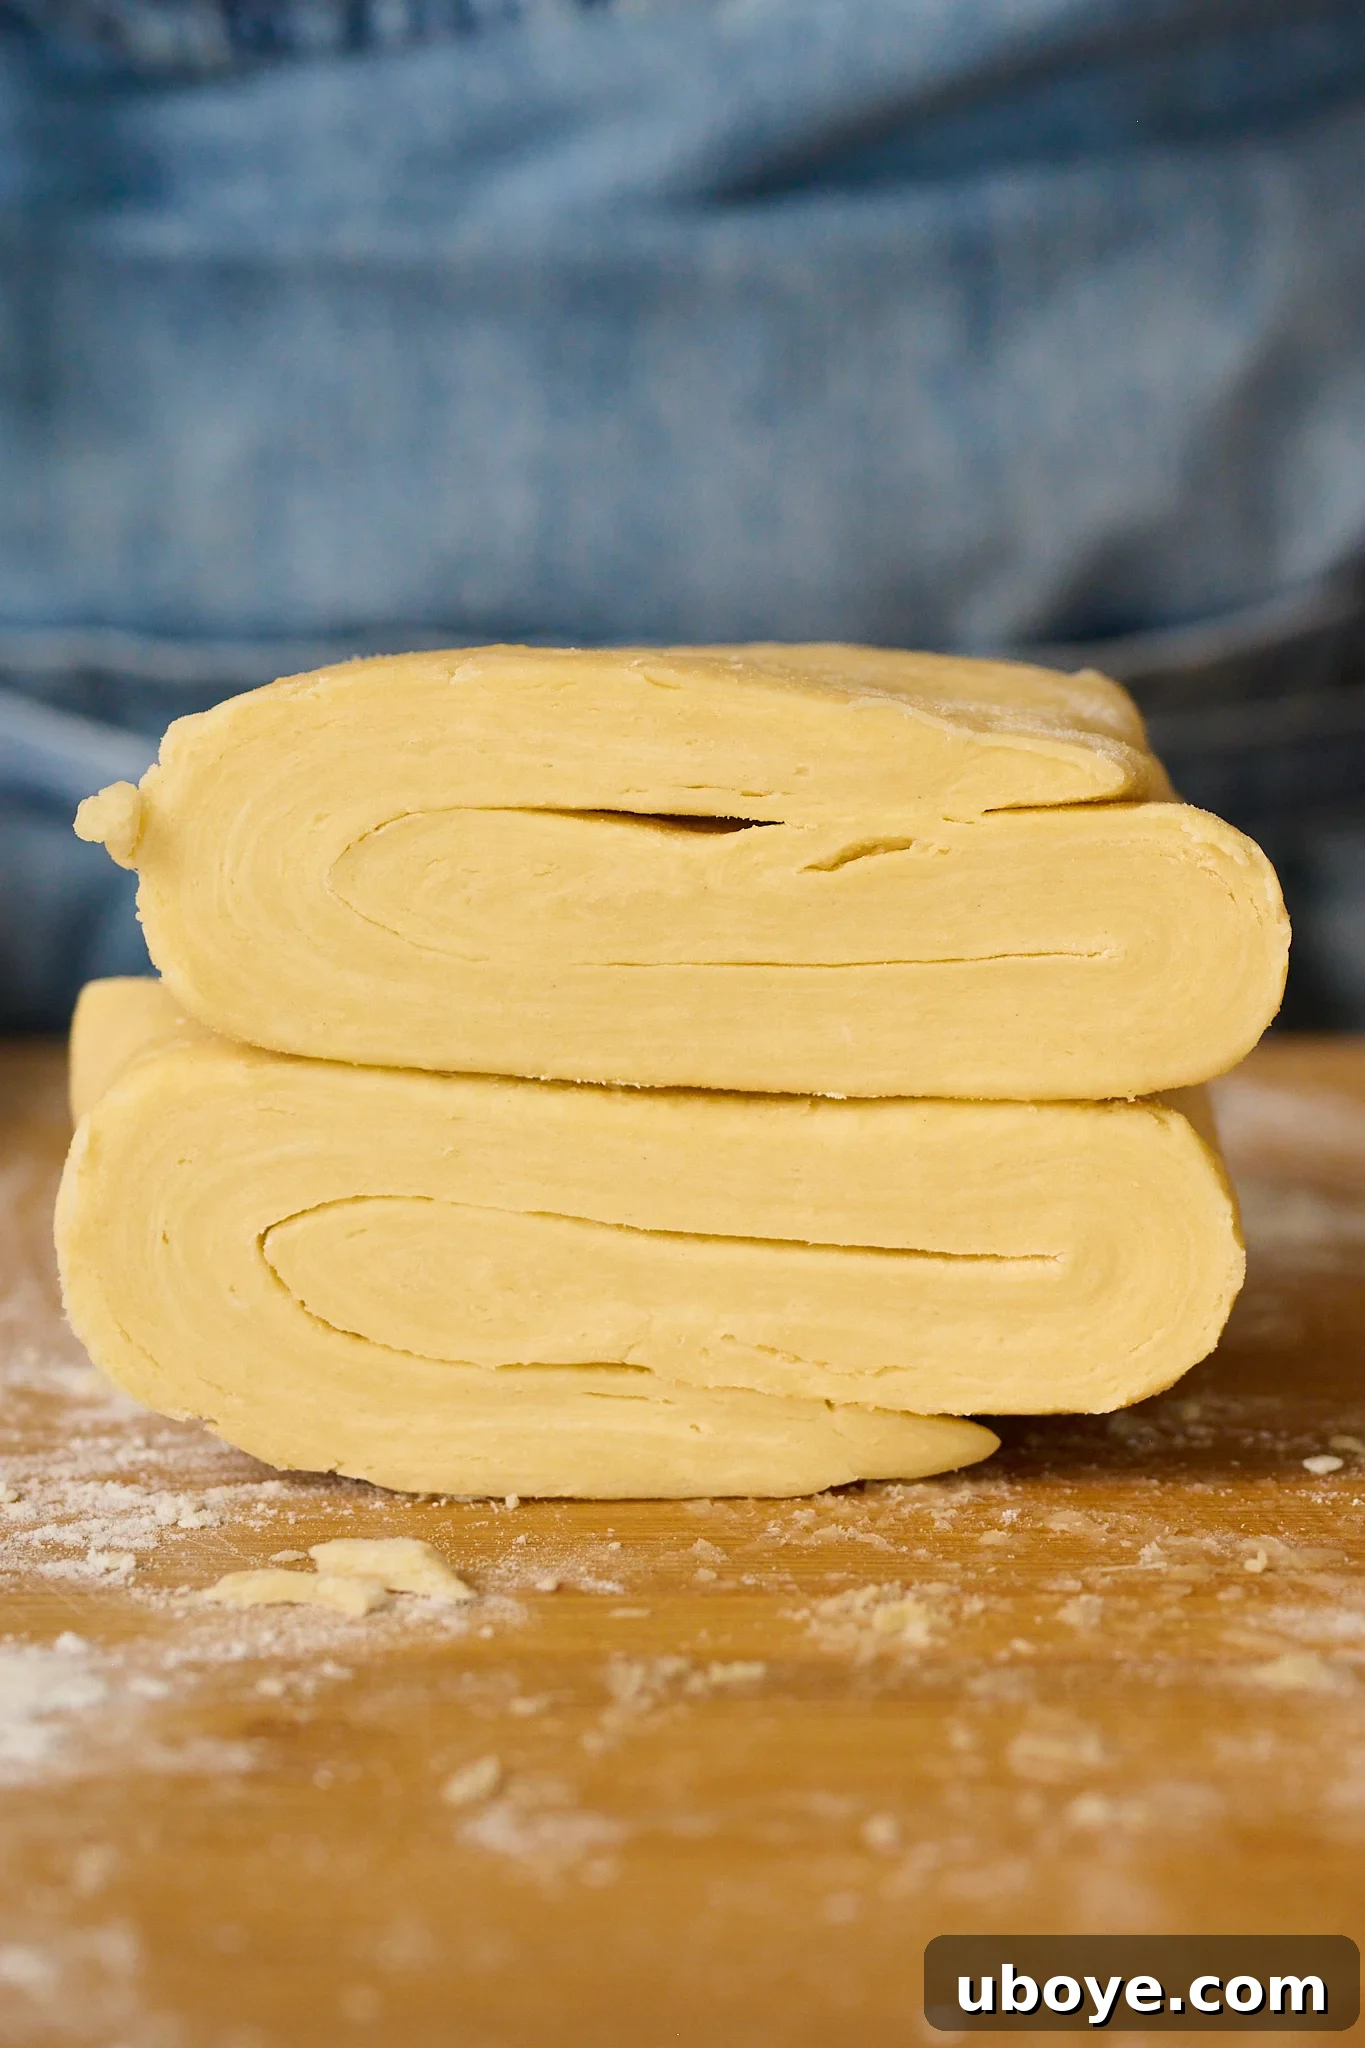
Step 5: Chilling the Laminated Dough. After completing the lamination folds, divide the dough into two equal pieces. Wrap each piece individually in plastic wrap, ensuring it’s sealed tightly. Return the wrapped dough to the refrigerator to rest for a minimum of 15 minutes, or up to 2 days. This chilling period is crucial for the butter to firm up again and the gluten to relax, preventing shrinkage when rolling. For longer storage, the dough freezes exceptionally well for up to 3 months. Just thaw it in the refrigerator overnight before use.
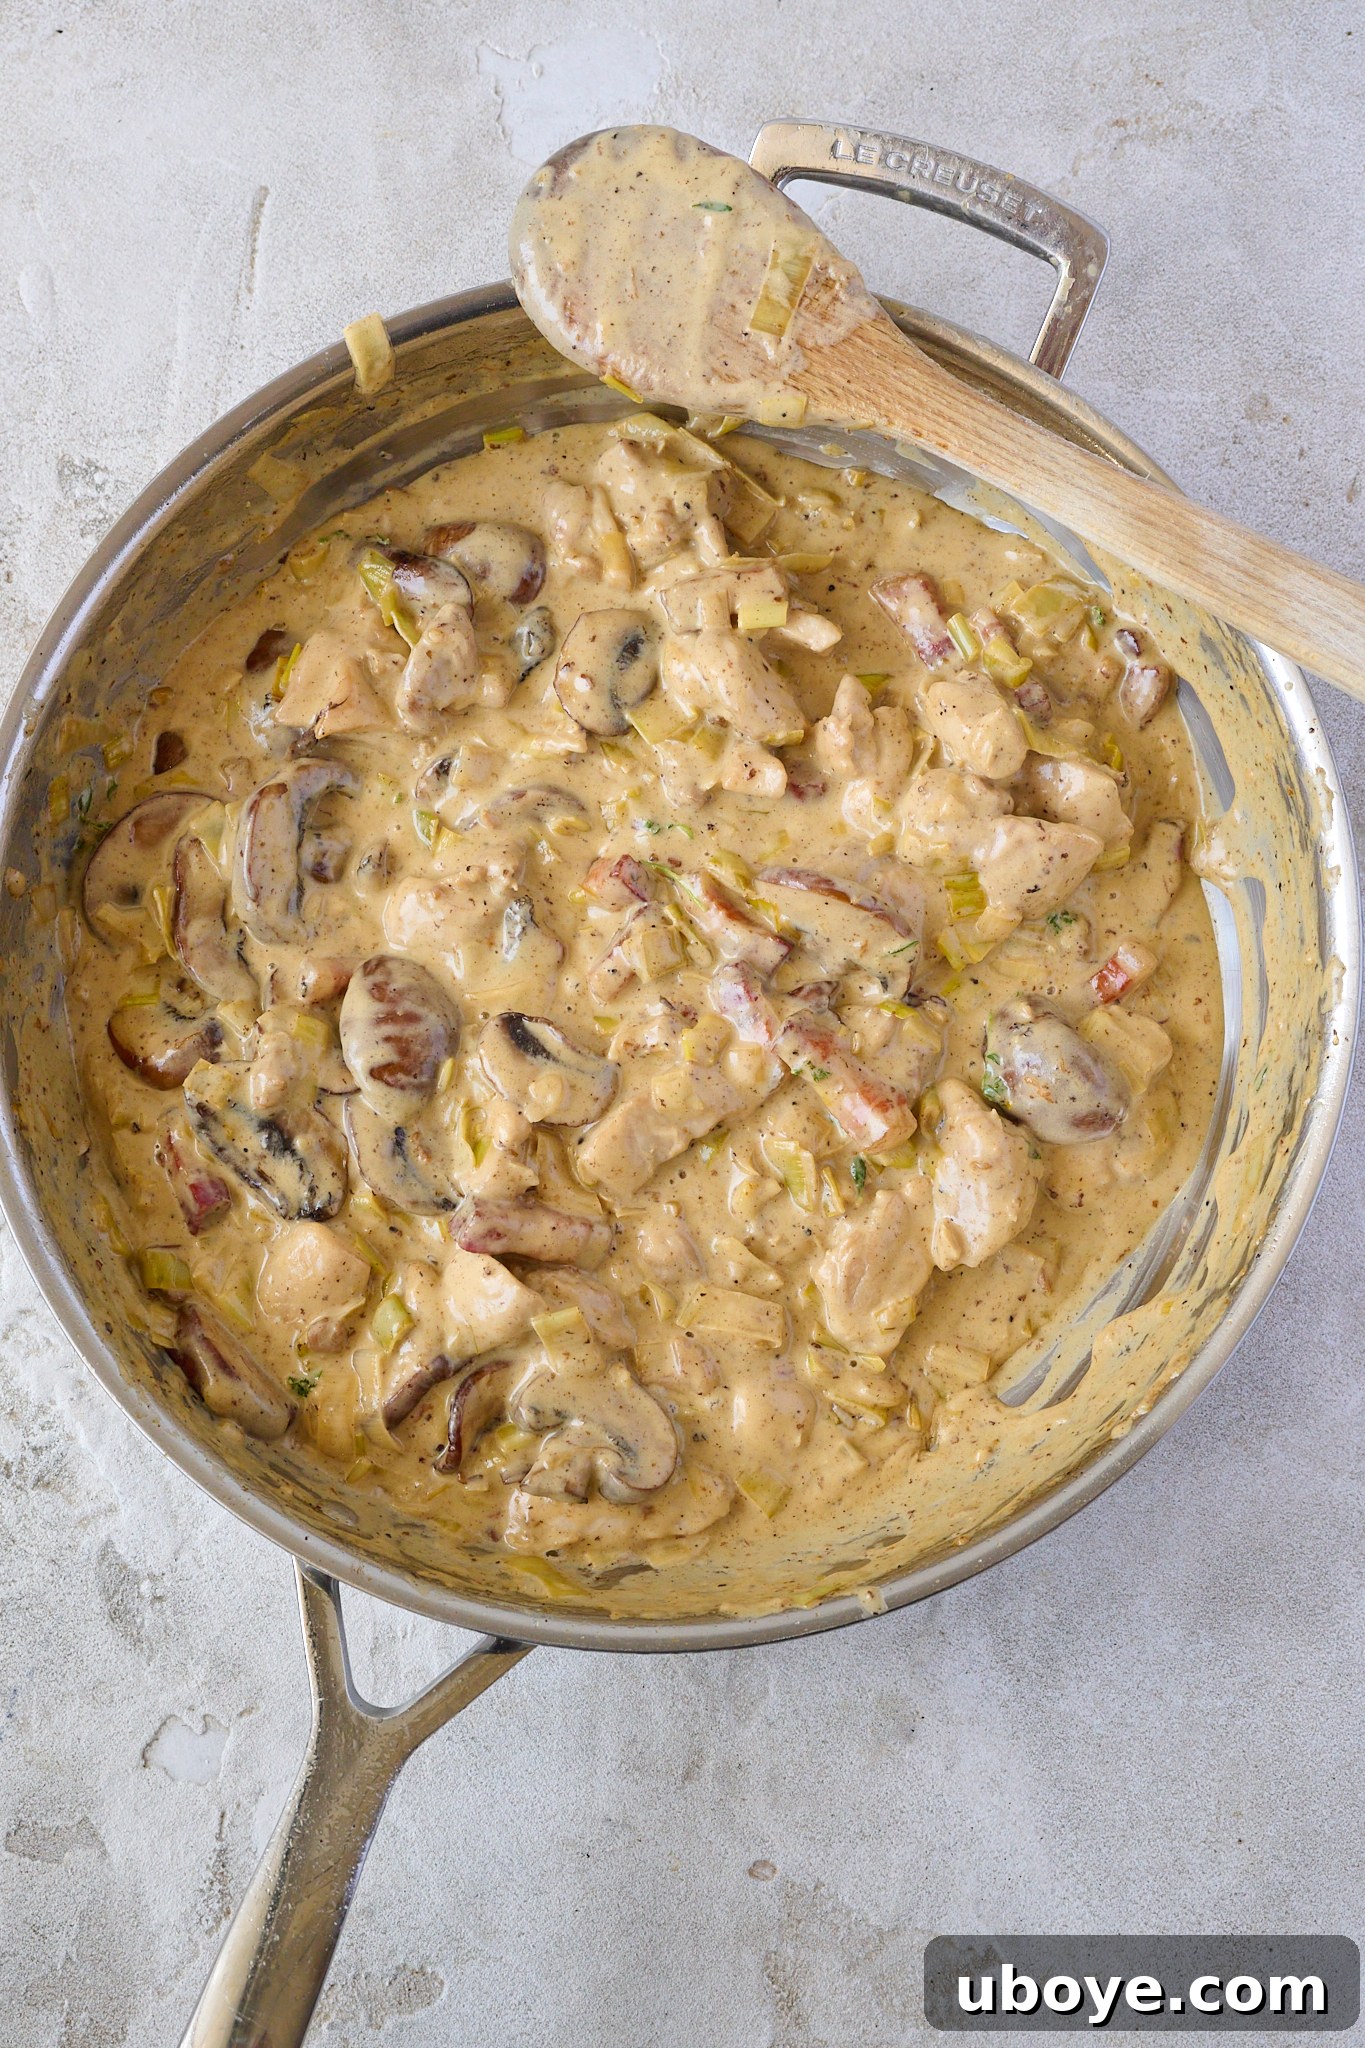
Step 6: Preparing the Luscious Filling. While your pastry chills, prepare the rich and creamy pot pie filling. Cook the bacon or pancetta until crispy, then brown the chicken thighs until golden. Sauté the mushrooms until deeply colored and fragrant, followed by the leeks and garlic. Deglaze the pan with white wine, then thicken the sauce with flour and cream. Stir in the chicken, bacon, mushrooms, Dijon mustard, fresh thyme, and lemon juice, seasoning generously. Bring the mixture to a gentle simmer, allowing the flavors to meld beautifully. Once the filling is cooked, let it cool slightly before transferring it to your chosen pie dish. This prevents the hot filling from melting the raw pastry.
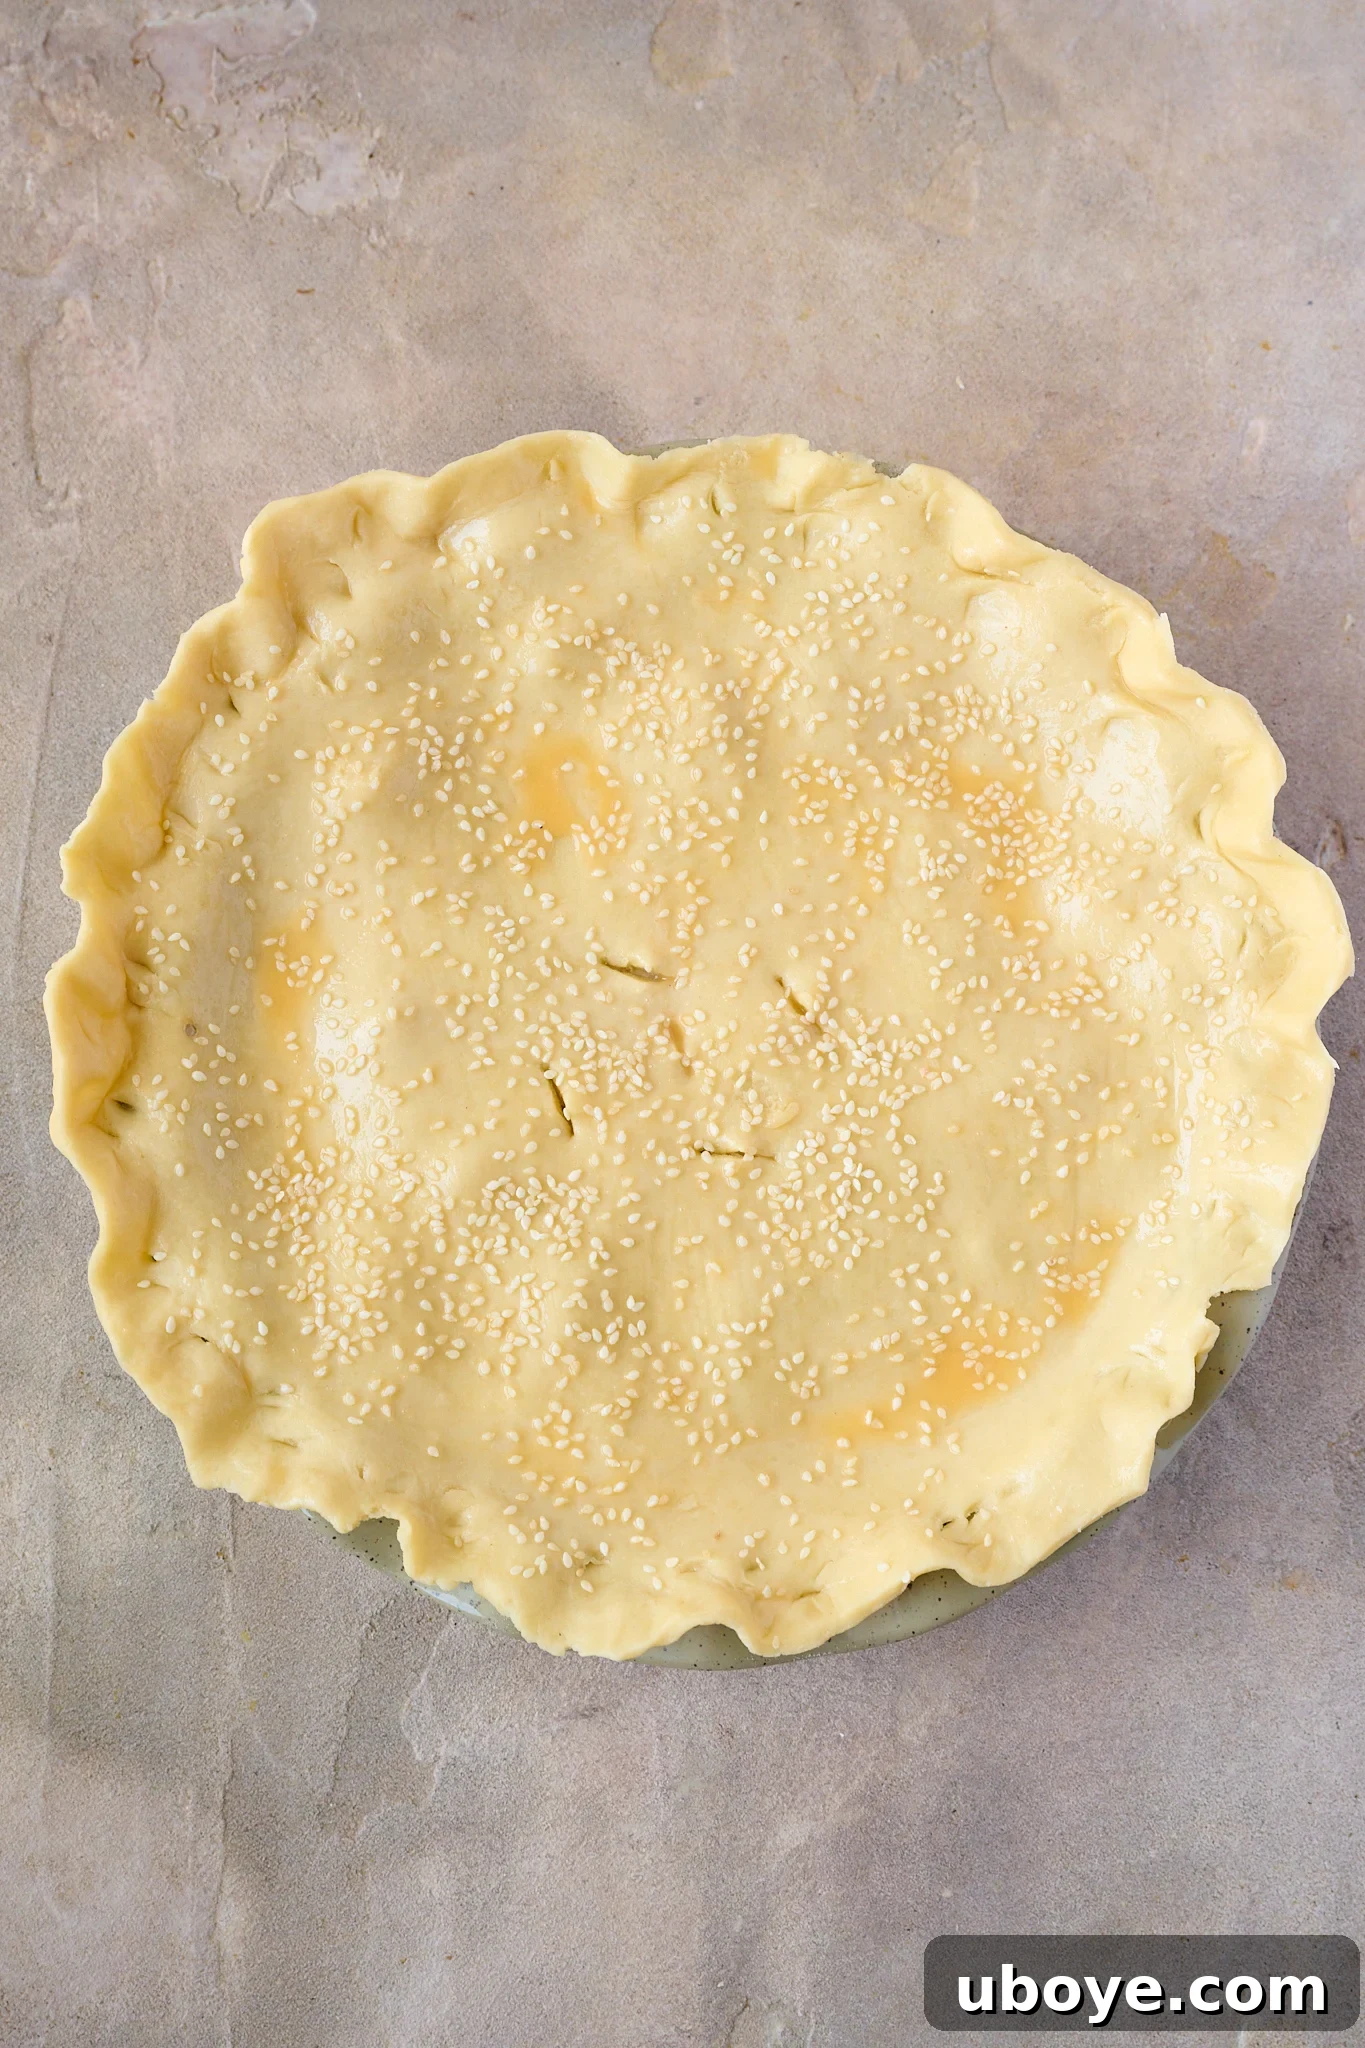
Step 7: Assembling Your Masterpiece. Retrieve one disc of your prepared puff pastry (or a sheet of store-bought pastry) from the fridge. Lightly dust your kitchen bench or work surface with flour to prevent sticking. Using a rolling pin, roll the dough out into a large, even circle, roughly 4 mm (0.16 inches) thick and about 25 cm (10 inches) wide. Carefully roll the dough onto your rolling pin, then unfurl it over the pie dish, allowing it to elegantly cover the filling. Trim any excess pastry, then crimp the edges decoratively to seal the pie. To achieve that irresistible golden sheen, brush the pastry generously with an egg wash (a whisked egg with a splash of water or milk). For an extra layer of texture and visual appeal, sprinkle sesame seeds liberally over the top.
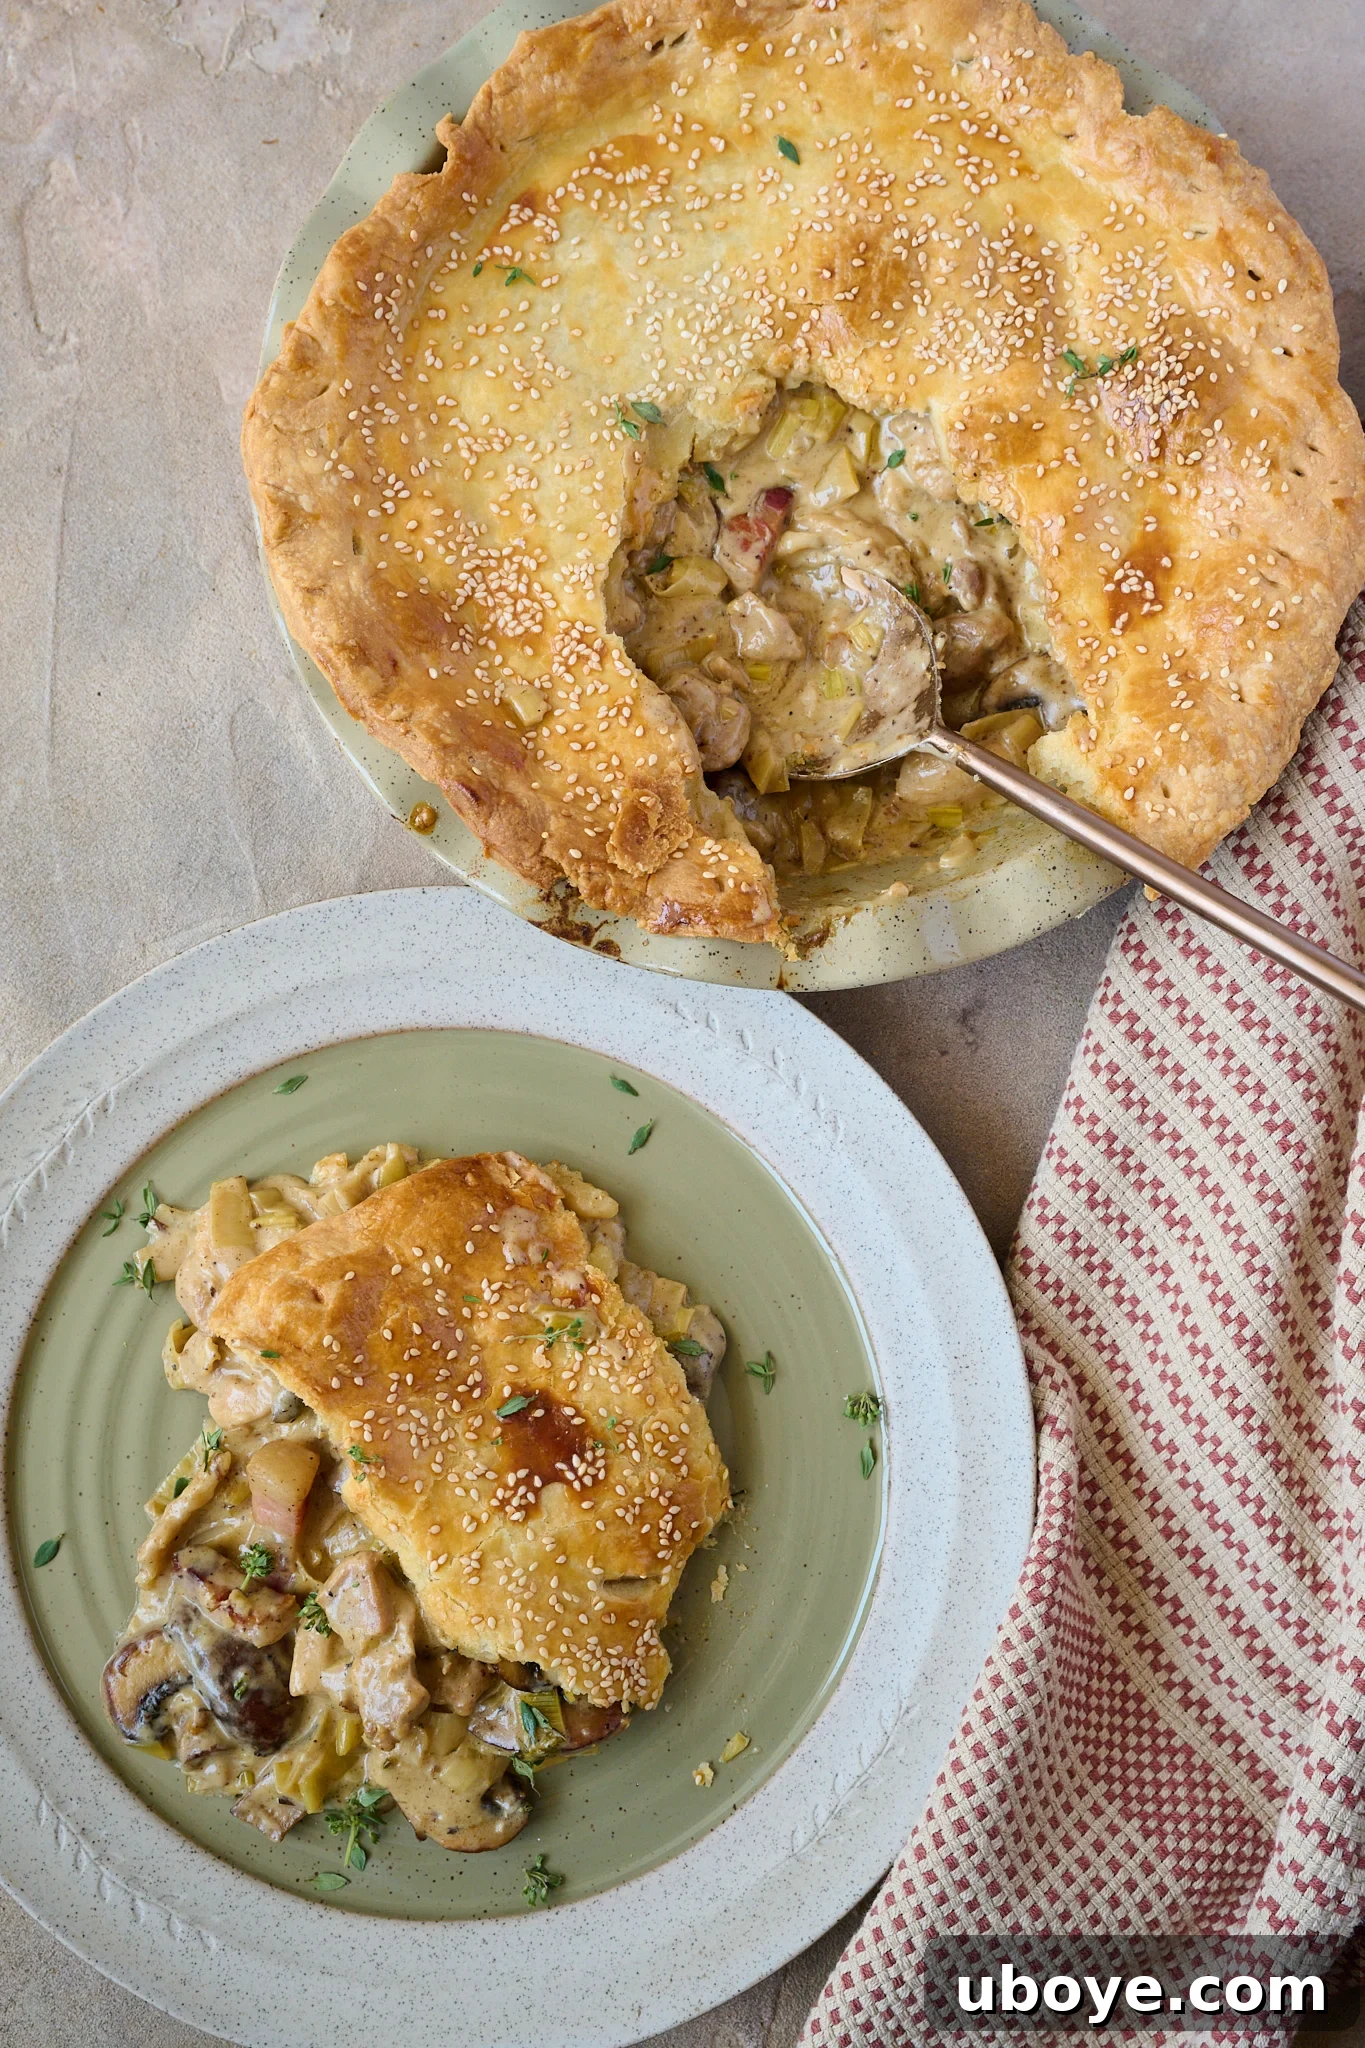
Step 8: Baking to Golden Perfection. Preheat your oven to 180°C (355°F). Place the assembled pot pie into the preheated oven and bake for 35 to 40 minutes. Keep a close eye on it; you’re looking for a magnificently golden-brown and delightfully crispy crust that puffs up beautifully. The filling beneath should be bubbling gently, indicating it’s heated through. Once baked to perfection, remove the pie from the oven and allow it to rest for about 10 minutes before serving. This brief resting period allows the filling to set, making it easier to slice and ensuring every piece holds its shape beautifully.
Frequently Asked Questions About Chicken, Mushroom & Bacon Pot Pie
Absolutely! Using a good quality store-bought puff pastry is a fantastic time-saving option that works perfectly for this recipe. It allows you to focus your efforts on creating the rich, flavorful filling without compromising the delicious flakiness of the crust.
Yes, our homemade sour cream puff pastry is excellent for meal prep. You can prepare the dough up to 2 days in advance and store it securely wrapped in plastic in the fridge. For longer storage, it freezes wonderfully for up to 3 months. Just be sure to thaw it completely in the refrigerator before rolling and using.
Certainly! While chicken thighs are often preferred for their inherent juiciness and richer flavor, boneless, skinless chicken breast is a perfectly acceptable substitute. Just be mindful during cooking to avoid overcooking, as chicken breast can dry out more easily than thighs.
Yes, this pot pie is a fantastic make-ahead meal! You can prepare the entire filling, allow it to cool completely, and then store it in an airtight container in the refrigerator for up to 2 days. When you’re ready to bake, simply transfer the cold filling to your pie dish, top with the pastry, and bake as directed. You may need to add a few extra minutes to the baking time if starting with a cold filling.
Absolutely! Individual pot pies are a charming way to serve this dish. Simply divide the prepared filling evenly among individual ramekins or small oven-safe dishes. Then, cut your pastry into rounds or squares to fit each ramekin, top them off, and bake. Adjust baking time as needed for smaller portions, typically 20-30 minutes.
Certainly! This pot pie filling is wonderfully versatile. Feel free to incorporate other vegetables such as diced carrots, celery, peas, or corn. Add harder vegetables like carrots and celery early in the cooking process with the leeks to ensure they soften adequately. Peas and corn can be stirred in towards the end of the filling’s simmering time.
For an impeccably crispy crust, there are a few key tips: ensure your oven is fully preheated to the correct temperature, brush the pastry with an egg wash before baking for a golden finish, and make sure the filling is not too wet. Crucially, cut a few small slits in the top of the pastry before baking; this allows steam to escape from the filling, preventing a soggy crust and promoting maximum flakiness.
Perfect Pairings: How To Serve Your Pot Pie
This creamy chicken, mushroom, and bacon pot pie is wonderfully rich and satisfying on its own, making it a complete meal. However, pairing it with something fresh and vibrant on the side can beautifully balance its comforting richness and elevate the dining experience. Here are some exquisite serving suggestions:
- Simple Green Salad: A crisp, fresh green salad, lightly dressed with a classic vinaigrette of olive oil and lemon juice, provides a refreshing counterpoint to the pie’s creamy texture. The acidity helps cut through the richness.
- Steamed or Stir-fried Greens: Think vibrant steamed broccolini, asparagus, or garlicky green beans. Their fresh, slightly crisp texture and verdant flavor offer a delightful contrast and add a healthy balance to your meal.
- Creamy Mashed Potatoes: For the ultimate indulgence and a truly classic comfort meal, serve a generous scoop of creamy mashed potatoes alongside your pot pie. While the pie has its own filling, the extra layer of creamy potato creates an unbelievably cozy experience.
- A Glass of Crisp White Wine: A well-chilled glass of Chardonnay or a Sauvignon Blanc with bright acidity can beautifully complement the savory flavors of the pot pie, making for a sophisticated and enjoyable meal.
No matter your choice, ensure your sides are prepared with freshness in mind to create a harmonious and unforgettable dinner.
Storage Tips for Your Chicken, Mushroom & Bacon Pot Pie
Proper storage ensures you can enjoy the deliciousness of your pot pie long after it’s baked. Here’s how to store leftovers and prepare components ahead of time:
- Refrigerating Leftovers: Any leftover pot pie should be stored in an airtight container in the refrigerator. It will maintain its best quality for up to 3 days.
- Reheating for Crispiness: To revive that wonderful crispy pastry, reheat individual slices or the entire pie in the oven at 180°C (355°F) until it’s thoroughly warmed through. To prevent the pastry from burning while the filling heats, we recommend covering the pie loosely with aluminum foil during reheating.
- Microwave Reheating: While convenient, reheating the pot pie in the microwave is not recommended if you desire a crispy crust, as the pastry will inevitably soften. It’s best reserved for times when crispiness isn’t a priority.
- Making the Filling Ahead: The creamy pot pie filling can be prepared entirely in advance. Allow it to cool completely before transferring it to an airtight container. It can be stored separately in the fridge for up to 2 days before you assemble and bake the pie.
- Freezing the Filling: The pot pie filling also freezes exceptionally well for up to 3 months. Store it in a freezer-safe, airtight container. When ready to use, thaw the filling completely in the refrigerator overnight before topping it with pastry and baking. This is a fantastic option for future quick and comforting meals.
- Freezing Unbaked Pie: You can also assemble the entire pie (with cooled filling) and freeze it unbaked. Wrap it tightly in plastic wrap and then foil. When ready to bake, thaw it in the fridge overnight, then bake as directed (it might need an extra 10-15 minutes).
More Comfort Meals To Love!
Meat
Osso Buco With Gremolata & Risotto
Meat
Beef Short Rib Ragu
Pasta
Creamy Garlic One Pan Orzo
Meat
Creamy Garlic Parmesan Chicken
If you create this delicious Creamy Chicken, Mushroom & Bacon Pot Pie, we would absolutely love to see your culinary creations! Please share and tag us on Instagram, TikTok, or Pinterest so we can admire your wonderful dishes from Daen’s Kitchen!
Do you have any questions about this recipe, or would you like to share your feedback? Please feel free to leave a comment or review below! We always enjoy answering your food and recipe-related questions and appreciate hearing your thoughts on our culinary adventures.
This recipe was proudly sponsored by Robert Gordon to showcase their exquisite new Kitchen Life Range, which perfectly complements home cooking.
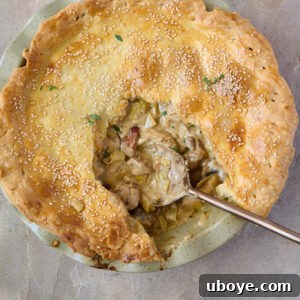
Creamy Chicken, Mushroom & Bacon Pot Pie
Daen Lia
If you are looking for a comforting chicken pot pie recipe that the whole family will love, this chicken, mushroom and bacon pot pie is it.
1 hr
1 hr
6
Ingredients
Sour Cream Puff Pastry
- 2.5 cups all-purpose flour
- 1 tsp sea salt flakes
- 2/3 cup salted butter, grated and chilled
- 1 cup sour cream
Filling
- 7 oz bacon or pancetta, sliced
- 1 lb chicken thighs, cubed
- 6 tbsp butter
- 14 oz brown button mushrooms, sliced
- 1 leek, white and pale green parts sliced
- 4 garlic cloves, minced
- 1/2 cup white wine
- 1 tbsp all-purpose white flour
- 8 oz heavy cream
- 1 tsp dijon mustard
- 1 tsp thyme leaves (fresh is best)
- 1 tbsp lemon juice
- Salt and pepper, to taste
Pie Assembly
- 1 sheet puff pastry (homemade or store-bought)
- 1 egg, whisked with a splash of water (for egg wash)
- 1 tbsp sesame seeds, optional
Instructions
Sour Cream Puff Pastry (if making from scratch)
- Freeze: Chill a large bowl, a box grater, and the butter in the freezer for 20 minutes before making the pastry.
- Rub In Butter: Place the flour and salt in the chilled bowl and whisk together. Grate the cold butter using the chilled grater into the flour. Rub the butter into the flour until you have a pebble-like crumbly texture. You can do this by pinching and rubbing the butter and flour between your fingers.
- Sour Cream: Create a well in the center of the mixture and add the sour cream. Using a fork, slowly mix the flour into the sour cream in the center until most of the flour is moist and you have a pebble-like texture.
- Shape & Chill: Lightly dust a work surface with flour and shape the dough into a disc. (The dough should be firm and moist, but not sticky. You want just enough moisture so the dough is barely sticking to itself. If it needs more moisture, slightly wet your hands when working with it or, if it’s too dry, lightly dust it with flour.) Cover with plastic wrap and leave to rest in the fridge for 1 – 2 hours, or ideally overnight.
- Lamination: Using a rolling pin, roll the dough out into a 2 cm thick and long rectangle. Fold the dough into thirds as if you were folding a piece of paper to go into an envelope. Turn the dough clockwise and roll it back out into a 2 cm thick rectangle. Repeat this step six times until you have created many layers and the dough is smooth.
- Chill: Divide the dough into two and wrap each piece in plastic wrap. Leave to rest in the fridge for a minimum of 15 minutes or up to 2 days. If you are not using within 2 days, you can store in the freezer for 3 months.
Filling
- Render: In a cold fry pan, add the bacon or pancetta. Turn the heat to low and cook until the fat has been rendered. Once there is enough fat in the pan, turn the heat to high-medium and cook until the bacon or pancetta is crispy. Using a slotted spoon, remove from the pan, reserving the rendered fat.
- Chicken: Add the cubed chicken thighs to the pan with the bacon fat and cook for 6 minutes, or until golden brown on the outside and cooked through. Remove the chicken from the pan and set aside with the bacon.
- Mushrooms & Aromatics: Add 4 tbsp of the butter to the same pan. Once melted and sizzling, add the sliced mushrooms and cook for 5 minutes until they start to release their moisture and brown. Season with salt and stir through. Remove the mushrooms from the pan and add the remaining butter. Add the sliced leek and cook for 5 minutes, or until softened and wilted. Add the minced garlic and cook for an additional 2 minutes until fragrant.
- Deglaze: Deglaze the pan with white wine, using a wooden spoon to scrape any browned bits off the bottom of the pan. Allow the wine to simmer and reduce slightly for 1-2 minutes.
- Flour: Sprinkle the all-purpose flour into the pan and stir it through with the leek and garlic mixture for 2 minutes. This cooks off the raw flour taste and creates a roux.
- Combine Filling: Return the cooked chicken, bacon, and mushrooms to the pan. Pour in the heavy cream, add the Dijon mustard, thyme leaves, lemon juice, and season generously with salt and pepper. Stir everything together until well combined. Bring the mixture to a gentle simmer and let it cook for 3 – 5 minutes, allowing the sauce to thicken and the flavors to meld. Remove from the heat and allow the filling to cool slightly before assembling the pie.
Pie Assembly
- Preheat: Preheat your oven to 180°C (355°F).
- Assemble: Pour the slightly cooled filling into your chosen pie dish.
- Roll out Pastry: Take one disc of the homemade puff pastry (or one sheet of store-bought puff pastry). Lightly sprinkle your kitchen bench or work surface with flour. Using a rolling pin, roll the dough out to a large circle that is roughly 4 mm thick and approximately 25 cm (10 inches) wide. Carefully roll the dough onto your rolling pin and gently unroll it over the pie dish, covering the filling. Crimp the edges of the pastry to seal it. Brush the pastry generously with egg wash for a golden finish and sprinkle sesame seeds all over, if desired. Don’t forget to cut a few small slits in the top of the pastry to allow steam to escape during baking.
- Bake: Bake in the preheated oven for 35 – 40 minutes, or until the pastry is beautifully golden brown and crispy, and the filling is bubbling.
- Serve: Let the pie rest for 10 minutes after baking to allow the filling to set, then serve immediately and enjoy!
Notes
- Allow the filling to cool slightly before topping with pastry to prevent the pastry from becoming soggy.
- Always cut small slits in the pastry top to allow steam to escape, ensuring a crispy crust.
- Egg wash the pastry for an irresistibly golden color and a beautiful shine.
- Do not skip seasoning the filling generously with salt and pepper. Taste it before assembling to adjust as needed.
- If using store-bought pastry (typically 25cm/10″ square), keep it cold until immediately ready to use.
- Let the pie rest for at least 10 minutes before serving. This allows the creamy filling to set, making for cleaner slices.
- For an even richer flavor, you can add a pinch of smoked paprika to the filling along with the thyme.
- Ensure your butter and tools are extremely cold when making homemade pastry; this is key to flakiness.
Nutrition
- Calories:
- 1110 kcal
- Carbohydrates:
- 66 g
- Protein:
- 24 g
- Fat:
- 83 g
- Saturated Fat:
- 40 g
- Polyunsaturated Fat:
- 7 g
- Monounsaturated Fat:
- 28 g
- Trans Fat:
- 1 g
- Cholesterol:
- 225 mg
- Sodium:
- 839 mg
- Potassium:
- 392 mg
- Fiber:
- 3 g
- Sugar:
- 4 g
- Vitamin A:
- 2111 IU
- Vitamin C:
- 4 mg
- Calcium:
- 121 mg
- Iron:
- 5 mg
Nutrition information is automatically calculated and should only be used as an approximation. Actual values may vary based on ingredients and preparation methods.
 Like this? Leave a comment below!