
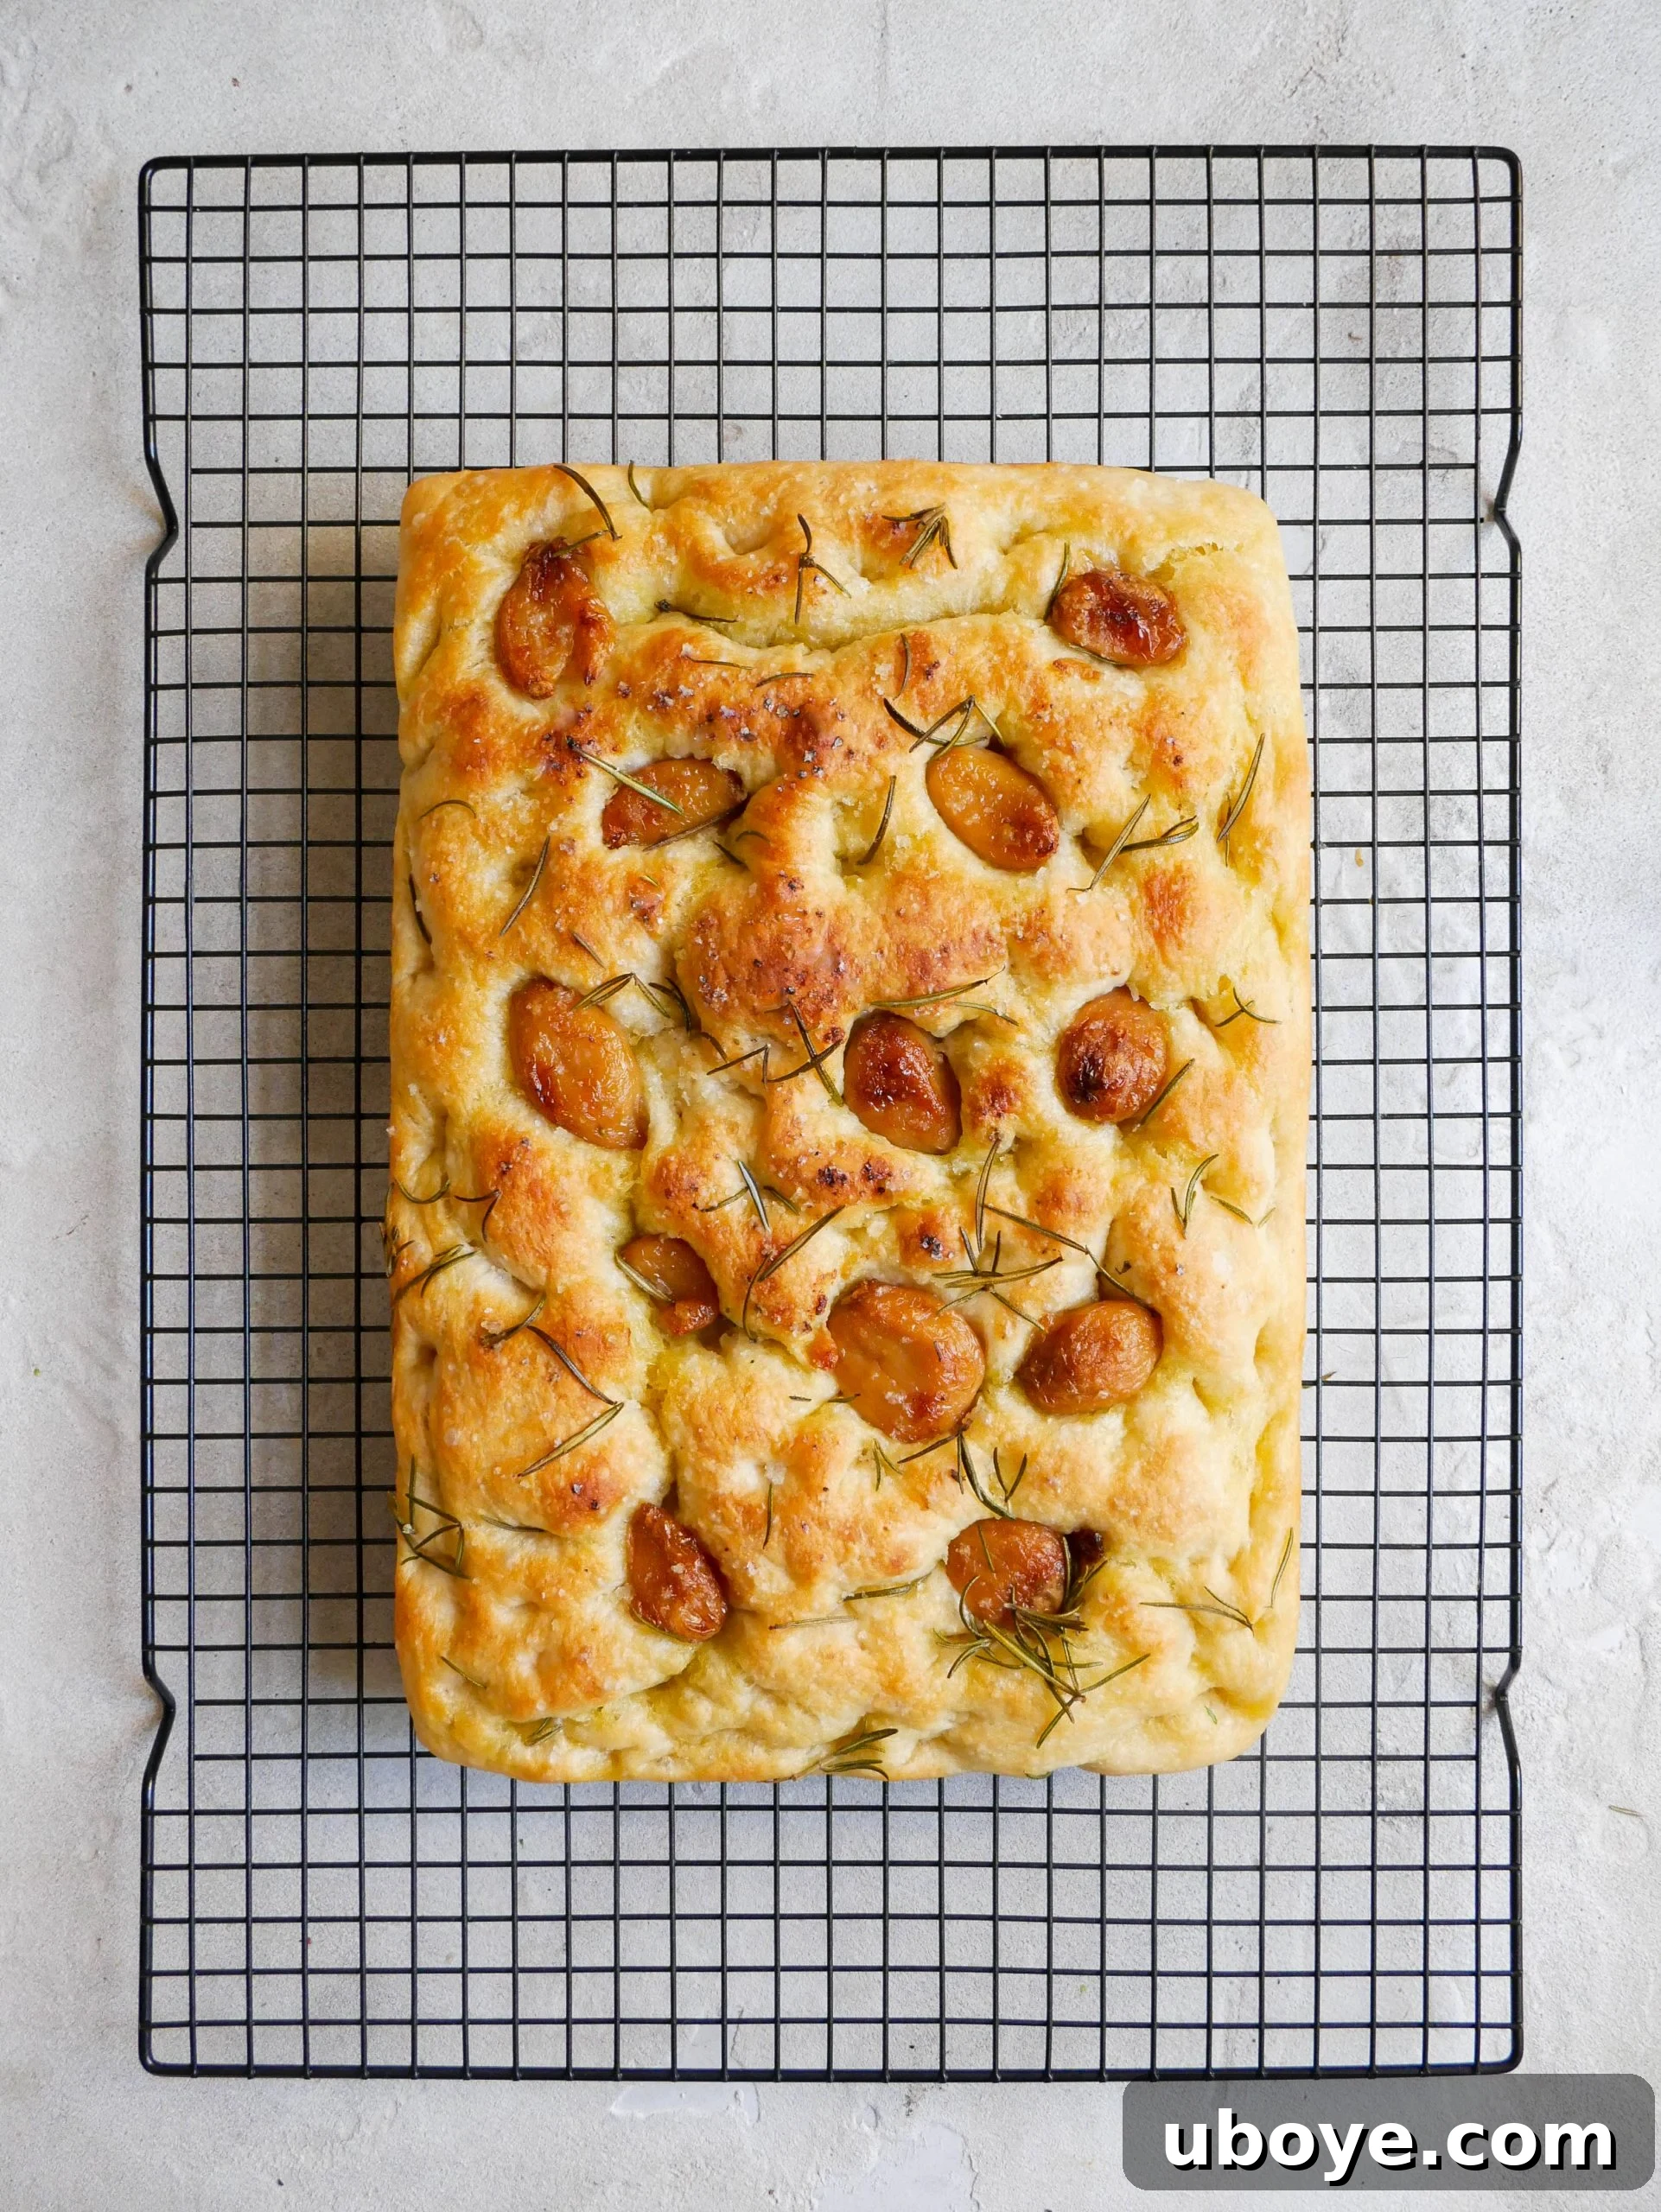
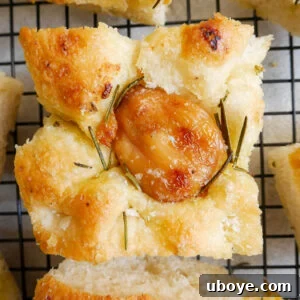
This garlic and rosemary no-knead focaccia is a culinary masterpiece, celebrated for its rich, caramelized flavor in every bite. Crafted using my renowned garlic confit, this recipe transforms simple ingredients into an extraordinary bread. The dough, effortlessly mixed by hand without any prior bread-making skills required, bakes into a stunning golden, fluffy loaf with irresistibly crispy edges. Crowned with fresh rosemary and tender confit garlic, it stands as the quintessential herby, garlicky bread, perfect for any occasion.
For those who share a passion for focaccia, my kitchen offers a diverse collection of toppings and variations designed to delight your palate. Explore fan favorites like my cheesy seeded focaccia, the vibrant green olive focaccia, or the sophisticated fig and goat’s cheese focaccia. Each recipe promises a unique flavor journey, rooted in the simplicity of the no-knead method.
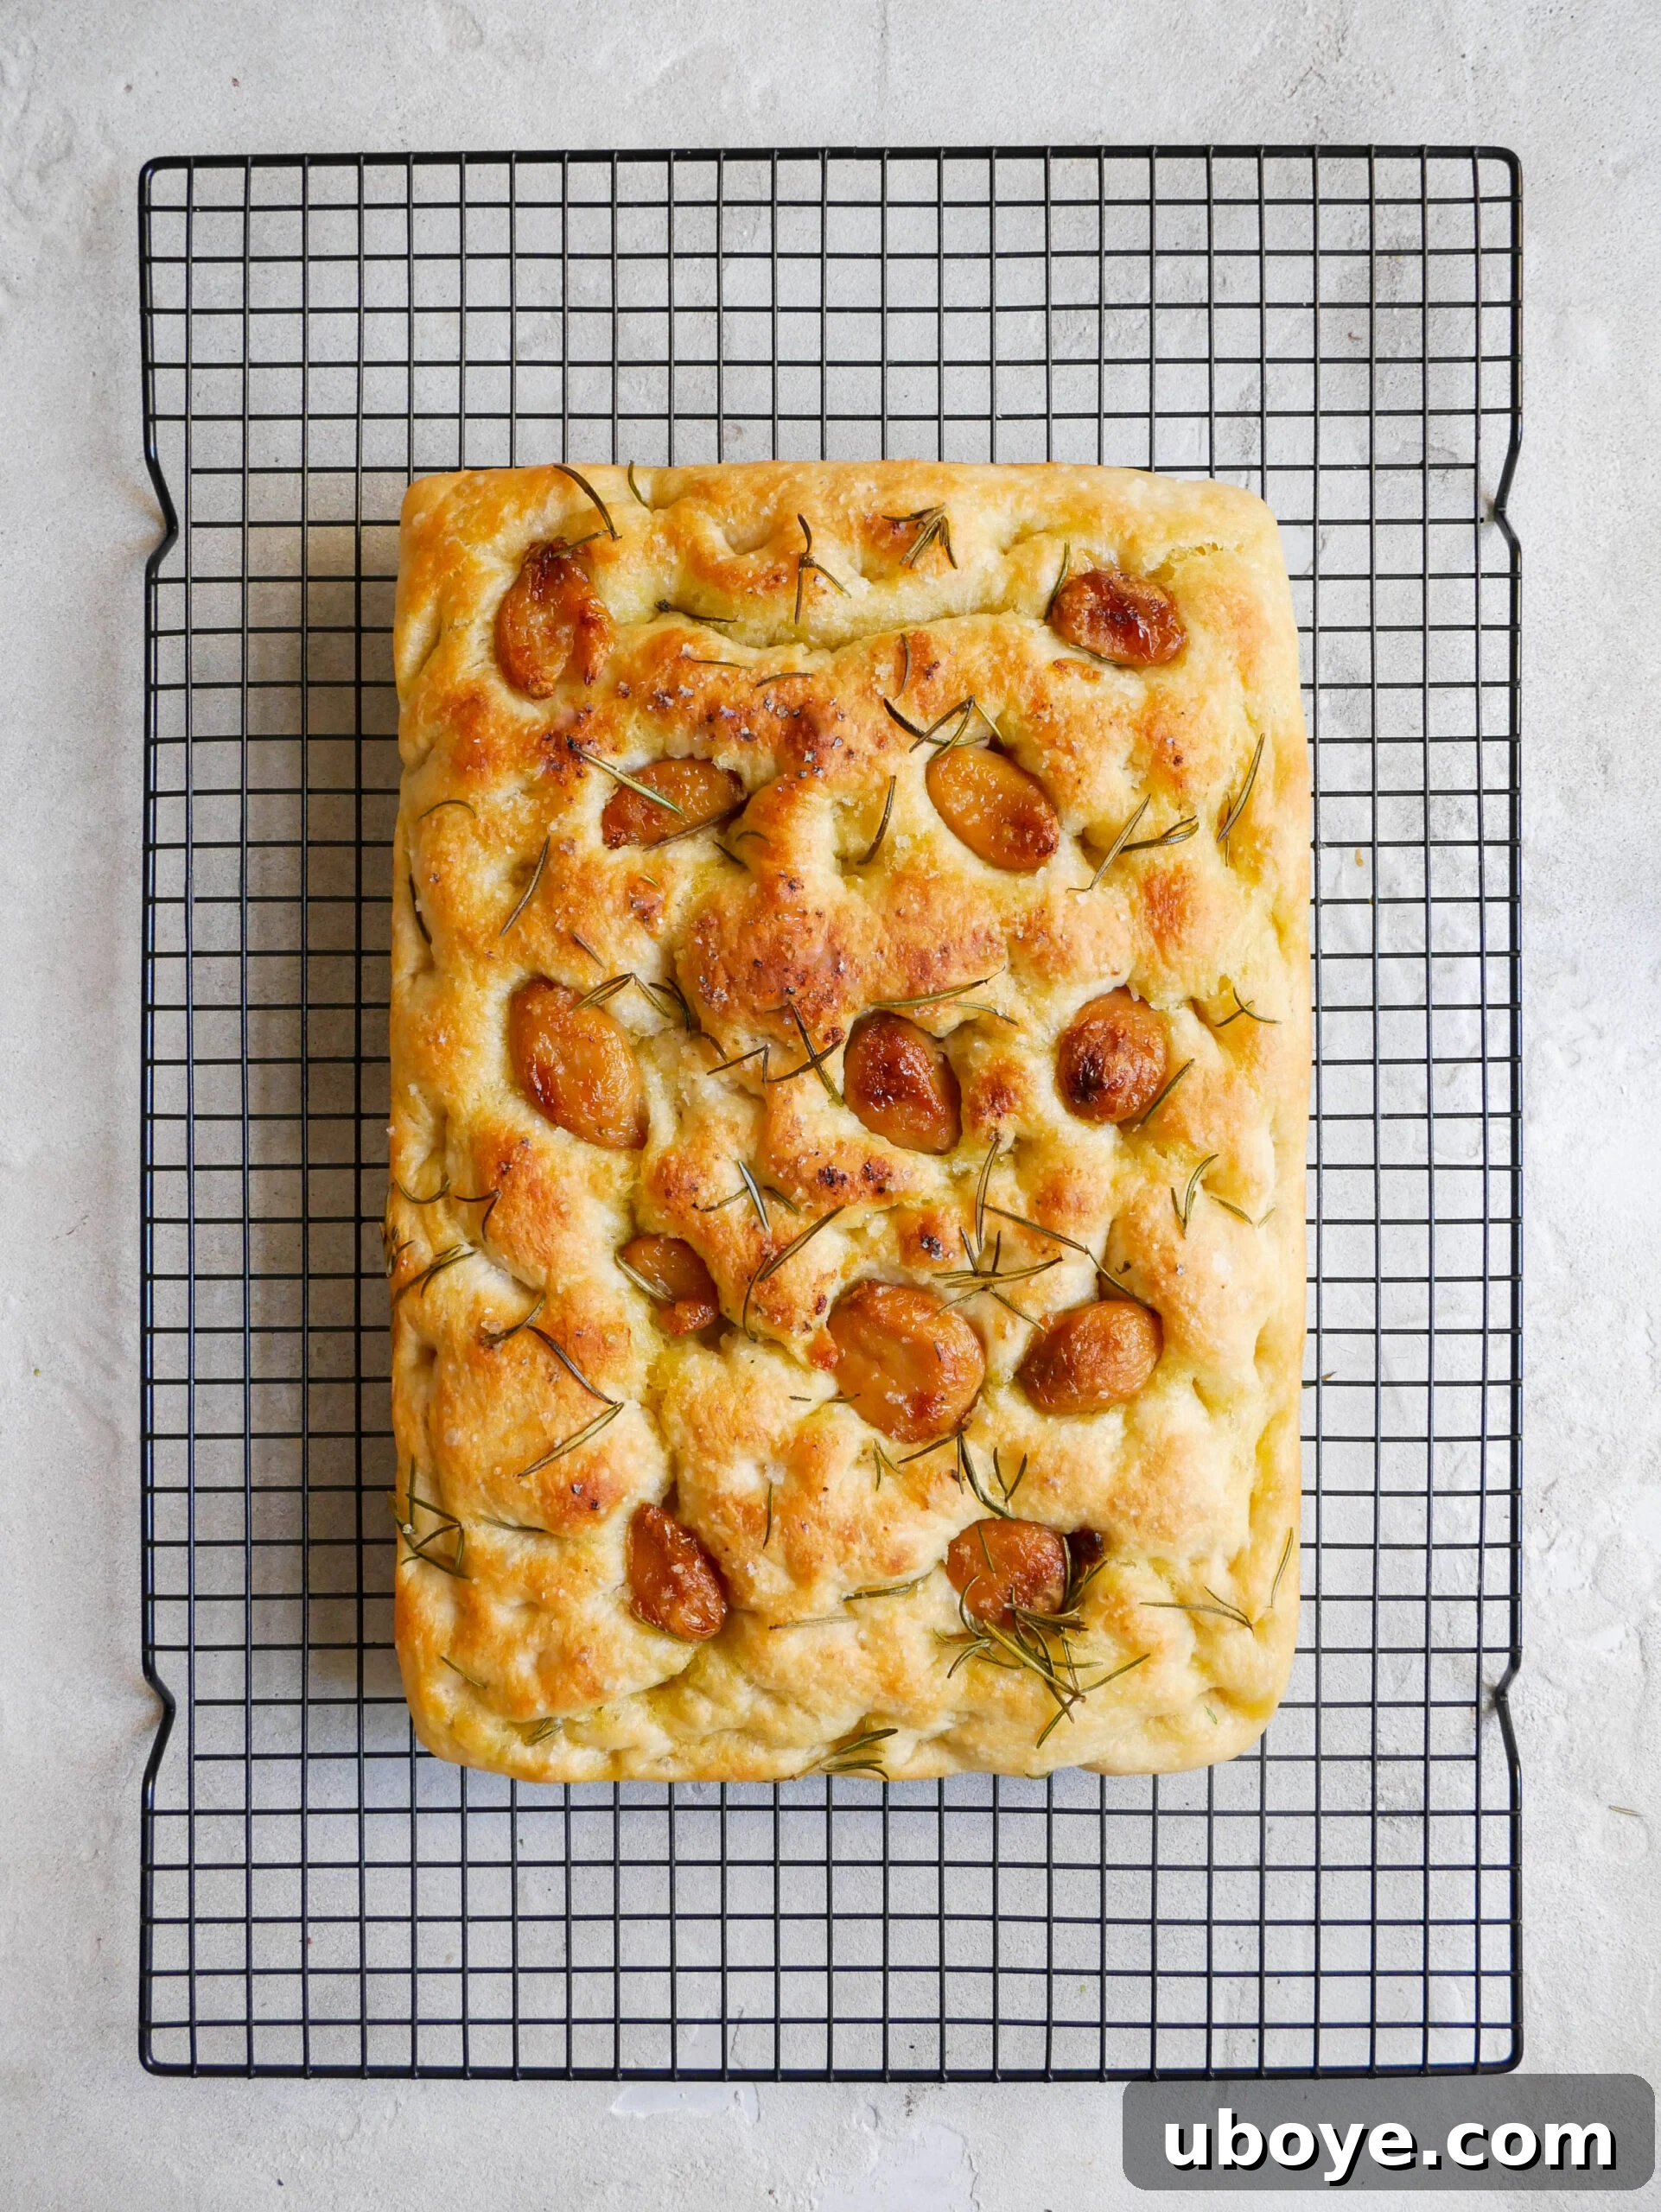
Garlic and Rosemary No-Knead Focaccia: Your Guide to Artisan Bread at Home
If there’s one recipe that has become synonymous with my kitchen, it’s focaccia. This versatile Italian style yeasted flatbread, often likened to a denser, more textured pizza dough, has inspired a whole collection of innovative toppings built around my incredibly foolproof no-knead dough. Among these cherished creations, this garlic and rosemary rendition holds a special place, often cited as my absolute favorite.
Crafted with my famous garlic confit, this garlic and rosemary no-knead focaccia offers a remarkable contrast in textures and a depth of flavor that is truly unparalleled. It boasts a soft, pillowy interior that gives way to a golden, exquisitely crispy exterior, all infused with an intoxicating blend of garlicky and herby notes. The magic lies in the slow-roasted garlic confit, which gently melts into the dough during baking, creating luscious, caramelized pockets on the surface. Fresh rosemary, scattered generously, contributes a fragrant, earthy finish, elevating this into a sophisticated yet rustic modern take on traditional Italian rosemary focaccia. The best part? This incredible dough comes together with nothing more than your hands – or a wooden spoon if you prefer to keep things tidy!
The beauty of this focaccia lies in its incredible versatility. Whether you’re tearing off a warm piece to dip into a pool of fragrant olive oil or a rich creamy roasted red pepper dip, serving it as an elegant accompaniment to a hearty bowl of pasta, or presenting it as a stellar side to a delicious Italian appetizer spread, it never disappoints. Its robust structure also makes it the ideal foundation for an epic sandwich, transforming a simple meal into a memorable culinary experience. This focaccia isn’t just bread; it’s a simple, satisfying, and always crowd-pleasing addition to any table.
Key Ingredients for Your No-Knead Focaccia Dough
Creating my signature no-knead focaccia dough requires only a handful of fundamental ingredients. Each plays a crucial role in achieving the perfect texture and flavor profile.
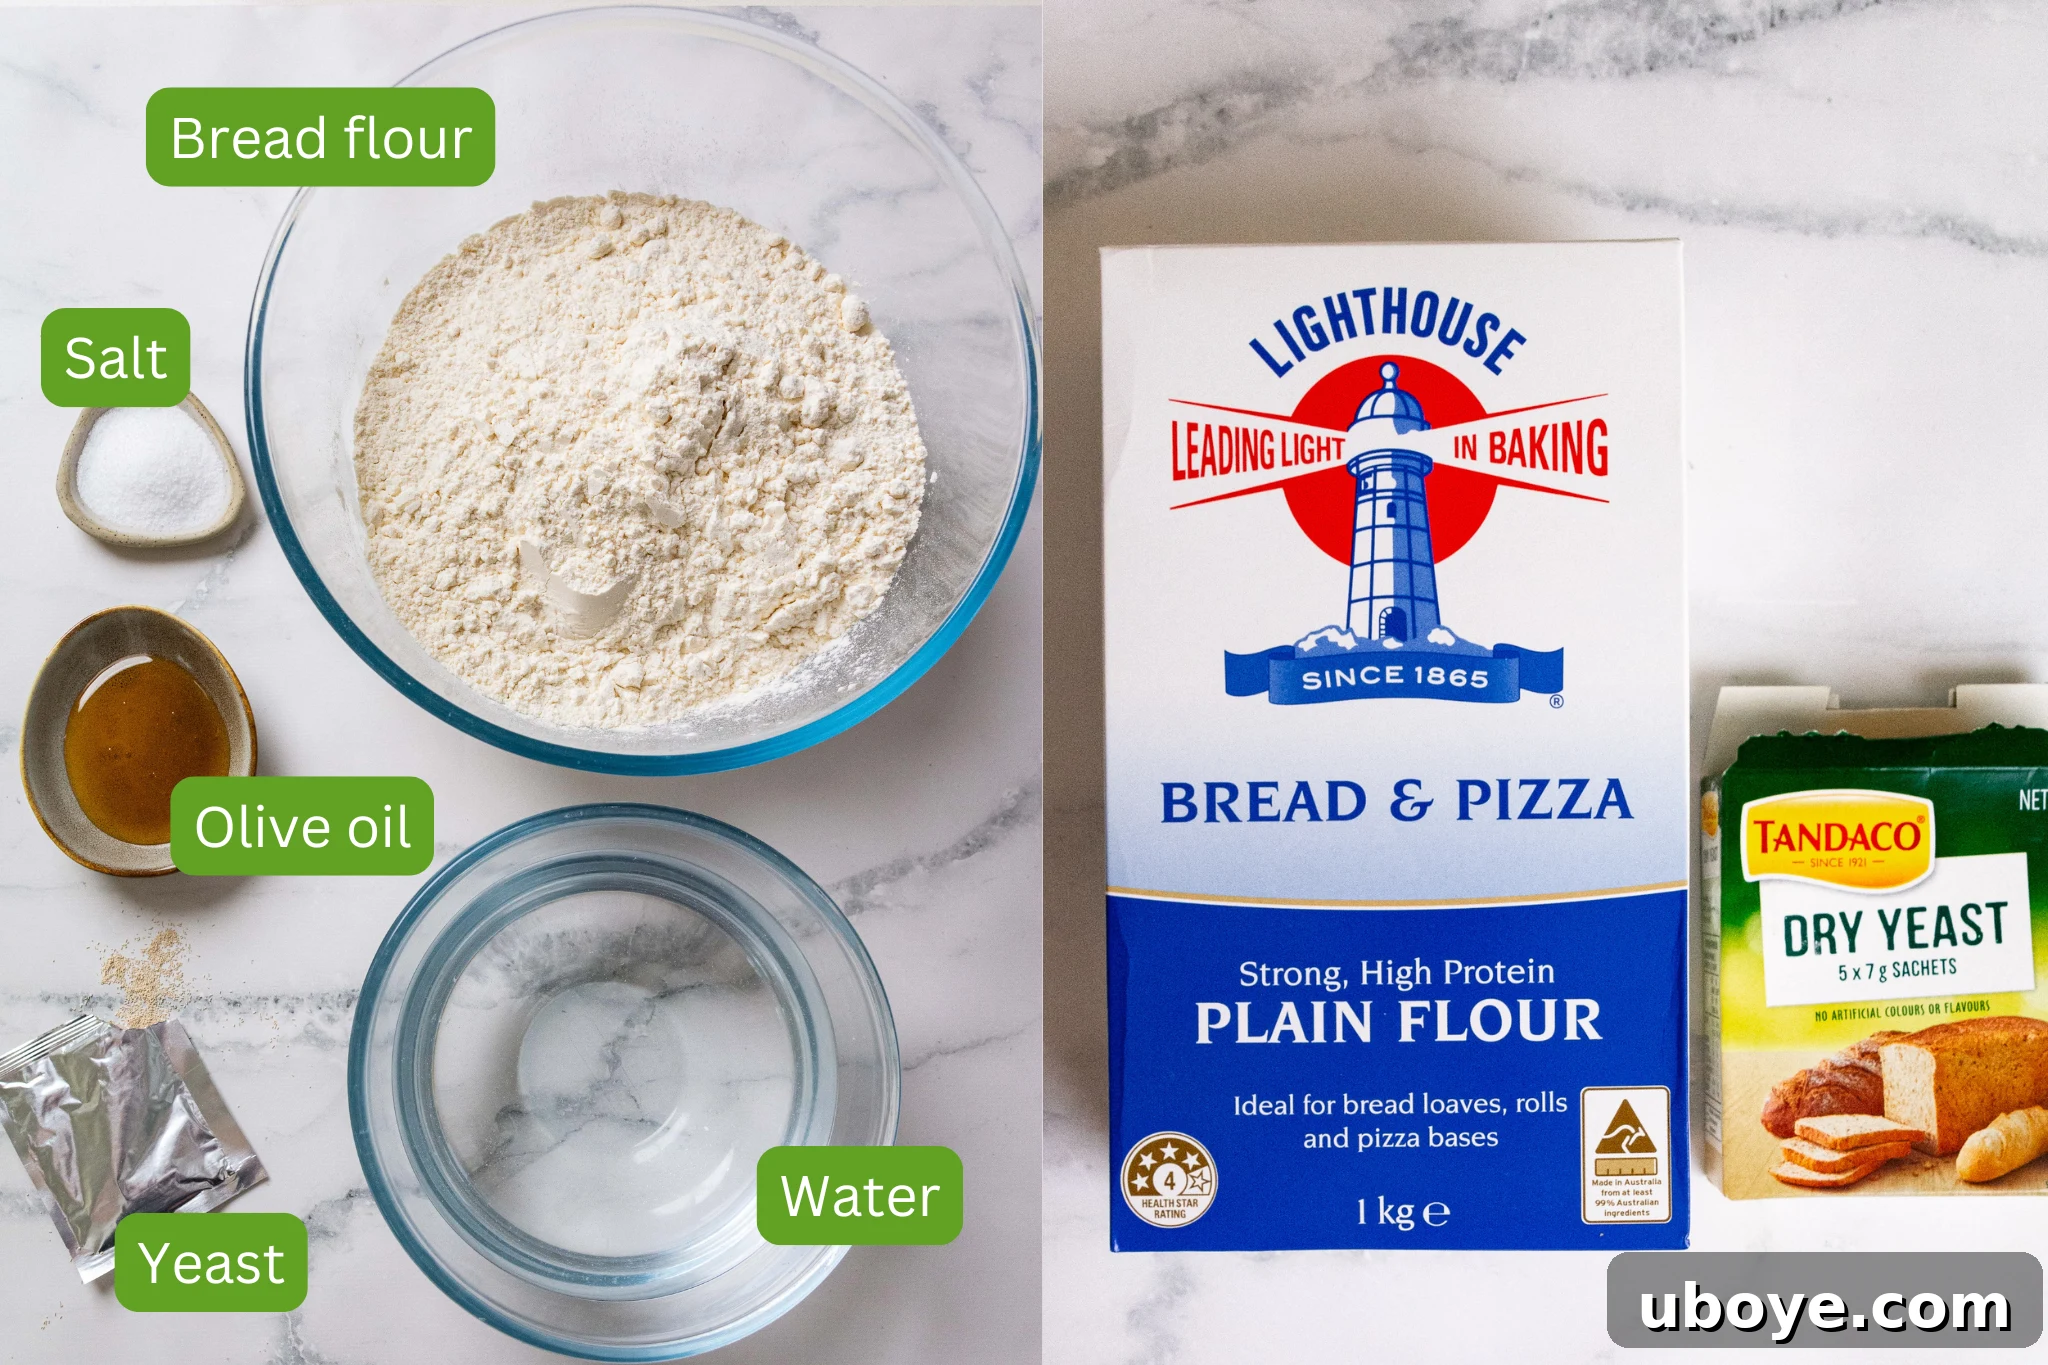
- Bread Flour: For an optimal focaccia with a softer, chewier crumb, I highly recommend using bread flour. Its higher protein content develops more gluten, contributing to that desirable airy yet substantial texture. My preferred brand is Lighthouse, but if bread flour isn’t readily available, standard all-purpose flour will still yield delicious results.
- Yeast: Yeast is the lifeblood of our focaccia, responsible for its incredible rise and characteristic airy pockets. I typically opt for dry yeast, which is a dehydrated form that springs to life when mixed with warm water, signaling its readiness with a frothy bloom. Tandaco’s 7g sachets are my go-to for convenience. Alternatively, instant yeast can be used directly with your dry ingredients, skipping the activation step.
- Salt: A crucial flavor enhancer, fine kosher sea salt brings out the natural tastes of the flour, olive oil, and toppings. Beyond flavor, salt strengthens the dough’s gluten structure, which is vital for a robust rise, and helps regulate yeast activity, contributing to a superior texture.
- Olive Oil: This is arguably the most vital ingredient in any focaccia recipe, defining its signature golden crust, rich flavor, and tender, pillowy interior. Olive oil is incorporated directly into the dough, liberally coats the pan, and is generously drizzled over the top before baking. This multi-stage application ensures a beautifully crisp crust while maintaining a soft, airy crumb. Always choose a high-quality extra virgin olive oil for the best possible flavor and texture.
For a complete list of ingredients with precise measurements, please refer to the recipe card located further down the page.
Mastering No-Knead Focaccia: Expert Tips for Success
Before you dive into the delightful process of making this incredible no-knead focaccia dough, here are some invaluable expert tips to ensure your baking journey is a resounding success and yields the best possible loaf:
- Maximize Resting and Rising Time: Patience is truly a virtue when it comes to no-knead focaccia. If your schedule allows, I highly recommend letting your dough rest and rise for 24 to 48 hours, or even up to 72 hours. This extended cold fermentation period dramatically enhances the flavor, creating a deeper, more complex profile, and results in an incredibly fluffier and lighter dough with large, open air pockets. If time is a constraint, aim for a minimum of 8 hours.
- Embrace High-Quality Extra Virgin Olive Oil: Focaccia relies heavily on olive oil, not just for its rich taste but also for its crucial role in developing the bread’s tender texture and that coveted golden, crunchy crust. Do not skimp on quality here; invest in a high-quality extra virgin olive oil. It makes a noticeable difference in the final product. Be generous when drizzling it over the dough and coating your baking pan.
- Cultivate a Warm Environment for the Second Rise: A consistently warm, room-temperature environment is essential for the dough’s second proof, allowing it to double in size beautifully. During colder months, a clever trick is to use your oven as a proofing box. Simply turn on the oven light (without any heat) and let your focaccia dough rise inside. This provides a gentle warmth without risking over-proofing. Be mindful not to leave the dough in an overly warm spot for too long, as over-proofed dough can deflate when dimpled. However, even an over-proofed focaccia will still taste wonderful!
- Choose the Right Baking Sheet: The dimensions of your baking vessel significantly impact the focaccia’s thickness and overall appearance. I find a baking dish measuring approximately 34cm x 23cm x 5cm (or roughly 13.5 x 9 x 2 inches) works perfectly for a standard-sized, beautifully risen loaf. If you prefer a slightly thinner focaccia with a broader surface area, a standard rimmed baking sheet will also work excellently, allowing the dough to spread out more. Ultimately, it comes down to personal preference.
- Trust the High Hydration: This focaccia recipe features a very high hydration level, around 98% (meaning almost as much water as flour by weight). Don’t be alarmed if the dough initially appears very wet, loose, and sticky – this is exactly how it should be! High hydration is key to achieving focaccia’s characteristic airy, open crumb. Trust the process: keep mixing until the wet dough forms, and you’ll witness its strength develop beautifully with each subsequent stretch and fold.
Crafting Garlic & Rosemary No-Knead Focaccia: A Step-by-Step Guide
This garlic and rosemary no-knead focaccia truly comes together with minimal effort, rewarding you with an artisanal loaf that tastes like it took hours of complex work. Simply follow these steps: mix the dough, allow it to rise to perfection, and then bake until it’s beautifully golden and irresistibly crispy.
Garlic Confit Preparation (Prerequisite)
- Preheat Oven: Set your oven to a low 120°C / 250°F.
- Prepare Garlic: Peel two bulbs of garlic. The easiest method is to separate the cloves, place them in a heatproof bowl, submerge them in boiling hot water for 5 minutes, then drain. The skins will then slip off effortlessly.
- Confit Garlic: Place the peeled garlic cloves into a small, ovenproof dish and pour in about 1 cup of high-quality extra virgin olive oil, ensuring the garlic is completely submerged. This prevents burning and allows for even cooking. Bake for 1 to 2 hours, or until the garlic is tender and has developed a beautiful golden hue. Allow the garlic confit to cool, then separate the softened cloves from the aromatic oil. You’ll use 12 of these flavorful cloves for your focaccia, and some of the infused oil for the dough.
Focaccia Dough Creation
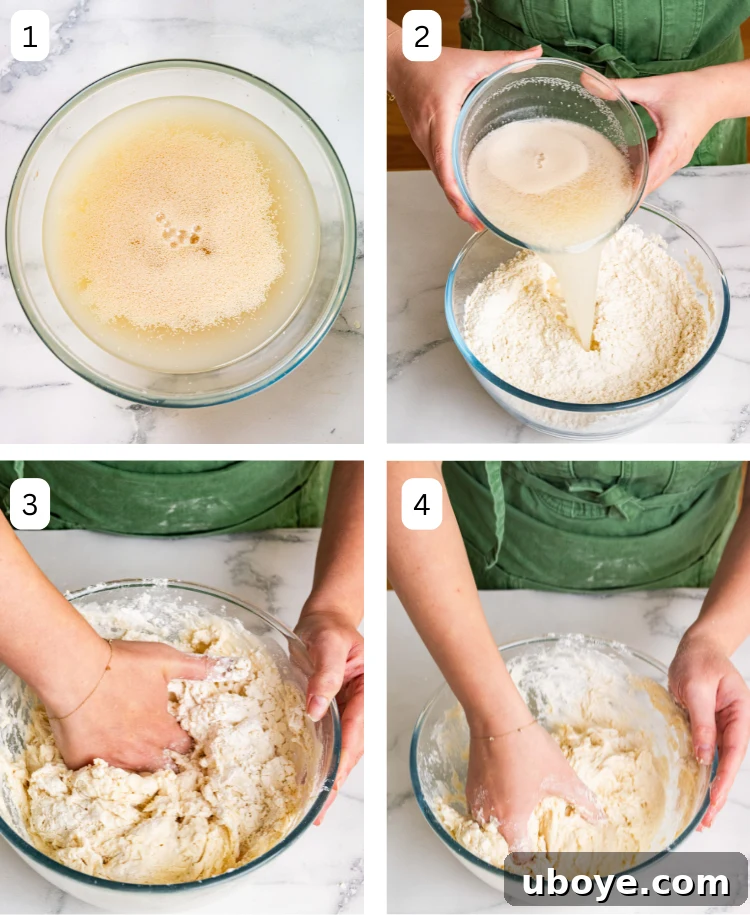
- Activate Yeast: In a medium-sized bowl, gently whisk together 680g lukewarm water (ideally around 100°F / 34°C), 7g dry yeast, and 1 teaspoon of honey. Allow this mixture to rest for approximately 5 minutes. You’ll know the yeast is active and ready when the surface becomes frothy, indicating the yeast is alive and well.
- Combine Dry Ingredients: In a separate, larger mixing bowl, whisk together 700g bread flour and 12g fine sea salt until thoroughly combined.
- Mix Wet and Dry: Pour the activated yeast mixture into the bowl with the dry ingredients. Using a sturdy wooden spoon or your clean hands, mix until all ingredients are just combined. You’re aiming for a wet, sticky dough with no dry pockets of flour remaining. This dough has a very high hydration (around 98%), so its wet consistency is intentional and crucial for the final texture.
- Initial Rest: Cover the bowl with plastic wrap or a damp kitchen towel and let the dough rest for 10 minutes. This short rest allows the flour to fully hydrate, making the dough easier to work with in the next step.
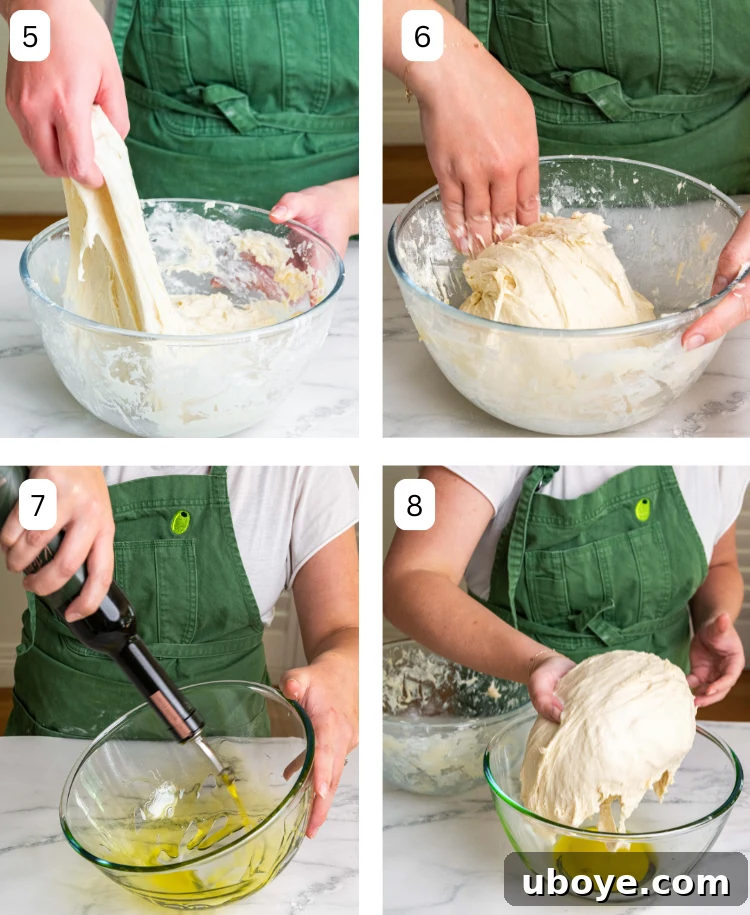
- Perform Stretch and Folds (First Set): Dampen your hands slightly to prevent sticking. Gently grab a section of the dough from the edge of the bowl, stretch it upwards, and fold it over itself towards the center. Rotate the bowl a quarter turn and repeat this stretching and folding action three more times. This method builds gluten strength without traditional kneading. Cover the dough again and let it rest for another 10 minutes.
- Continue Stretch and Folds (Second Set): Repeat the stretch and fold process. You’ll notice the dough becoming progressively stronger, smoother, and more elastic. Continue this process for a few more sets (typically 2-3 more sets with 10-minute rests in between) until the dough starts to hold a more defined ball-like shape.
- First Proof (Cold Fermentation): Drizzle 20g of extra virgin olive oil into a clean bowl, ensuring the bottom and sides are well coated. Carefully transfer the dough into this oiled bowl, turning it once to coat lightly. Cover the bowl tightly with plastic wrap to prevent a skin from forming. Place the dough in the refrigerator for its first proof, which can range from 12 to a maximum of 72 hours. This long, cold fermentation is key to developing incredible flavor and a beautiful open crumb structure. For this recipe, you will only need half of the dough, so you can slice it in half after the first proof and save the other half for another delightful focaccia batch later!
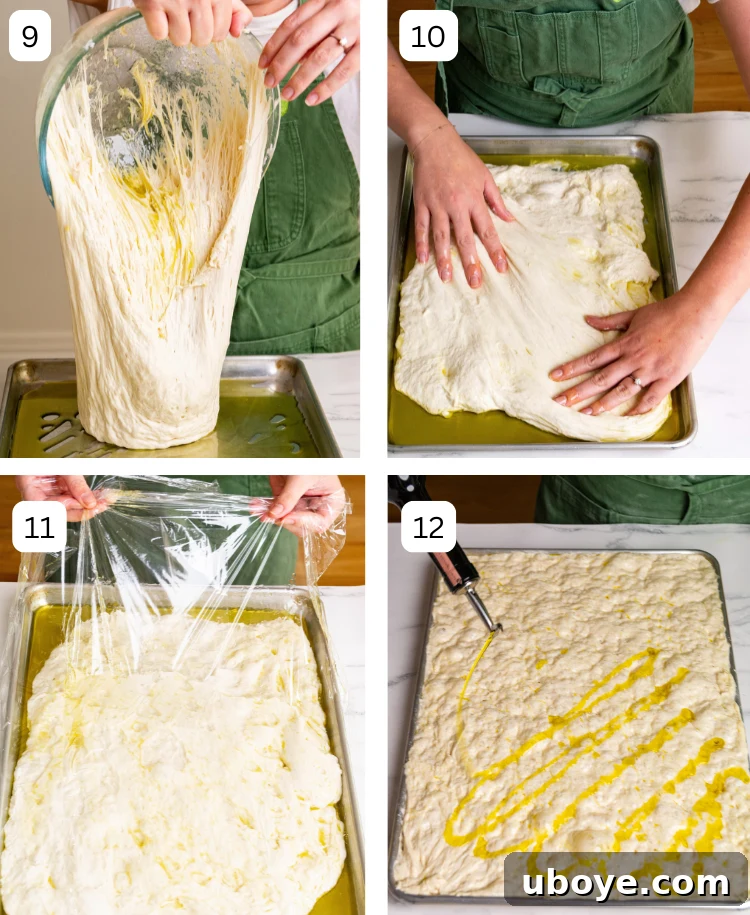
- Prepare for Second Proof: Drizzle another 20g of extra virgin olive oil into your chosen baking tin (approximately 34cm x 23cm x 5cm) or a rimmed baking sheet, ensuring the entire surface is well coated. Gently transfer one half of the cold dough into the prepared tin.
- Gentle Shaping and Second Rise: Carefully stretch the dough into a rough rectangle, allowing it to relax and fill the pan naturally. Avoid forcing it to the edges, as it will naturally expand during the second rise. Cover the tin loosely with a damp cloth or plastic wrap and let the dough rise in a warm spot for about 2 hours, or until it has visibly doubled in size and appears airy and bubbly.
- Preheat Oven: While the dough undergoes its second rise, preheat your oven to 200°C (390°F).
- Prepare for Baking: Once the dough has sufficiently risen, drizzle the surface generously with the remaining extra virgin olive oil.
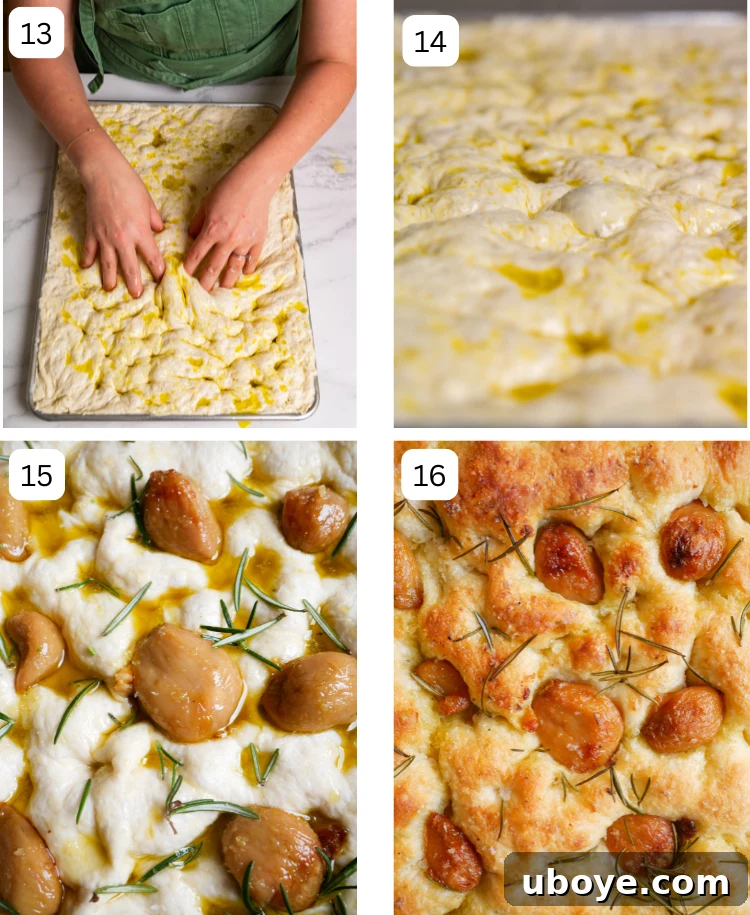
- Dimpling and Topping: Lightly oil your hands to prevent sticking. Use your fingertips to gently, yet firmly, dimple the entire surface of the dough, creating those signature focaccia indentations. Then, scatter the 12 confit garlic cloves, 1 tablespoon of finely chopped fresh rosemary, and 1 teaspoon of flaky sea salt evenly over the dimpled surface.
- Bake to Golden Perfection: Place the baking tin in the preheated oven and bake for approximately 30 minutes, or until the focaccia boasts a beautiful deep golden-brown crust and sounds hollow when tapped.
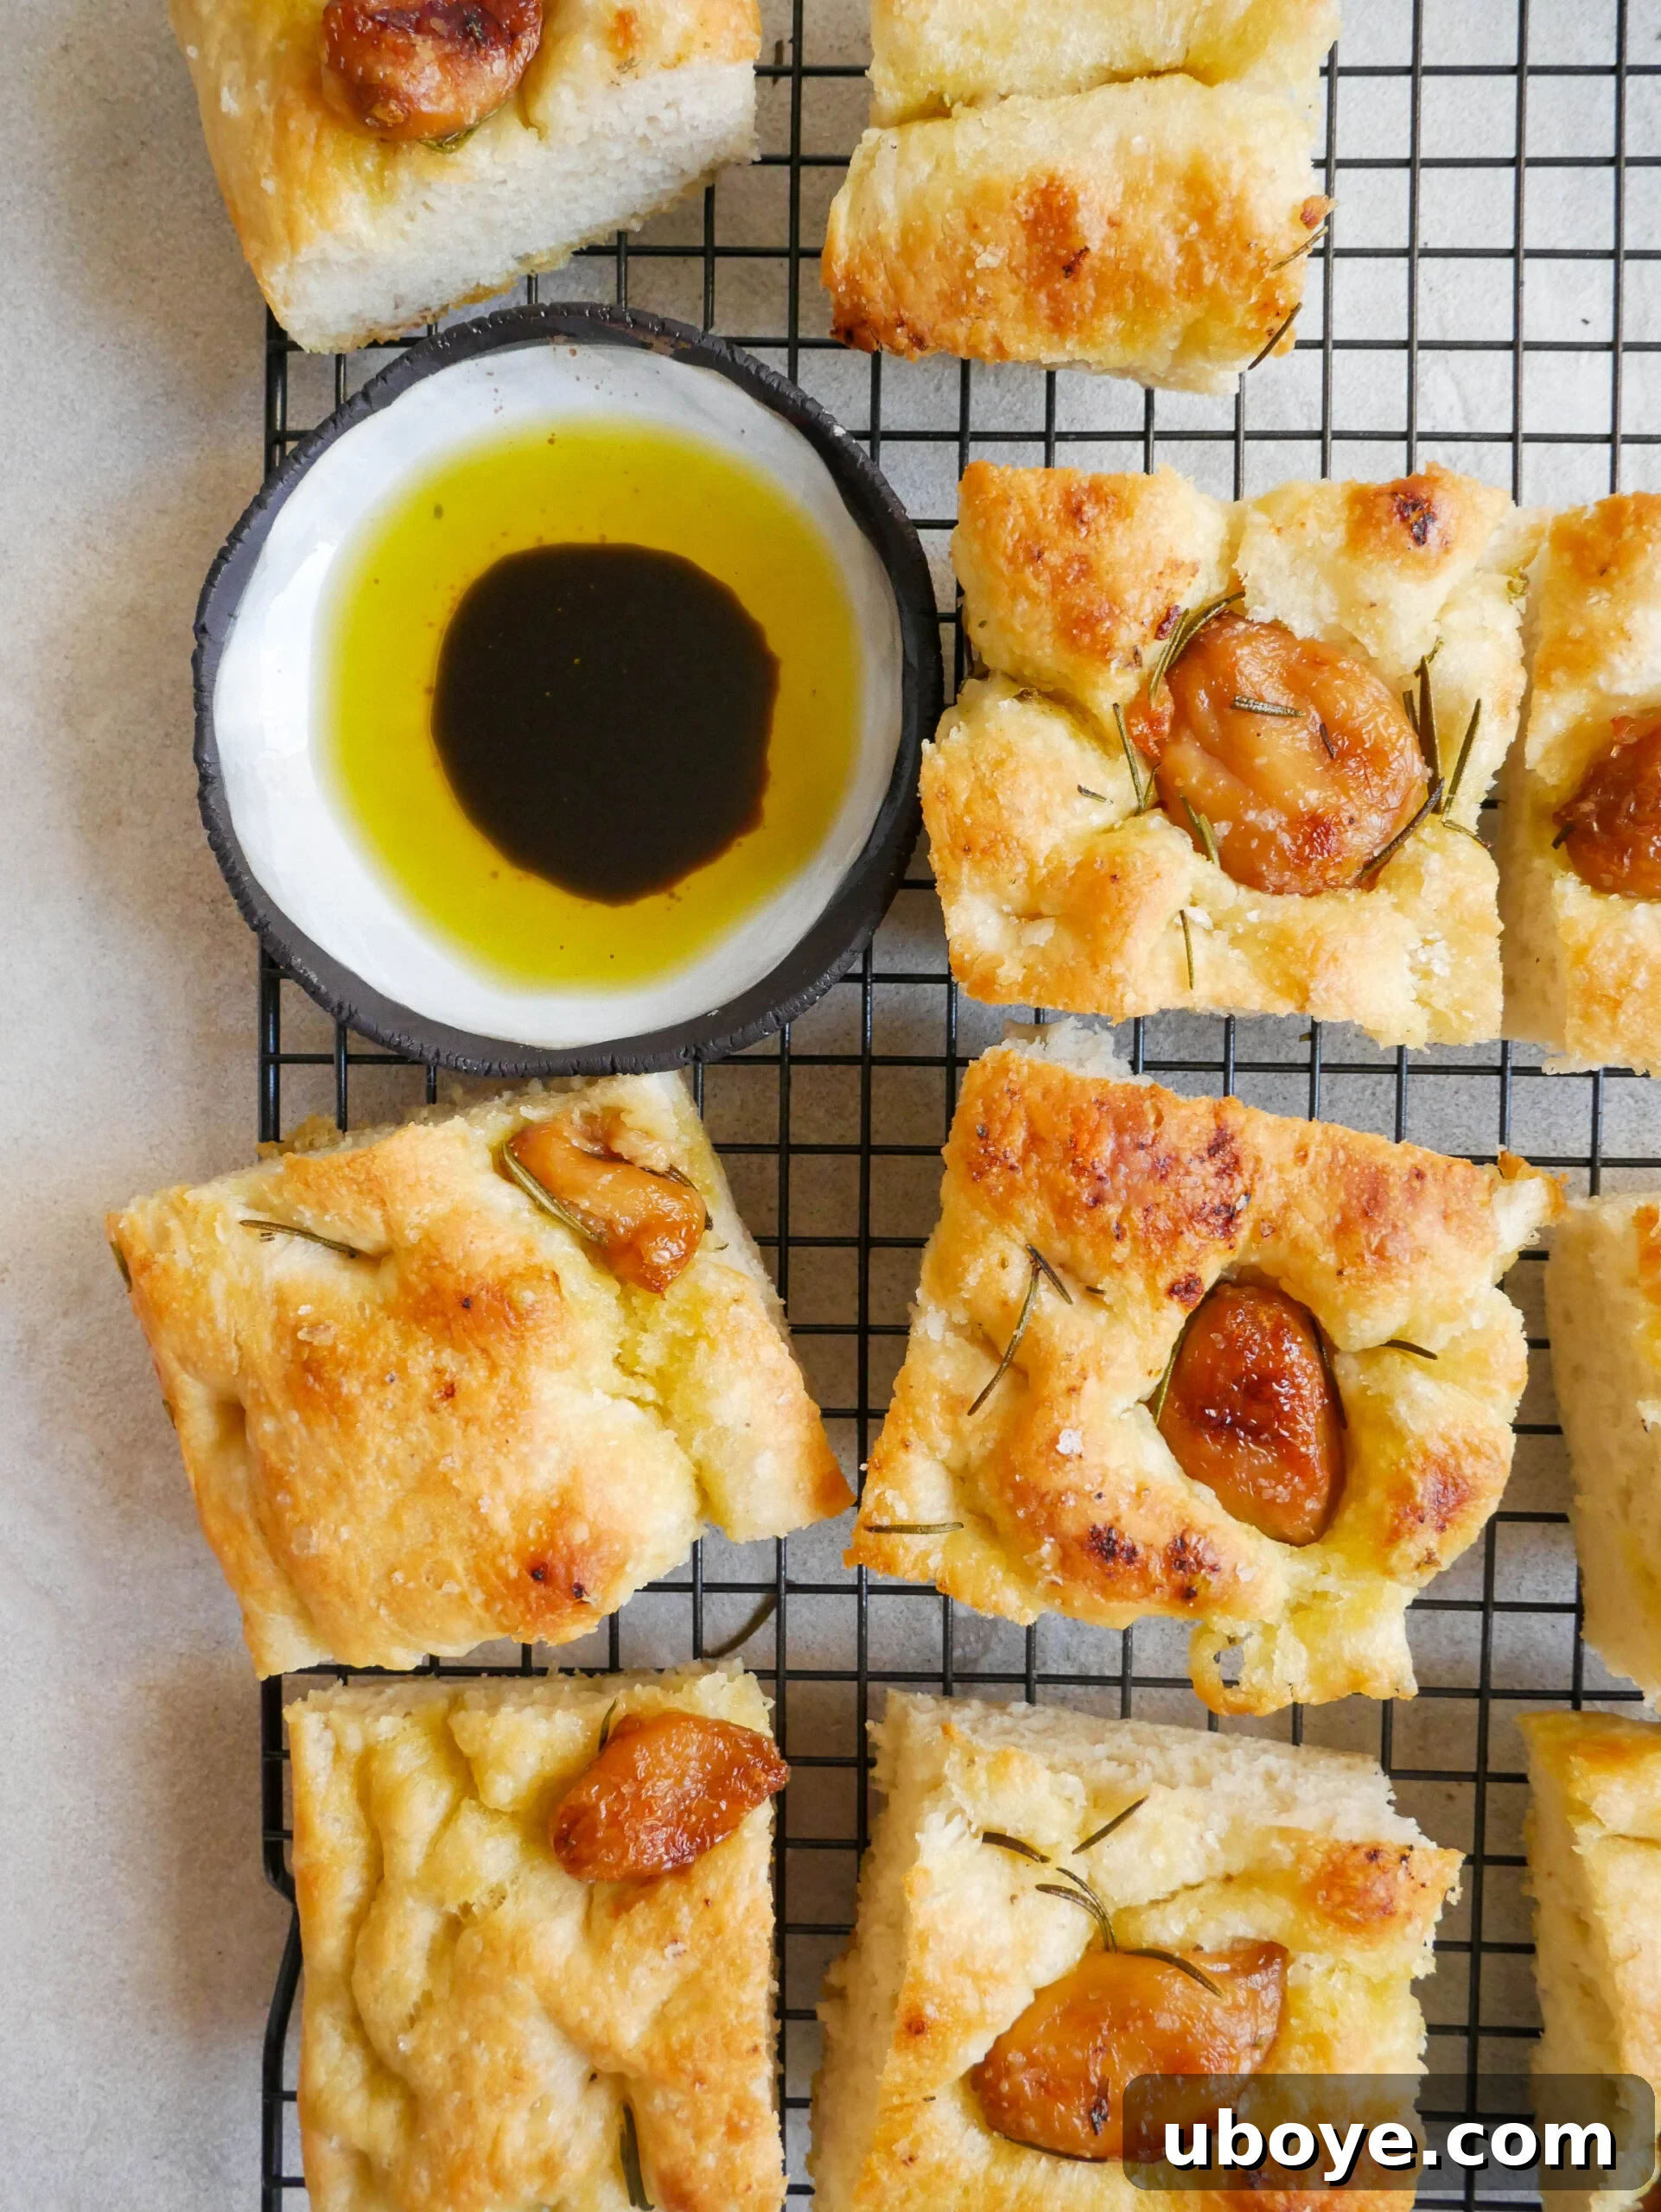
- Cool and Serve: Once baked, remove the focaccia from the oven. Allow it to cool slightly in the tin before carefully transferring it to a wire rack to rest for about 15 minutes. This cooling period allows the internal structure to set. Slice into generous pieces and serve immediately to enjoy its warmth and exquisite flavors.
Frequently Asked Questions About No-Knead Focaccia
Can I make this focaccia without garlic confit?
Absolutely, while garlic confit lends a unique sweet, mellow, and caramelized depth that is truly special, you can certainly adapt the recipe. You could substitute with thinly sliced fresh garlic cloves (though the flavor will be sharper), or use roasted garlic for a similar mellow taste. If garlic isn’t your preference, you can omit it entirely and still enjoy a delicious rosemary focaccia.
How long should I let the no-knead dough rise?
For the first proof, it’s best to let the dough rise for at least 8 hours and up to a maximum of 72 hours in the refrigerator, ensuring it’s well covered. This slow, cold fermentation process is crucial for developing complex flavors and achieving the focaccia’s signature airy, bubbly texture. The second rise, at room temperature, typically takes about 2 hours.
Can I use dried rosemary instead of fresh?
While fresh rosemary is highly recommended for its vibrant aroma, intense flavor, and appealing texture, dried rosemary can be used as a substitute. If you opt for dried, remember that its flavor is more concentrated, so use about half the amount specified for fresh rosemary to avoid overwhelming the bread.
How do I prevent my focaccia from sticking to the pan?
The key to preventing sticking and achieving that wonderfully crispy bottom crust is to generously coat your baking pan with high-quality olive oil. Don’t be shy – a good layer of oil acts as a release agent and contributes to the focaccia’s rich texture. As an additional measure, you can also line your baking tray with parchment paper. Rest assured, this will not negatively impact the crispiness of the bottom crust at all.
Can I use a stand mixer for this recipe?
While this is a “no-knead” recipe designed for hand-mixing, you can certainly use a stand mixer fitted with a dough hook for the initial mixing stages. Mix on low speed until the ingredients are just combined and no dry spots remain, then proceed with the stretch and fold method as described. The goal is to build gluten gently, rather than aggressively kneading.
How can I tell if my dough is over-proofed?
An over-proofed dough will typically look overly puffy and may start to deflate slightly. When you gently dimple it with your fingers, it won’t spring back readily; instead, it might hold the impression or even collapse a bit. While texture might be slightly compromised, it will still taste delicious! Learning to recognize the signs of a perfectly proofed dough comes with practice.
What kind of baking dish is best for focaccia?
A rectangular baking pan with high sides, such as a 9×13 inch (approx. 34×23 cm) pan, is ideal for achieving a thick, fluffy focaccia. You can also use a cast iron skillet for an extra-crispy crust. If you prefer a thinner focaccia, a larger rimmed baking sheet will allow the dough to spread more. The material of the pan (metal, glass, or cast iron) can slightly affect baking time and crust development, so keep an eye on it during baking.
Serving Suggestions: Elevate Your Meal with Focaccia
This garlic and rosemary no-knead focaccia is a versatile star, best enjoyed warm, straight from the oven, when its crust is perfectly golden and crisp, and the interior is soft and fragrant. While incredibly satisfying on its own, torn into generous pieces, its robust flavor and delightful texture make it an exceptional companion to a wide array of dishes.
Consider pairing it with a rich one-pan creamy orzo with burrata, allowing the focaccia to soak up every last drop of the delicious sauce. It’s also the perfect vessel for sopping up the savory broth from Italian Mussels with Tomato and Chilli. For an appetizer spread, serve it alongside a big bowl of creamy garlic confit dip, or as part of an elaborate charcuterie board. Beyond being a side, this no-knead focaccia dough is the ideal foundation for crafting one of my beloved Italian Sandwiches, transforming any lunch into an extraordinary culinary experience.
Think outside the box: use leftover focaccia to make gourmet croutons for salads, or slice it thin and toast it for bruschetta. Its hearty nature also makes it a fantastic accompaniment to robust soups or stews. Pair it with a crisp white wine, such as a Sauvignon Blanc, or a light-bodied red like a Pinot Noir, to complement its earthy, garlicky notes.
Storage and Reheating Tips for Freshness
To ensure your garlic and rosemary focaccia remains as delicious as the day it was baked, proper storage is key. Allow the focaccia to cool completely at room temperature before wrapping it tightly in aluminum foil or placing it in an airtight container. This method will keep it fresh and flavorful for up to 2 days on the countertop, or up to 5 days if stored in the refrigerator. For longer storage, focaccia freezes exceptionally well. Simply wrap cooled slices tightly in plastic wrap, then aluminum foil, and store in a freezer-safe bag for up to 2-3 months. Thaw at room temperature before reheating.
Reviving leftover focaccia to its freshly baked glory is simple. For optimal crispness, pop slices into an air fryer at 160°C (320°F) for approximately 3–5 minutes until warmed through and the crust is revitalized. Alternatively, reheat in a preheated oven at 180°C (350°F) for 8–10 minutes on a baking tray. For a quick and easy option, individual slices can be toasted in a toaster; just ensure any toppings, especially garlic confit, are well-set to prevent sticking to the toaster slots.
Discover More Focaccia Recipes You’ll Adore
Focaccia
Cinnamon Scroll Sweet Focaccia
Focaccia
Cheesy Sesame Seed Focaccia
Focaccia
Olive No-Knead Focaccia
Focaccia
Mini No-Knead Focaccia
Have questions or want to leave a review about this No-Knead Focaccia? Please feel free to share your thoughts and feedback below. I always enjoy answering your questions and hearing about your culinary experiences.
If you recreate this delicious recipe, please follow me and tag me on Instagram, TikTok, or Pinterest so I can admire your wonderful creations!
Garlic & Rosemary No-Knead Focaccia
Daen Lia
1 day 30 mins
30 mins
6
Ingredients
For the Garlic Confit
- 2 bulbs garlic
- 1 cup olive oil, extra virgin
For the Focaccia
- 700 g bread flour
- 680 g lukewarm water, (100°F / 34°C) – 95% hydration
- 7 g dry yeast
- 12 g fine sea salt
- 1 tsp honey
- 60 g olive oil, extra virgin (plus more for confit and pan)
- 12 garlic confit cloves
- 1 tbsp rosemary, finely chopped
- 1 tsp flakey sea salt
Instructions
Garlic Confit
-
Preheat: Preheat the oven to 120°C / 250°F.
-
Peel Garlic: Peel the garlic by breaking the cloves away and placing them into a heatproof bowl. Submerge in boiling hot water for 5 minutes and drain. The skin will become loose and easy to peel away.
-
Bake: Place the peeled garlic cloves into an ovenproof dish and fully submerge them in extra virgin olive oil. It’s important the garlic is completely covered so it confits evenly and does not burn. Bake for 1–2 hours, or until the garlic has become golden and is soft to touch. Allow the garlic confit to cool completely, then carefully separate the garlic cloves from the infused oil. Use 12 cloves for this focaccia recipe and some of the flavorful oil in the dough.
Focaccia Dough
-
Activate Yeast: In a medium bowl, stir together the lukewarm water, dry yeast, and honey. Let it sit for about 5 minutes until the mixture becomes frothy, indicating the yeast is active.
-
Combine Ingredients: In a large bowl, whisk the bread flour and fine sea salt. Pour in the yeast mixture. Stir with a spoon or your hands until a wet, sticky dough forms and there are no dry spots of flour remaining. Cover the bowl with plastic wrap or a damp cloth and let it rest for 10 minutes.
-
Stretch and Fold: With damp hands, gently stretch a portion of the dough from the edge of the bowl and fold it over itself towards the center. Rotate the bowl and repeat this action three more times. Cover and let the dough rest for another 10 minutes. Repeat this stretch and fold process 2-3 more times (with 10-minute rests in between) until the dough starts to gain some structure and forms a loose ball. This method strengthens the dough without kneading.
-
First Proof (Cold Fermentation): Coat a new bowl with 20g of extra virgin olive oil. Place the dough inside, turning once to coat. Cover it tightly with plastic wrap and refrigerate for 12 to 72 hours for the first proof. This long, cold fermentation develops deep flavor. When ready to bake, slice the dough in half; you’ll only need one half for this recipe (the other half can be used for another focaccia later).
-
Second Proof: Drizzle another 20g of extra virgin olive oil into your chosen baking tin. Transfer one half of the dough to the tin, gently stretching it into a rough rectangle. Avoid pulling it too much towards the edges, as it will spread during its rise. Cover the tin with a damp cloth or plastic wrap and let the dough rise in a warm spot for 2 hours, or until it has doubled in size.
-
Preheat Oven: Preheat your oven to 200°C (390°F) during the final stages of the second rise.
-
Add Toppings: After the dough has risen, gently dimple the surface with oiled fingers. Evenly scatter the finely chopped fresh rosemary, the 12 confit garlic cloves, and the flaky sea salt all over the dough. Drizzle generously with the remaining olive oil.
-
Bake & Rest: Bake for 30 minutes, or until the focaccia is beautifully golden brown and sounds hollow when tapped. Allow the focaccia to cool slightly in the tin before transferring it to a wire rack to rest for 15 minutes. Slice into generous portions and serve immediately for the best experience.
Video Tutorial
Notes
- Yeast: This recipe uses dry yeast that needs activation in warm water. If you prefer instant yeast, you can simply add it directly to your dry ingredients along with the water and honey, skipping the initial activation step.
- Flour: While bread flour is recommended for its high protein content, which contributes to a chewier and softer crumb, all-purpose flour can be used successfully if bread flour is unavailable.
Nutrition Facts (per serving)
Carbohydrates: 86g
Protein: 14g
Fat: 49g
Saturated Fat: 7g
Polyunsaturated Fat: 6g
Monounsaturated Fat: 34g
Sodium: 1167mg
Potassium: 134mg
Fiber: 3g
Sugar: 1g
Vitamin A: 13IU
Vitamin C: 0.3mg
Calcium: 24mg
Iron: 1mg
Nutrition information is an approximation and may vary based on specific ingredients and preparation methods.

Like this? Leave a comment below!