
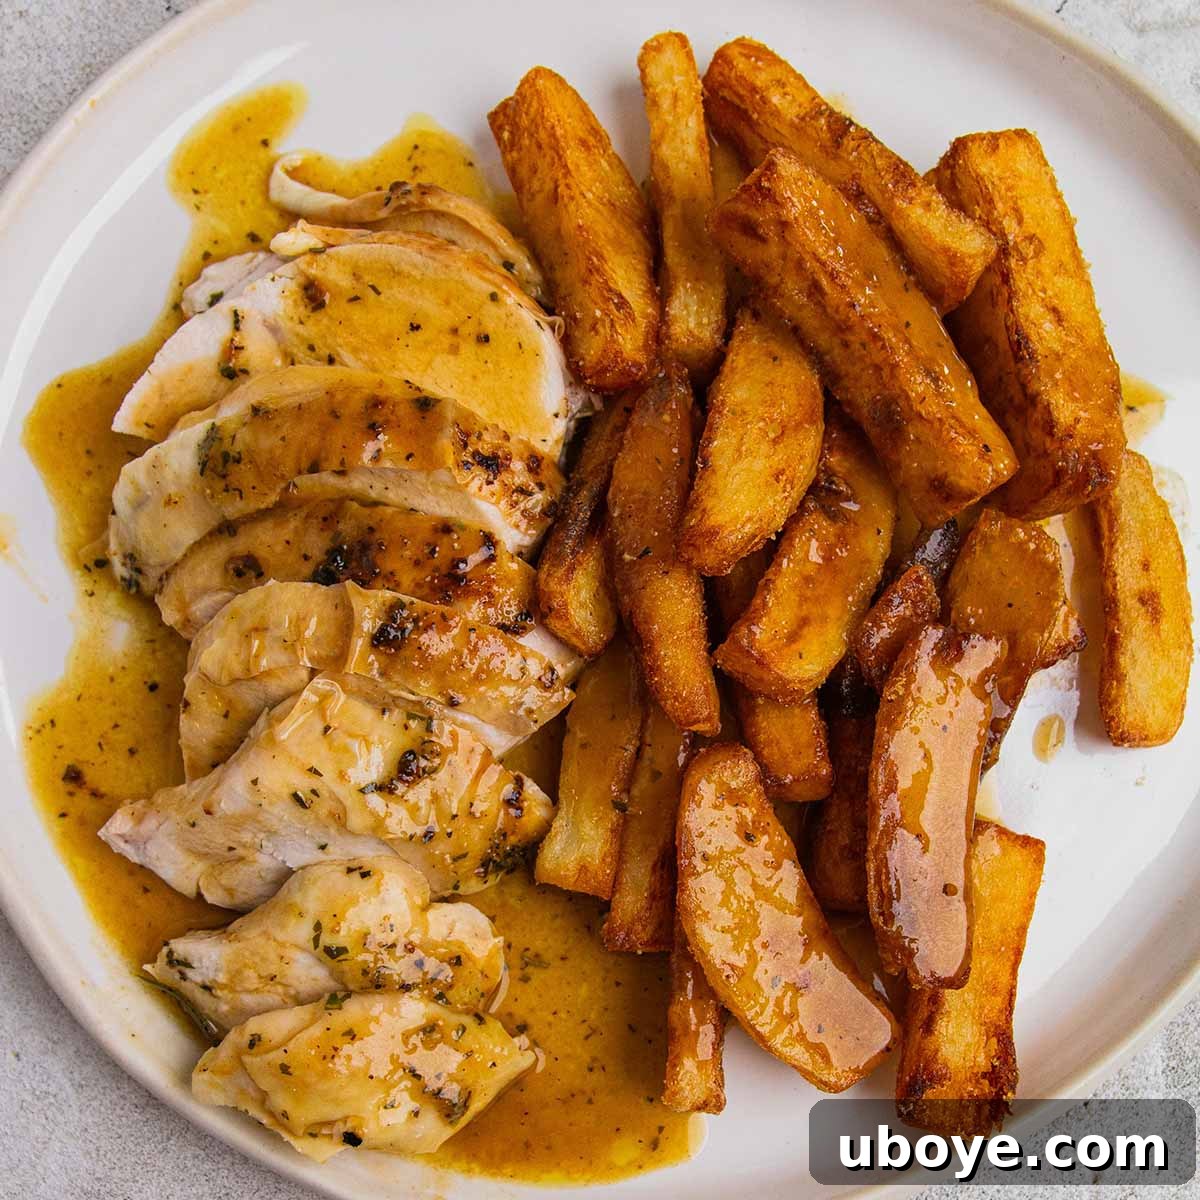
Sometimes, the most exquisite culinary experiences come not from extravagant dishes but from simple, honest food prepared with care and passion. This truth shines brilliantly in the realm of comfort food, where familiar flavors and textures transport us to a place of warmth and contentment. Among these cherished classics, few hold a candle to the unparalleled joy of homemade Chicken, Chips, and Gravy. It’s more than just a meal; it’s a culinary embrace, a delightful symphony of crispy, juicy, and rich elements that promise to satisfy the soul.
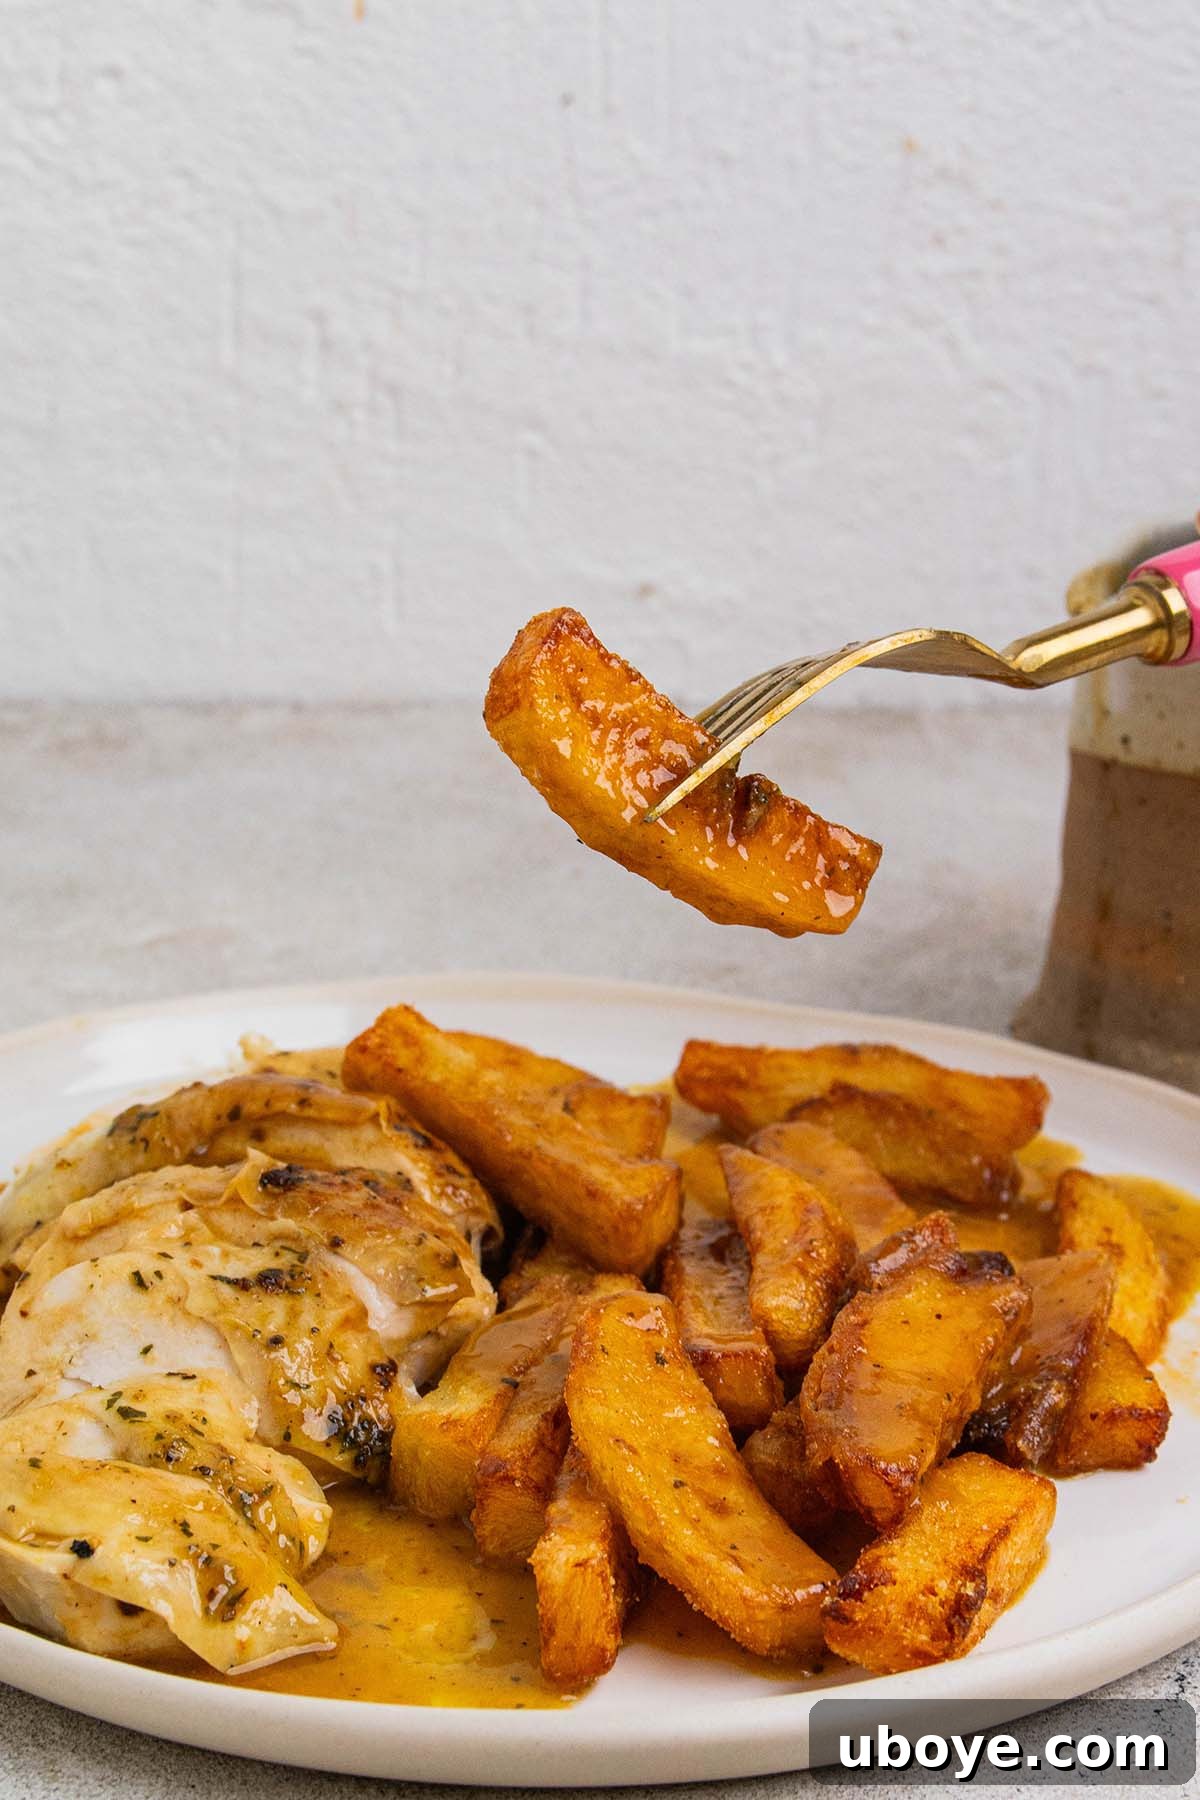
This isn’t just any version of the beloved trio; it’s a meticulously crafted, Australian-inspired rendition where every component is made from scratch. Imagine perfectly roasted, succulent chicken, its skin golden and infused with aromatic garlic butter. Alongside, you’ll find crunchy, triple-cooked chips, seasoned with a unique, savory homemade chicken salt. And tying it all together, a luscious, rich gravy, lovingly prepared from the very pan juices of your roast chicken. This combination is, quite simply, perfection. It’s a dish guaranteed to become a cherished family favorite, whether for a cozy weeknight dinner or a special weekend treat.
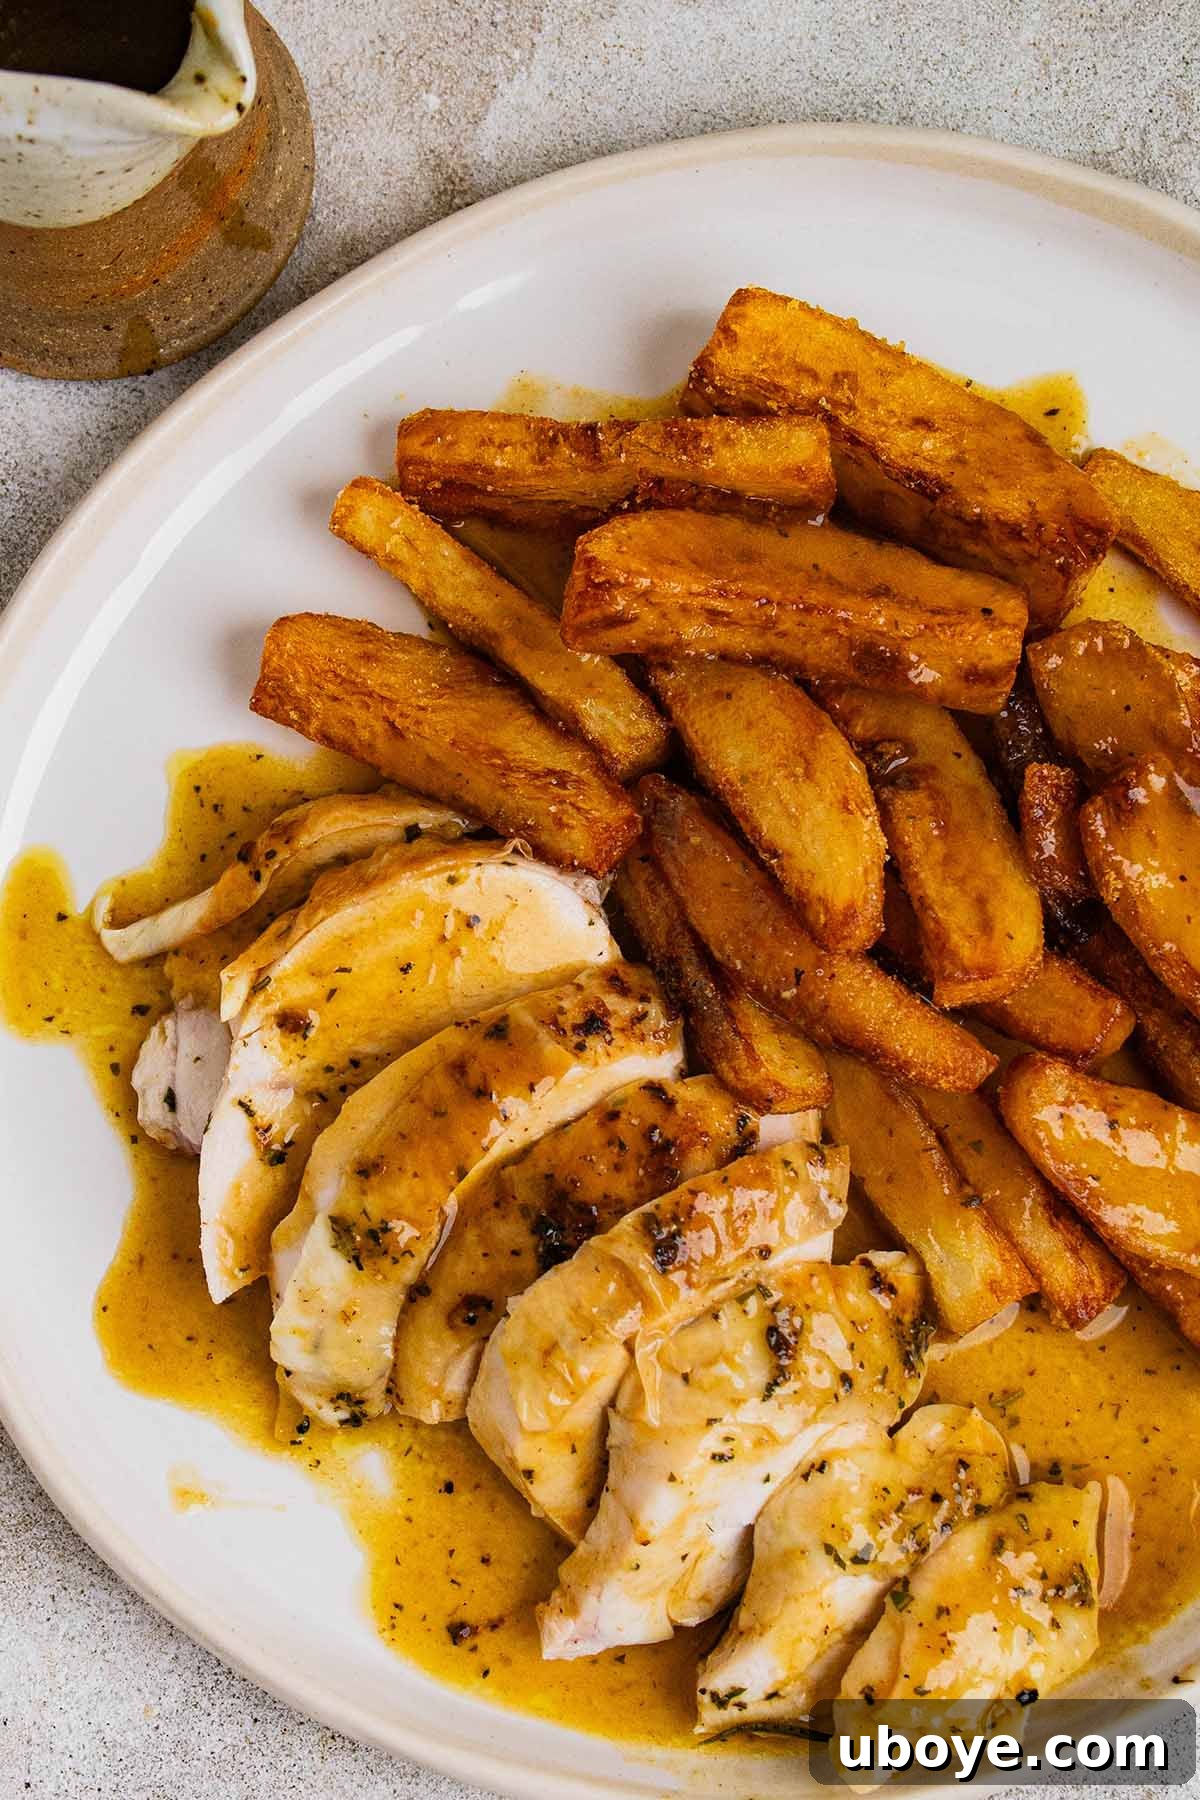
The concept of chicken, chips, and gravy transcends borders, with each country offering its unique interpretation. From the classic fish and chips with gravy in the UK to the crispy French fries in France or the ubiquitous fried chicken variations in the US, the global love for this combination is undeniable. In Australia, we celebrate this trio with a distinctive simplicity that elevates it to true comfort food status. Our version centers around a beautifully roasted chicken, meticulously prepared homemade chips, and a deeply flavorful gravy crafted from the exquisite pan juices. It’s hearty, satisfying, and designed to uplift your spirits with every bite. The real magic, however, lies in three key elements: selecting a quality chicken (or “chook” as we say), mastering the art of low and slow cooking, and creating a rich, homemade gravy that harmonizes all the flavors into an unforgettable experience.
Looking to explore more delightful chicken and chip recipes? Don’t miss these incredibly flavorful garlic butter fries or this vibrant roasted chicken with salsa verde for a fresh twist!
Why You’ll Love This Homemade Chicken, Chips, and Gravy Recipe
This isn’t just another recipe; it’s a masterclass in elevating simple ingredients to create something truly extraordinary. Here’s why this homemade chicken, chips, and gravy will quickly become a cherished part of your culinary repertoire:
- Unrivaled Crispy Chips: We employ a triple-cooking method for our chips, ensuring they achieve an unparalleled crispiness on the outside while remaining wonderfully fluffy on the inside. This technique, combined with a special ingredient, guarantees a chip experience like no other.
- Homemade Chicken Salt Perfection: Forget store-bought! This recipe guides you through creating your own signature chicken salt. This unique Australian seasoning adds an incredible depth of savory, umami flavor to your chips, making them utterly irresistible.
- Juicy, Flavorful Spatchcocked Chicken: By spatchcocking (butterflying) the chicken, we ensure it cooks evenly and quickly, resulting in incredibly tender, juicy meat and beautifully crispy skin. Infusing it with a homemade garlic herb butter takes the flavor profile to another level.
- Rich, Authentic Pan Gravy: The gravy is the heart of this dish, and ours is made from the concentrated drippings and roasted vegetables from the chicken. This ensures a deep, authentic flavor that perfectly complements the chicken and chips, offering a comforting warmth with every spoonful.
- Ultimate Comfort Food Experience: This dish embodies everything comfort food should be – hearty, satisfying, and reminiscent of home-cooked goodness. It’s the perfect meal to gather the family around, offering a sense of warmth and happiness.
Essential Ingredients for Your Chicken, Chips & Gravy Feast
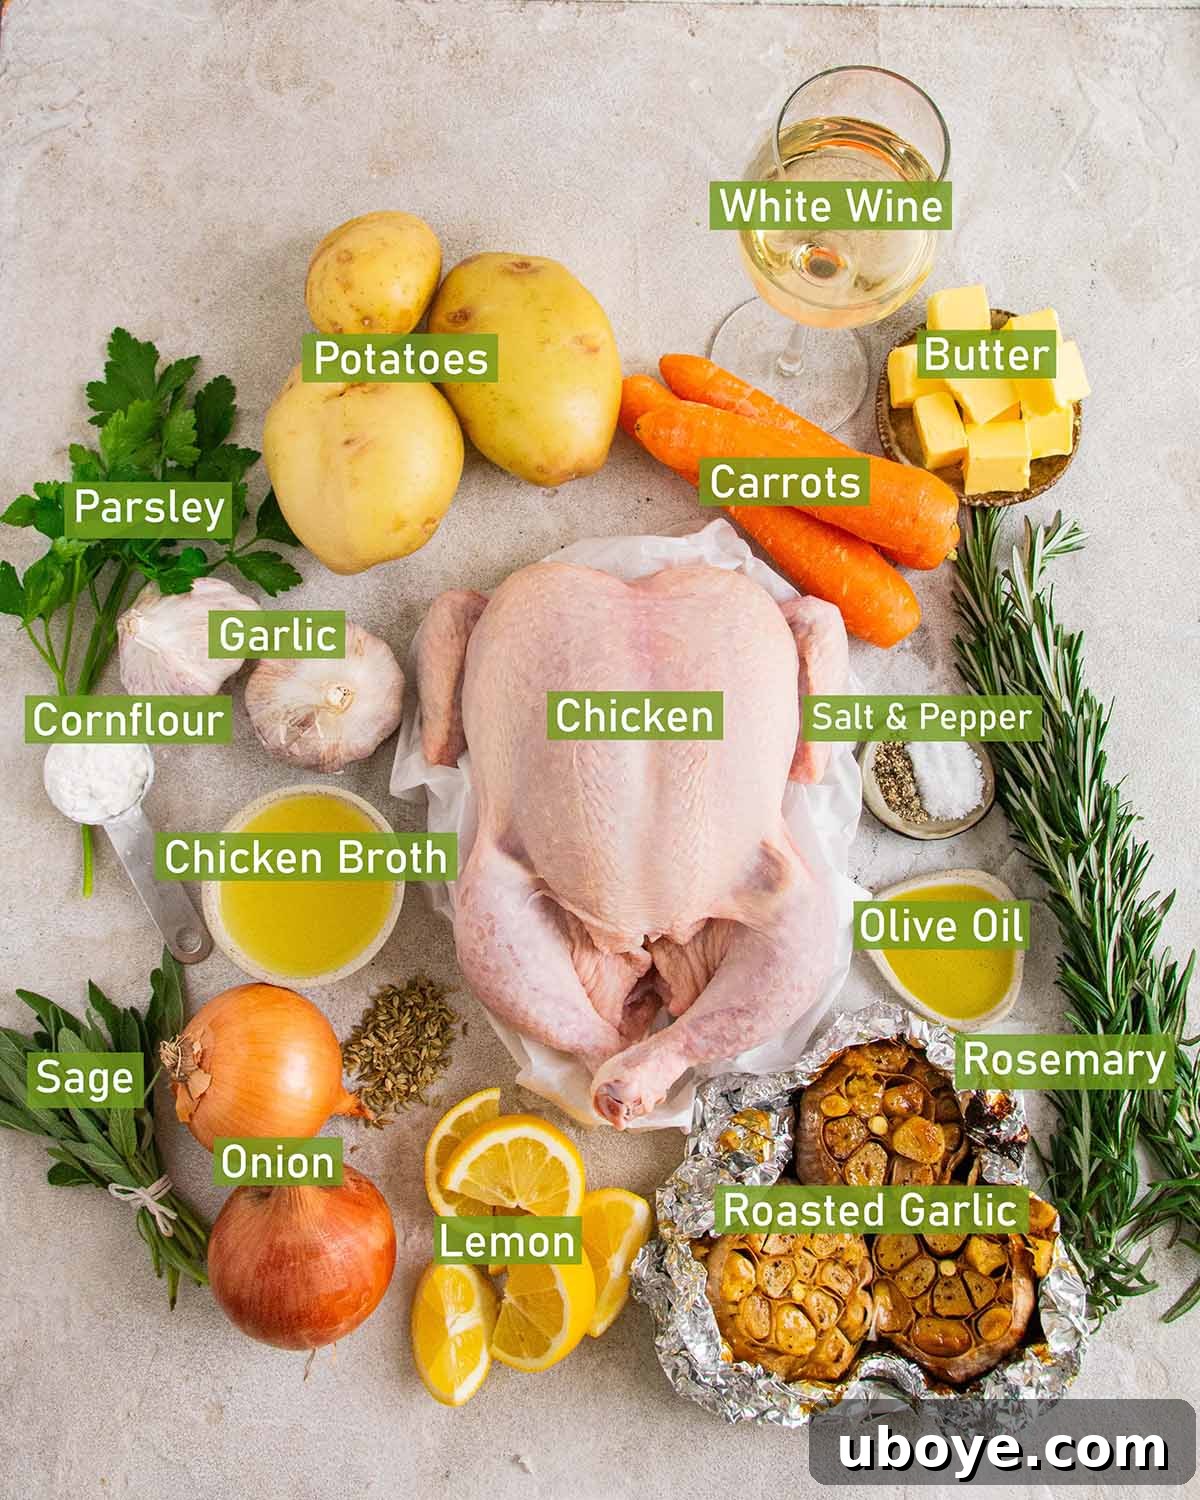
Ready to embark on this delicious culinary adventure? Gather these key ingredients, and you’ll be well on your way to enjoying a steaming, comforting plate of homemade chicken, chips, and gravy:
- Whole Chicken: The star of our meal! We recommend starting with a whole chicken that has been spatchcocked (butterflied). This preparation method involves removing the backbone and flattening the bird, which allows for more even cooking, faster roasting times, and exceptionally crispy skin. Don’t worry if you haven’t spatchcocked a chicken before; it’s simpler than it sounds and worth the effort for the superior results.
- Potatoes: For the ultimate crispy yet fluffy chips, the choice of potato is crucial. Opt for a firm, starchy variety such as Russet (also known as Idaho potatoes) or Yukon Gold. These varieties have a lower moisture content and higher starch, which makes them ideal for frying, ensuring they develop a beautiful golden crust while remaining tender and creamy on the inside.
- Chicken Salt: This uniquely Australian seasoning is a game-changer, adding an incredible depth of umami and savory flavor to your chips. While you can sometimes find it pre-made, this recipe includes instructions on how to easily craft your own from common pantry staples, ensuring you get that authentic taste.
- Butter: Essential for our aromatic garlic butter. Using room-temperature butter ensures it blends smoothly with the roasted garlic and fresh herbs, making it easy to spread under the chicken skin for maximum flavor and moisture.
- Fresh Herbs: A combination of parsley, sage, and rosemary will infuse your garlic butter with fragrant, earthy notes, complementing the chicken beautifully. Fresh herbs always make a difference compared to dried ones.
- Garlic: Not just for the butter! We roast whole bulbs of garlic, which transforms its pungent raw flavor into a sweet, mellow, and spreadable paste, perfect for enhancing both the chicken and the gravy.
- Vegetables for Roasting: Carrots, onions, and extra garlic bulbs are placed under the chicken during roasting. These not only provide a bed for the chicken to cook on but also caramelize and contribute immensely to the rich base of your homemade gravy.
- White Wine & Chicken Stock: These liquids form the foundation of our luxurious gravy. The white wine deglazes the pan, capturing all those delicious browned bits, while good quality chicken stock provides a savory base that thickens into a rich sauce.
- Cornstarch: Used as a thickening agent for the gravy, cornstarch creates a silky, smooth consistency without altering the flavor.
Refer to the detailed recipe card below for precise quantities and additional information on ingredients.
Creative Variations to Customize Your Comfort Meal
While the classic Chicken, Chips, and Gravy is perfect as is, these variations allow you to personalize your meal and explore new flavor profiles:
- Infuse with Spice: For those who love a bit of heat, introduce a kick to your roast chicken by mixing a pinch of cayenne pepper or chili flakes into the garlic butter before rubbing it onto the chicken. Alternatively, offer a selection of hot sauces or a spicy aioli on the side with your crispy chips for individual customization.
- Sweet Potato Chips: A delightful and colorful alternative to traditional potato chips. Simply swap Russet potatoes for sweet potatoes. As sweet potatoes cook faster and have a different starch content, you’ll need to adjust the preparation: skip the initial boiling step and proceed directly to the first fry (after soaking and drying), then the second fry for crispiness. Their natural sweetness offers a fantastic contrast to the savory chicken and gravy.
- Spanish-Style Bravas Sauce: If you’re short on time or simply craving a different flavor profile, substitute the traditional gravy with a homemade bravas sauce. This spicy, tomato-based sauce is vibrant and tangy, offering a Spanish-inspired twist that pairs wonderfully with crispy chips. Check out my Patatas Bravas recipe for a fantastic bravas sauce recipe!
- Herb-Crusted Chicken: For an extra layer of texture and flavor, finely chop a generous amount of fresh herbs (like rosemary, thyme, and oregano) and mix them with a little olive oil and breadcrumbs. Press this mixture onto the chicken skin before roasting for a fragrant, crispy crust.
- Loaded Chips: Turn your side into a decadent treat by topping the hot, seasoned chips with melted cheese, crispy bacon bits, chopped green onions, and a dollop of sour cream before pouring over the gravy.
- Mushroom Gravy: Elevate your gravy by sautéing sliced mushrooms (cremini or button work well) with the roasted vegetables and drippings before adding the wine and stock. This adds an earthy, umami depth to the sauce.
Step-by-Step Guide to Crafting the Ultimate Chicken, Chips & Gravy
Part 1: Mastering the Crispy Chicken Salt Chips
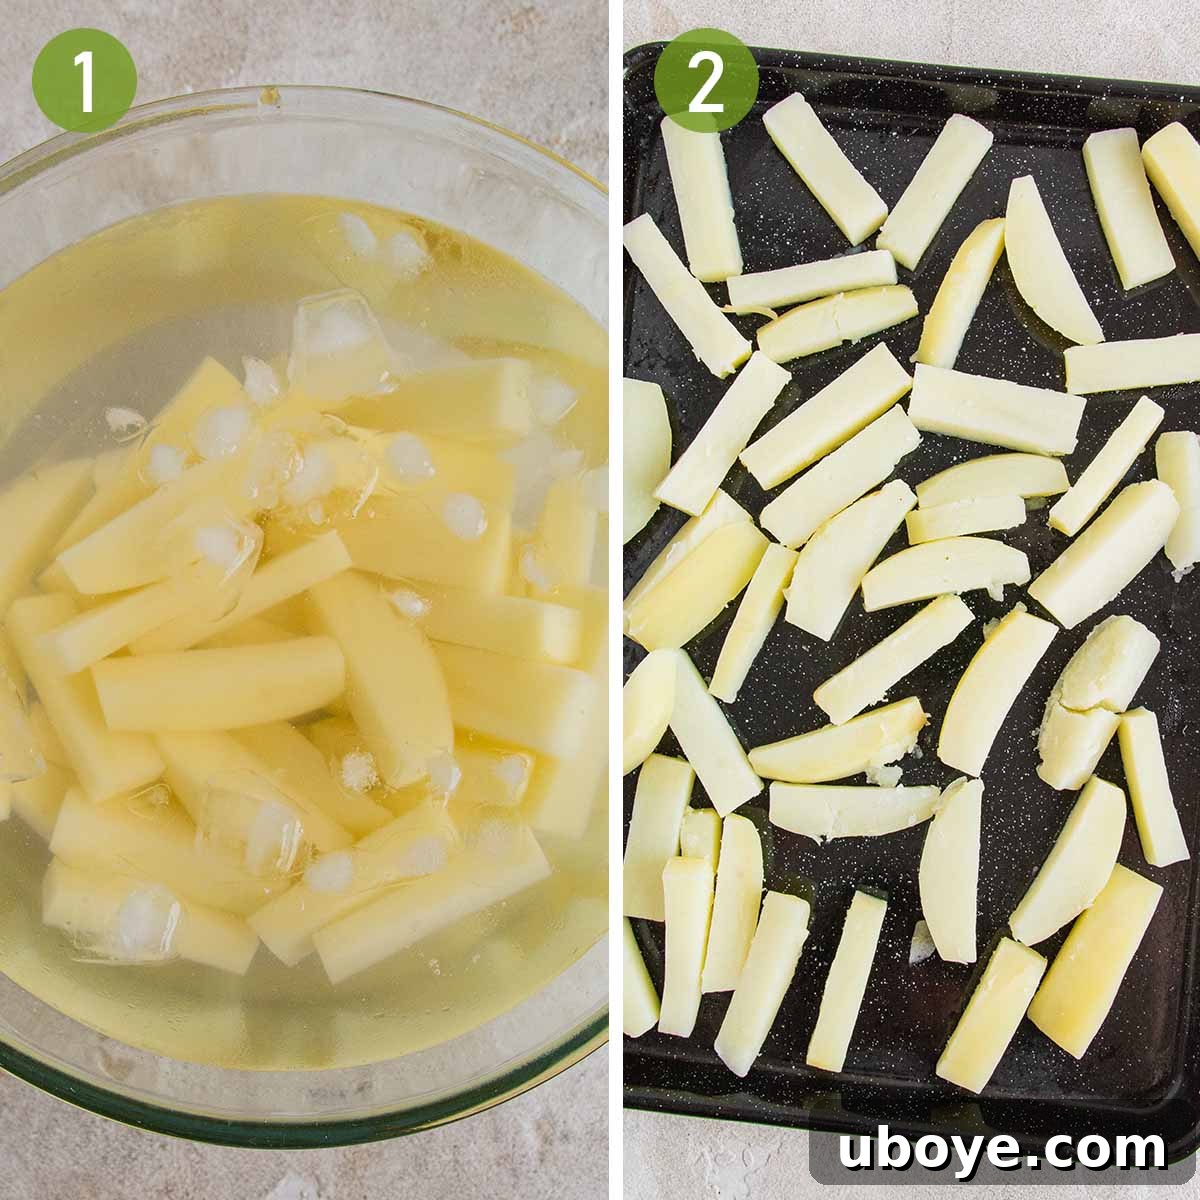
- Prepare the Potatoes: Begin by trimming the ends of your peeled potatoes to create a more uniform, square shape. Then, carefully cut them into chips, aiming for pieces roughly 3/4 by 2 1/2 inches (approximately 2 by 6 cm). This consistent sizing is important for even cooking. As you cut, immediately place the chips into a large bowl of cold water to prevent oxidation (browning) and to start the starch removal process.
- Rinse and Remove Starch: With the chips in the bowl of cold water, place the bowl under a running tap. Rinse the chips thoroughly, agitating them gently, until the water turns cloudy. Continue to drain and rinse several times until the water remains mostly clear. This step is critical for removing excess starch, which is key to achieving that coveted crispy texture. Once rinsed, drain them completely in a colander.
- Parboil the Chips: Transfer the drained chips to a large pot and cover them with fresh cold water. Season the water generously with salt – this seasons the potatoes from the inside out. Place the pot on high heat and immediately start a timer for 20 minutes. As soon as the water begins to boil, reduce the heat to medium. Cook the potatoes until they are fork-tender but not falling apart. This parboiling helps create a fluffy interior.
- Cool Thoroughly: Using a spider or a slotted spoon, carefully remove the parboiled chips from the water and spread them in a single layer on a wire rack. Allow them to air dry for a few minutes to let any surface moisture evaporate. Then, transfer the wire rack with the chips into the refrigerator or freezer until they are completely cold, but not frozen solid. This cooling process can take about 30 minutes in the freezer or up to 2 hours in the fridge and is crucial for achieving truly crispy, non-soggy chips.
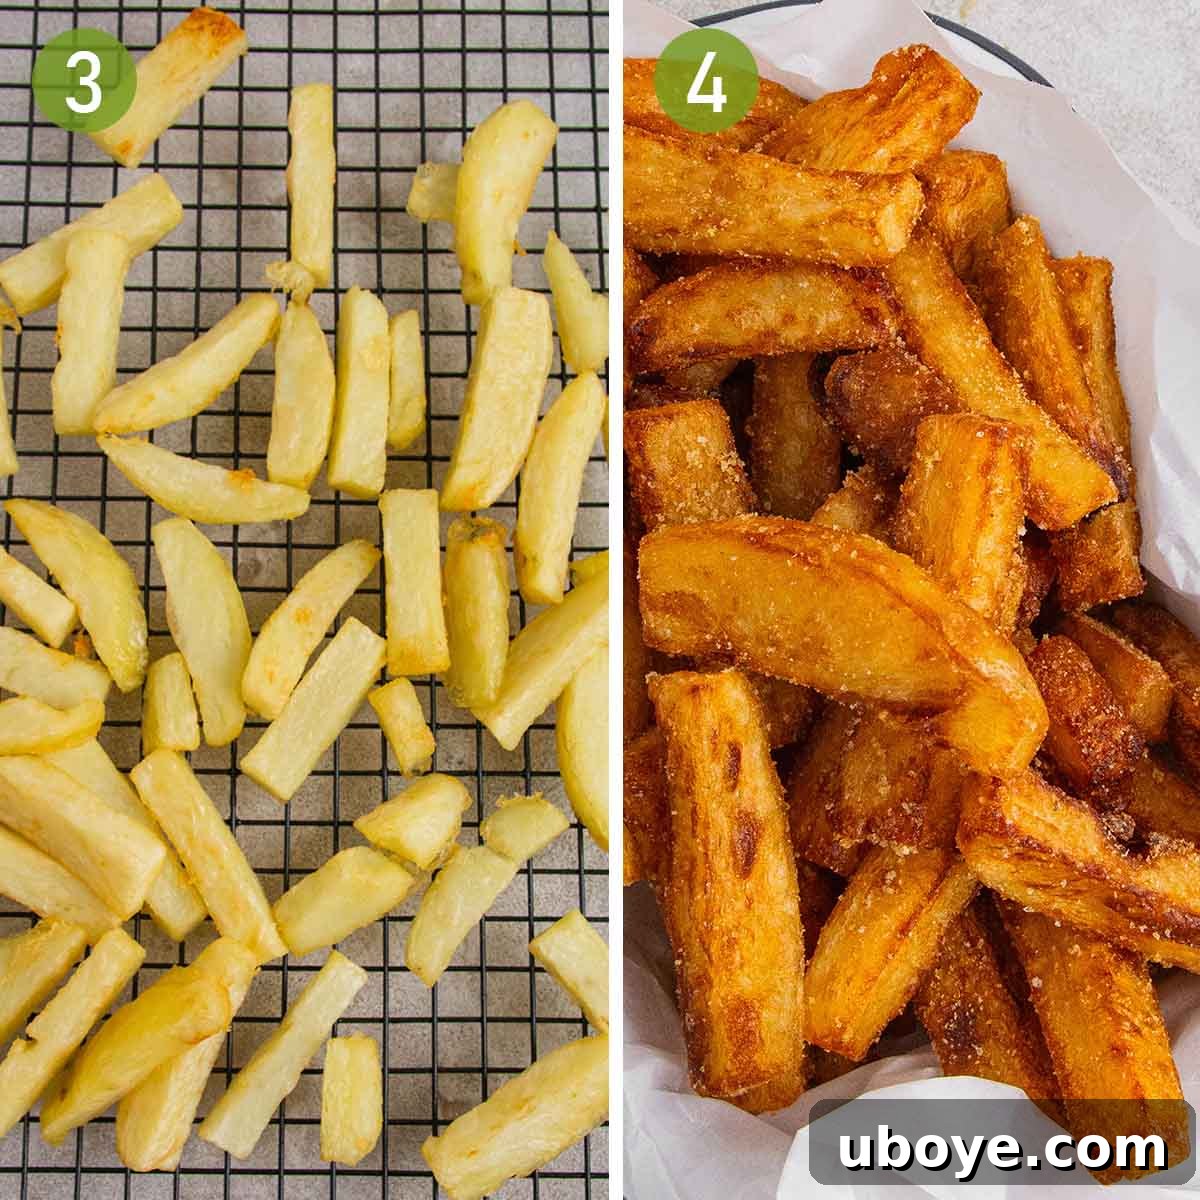
- First Fry (Blanching): Fill a large, heavy-bottomed pot or a deep fryer with vegetable or grapeseed oil, heating it to 140°C (285°F). Carefully lower the cold chips into the hot oil using a spider or slotted spoon. Fry them for about 8 minutes. At this stage, they should be very lightly colored, almost pale. This “blanching” fry cooks them through and begins the crisping process. Remove the chips from the oil and place them back on the wire rack. Crucially, return them to the fridge or freezer until they are cold again. This double-cooling method is the secret to extreme crispiness!
- Prepare Chicken Salt: While your chips are chilling for the second time, prepare your homemade chicken salt. In a small bowl, combine the chicken bouillon powder, onion powder, garlic powder, a tablespoon of salt (adjust to taste), white pepper, and brown sugar. Mix thoroughly until all ingredients are evenly distributed. This blend will give your chips that authentic, savory flavor.
- Second Fry (Crisping): Increase the temperature of the same frying oil to 180°C (355°F). Once the oil is at temperature and the chips are cold, carefully place them back into the hot oil. Fry for another 4-6 minutes, or until they turn a beautiful golden brown and are incredibly crispy. Drain the finished chips on paper towels to remove any excess oil. Immediately transfer them to a clean bowl and season them generously with your freshly made chicken salt. Toss well to ensure an even coating. Set aside, keeping them warm while you finish the chicken and gravy.
Part 2: Preparing the Aromatic Garlic Butter & Roasting the Chicken
- Season the Chicken: Pat your spatchcocked chicken completely dry with paper towels. Generously season the chicken all over with flaky sea salt and freshly ground black pepper. If time permits, allow the chicken to sit at room temperature for about 2 hours before roasting. This “dry brining” step helps to tenderize the meat and ensures a juicier result.
- Preheat Oven & Roast Garlic: Preheat your oven to 160°C (320°F). While the oven heats, take 3 bulbs of garlic. Using a sharp knife, slice about 2-3 cm (approximately 1 inch) off the tops to expose the raw cloves. Place these garlic bulbs into the center of an ovenproof dish. Drizzle with a little olive oil and sprinkle with salt and pepper. Roast in the preheated oven for 1 hour until the garlic is soft and caramelized.
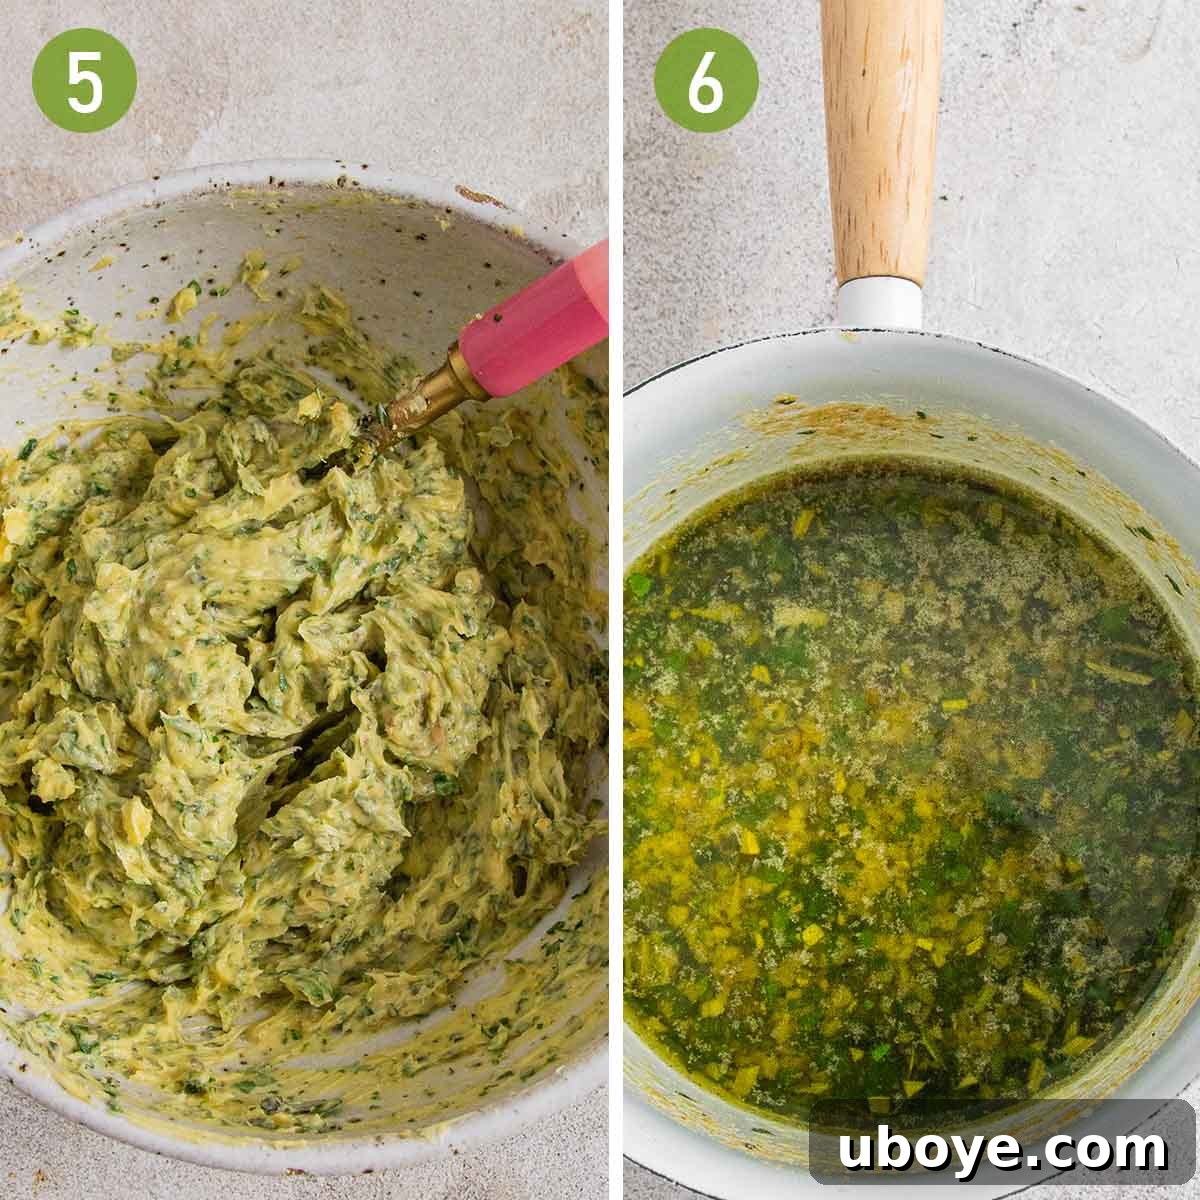
- Prepare Roasted Garlic Butter: Once the roasted garlic bulbs are cool enough to handle, gently squeeze the softened cloves out of their skins into a mixing bowl. Add the room-temperature butter, finely chopped fresh parsley, sage, rosemary, and a generous pinch of salt and black pepper. Use a fork to mash everything together until it’s well combined and creamy. This aromatic butter will be integral to the chicken’s flavor.
- Melt Garlic Butter for Chicken: Measure out approximately 1/3 cup (about 80g) of the prepared garlic butter and gently melt it in a small pot over low heat. Set this melted butter aside for drizzling. The remaining garlic butter can be stored in the fridge for other uses, like spreading on toast or flavoring vegetables.
- Increase Oven Temperature: Once the garlic is roasted and removed, increase your oven temperature to a higher heat of 210°C (410°F) for the chicken.
- Flavor the Chicken: Using your fingers, carefully lift the skin from the chicken breasts and gently rub about a tablespoon (10g) of the solid garlic butter mixture under the skin on each side. This directly flavors the meat and helps keep it moist during cooking.
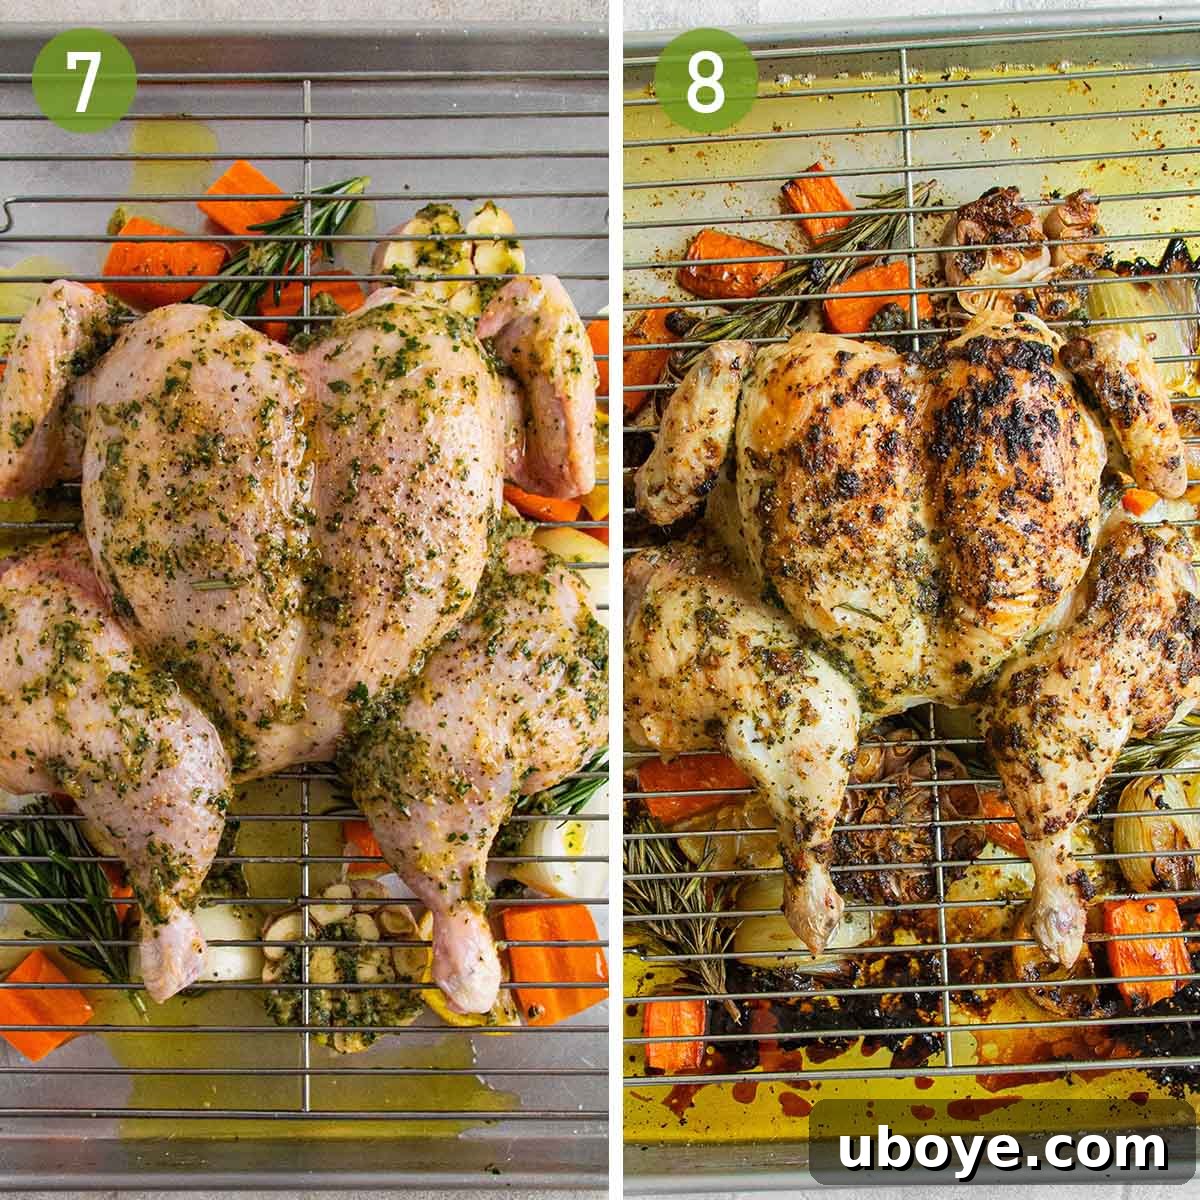
- Assemble for Roasting: Arrange the roughly chopped carrots, quartered onions, the two halved raw garlic bulbs, lemon quarters, and rosemary sprigs in the bottom of a large roasting tin. These vegetables will absorb the chicken drippings and form the base for your gravy. Place a wire rack over the roasting tin, then lay the buttered chicken on top of the rack, skin-side up. Drizzle the melted garlic butter and some olive oil liberally over the entire chicken.
- Roast the Chicken: Transfer the roasting tin to the preheated 210°C (410°F) oven. Roast for approximately 45 minutes, or until the chicken skin is beautifully golden brown and crispy, and an instant-read thermometer inserted into the thickest part of the thigh (without touching bone) registers an internal temperature of 75°C (165°F).
- Rest the Chicken: Once cooked, carefully remove the wire rack with the chicken from the roasting tin. Place the chicken on a cutting board and let it rest, loosely tented with foil, while you prepare the gravy. Resting allows the juices to redistribute, ensuring a tender and moist chicken.
Part 3: Crafting the Rich Gravy & Serving Your Feast
- Make the Gravy Base: Carefully pour all the chicken drippings and the roasted vegetables from the roasting tin into a medium saucepan. Place the saucepan over medium heat and bring the mixture to a rapid simmer. The caramelized bits at the bottom of the roasting pan contain immense flavor, so scrape them all into the saucepan.
- Deglaze and Thicken: Add the white wine to the saucepan and let it cook vigorously for about 2 minutes, stirring constantly to deglaze the pan and incorporate all the flavors. In a small separate bowl, whisk together the cornstarch with the chicken stock to create a smooth slurry. Gradually pour this slurry into the simmering gravy mixture in the saucepan, whisking continuously to prevent lumps.
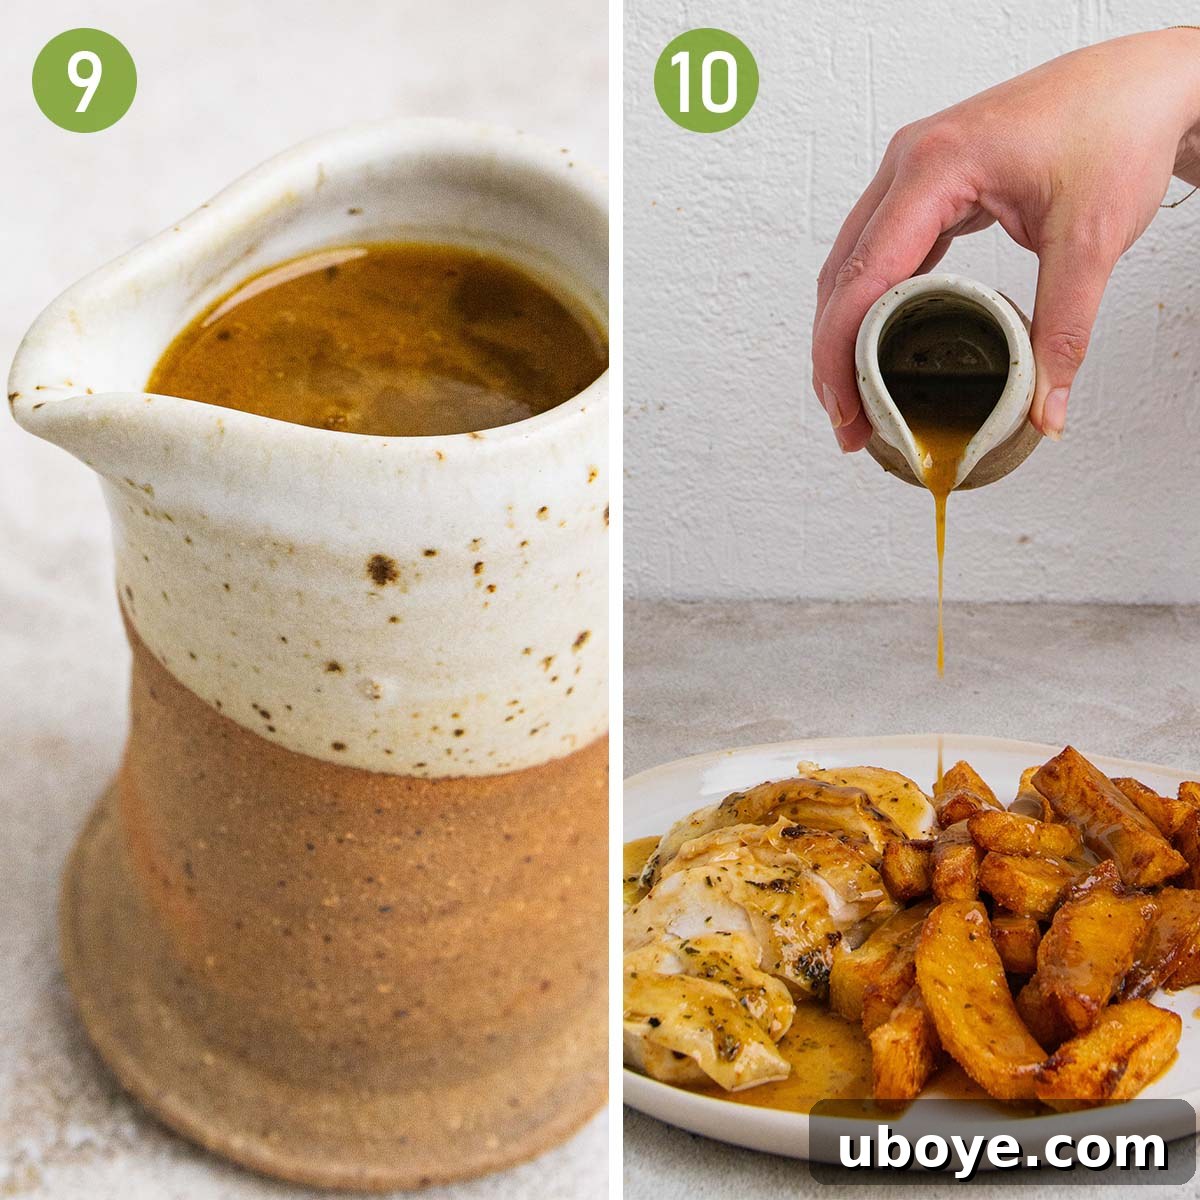
- Simmer and Strain: Continue to simmer the gravy for about 10 minutes, whisking occasionally, until it has thickened to your desired consistency. Once thickened, pour the gravy through a fine-mesh strainer into a clean bowl. Press down on the solids (roasted vegetables) with the back of a spoon to extract all the flavorful liquid. This step ensures a wonderfully smooth and velvety gravy. Discard the strained solids. Taste and adjust seasoning if necessary.
- Serve Your Masterpiece: Carve the rested chicken into quarters or desired portions. Arrange the succulent chicken alongside a generous mound of your crispy, chicken-salt seasoned chips on plates. Pour a lavish amount of the warm, rich homemade gravy over everything. Serve immediately and savor every comforting bite while the chips are hot and at their peak crispiness!
Frequently Asked Questions About Chicken, Chips & Gravy
What kind of chicken should I use for the best Chicken, Chips, and Gravy?
For the most flavorful and evenly cooked chicken for this dish, we highly recommend using a whole chicken and spatchcocking (butterflying) it before roasting. This method flattens the bird, allowing heat to circulate more efficiently, resulting in beautifully crispy skin and consistently juicy meat. A high-quality, free-range chicken will also significantly enhance the overall flavor of both the roast and the accompanying gravy.
How do you spatchcock a chicken, and why is it beneficial?
Spatchcocking a chicken is surprisingly simple! All you need is a sharp pair of kitchen shears or a sturdy knife. First, place the chicken breast-side down on a cutting board. Using your shears, cut along both sides of the backbone from the tail to the neck, then remove the backbone entirely. Flip the chicken over and press down firmly on the breastbone with the heel of your hand until it flattens. This technique allows for faster, more even cooking and helps achieve that desirable crispy skin all over. It can also reduce your roasting time by nearly half!
What’s the secret to getting truly crispy chips when making homemade Chicken, Chips, and Gravy?
The secret to achieving perfectly crispy chips lies in a meticulous triple-cooking process and proper cooling. Start by parboiling the cut potatoes until they are fork-tender. Then, and this is crucial, allow them to cool completely, preferably in the fridge or freezer, to remove excess moisture and firm them up. Next, perform a first fry at a lower temperature (blanching), followed by another thorough cooling period. Finally, fry them a second time at a higher temperature until they turn golden brown and crisp. This multi-step approach ensures a crunchy exterior and a fluffy interior, preventing any sogginess.
Can I make the gravy ahead of time?
Yes, you can absolutely make the gravy ahead of time. Prepare it as directed, strain it, and let it cool completely before storing it in an airtight container in the refrigerator for up to 3-4 days. When ready to serve, gently reheat it in a saucepan over medium-low heat, whisking occasionally, until warmed through. You might need to add a splash of chicken stock or water if it’s too thick.
What if I don’t have chicken bouillon powder for the chicken salt?
If chicken bouillon powder isn’t available, you can substitute it with fine chicken stock powder or even a good quality vegetable bouillon powder for a savory umami base. Alternatively, you can make a simpler version of chicken salt with just onion powder, garlic powder, regular salt, white pepper, and a touch of brown sugar. The goal is a savory, slightly sweet, and aromatic seasoning.
Enhance Your Meal: Perfect Sides for Chicken, Chips & Gravy
To perfectly complement the rich and satisfying flavors of this homemade chicken, chips, and gravy, consider pairing it with a fresh and vibrant side dish. A well-chosen salad can cut through the richness, adding a delightful textural contrast and a burst of fresh flavor.
- Bright & Tangy Peach Salad: I highly recommend my peach salad with garlic confit dressing. This exquisite salad combines juicy, ripe peaches, creamy burrata cheese, peppery rocket (arugula), and savory prosciutto, all drizzled with a sweet and tangy balsamic glaze. It’s a harmonious blend of sweet, salty, and acidic notes that beautifully balances the heartiness of the main course.
- Hearty Roasted Pumpkin, Walnut & Kale Salad: For a more substantial and earthy side, my roasted pumpkin, walnut & kale salad is an excellent choice. The sweet roasted pumpkin, crunchy walnuts, and robust kale provide a wonderful depth of flavor and texture, making it a perfect autumn or winter accompaniment.
- Fresh & Zesty Tabouli: If you’re after something light, fresh, and herbaceous to truly cut through the richness of the meal, tabouli is a fantastic option. Its bright parsley, mint, and lemon flavors offer a refreshing contrast.
- Classic Caesar Salad: You can never go wrong with a classic! My Caesar salad, featuring crisp cos lettuce, a creamy garlic confit aioli dressing, and homemade croutons, provides that irresistible crunch and savory depth that everyone loves.
- Simple Steamed Greens: For a quick and easy option, a bowl of lightly steamed green beans, asparagus, or broccoli with a squeeze of lemon juice and a sprinkle of salt can provide a refreshing element without overpowering the main dish.
Chef’s Top Tips for Perfect Chicken, Chips & Gravy
Achieving restaurant-quality results at home is all about paying attention to a few key details. Follow these expert tips to ensure your homemade chicken, chips, and gravy is nothing short of spectacular:
- Master the Chip Cooling: The absolute most critical step for crispy chips is proper cooling. After parboiling and after the first fry, ensure the chips are thoroughly chilled in the fridge or freezer until completely cold. Skipping this step, or not allowing enough cooling time, is the most common reason for soggy chips. Cold potatoes hit hot oil, creating that ultimate crisp exterior.
- Spatchcock for Superior Chicken: Don’t be intimidated by spatchcocking the chicken. It’s quicker and easier than it sounds, and the benefits are immense. Learn how to spatchcock your chicken here. This technique ensures the chicken cooks more evenly, significantly reduces roasting time, and guarantees a much crispier skin all over, preventing dry spots often found in traditionally roasted birds.
- Roast Chicken Over Veggies for Flavorful Gravy: Always place your chicken on a wire rack over a bed of roasting vegetables in the tin. As the chicken roasts, its delicious juices and rendered fat will drip down onto the vegetables, caramelizing them and infusing them with incredible flavor. These drippings and roasted vegetables are the foundation of your rich, savory gravy. Don’t let those precious juices go to waste!
- Embrace the Garlic Butter: For a truly succulent and aromatic roast chicken, do not skip the garlic butter step. Rubbing a generous amount of this homemade herb-infused butter under the chicken skin directly flavors the meat and helps keep it incredibly moist while creating an even crispier, golden skin. It’s a simple step that makes a world of difference.
- Don’t Rush the Gravy: A good gravy takes time. Allow it to simmer gently for the recommended duration to ensure the flavors meld and it thickens properly. Straining it at the end creates a silky-smooth texture that elevates the entire dish.
- Season Generously: Remember to season at every step – from the boiling water for the chips to the chicken itself and finally, the gravy. Layers of seasoning build complex flavors.
More Delicious Chicken Recipes to Explore
If you’ve enjoyed this ultimate chicken, chips, and gravy, be sure to try some of these other fantastic chicken recipes from Daen’s Kitchen:
- Chicken Breast In Creamy Mushroom Sauce: A quick and comforting meal perfect for busy weeknights.
- Oven Baked Crispy Chicken Wings with Lemon & Garlic Sauce: Irresistibly crispy and bursting with bright flavors.
- Crispy Breaded (Crumbed) Chicken: A golden, crunchy classic that’s always a hit.
- Garlic Confit Chicken Wings: Tender, flavorful wings infused with rich garlic goodness.
Share Your Culinary Success!
We absolutely love hearing from you and seeing your wonderful culinary creations! If you have any questions about this recipe or would like to leave a review, please do so in the comments section below. Your feedback and questions are always welcome!
If you make this irresistible homemade chicken, chips, and gravy, please be sure to follow me and tag me on Instagram, TikTok, or Pinterest. I can’t wait to see your delicious results!
Homemade Chicken, Chips and Gravy
By Daen Lia
These Australian-style chicken chips and gravy is the ultimate comfort meal! The triple cooked, chicken salt chips are crispy, the chicken is juicy, and the rich gravy brings everything together. It’s the kind of food that makes everything better!
Prep Time: 45 mins
Cook Time: 2 hrs
Cooling Time: 1 hr
Total Time: 3 hrs 45 mins
Servings: 6
Ingredients
For the Chicken Salt Chips
- 3.3 pounds Russet potatoes, peeled
- 8 1/2 cups vegetable oil, or grapeseed oil (for frying)
- 3 tablespoons chicken bouillon powder
- 1 tablespoon onion powder
- 1 tablespoon garlic powder
- 1 tablespoon salt, plus more as needed
- 1 teaspoon white pepper
- 1 teaspoon brown sugar
For the Garlic Butter
- 1 cup butter, at room temperature
- 3 bulbs garlic (for roasting)
- 1/3 cup parsley, finely chopped
- 2 tablespoons fresh sage, finely chopped
- 1 1/2 teaspoons fresh rosemary, finely chopped
- 1 pinch flaky sea salt, or to taste
- 1 pinch black pepper, or to taste
For the Roasted Chicken
- 3.3 pounds chicken, spatchcocked (butterflied)
- 2 carrots, roughly chopped
- 2 onions, peeled and quartered
- 2 bulbs garlic, halved crosswise to expose the cloves
- 1/2 lemon, quartered
- 2 sprigs rosemary
- 2 tablespoons olive oil
For the Chicken Gravy
- 1/2 cup white wine
- 1 1/2 cups chicken stock
- 2 teaspoons cornstarch
Unit Conversion: Imperial (US) – Metric
Instructions
Making the Chicken Salt Chips
- Cut Chips: Trim off the edges of the potatoes until they have a square shape. Cut the potatoes into chips that are roughly 3/4 by 2 1/2 inches (2 by 6 cm). Place the cut chips as you go into a bowl of cold water to keep them from oxidizing.
- Rinse: Place the bowl of cut chips under the tap and rinse until the water turns cloudy to remove excess starch from the potatoes. Drain in a colander and rinse again with cold water.
- Boil: Place the chips into a large pot and cover with cold water. Season with a generous amount of salt. Place the pot onto the stove on a high heat and start the timer for 20 minutes as soon as you turn the heat on. Once the water is boiling, turn the heat to medium. Cook the potatoes until they are fork tender.
- Cool: Drain the chips with a spider or slotted spoon and place them on a cooling rack to allow all the moisture to drip off. Place the cooling rack into the fridge or freezer until the chips are cold, not frozen; this takes about 30 minutes in the freezer or up to 2 hours in the fridge.
- Fry #1: Fill a large pot with the vegetable oil and bring to 140°C (285°F). Carefully place the chips into the hot oil with a spider or slotted spoon and fry for 8 minutes. Remove the chips from the oil and place back onto the cooling rack. Put the chips back into the fridge or freezer until they’re cold.
- Chicken Salt: While the chips are in the freezer, prepare the chicken salt by combining the chicken bouillon powder, onion and garlic powder, flaky sea salt, and white pepper in a bowl. Mix until combined.
- Fry #2: Use the same oil but heat it to 180°C (355°F) this time. Using a slotted spoon, carefully place the chips into the hot oil and fry for 4-6 minutes, or until golden and crispy. Using a slotted spoon, remove the chips from the oil and place back onto the cooling rack. Season generously with as much chicken salt as you please and serve.
Making the Garlic Butter
- Season Chicken: Pat the chicken skin dry with paper towel and generously season with sea salt flakes and pepper all over. If time allows, allow the chicken to come to room temperature; about 2 hours. This step acts like a dry brine for extra juicy chicken.
- Preheat: Preheat oven to 160°C (320°F).
- Roast Garlic: Using a sharp knife, slice about 2-3 cm (1 inch) off of the tops of 3 garlic bulbs to expose the raw cloves. Place the garlic bulbs into the center of an ovenproof dish, drizzle with olive oil, and sprinkle with a generous amount of salt and pepper. Bake for 1 hour.
- Remove Skins: Remove the garlic from the dish and set aside to cool until you are able to handle it. Squeeze the roasted garlic cloves out of their skins with your fingers.
- Garlic Butter: Place the garlic cloves in a bowl with the butter, parsley, sage, rosemary, oregano and a big pinch of salt and pepper. Mash together with a fork until well combined.
- Increase Temperature: Increase the oven temperature to 210°C (410°F).
Roasting the Chicken
- Butter Chicken: Using your fingers, carefully separate the skin from the chicken breast and evenly stuff each side with just under a tablespoon (10g) of garlic butter.
- Melt Garlic Butter: In a small pot on a low heat, melt 1/3 cup (80g) of the garlic butter. Reserve the remaining butter for another use.
- Roast: Lay the onions, carrots, two halved garlic bulbs, lemons, and rosemary sprigs into a baking tin. Place the chicken on a wire rack and set over the tin. Drizzle the melted garlic butter and some olive oil all over the chicken. Bake for 45 minutes, or until golden, and the chicken has reached an internal temperature of 75°C (165°F).
- Cool & Rest: Remove the wire rack with the chicken on it from the tray and set to the side. Allow the chicken to rest while you prepare the gravy.
Making the Gravy & Serving
- Making Gravy: Transfer the chicken drippings and roasted vegetables into a medium saucepan. Bring to a rapid simmer over medium heat, then add the white wine and cook for 2 minutes. Mix the cornstarch with the chicken stock to make a slurry, then add it to the pan. Simmer for 10 minutes or until thickened, whisking occasionally. Pour the gravy through a mesh strainer that is placed over a bowl to remove any lumps.
- Serve: Slice the chicken into quarters and serve with the chicken salt chips and a generous amount of gravy on top. Enjoy!
Video
Notes
- Cool the chips properly after boiling. After parboiling and doing the first fry, chill the chips in the fridge or freezer. Skipping this can lead to soggy chips!
- For faster, more even cooking, spatchcock the chicken. It’s quicker and easier than it sounds!
- Make sure that you roast the chicken over the veggies; you’re going to need the juices later to bring a great flavor to the gravy.
- For a flavorful roast chicken, don’t skip the garlic butter!
Nutrition
Serving: 1 serving
Calories: 969 kcal
Carbohydrates: 59 g
Protein: 40 g
Fat: 63 g
Saturated Fat: 28 g
Polyunsaturated Fat: 8 g
Monounsaturated Fat: 23 g
Trans Fat: 1 g
Cholesterol: 212 mg
Sodium: 2252 mg
Potassium: 1647 mg
Fiber: 5 g
Sugar: 7 g
Vitamin A: 4887 IU
Vitamin C: 31 mg
Calcium: 114 mg
Iron: 5 mg
Nutrition information is automatically calculated, so should only be used as an approximation.

Enjoyed this recipe? Leave a comment below!
Images by Alanna Penna Photography.