
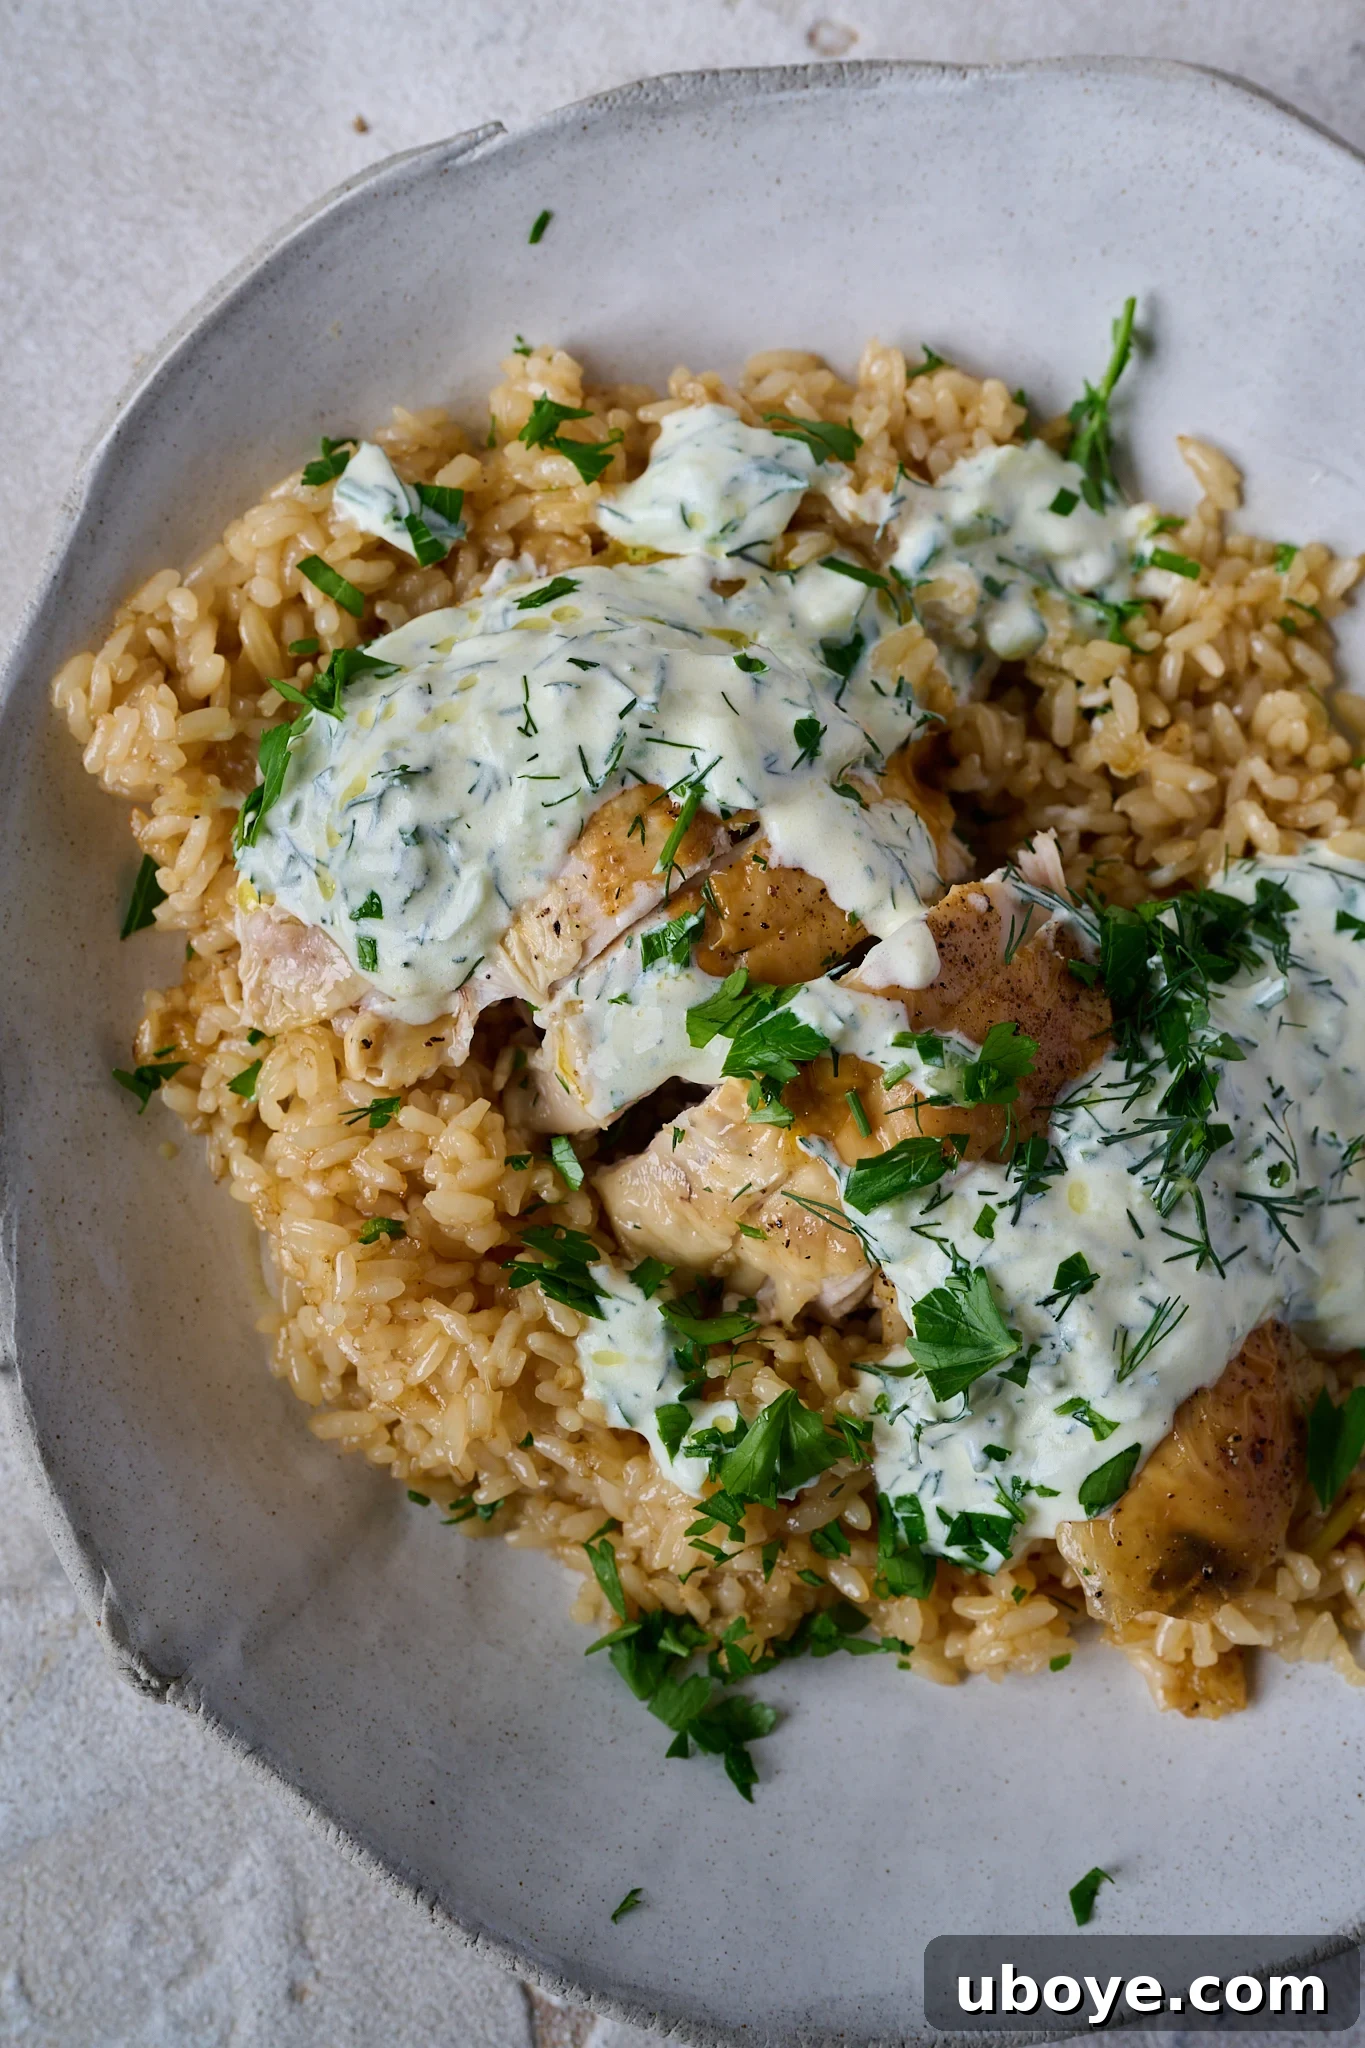
One Pan Chicken & Garlicky Rice: Your Ultimate Weeknight Meal Solution
This one pan chicken and garlicky rice recipe truly embodies everything you could wish for in a meal. Crafted with just a handful of straightforward ingredients, it effortlessly fills your home with the most inviting and comforting aroma as it bakes. Beyond its delightful taste, this dish offers the added bonus of wonderful leftovers, which can be effortlessly transformed into a new, exciting meal the following day. It represents fuss-free cooking at its absolute finest, making it the quintessential choice for any busy mid-week evening!
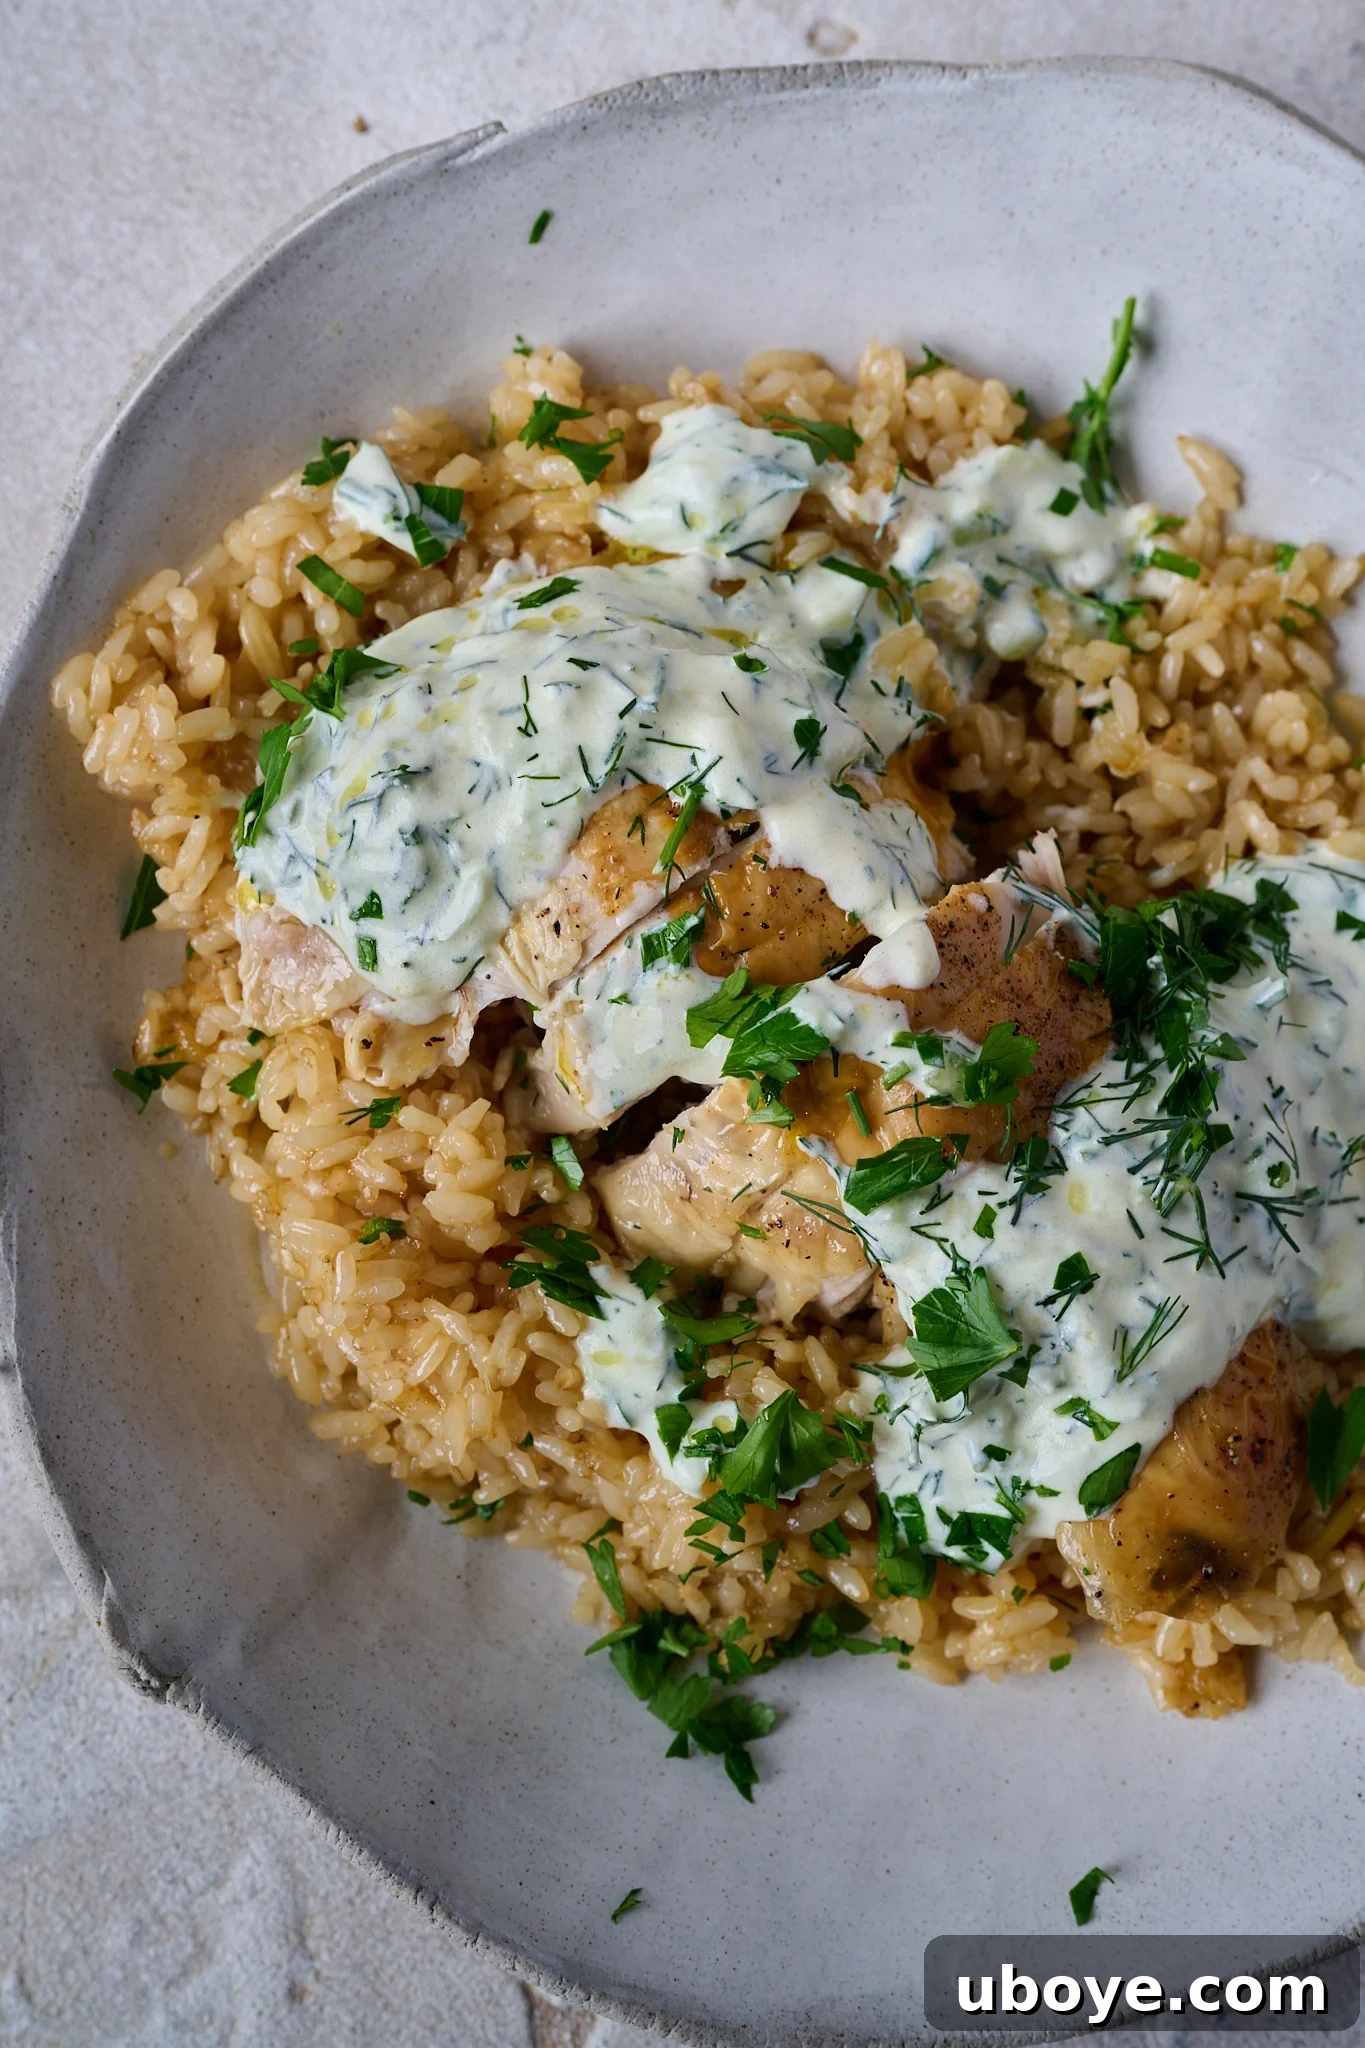
Why You’ll Fall in Love with This One Pan Chicken & Garlicky Rice!

As much as I adore a quick and easy mid-week chicken dinner, from my crispy breaded chicken to a luscious chicken breast in creamy mushroom sauce, this one pan chicken and garlicky rice holds a special place in my heart for its sheer simplicity and profound depth of flavor. The chicken, requiring nothing more than a drizzle of olive oil and a generous seasoning of salt and pepper, roasts to golden perfection. The true magic, however, lies in its ingenious preparation: the rice cooks directly in the same pan, absorbing every drop of the succulent pan drippings and the rich essence of slow-roasted garlic.
Once the chicken has achieved its beautiful golden crisp, it’s removed, leaving behind a treasure trove of flavor: rich olive oil, caramelized bits stuck to the tray, and a whole bulb of garlic transformed into a soft, jammy delight. These precious remnants are then stirred directly into the rice and chicken stock. As the rice simmers, it soaks up every intricate note, evolving into the most incredibly comforting and aromatic garlicky rice you’ll ever have the pleasure of tasting. It’s a symphony of flavors achieved with minimal effort.
This recipe is truly a “shove it in the oven and walk away” kind of meal, making it an absolute lifesaver for those hectic weeknights. While it roasts, filling your kitchen with an irresistible aroma, you’re free to tackle other tasks, like tidying up the house or spending quality time with family. It’s effortless, deeply satisfying, and consistently hits all the right comfort notes. And the versatility doesn’t end there! Should you find yourself with any leftovers, the tender chicken can be shredded and tossed through a heartwarming bowl of pastina, or the carcass can be saved to create your very own rich, homemade chicken broth. This recipe truly is the gift that keeps on giving!
Key Ingredients for Our One Pan Chicken & Garlicky Rice
Creating this spectacular one pan chicken and rice dish relies on a carefully selected, yet surprisingly simple, list of ingredients. With just quality olive oil, salt, and pepper, you’re on your way to achieving a perfectly roasted chicken and an unforgettable meal.
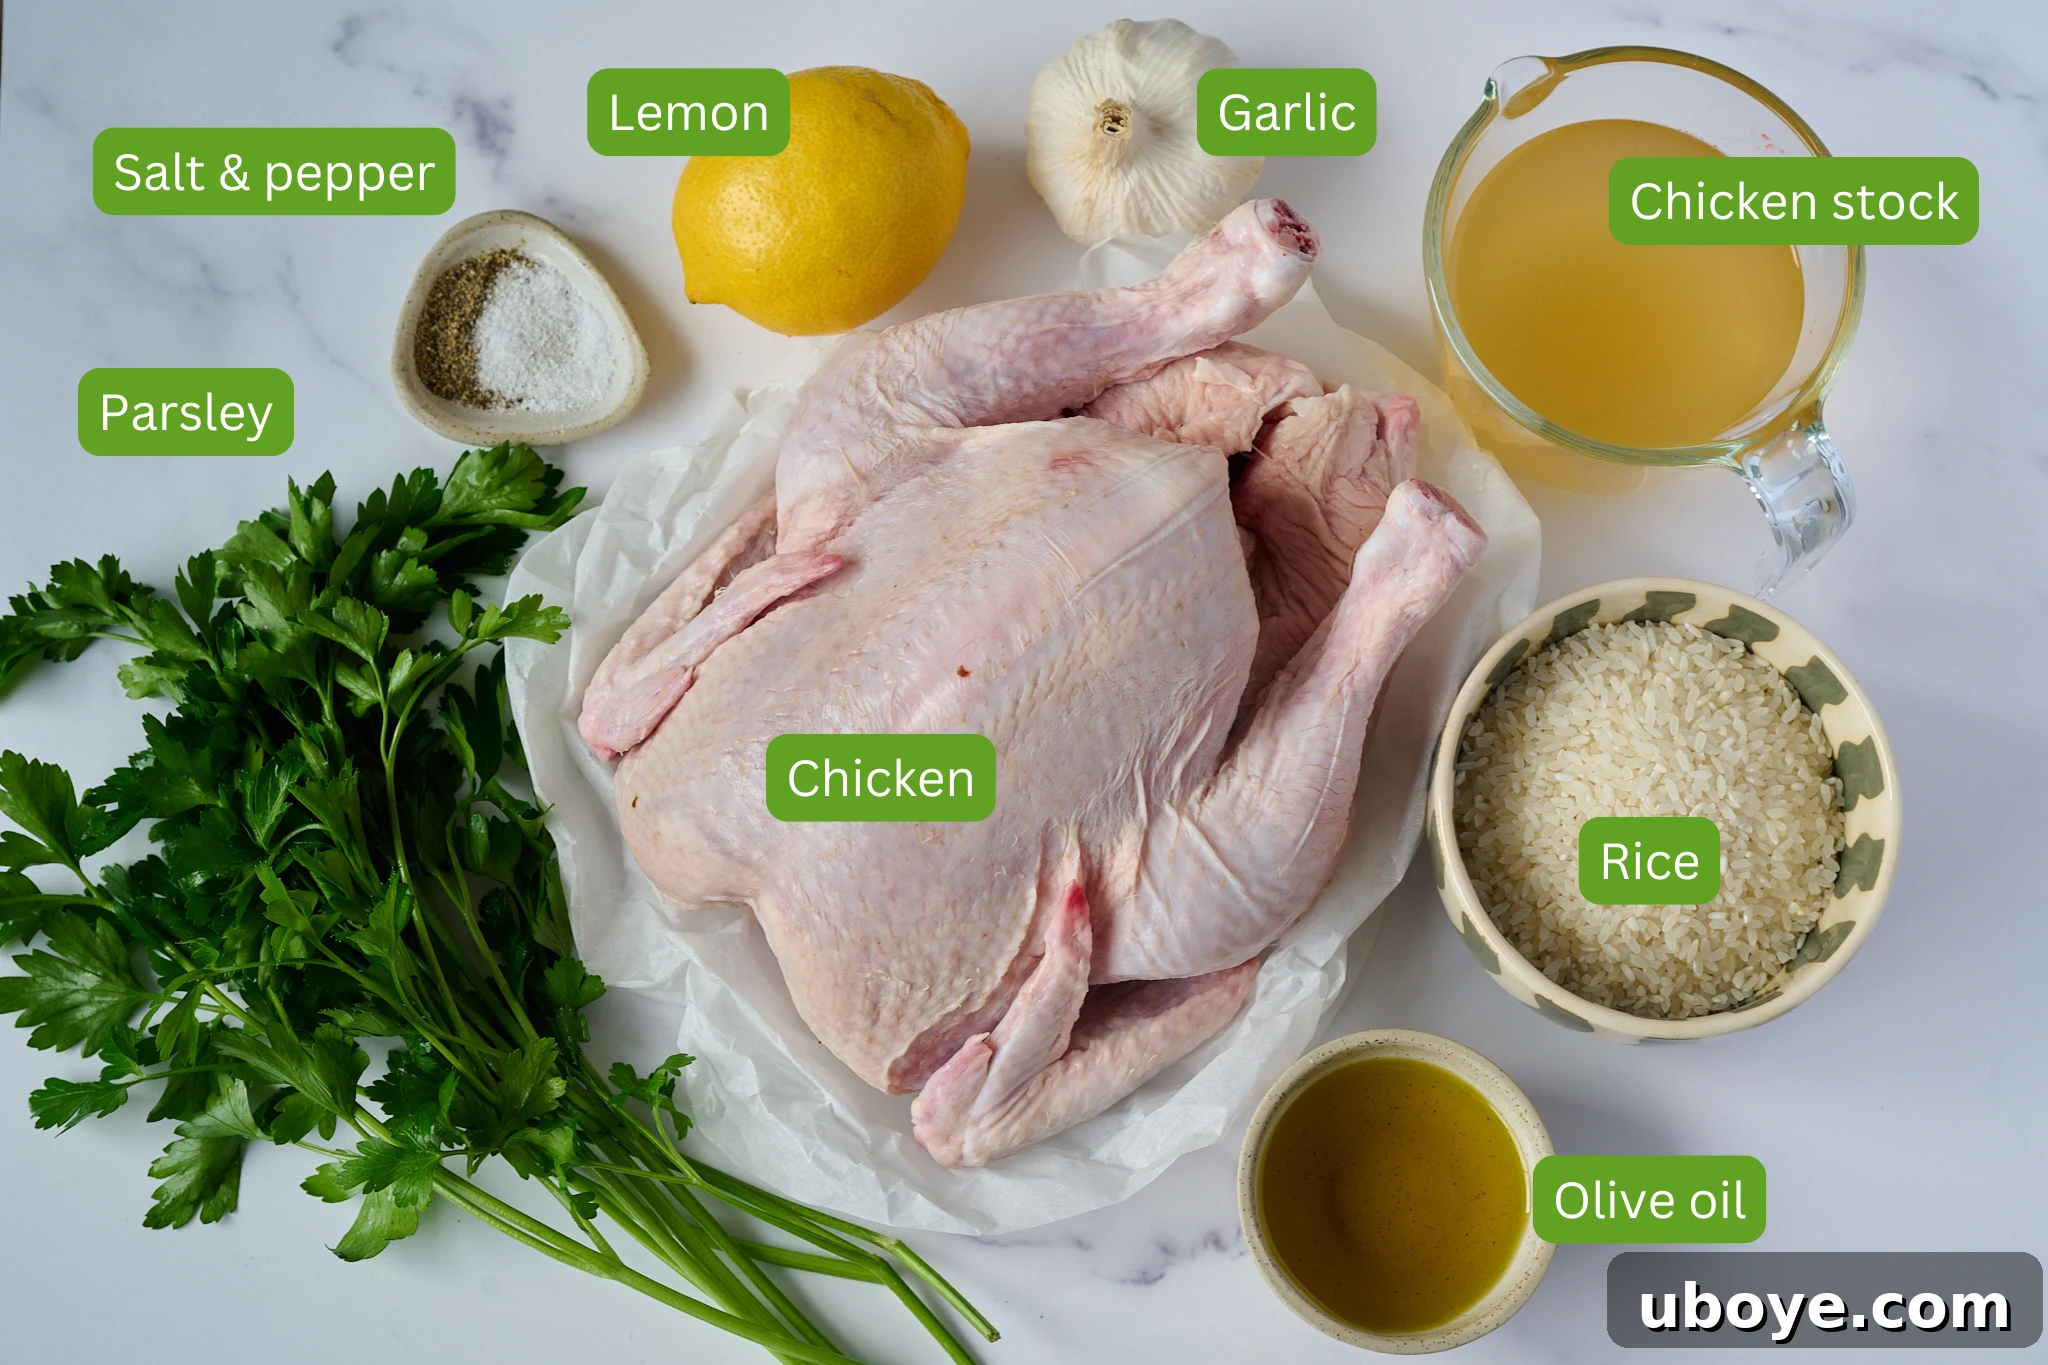
- Rice – For this recipe, I highly recommend using a long-grain rice variety such as basmati or jasmine. Their distinct characteristics ensure that they cook up fluffy and separate, rather than becoming mushy. This texture is crucial as it allows them to beautifully absorb all those magnificent pan drippings and the sweet, roasted garlic without losing their individual grain integrity.
- Whole Chicken – Opting for a whole chicken is a game-changer for this recipe, delivering an unparalleled depth of flavor and culinary value. It ensures you get the best of all worlds: incredibly juicy meat, deliciously crispy skin, and a bounty of rich pan juices that are absolutely essential for flavoring the rice. Furthermore, the bones can be repurposed into a nutritious homemade stock, making it an economical and zero-waste choice that maximizes flavor.
- Garlic Bulb – The star of the “garlicky” rice! A whole garlic bulb is strategically placed within the chicken’s cavity during roasting. This allows it to slowly roast until it transforms into a wonderfully soft, spreadable, and intensely jammy texture. Once roasted, its mellow, sweet essence is squeezed directly into the pan drippings, infusing the rice with an incredibly deep and irresistible garlicky flavor.
- Chicken Stock – The quality of your chicken stock significantly impacts the final flavor of your rice. Use a good quality chicken stock, as it will impart a profound depth and richness to every grain. While chicken stock is preferred, you can certainly use vegetable or beef broth as suitable alternatives, depending on your preference and what you have on hand.
- Olive Oil – A cornerstone of Mediterranean cooking, olive oil plays a dual role here. It helps the chicken skin crisp up beautifully, developing a golden crust, and contributes to the foundational flavor of the pan drippings that the rice will later absorb.
- Salt and Pepper – Simple yet indispensable. Generous seasoning with kosher salt and freshly ground black pepper is all the chicken needs to develop its incredible flavor during roasting.
- Lemon & Fresh Herbs (optional) – Tucked into the chicken’s cavity alongside the garlic, half a lemon and a few sprigs of fresh parsley or thyme release their aromatic oils, subtly infusing the chicken with bright, herbaceous notes that complement the rich, savory flavors.
A full list of ingredients with precise measurements can be found in the comprehensive recipe card below.
Effortless Steps: How to Make One Pan Chicken & Garlicky Rice
This recipe is celebrated for its incredible ease and low-effort approach, largely managing itself within the oven. The key to achieving that beautifully crispy chicken skin and capturing all those invaluable pan drippings, which are crucial for flavoring the rice, is to use a sturdy roasting tray with a wire rack. Let’s dive into the simple steps to create this culinary masterpiece.
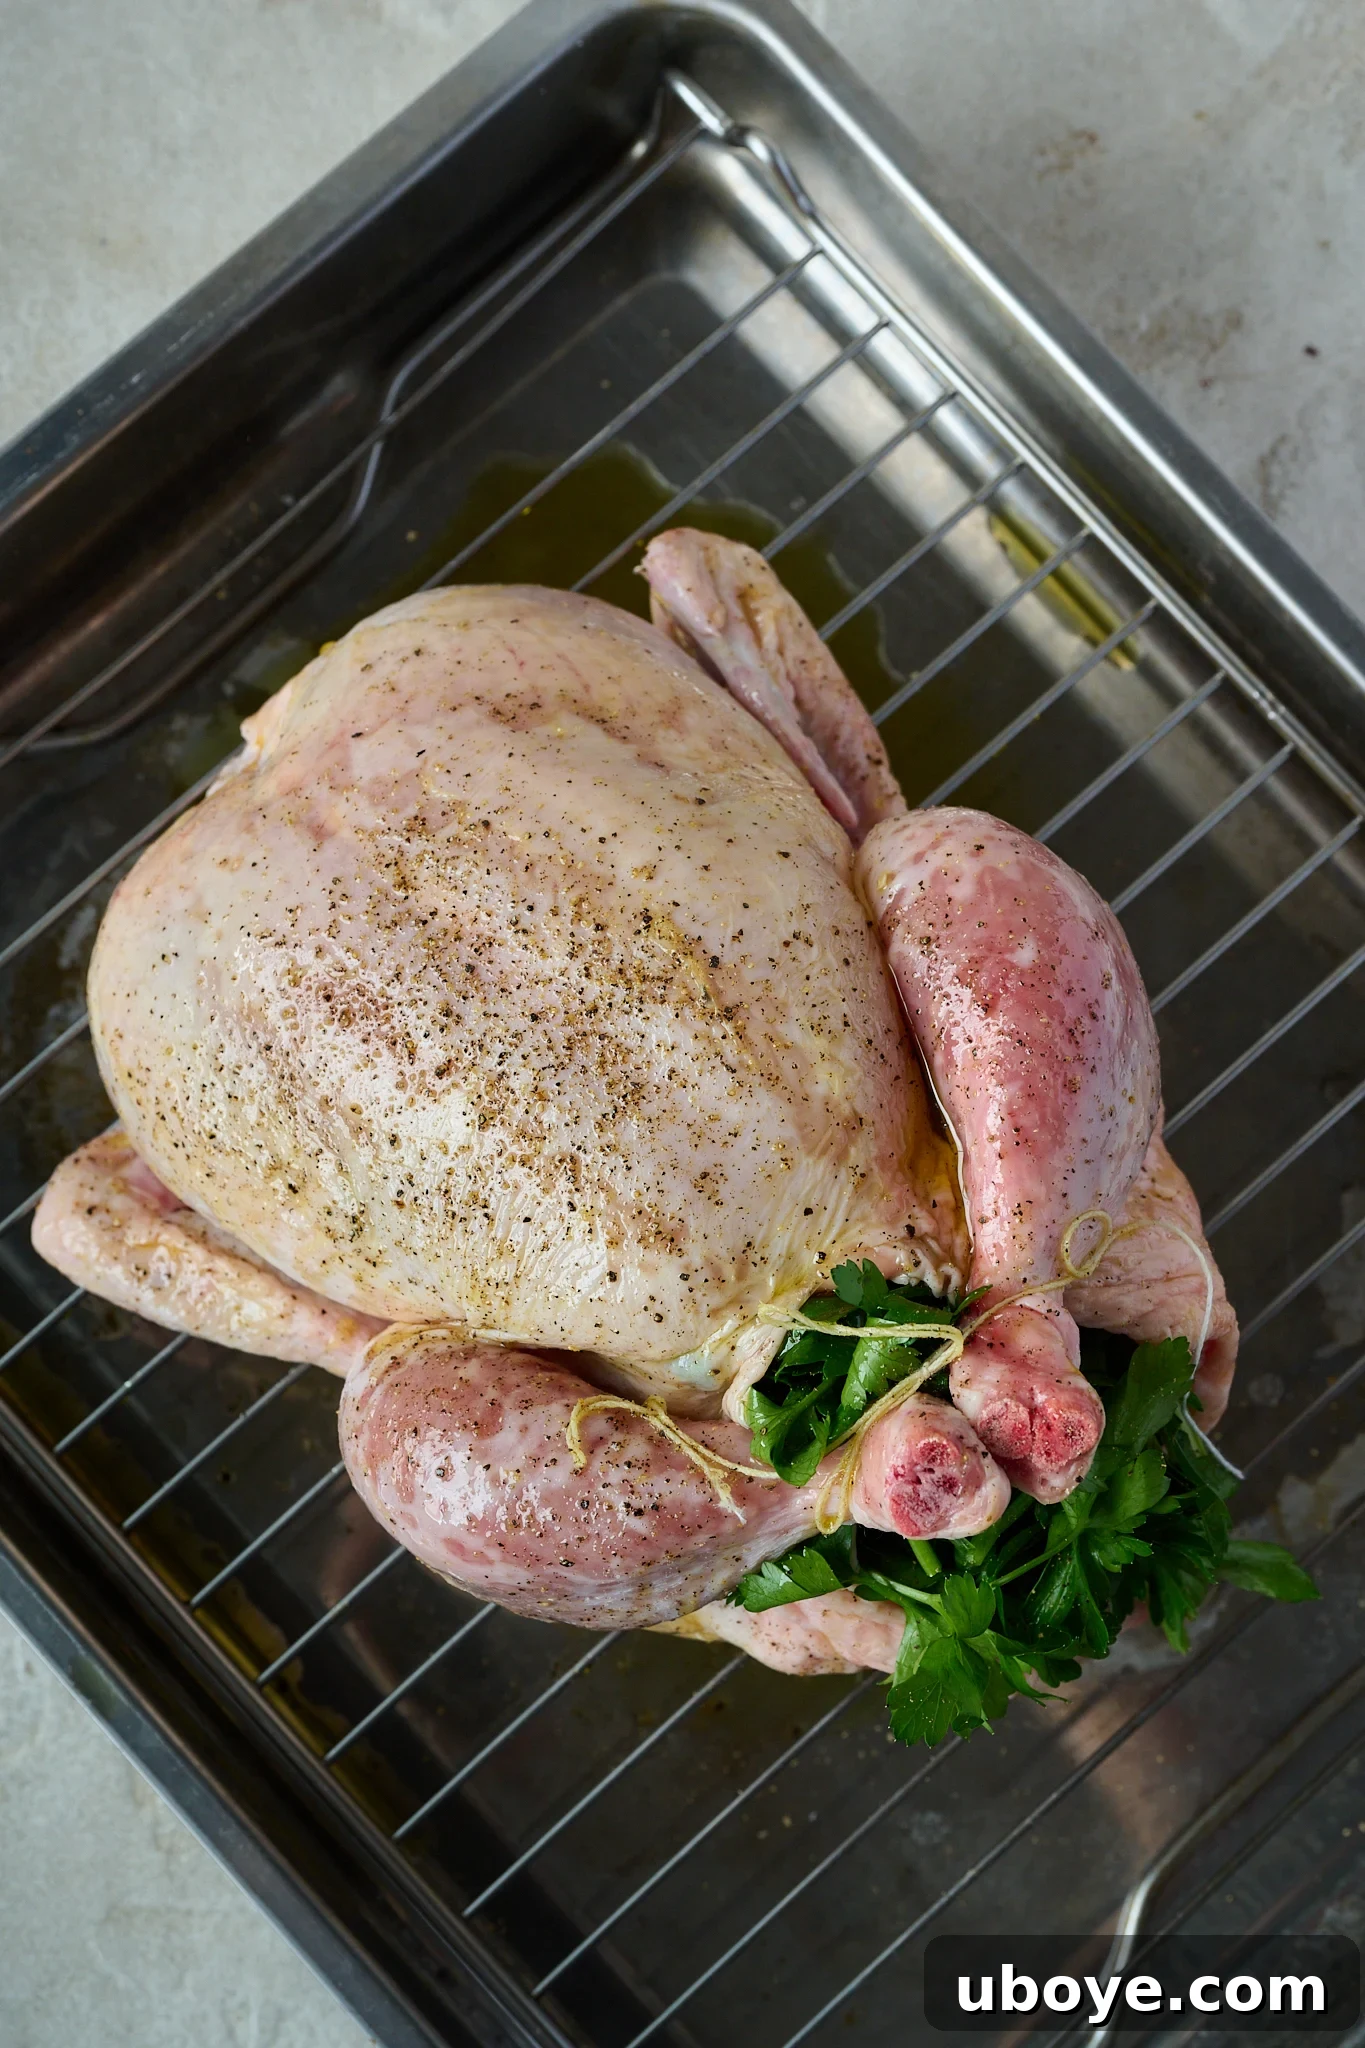
Step 1: Prep & Truss the Chicken
Begin by thoroughly patting the whole chicken dry with paper towels – this is a critical step for crispy skin! Season the chicken generously all over with salt, including inside the cavity. For an extra juicy result, consider dry brining it overnight in the fridge. Next, take a sharp knife and slice the very top off your garlic bulb (about 2-3 cm down) to expose the cloves. Place this garlic bulb, along with half a lemon and any fresh herbs you’re using (like parsley or thyme), into the chicken’s cavity. Finally, using kitchen string, tie the legs of the chicken together. This simple technique, known as trussing, ensures that the chicken cooks more evenly and helps create that desirable golden, crispy skin.
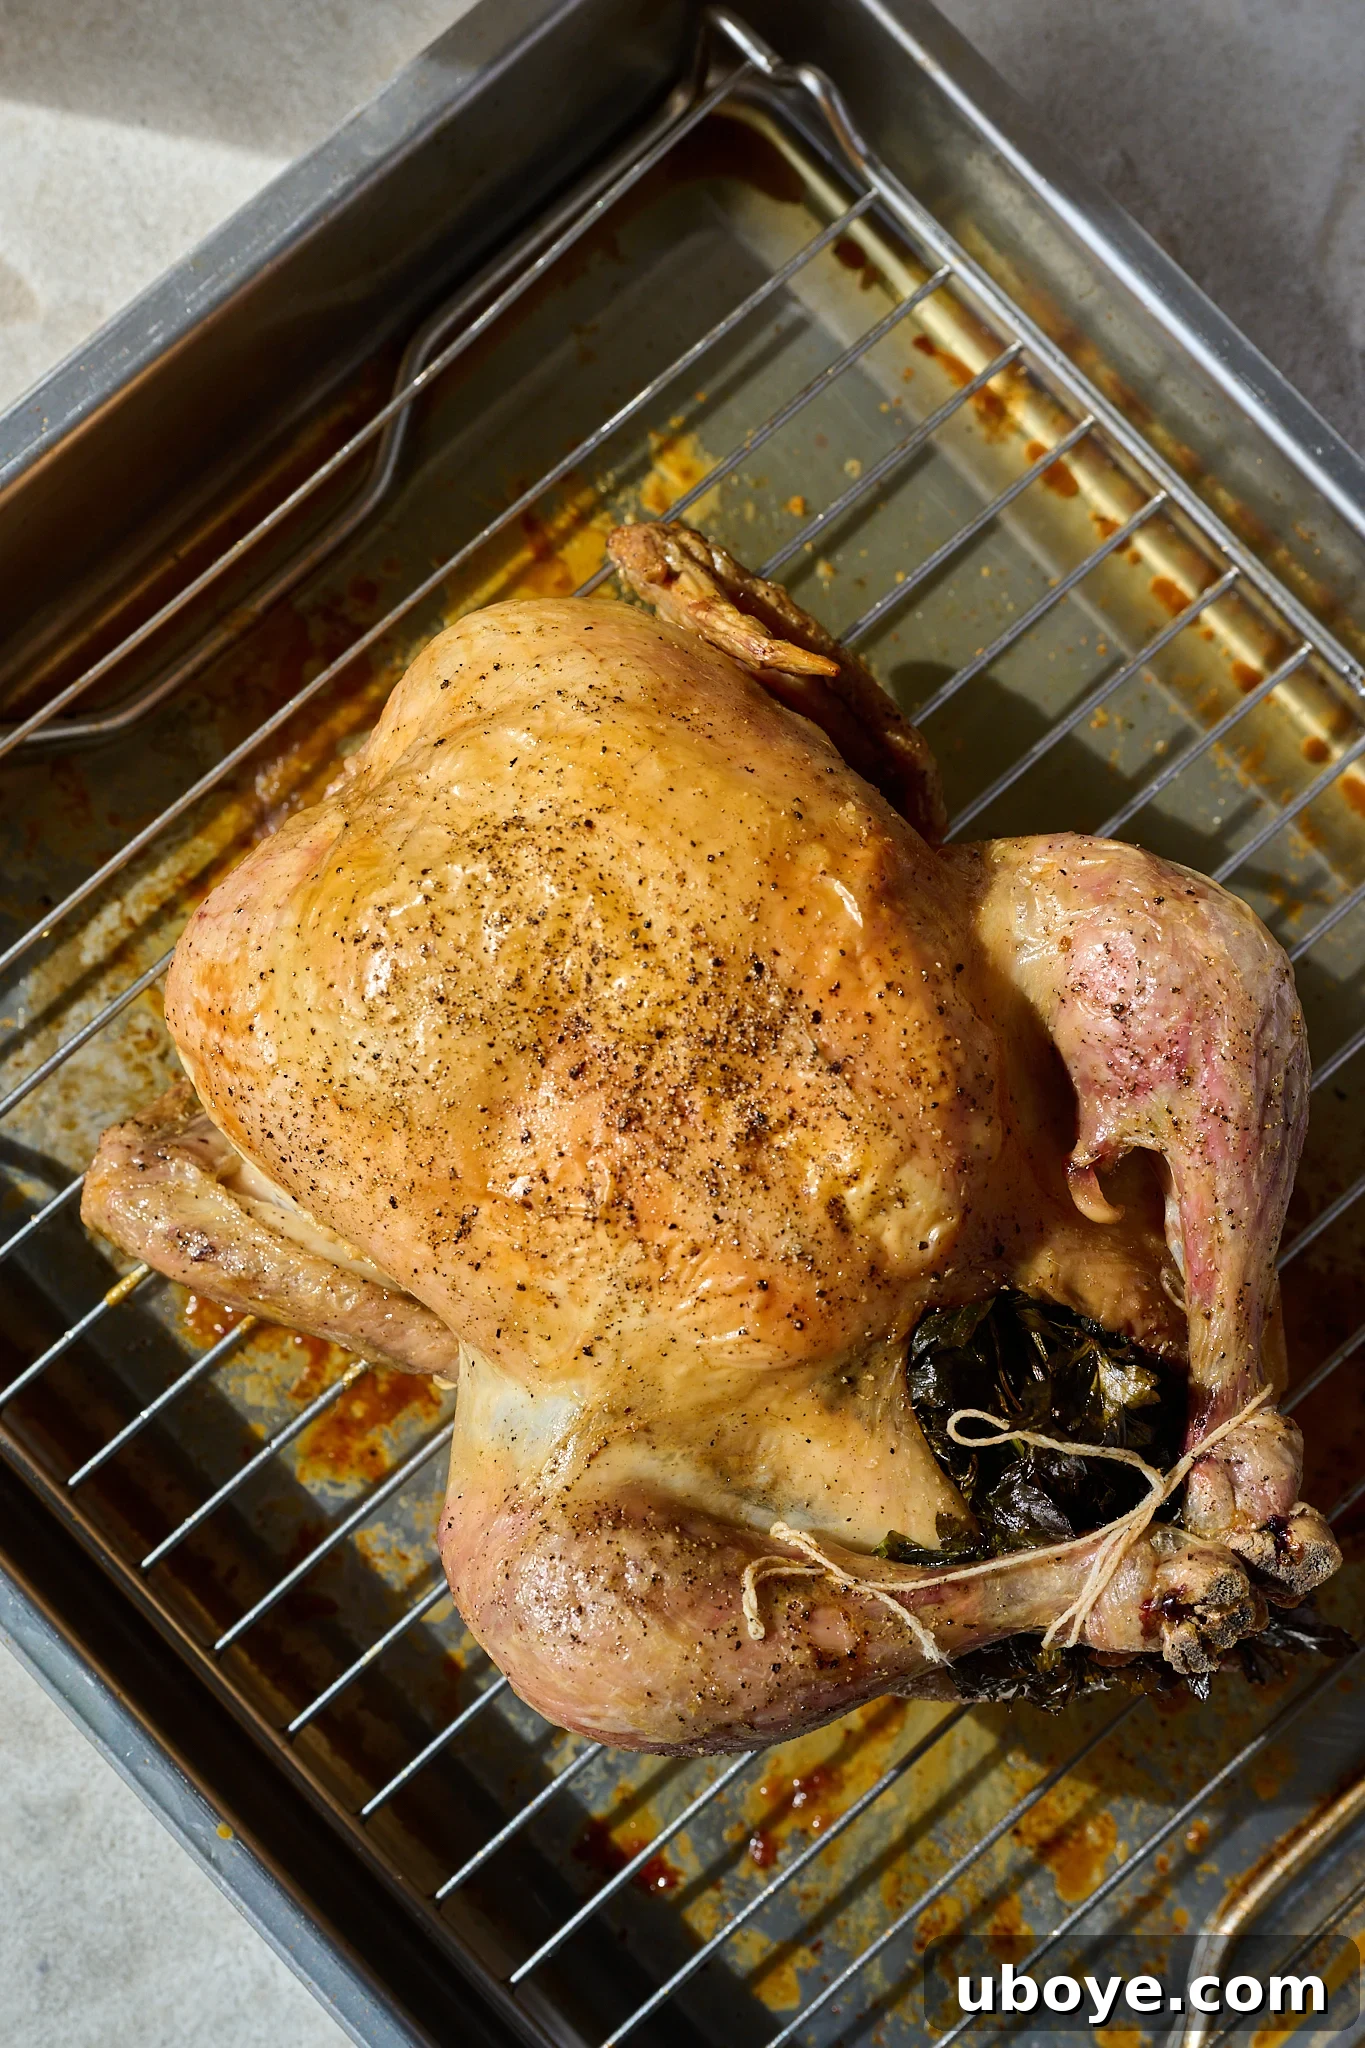
Step 2: Roast to Golden Perfection
Before roasting, allow your chicken to come to room temperature for about 30 minutes, which promotes even cooking. Preheat your oven to 355°F / 180°C. Carefully transfer the prepared chicken to a baking tray, ideally with a wire rack set inside. Drizzle a generous amount of olive oil over the entire chicken and massage it gently into the skin. Season with freshly ground black pepper. Place it into the preheated oven and roast for approximately 1 hour and 20 minutes, or until the chicken is thoroughly cooked, the juices run clear, and the skin is beautifully golden and irresistibly crispy. A meat thermometer inserted into the thickest part of the thigh (avoiding bone) should read 165°F (74°C).
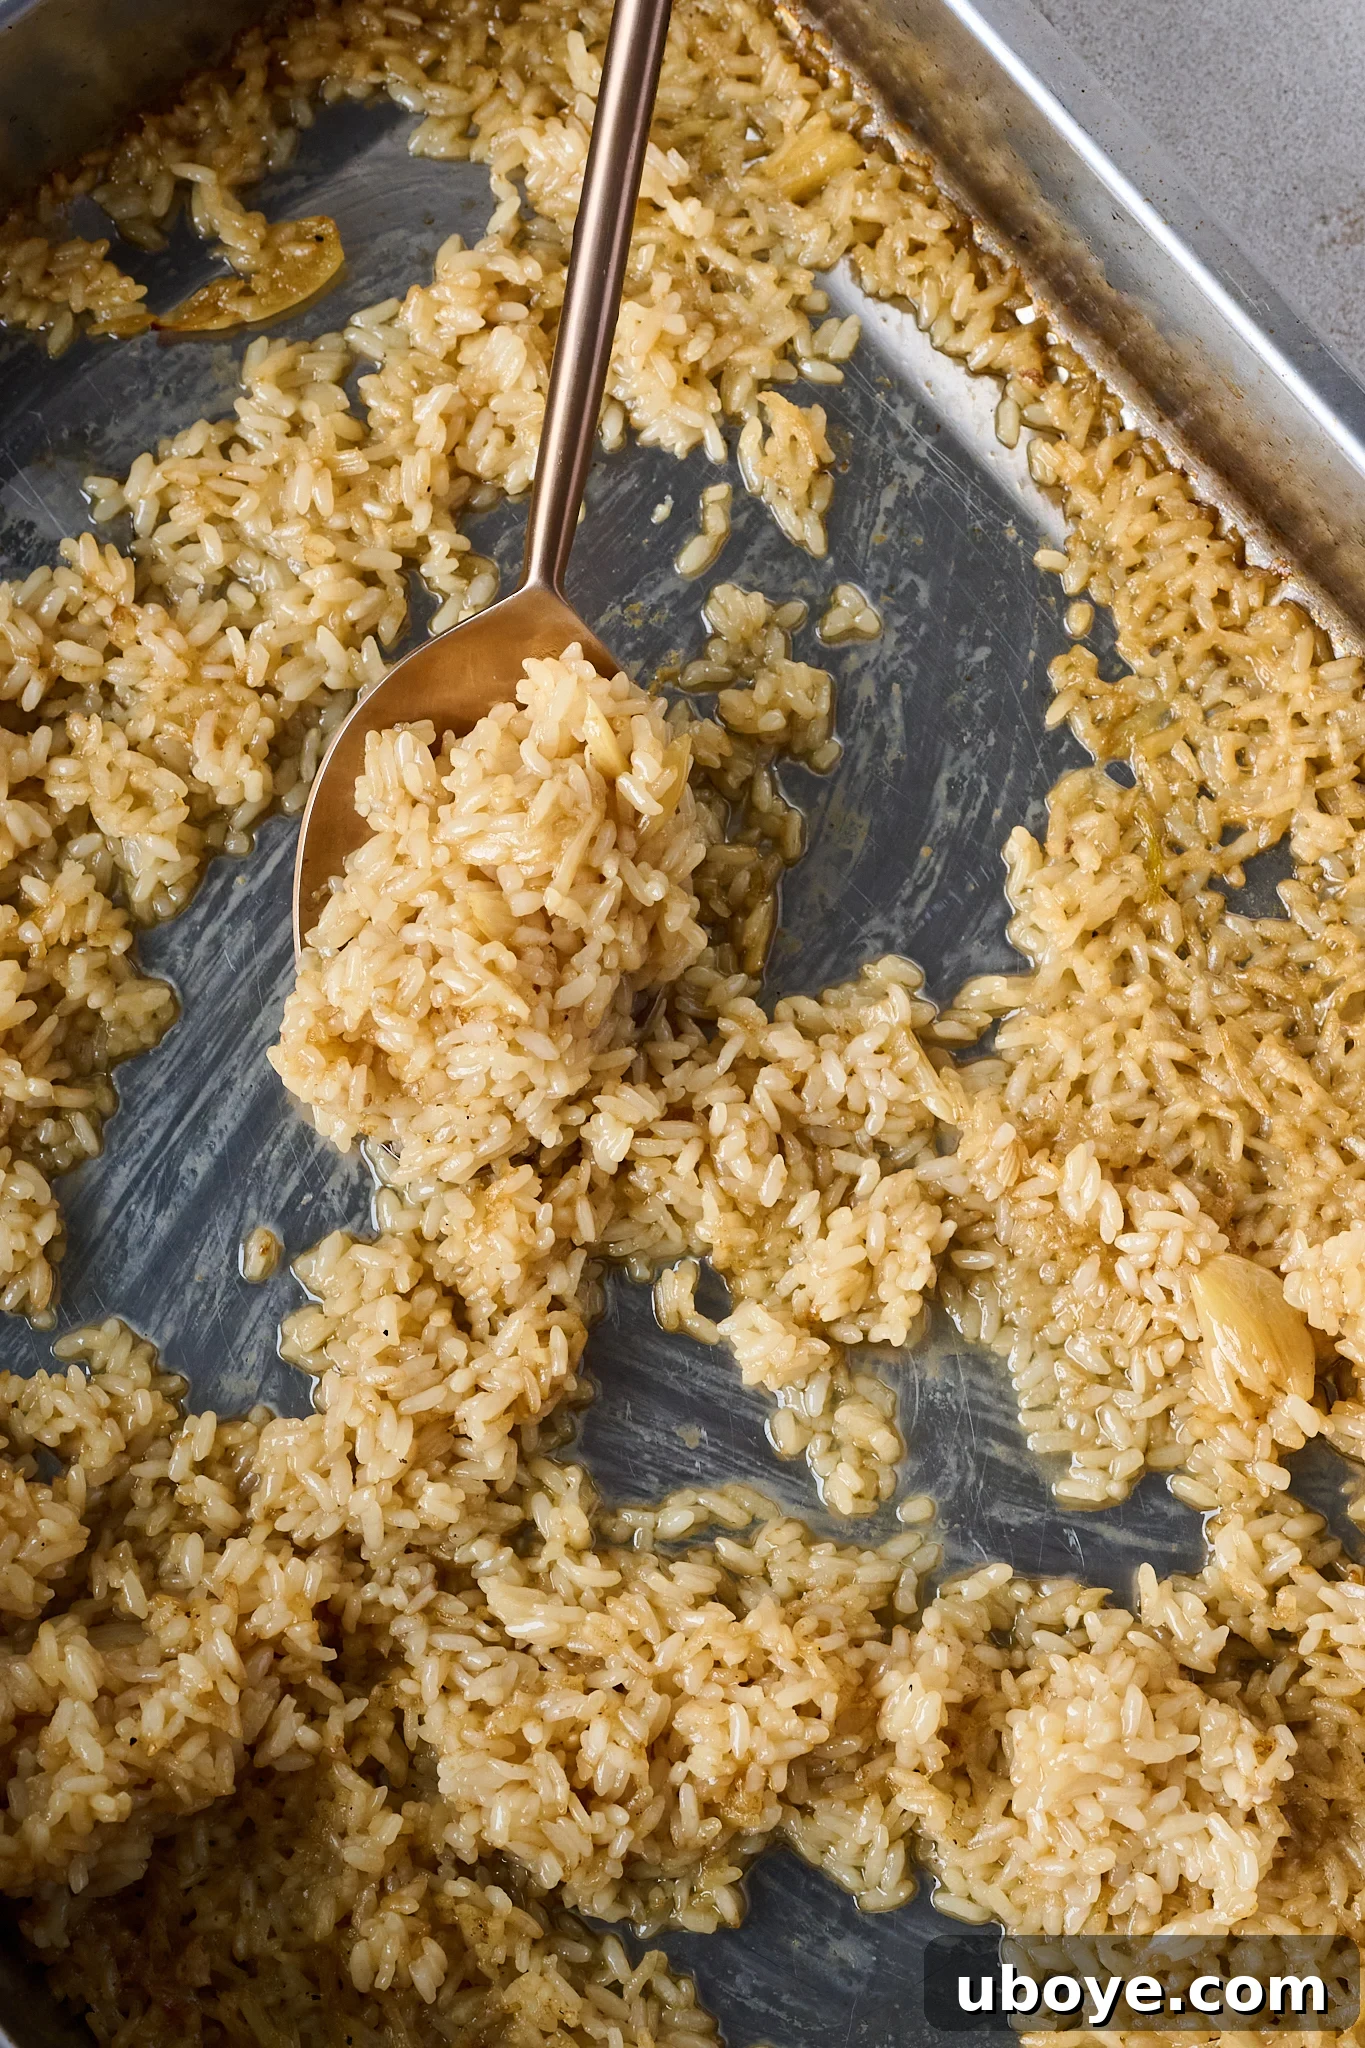
Step 3: Bake the Flavorful Rice
Once the chicken is perfectly roasted, carefully transfer it from the baking tray to a chopping board. Make sure to remove the lemon and the now soft, jammy garlic bulb from its cavity. Gently squeeze the tender roasted garlic cloves and the juice from the lemon directly into the baking tray, mingling them with the delicious pan drippings. Add your chosen long-grain rice and the chicken stock to the tray. Stir all the ingredients together thoroughly, ensuring the rice is fully coated and submerged in the flavorful liquid. Return the tray to the oven and bake for an additional 15-20 minutes, or until the rice is fully cooked, tender, and has absorbed all the liquid, becoming incredibly fragrant and garlicky.
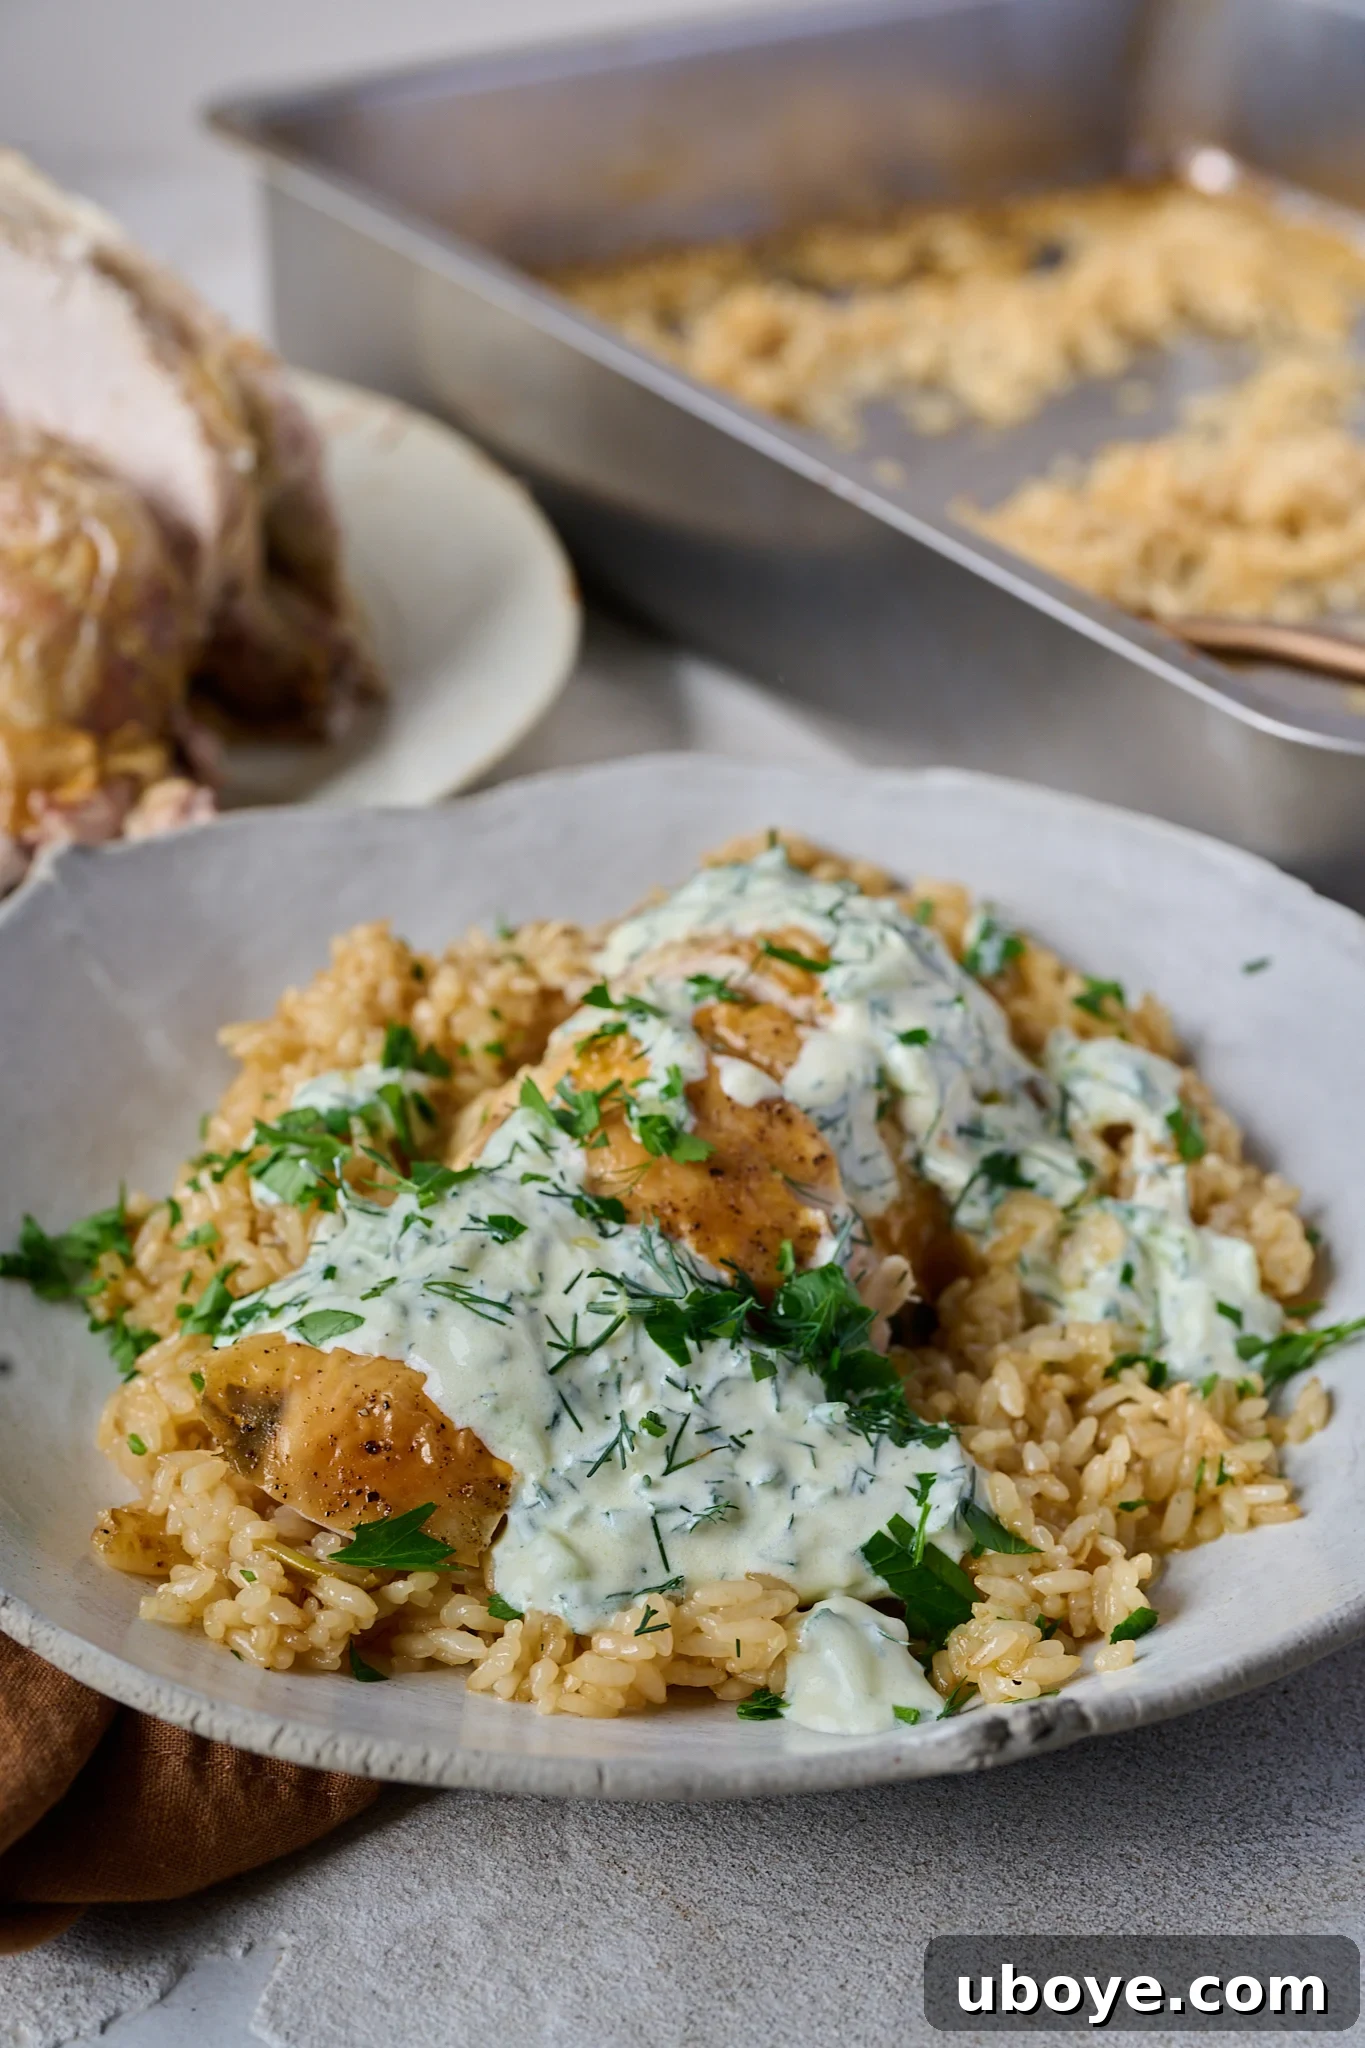
Step 4: Carve and Serve
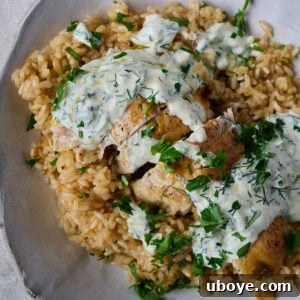
Allow the roasted chicken to rest for at least 10-15 minutes on the chopping board before carving. This crucial resting period allows the juices to redistribute throughout the meat, resulting in an even more tender and succulent chicken. Once rested, carve the chicken into desired portions. Serve the warm, tender carved chicken immediately alongside the aromatic garlicky rice. For a refreshing contrast, a dollop of homemade tzatziki or a fresh herb garnish makes an excellent accompaniment, adding brightness to the rich flavors. Enjoy this delightful one-pan masterpiece!
Expert Tips & Tricks for the Perfect One Pan Chicken & Garlicky Rice
Achieving a truly outstanding one pan chicken and garlicky rice is simpler than you might think, especially with these expert tips and tricks designed to elevate your dish from good to unforgettable:
- Dry Brine for Juicy Meat: For exceptionally moist and flavorful chicken, consider salting your chicken at least an hour before cooking, or even better, the night before. Leave it uncovered in the fridge. This dry brining technique draws moisture out, then reabsorbs it with the salt, leading to a perfectly seasoned and incredibly juicy result.
- Bring to Room Temperature: Always take your chicken out of the fridge at least 30 minutes before you plan to roast it. Allowing the chicken to come closer to room temperature ensures it cooks more evenly throughout, preventing the outside from drying out while the inside struggles to reach temperature.
- Pat Dry for Crispy Skin: This step cannot be stressed enough! Use paper towels to remove as much moisture as possible from the chicken’s skin. A dry surface is essential for achieving that coveted, irresistibly crispy golden skin that everyone loves.
- Stuff the Cavity for Flavor Infusion: Don’t underestimate the power of the chicken’s cavity! Anything you stuff inside – be it citrus, garlic, fresh herbs, or even hardy vegetables – will slowly release its flavors into the chicken and, more importantly, into the pan drippings. These drippings then become the base for your incredibly delicious, aromatic rice.
- Season Generously: While a variety of seasonings can be fun, sometimes simplicity is key. A generous application of good quality olive oil, coarse salt (like kosher salt), and freshly ground black pepper is often all you need to create the most intensely flavorful and delicious chicken you’ll ever eat. Don’t be shy with the seasoning!
- Truss the Chicken (Tie the Legs): Tying the legs of the chicken together with kitchen string (trussing) serves multiple purposes. It helps the chicken cook more evenly by compacting the shape, preventing the thinner parts from overcooking. It also lifts the thigh meat slightly off the bottom of the pan, encouraging a more uniform and crispy skin all around.
- Resting is Essential: Once your chicken is out of the oven, resist the urge to carve it immediately. Allow the meat to rest, loosely tented with foil, for at least 10-15 minutes. This crucial resting period allows the muscle fibers to relax and the juices to redistribute throughout the meat, ensuring every bite is tender, moist, and bursting with flavor.
- Choose the Right Pan: For optimal crispiness of the chicken skin and efficient collection of pan drippings, always use a large, shallow roasting tray, ideally with a wire rack. Avoid deep casserole dishes, as they can steam the chicken rather than allowing it to roast and crisp up properly.
Frequently Asked Questions About One Pan Chicken & Garlicky Rice
Absolutely, you can use individual chicken pieces such as thighs, drumsticks, or marylands. They work very well and will still yield a delicious meal. However, be aware that using chicken pieces means you might miss out on some of the intensely rich pan juices and bones that contribute extra flavor and versatility to the rice and potential homemade stock. If using pieces, you will also need to adjust your cooking time to approximately 45 minutes at 400°F / 200°C, or until thoroughly cooked and golden.
For the best results, a long-grain rice variety such as basmati or jasmine is highly recommended. These types of rice are ideal because they remain fluffy and separate as they cook, perfectly absorbing all the incredible pan drippings and the sweet, roasted garlic without turning mushy or sticky. Their light texture complements the rich chicken flavors beautifully.
Yes, this recipe is fantastic for meal preparation! Both the roasted chicken and the garlicky rice reheat wonderfully, making it an excellent option for busy weeknights or packed lunches. Simply allow the dish to cool completely before storing, then reheat portions as needed. It’s a convenient and delicious way to ensure you have wholesome meals ready to go.
Several key techniques contribute to wonderfully crispy chicken skin. Firstly, always pat the chicken thoroughly dry with paper towels before seasoning and roasting. Secondly, use a shallow roasting tray, ideally with a wire rack, to allow air circulation around the chicken. Lastly, avoid covering the chicken while it roasts, as this traps steam and prevents the skin from crisping up properly. High heat at the beginning can also help.
Absolutely! Adding vegetables is a great way to make this a truly complete one-pan meal. Root vegetables like chopped carrots, potatoes, parsnips, or even Brussels sprouts can be added to the roasting pan alongside the chicken for the last 30-40 minutes of its cooking time, or until tender and caramelized. They will also absorb some of the delicious pan drippings.
Creative Ways to Serve Your One Pan Chicken & Garlicky Rice
While this one pan chicken and garlicky rice is perfectly satisfying on its own, there are many delightful ways to elevate and customize your meal. Here are some of my favorite serving options to enhance your dining experience:
- Serve with a Homemade Sauce: Elevate the flavors with a luscious sauce. My homemade garlic butter melts beautifully over the warm chicken, or try cowboy butter for a rich, herbaceous kick. For a brighter, tangier note, a drizzle of olive oil mayonnaise with chili, garlic, and lime or a refreshing cucumber-yogurt tzatziki provides a wonderful contrast.
- Pair with a Light and Green Salad: Cut through the richness of the chicken and rice with a fresh, vibrant salad. A zesty tabouli recipe offers a burst of freshness, while a creamy cucumber salad with Greek yogurt adds a cooling and refreshing element. A simple green salad with a light vinaigrette is also a fantastic choice.
- Serve with Roasted Vegetables on the Side: Enhance the meal with additional roasted vegetables that complement the chicken. Try tender garlicky green beans for a burst of vibrant color and flavor, or sweet and savory hot honey roasted carrots for a delightful side dish that bakes perfectly alongside the main course.
- Fresh Herbs and Lemon Wedges: A final sprinkle of chopped fresh parsley, dill, or chives, along with some fresh lemon wedges for squeezing, can brighten the entire dish and add a professional touch.
Storage & Leftover Ideas for Your One Pan Chicken & Garlicky Rice
This dish is not only delicious freshly made but also makes for excellent leftovers, offering convenience and versatility for future meals. Here’s how to store it properly and get the most out of any remaining portions:
- Cool Completely Before Storing: Always allow both the chicken and the garlicky rice to cool down completely to room temperature before transferring them to storage containers. This prevents condensation and inhibits bacterial growth, ensuring food safety and quality.
- Refrigeration: Store any leftovers in an airtight container in the refrigerator. Properly stored, your one pan chicken and rice will remain fresh and delicious for up to 3 days.
- Reheating Rice: The garlicky rice reheats beautifully. You can warm it gently in the microwave with a splash of water or broth to restore moisture. For an extra crispy texture that’s perfect for salads, reheat the rice in an air fryer or a hot pan until golden and slightly crunchy. I particularly love tossing crispy rice through my salads for added texture!
- Freezing Chicken Carcass: Don’t let the chicken carcass go to waste! Place it in a resealable freezer bag and store it in the freezer. It will be ready whenever you decide to make a batch of rich, flavorful homemade chicken stock – a culinary treasure.
- Creative Chicken Leftover Uses: Leftover chicken meat is incredibly versatile. Shred or dice it and toss it through hearty soups, comforting stews, or even your favorite pasta sauces. It’s also excellent in sandwiches, wraps, or as a protein boost in salads.
More Mid-week Chicken Dinners You’ll Love!
Meat
Roast Chicken with Salsa Verde
Meat
Crispy Breaded (Crumbed) Chicken
Meat
Chicken Breast In Creamy Mushroom Sauce
Pasta
One Pan Creamy Chicken Alfredo
If you create this delicious one pan chicken and garlicky rice, I would absolutely love to see your culinary masterpiece! Please tag me on Instagram, TikTok, or Pinterest so I can admire your wonderful creations from Daen’s Kitchen!
Should you have any questions about the recipe or wish to share your feedback, please don’t hesitate to leave a comment below. I always enjoy engaging with your food and recipe-related queries and hearing about your experiences with my recipes.
Save
Saved
Pin
One Pan Chicken & Garlicky Rice
Daen Lia
5 minutes
1 hour 20 minutes
6
Ingredients
Chicken & Rice
- 3.3 lbs whole chicken
- 2 tbsp olive oil
- 1/2 lemon
- 1 garlic bulb
- 4 sprigs parsley, optional
- 9 oz long grain rice
- 17 oz chicken broth
- salt and pepper
Tzatziki
- 1 cup plain Greek Yoghurt
- 1 cucumber, grated
- 2 tbsp olive oil
- 1 tbsp lemon juice
- 1 garlic clove, grated
- 2 tbsp dill, finely chopped
- salt and pepper
Metric
Prevent your screen from going dark
Instructions
Chicken & Rice
-
Prep chicken: Pat the chicken skin dry with paper towel and generously season with kosher salt all over, not forgetting the cavity. If time allows, place the chicken into the fridge uncovered over night. This step acts like a dry brine for juicy chicken results.
-
Bring chicken to room temp: When ready to roast, remove the chicken from the fridge 30 minutes prior to take the fridge chill off.
-
Preheat oven: Preheat the oven to 355°F / 180°C.
-
Stuff & truss chicken: Using a sharp knife, slice the top off the garlic bulb, about 2–3 cm down from the top, to expose the cloves, then place in the cavity of the chicken with the lemon and fresh herbs. Tie the legs of the chicken together with kitchen string as this will help the chicken cook evenly.
-
Roast chicken: Transfer the chicken to a baking tray with a wire rack. Season the chicken with pepper and drizzle olive oil all over. Massage into the skin. Bake for 1hr 20mins or until the chicken is cooked through and golden all over.
-
Bake rice: Transfer the chicken from the baking tray to a chopping board and remove the lemon and garlic from the cavity. Squeeze the garlic cloves and lemon juice into the baking tray. Add the rice and chicken stock to the baking tray and stir through to combine all ingredients. Bake for 15 – 20 minutes or until the rice is cooked.
-
Serve: Carve the chicken and serve with the rice and tzatziki.
Tzatziki
-
Squeeze cucumber: Grate the cucumber and place into a tea towel. Give it a big squeeze to remove as much moisture as possible.
-
Mix: Place all ingredients into a bowl and mix until well combined. Season with salt and pepper.
Video
Notes
- Brine. Salt your chicken at least an hour if not the night before and leave uncovered in the fridge as this will act as a dry brine and leave you with moist and juicy meat
- Room temp. Take the chicken out of the fridge at least 30 mins before roasting it so it cooks evenly
- Pat dry. Remove as much moisture from the chicken as possible by patting the skin dry with paper towels
- Stuff the cavity. Anything you stuff into the cavity of the chicken will seep into the pan while cooking and create the most delicious jus. You can stuff it with anything you like from citrus and garlic to herbs and vegetables.
- Season generously. The more seasoning the better but this doesn’t mean you have to use a variety of seasoning! Just Olive oil, salt and pepper can create the most delicious chicken you will ever eat.
- Truss – tie up the legs of the chicken. Not only will this help the chicken cook more evenly, it will also lift the thigh meat off the bottom of the pan and help create a golden skin.
- Leave to rest. Allowing the meat to rest will allow all of that flavour to combine and for the juices to be redistributed across the meat – resting meat is very important and it needs to be done for at least 10 minutes.
- Use a roasting tray rather than a casserole dish to help the chicken skin crisp up properly.
Rice
- I like to use a long-grain rice such as basmati or jasmine. They stay fluffy and separate as they cook, while still soaking up all those gorgeous pan drippings and roasted garlic without turning mushy.
Nutrition
Carbohydrates: 37g
Protein: 26g
Fat: 28g
Saturated Fat: 7g
Polyunsaturated Fat: 5g
Monounsaturated Fat: 14g
Trans Fat: 0.1g
Cholesterol: 91mg
Sodium: 386mg
Potassium: 379mg
Fiber: 1g
Sugar: 1g
Vitamin A: 274IU
Vitamin C: 10mg
Calcium: 40mg
Iron: 2mg
Nutrition information is automatically calculated, so should only be used as an approximation.
 Like this? Leave a comment below!