
The Ultimate Lemon Curd Meringue Roulade: Your Festive Dessert Guide
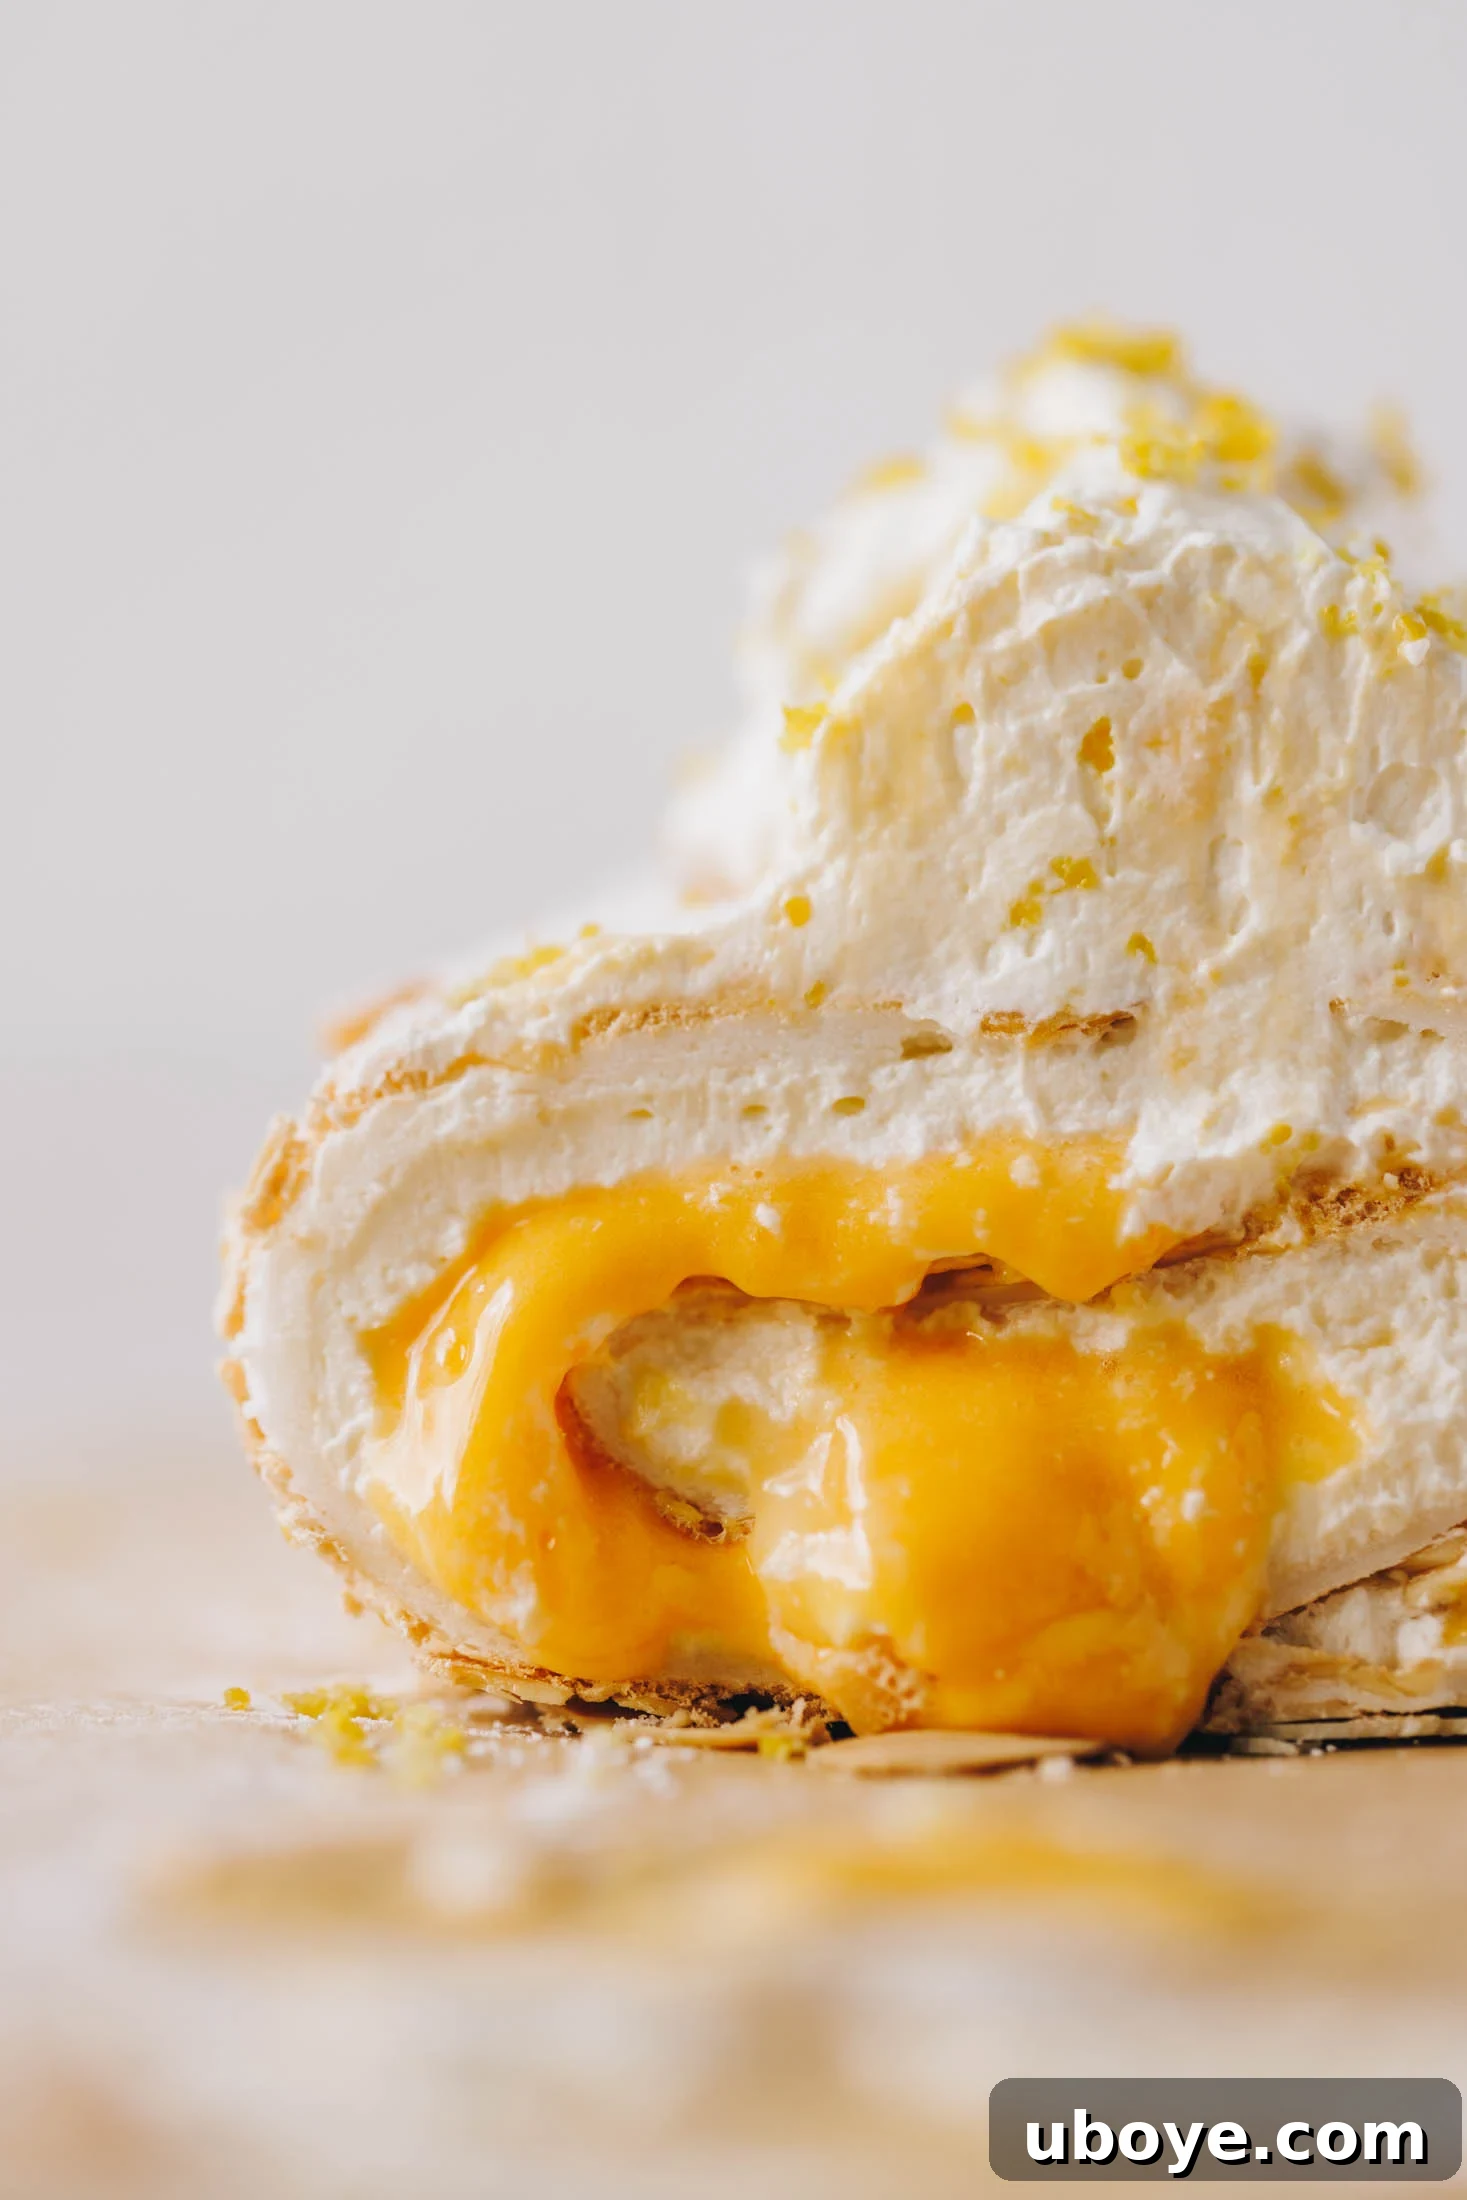
Every year, as the festive season approaches, one dessert takes center stage in my kitchen: my signature Lemon Curd Meringue Roulade. It’s more than just a recipe; it’s a tradition, a delightful blend of textures and flavors that embodies the joy of celebration. This elegant dessert is a true masterpiece, boasting a light, airy meringue with a soft, marshmallowy interior and a delicate, crisp exterior. Swirls of vibrant, homemade lemon curd provide a zesty counterpoint to the sweet meringue, all generously finished with clouds of extra whipped cream and a sprinkle of fresh lemon zest. It’s a dessert that not only looks incredibly impressive but is also surprisingly achievable for home bakers.
Why You’ll Fall in Love with This Lemon Curd Meringue Roulade!

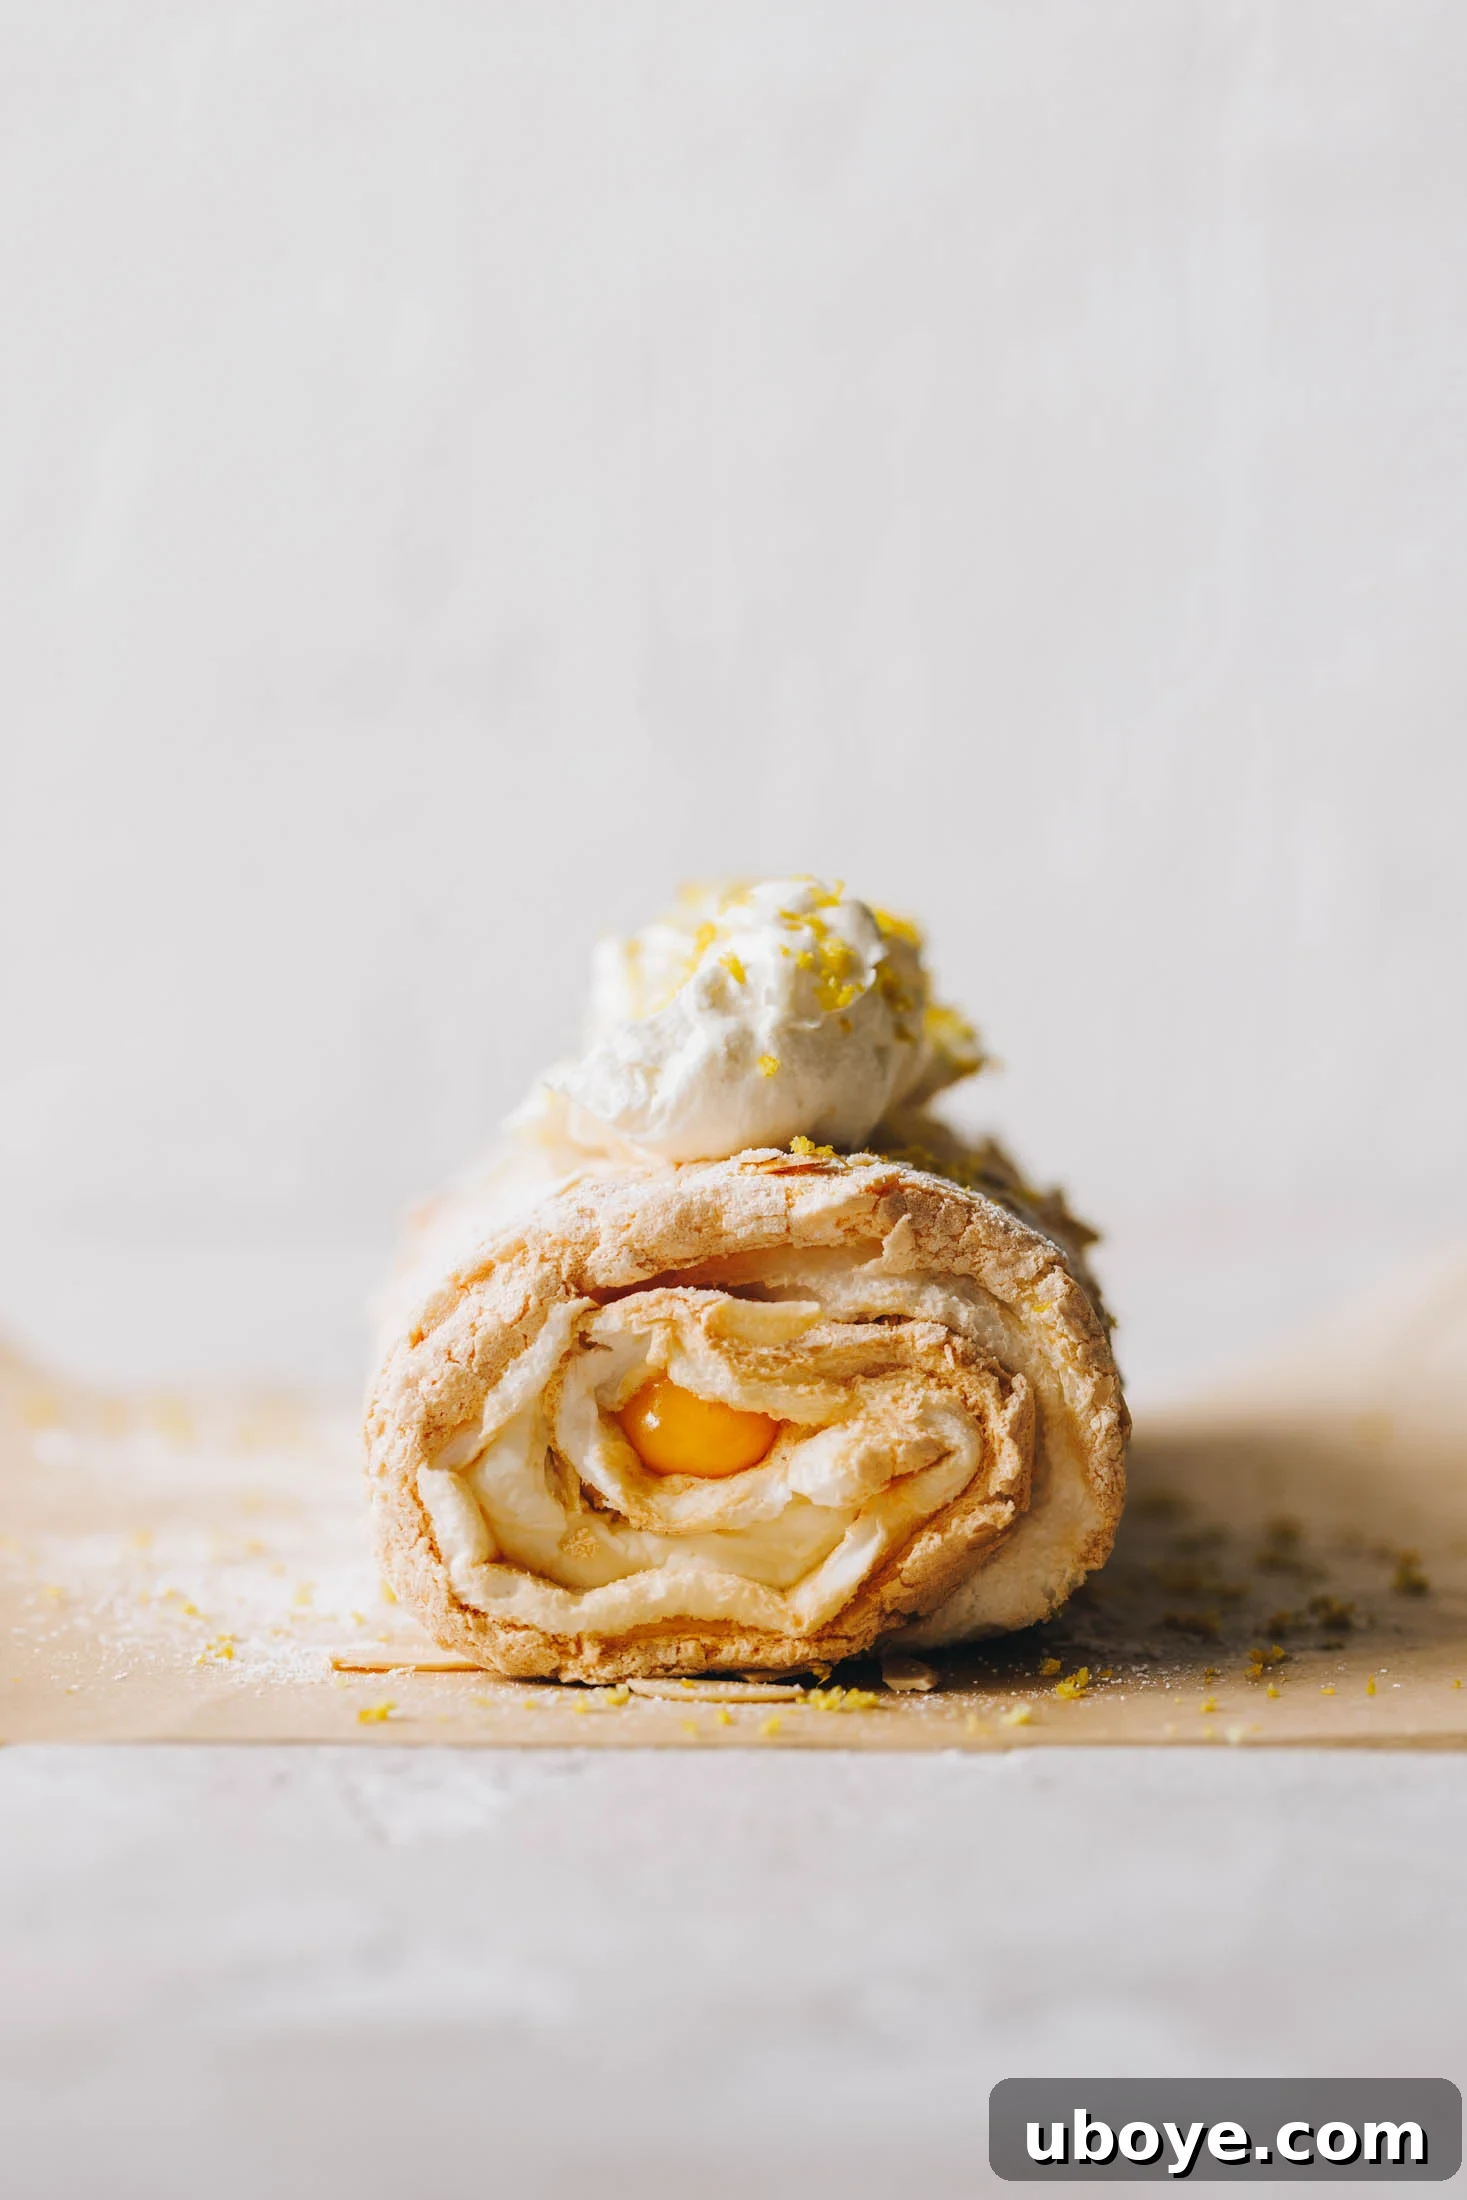
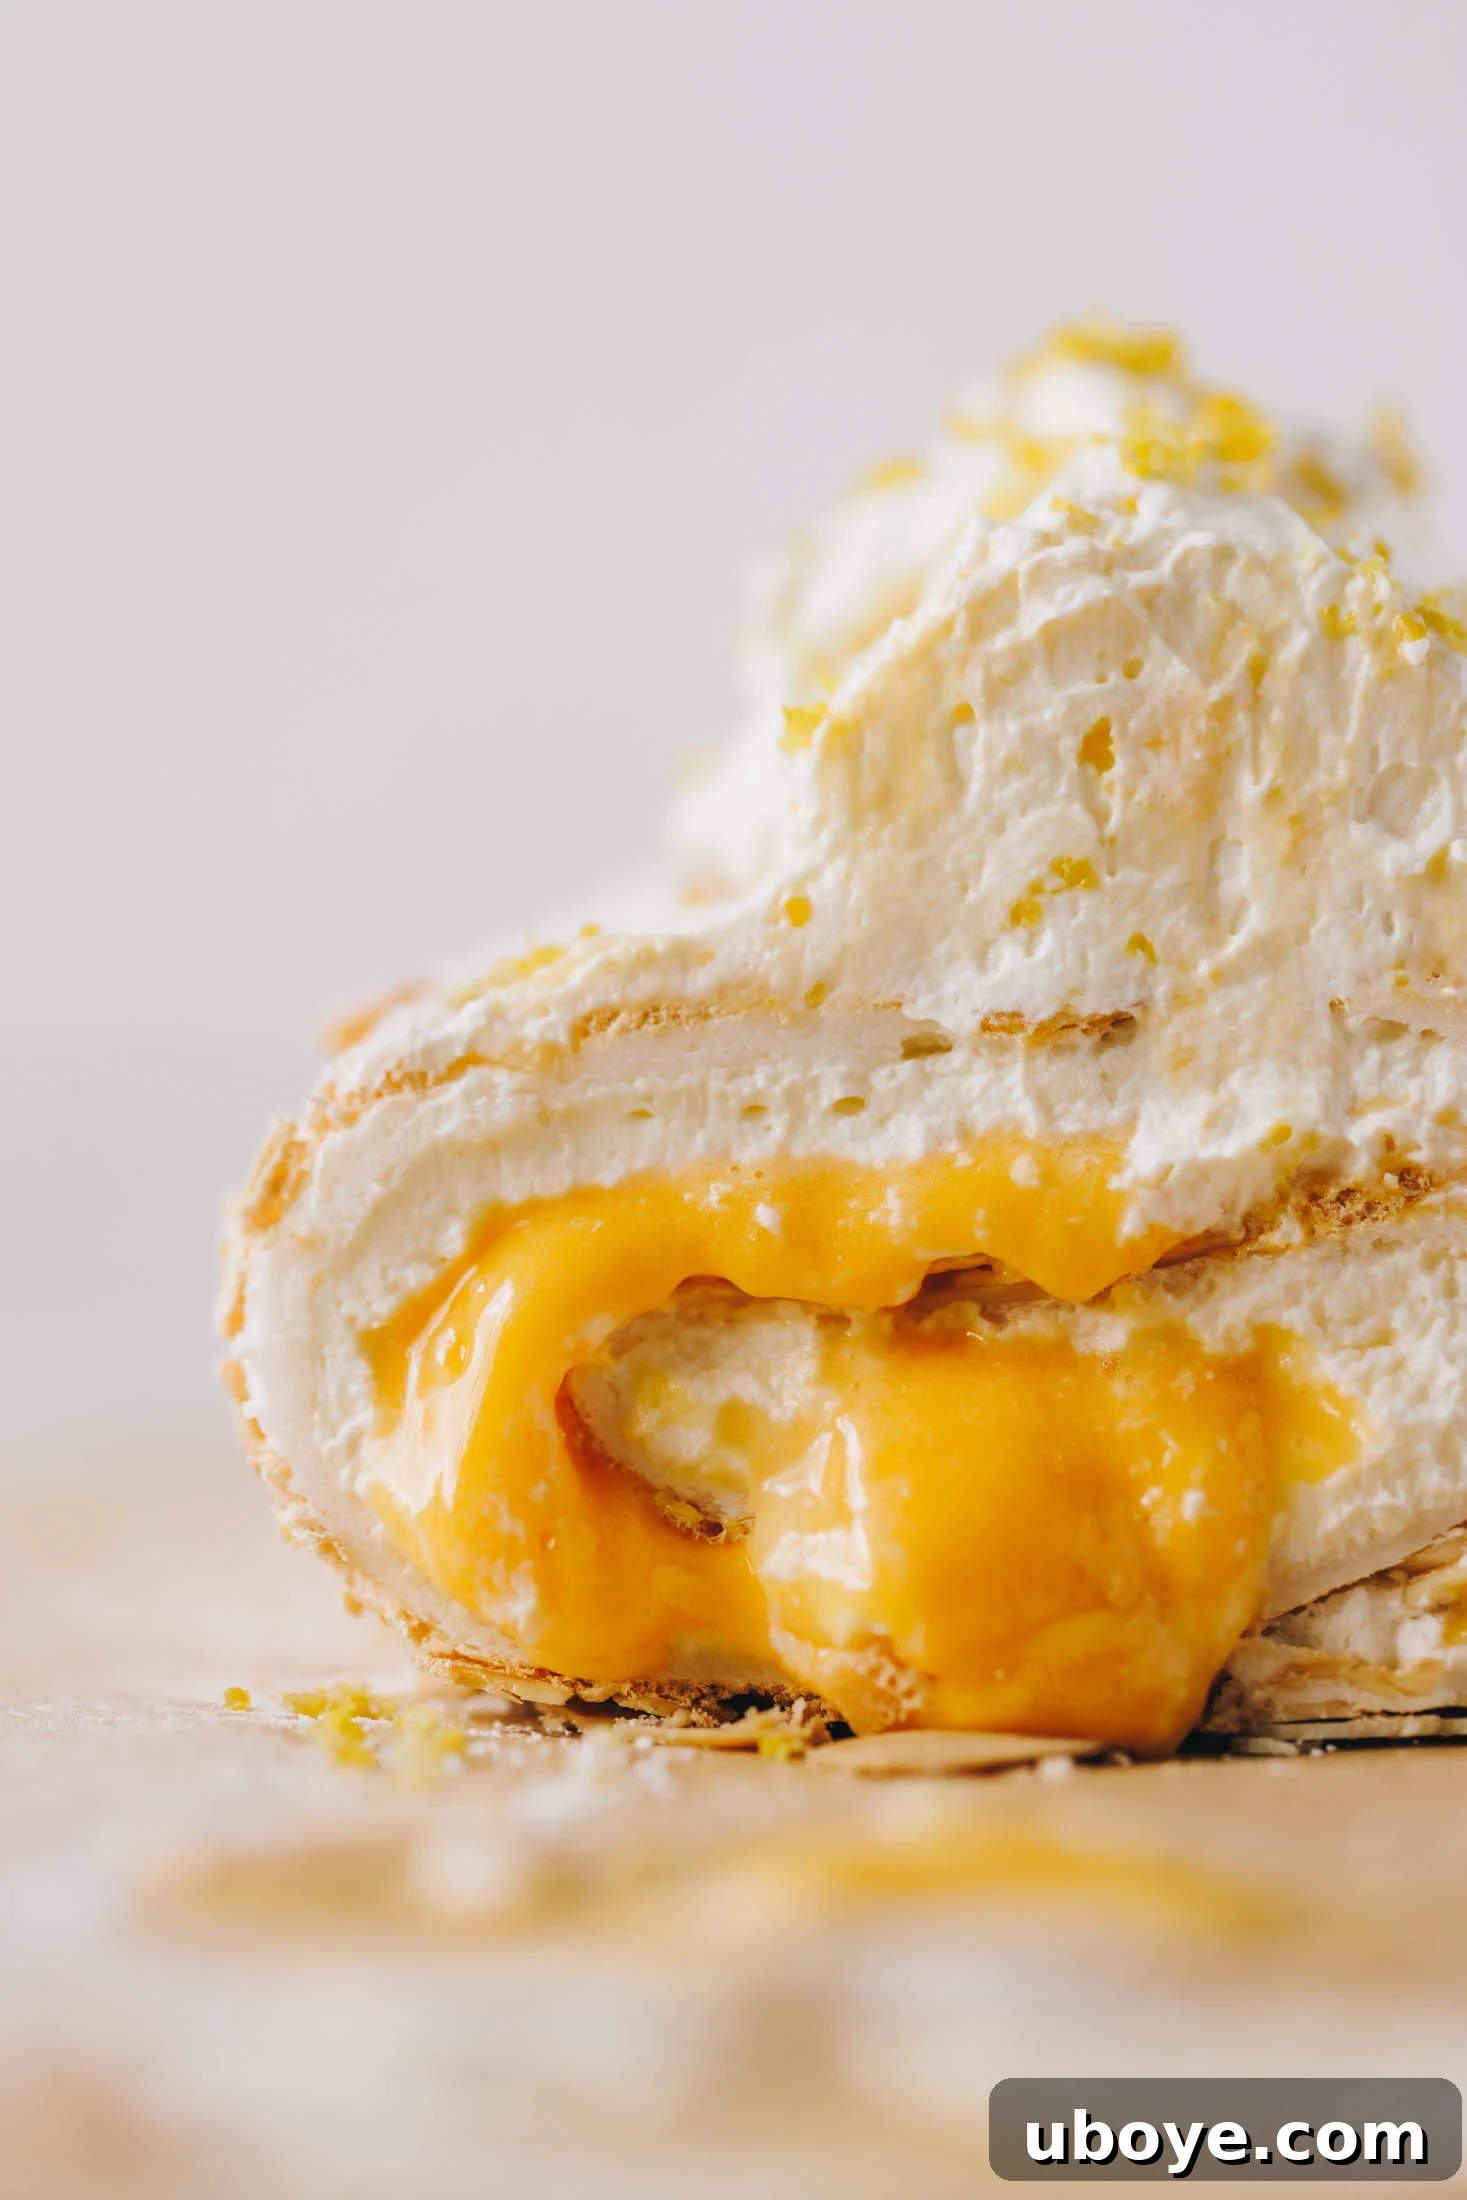
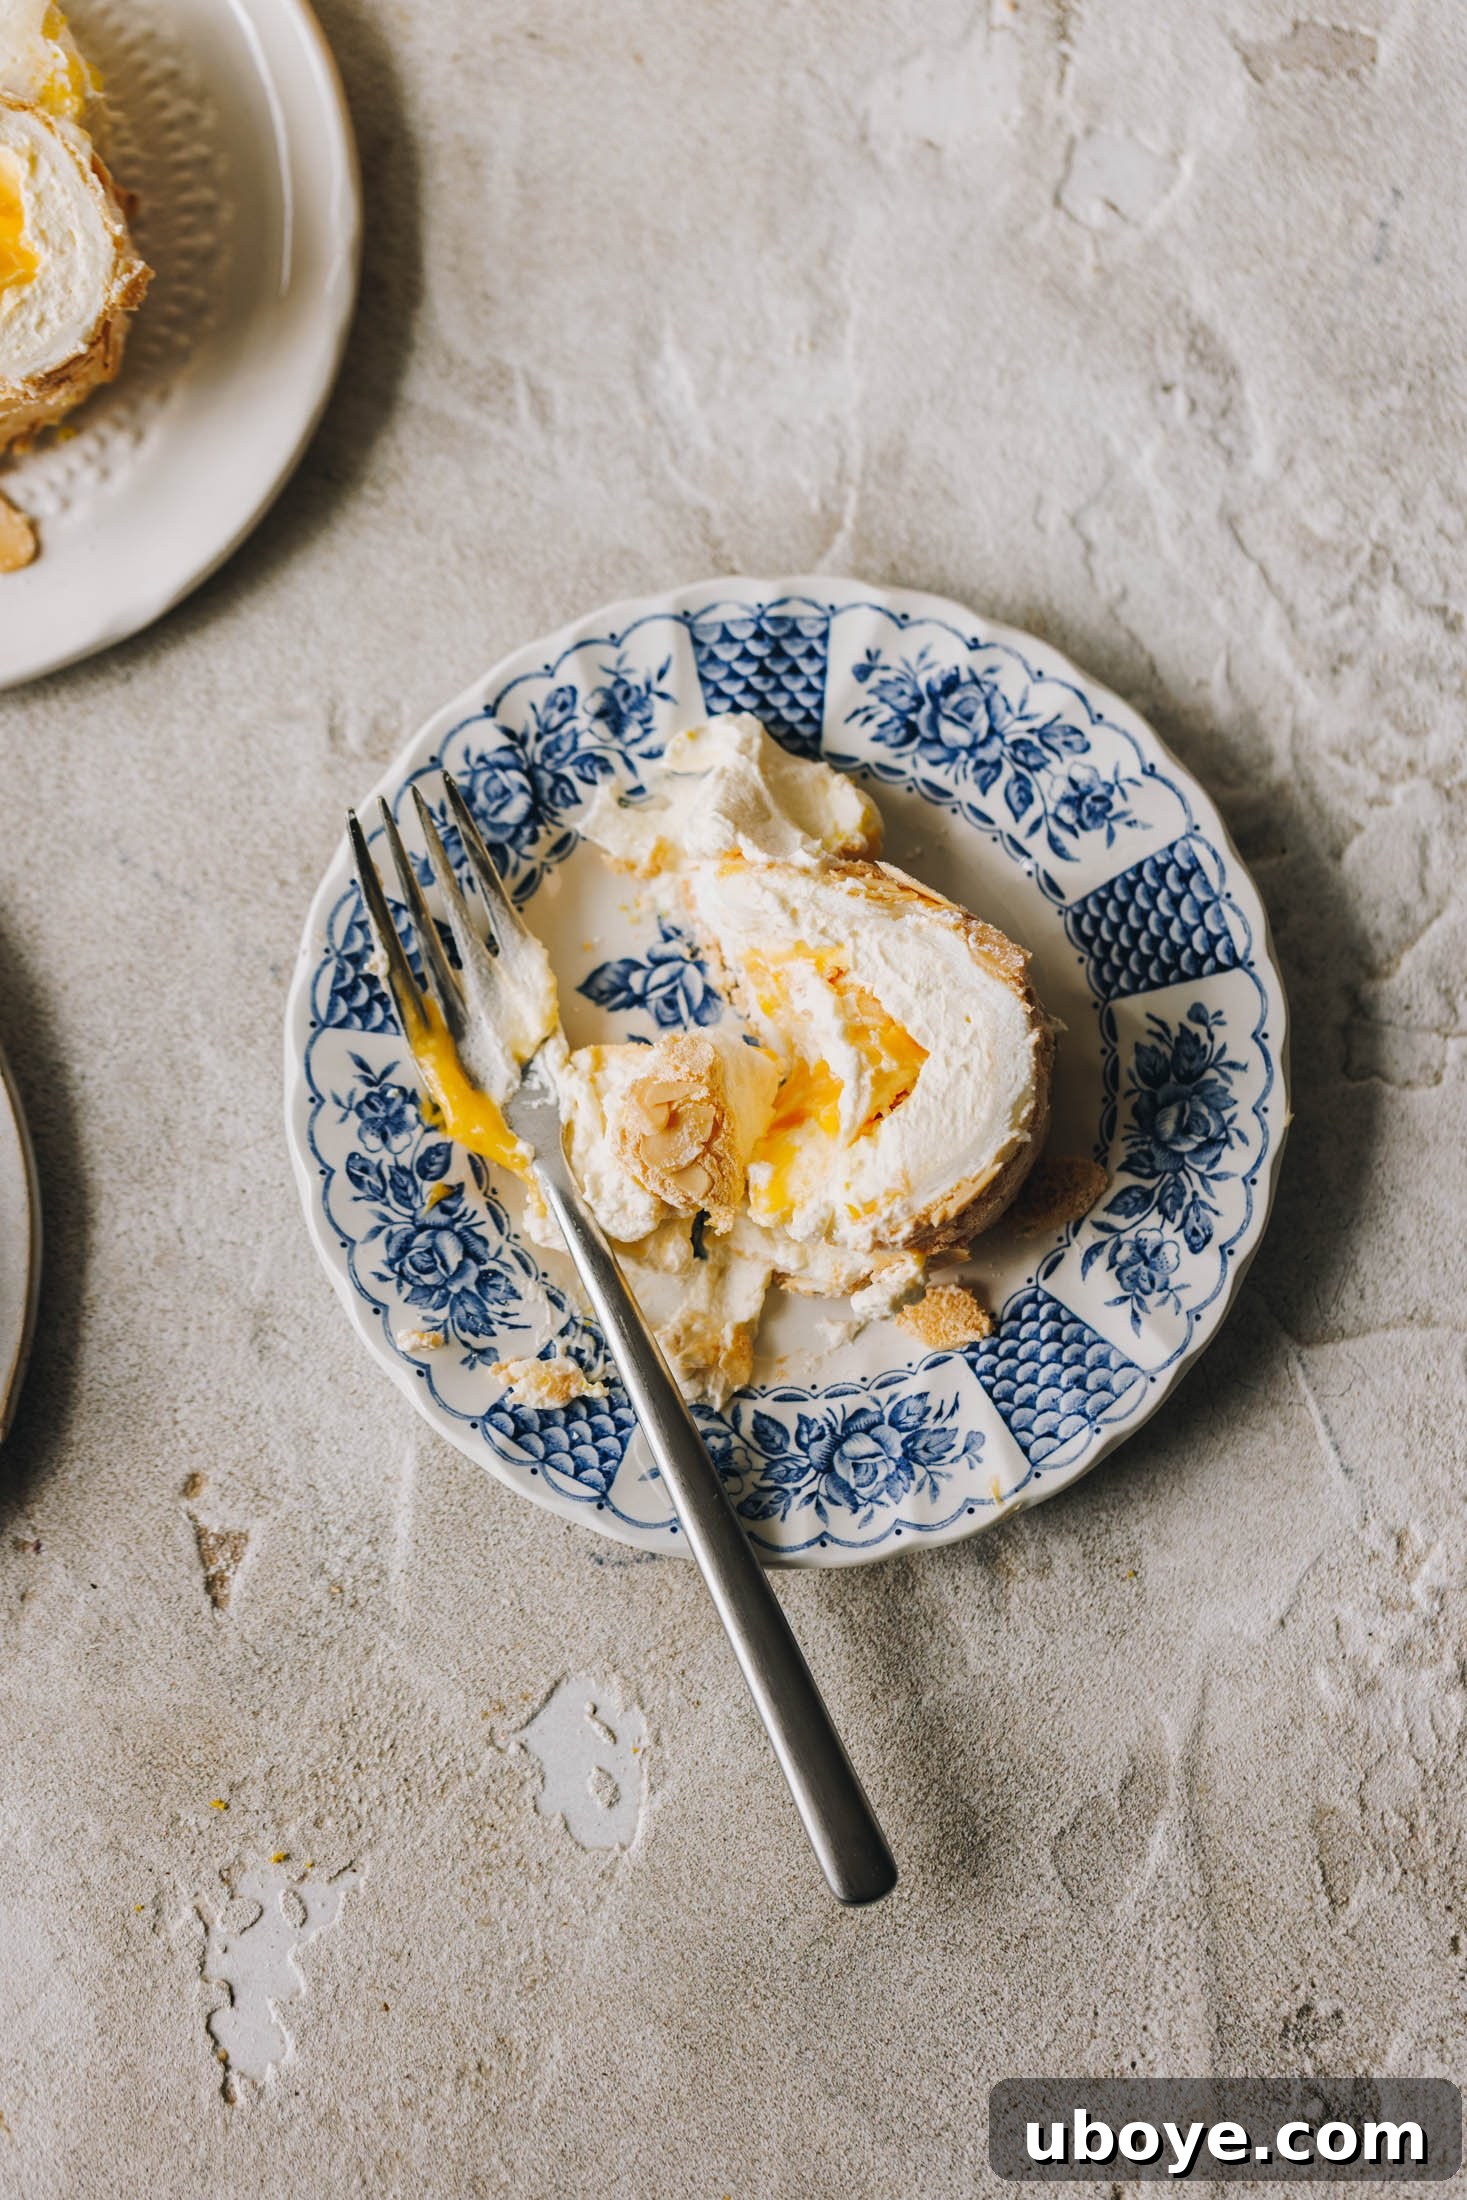
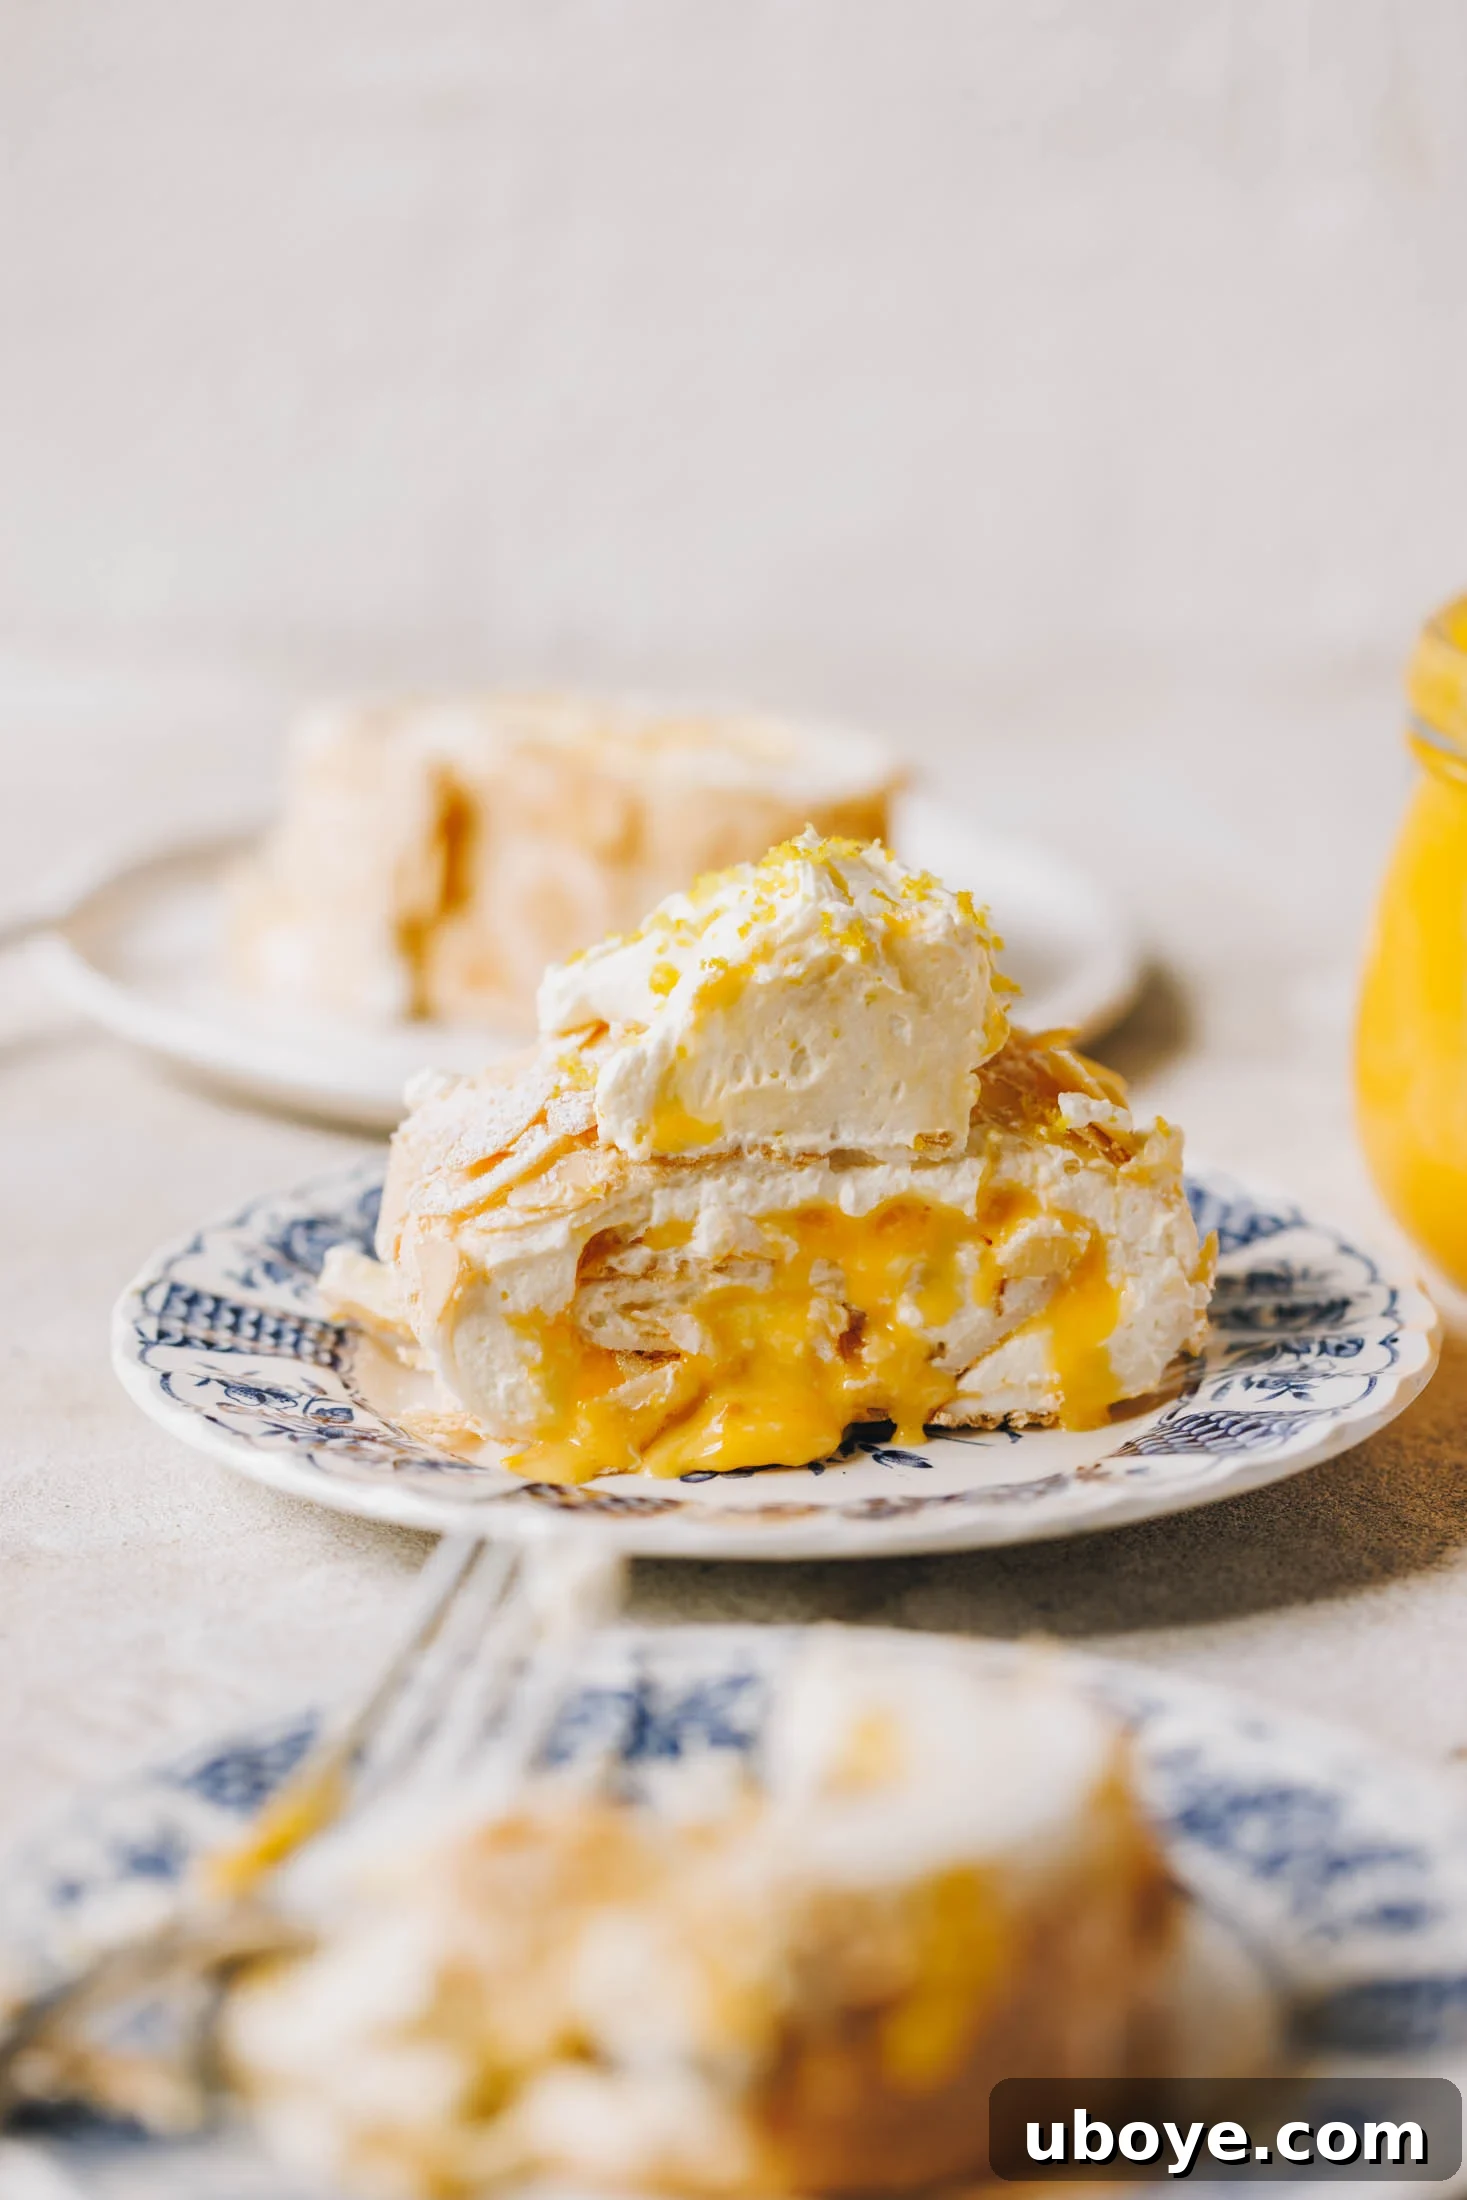
This Lemon Curd Meringue Roulade is undoubtedly the perfect dessert for any Summer gathering or a magnificent Christmas celebration. Its delicate appearance belies its ease of preparation, making it a truly rewarding bake. The meringue, with its ethereal crispness on the outside and wonderfully soft, chewy, marshmallow-like interior, forms the perfect canvas for the luxurious filling. Inside, you’ll discover generous ribbons of rich, buttery, tangy lemon curd, perfectly complemented by billowy clouds of freshly whipped cream. As a devout fan of lemon-flavored desserts, I can confidently say this roulade captures everything magical about lemon in a sweet treat.
One of the most appealing aspects of this recipe is its commitment to zero waste – it ingeniously utilizes both the egg whites and egg yolks. The whites are transformed into the spectacular, towering meringue, while the yolks become the foundational base for the vibrant, silky lemon curd. This means nothing goes to waste, a principle I deeply appreciate in the kitchen. In Australia, we often refer to this stunning creation as a pavlova roll, and despite its fancy presentation, it’s actually less daunting than crafting a traditional pavlova. The only step that might seem slightly technical is the rolling process, but I assure you, once you’ve done it once with a little guidance, it becomes far less intimidating than it sounds. It’s a skill easily mastered, leading to endless dessert possibilities.
Much like my beloved blueberry olive oil cake, this roulade is naturally gluten-free. This makes it an ideal choice when catering for a diverse crowd, ensuring everyone can indulge in this exquisite treat without worry. Its light and refreshing character ensures it’s never too heavy, making it an excellent finale to any meal, particularly during warmer months or as a lighter alternative to heavier holiday fare.
Essential Ingredients for Your Perfect Lemon Curd Meringue Roulade
The true genius of this lemon curd meringue roulade lies in its thoughtful use of ingredients, particularly how every part of the egg is utilized. This not only minimizes waste but also ensures maximum flavor and texture. The whites are whipped into an ethereal, light, and wonderfully marshmallowy meringue, while the yolks are whisked into a luxurious, rich, and buttery lemon curd. Here’s a closer look at the key components you’ll need to create this showstopper:
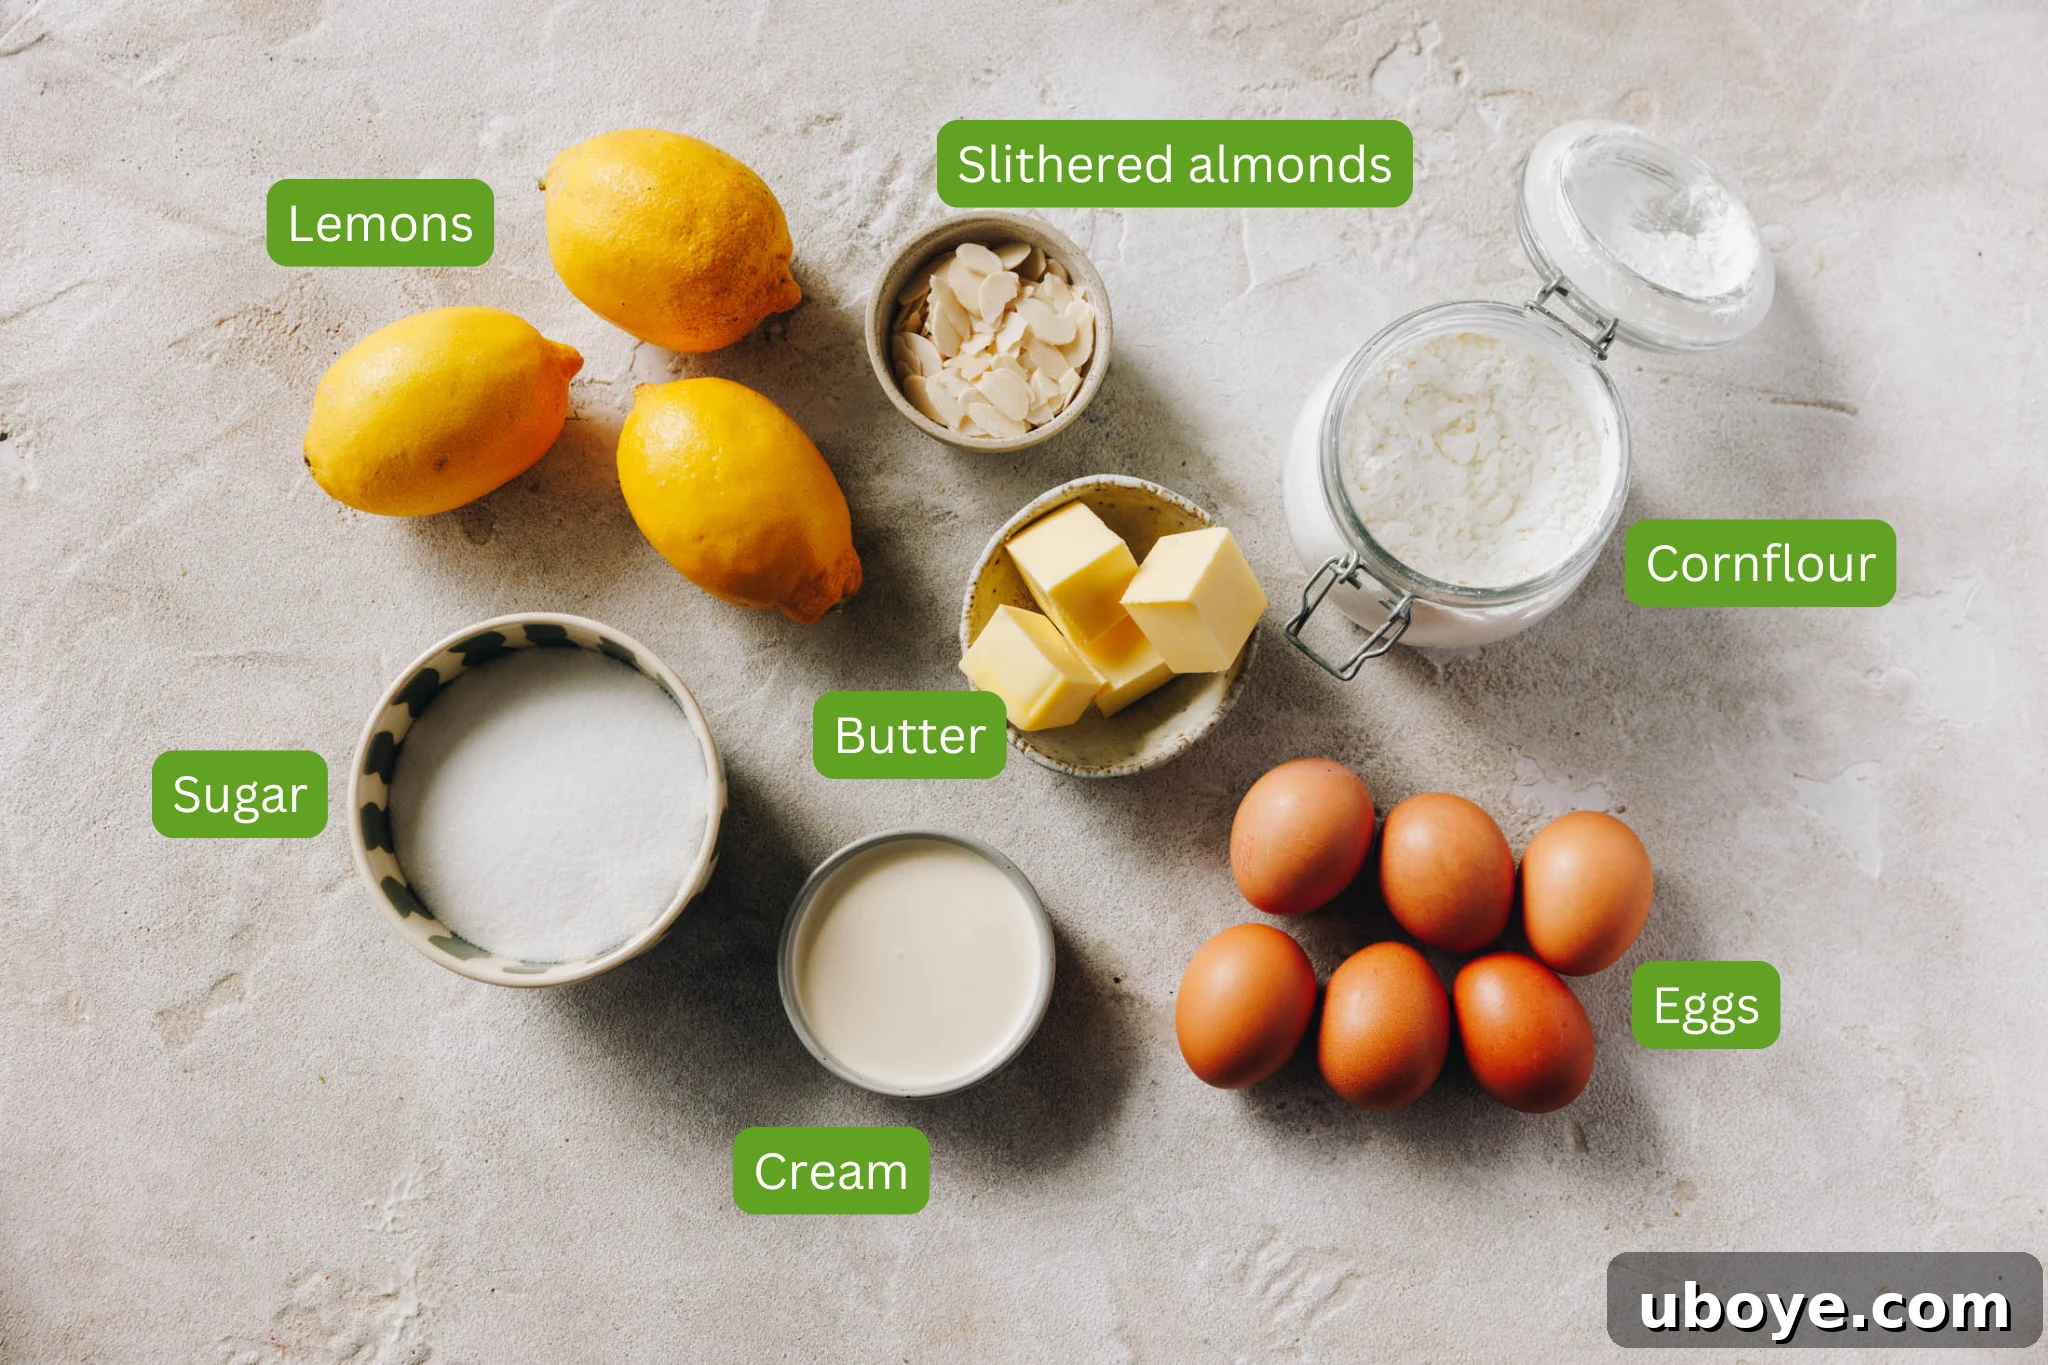
- Eggs: The foundation of our roulade and curd. This recipe thoughtfully employs the entire egg. The egg whites are the secret behind the light, fluffy, and soft meringue, transforming into a cloud-like confection when whipped correctly. Meanwhile, the rich egg yolks are essential for creating the luscious, creamy, and intensely flavored lemon curd, ensuring a decadent filling. This smart utilization means no ingredient is discarded.
- Caster Sugar: This fine-grained sugar is crucial for both components. In the meringue, it plays a vital role in stabilizing the egg whites, helping them achieve those desirable stiff, glossy peaks and contributing to the meringue’s crisp exterior and chewy interior. For the lemon curd, it provides the perfect balance of sweetness, harmonizing with the tartness of the lemons to create a well-rounded flavor profile.
- Lemons: Freshness is paramount here. Both the zest and the juice of fresh lemons are indispensable. The zest infuses the curd with an intense, aromatic citrus fragrance, while the juice provides the sharp, tangy brightness that cuts through the sweetness of the meringue and cream, preventing the dessert from being overly rich. Always opt for fresh, unwaxed lemons for the best flavor.
- Lemon Curd: While convenience might lead you to a store-bought jar, I passionately advocate for making your own! It’s astonishingly simple to whip together, requiring just a few basic ingredients and a little patience. Homemade lemon curd offers an unparalleled depth of flavor and a silky smooth texture that truly elevates this roulade. Plus, this recipe yields a generous amount, leaving you with delicious leftovers that can be stored in your fridge for up to two weeks, perfect for toast, scones, or other desserts.
- Cornflour (Cornstarch): A small but mighty addition to the meringue. Adding cornflour helps to achieve that signature marshmallow-soft, slightly chewy center that is characteristic of a perfect roulade. It also aids in preventing excessive cracking during the rolling process. Importantly, cornflour is naturally gluten-free, reinforcing that this delightful dessert is suitable for individuals with gluten sensitivities or those avoiding gluten.
- Thickened Cream: This forms the delightful creamy layer within the roulade, balancing the tart lemon curd and providing a cooling, luxurious element. When whipped with a touch of icing sugar, it becomes light, airy, and stable enough to hold the roulade’s shape.
- Flaked or Sliced Almonds: These are sprinkled over the meringue before baking, adding a beautiful golden-brown crunch and a subtle nutty flavor. Beyond taste and texture, they serve a practical purpose: they act as a non-stick layer, making it significantly easier to peel off the baking paper after baking and preventing the delicate meringue from sticking.
- Icing Sugar (Powdered Sugar): Used to sweeten and stabilize the whipped cream, ensuring it holds its form beautifully and adds to the overall sweetness without being gritty.
A full and precise list of all ingredients, including exact measurements, can be found in the detailed recipe card further below. Make sure to have all your ingredients at room temperature where specified for optimal results.
Your Step-by-Step Guide: How to Make Lemon Curd Meringue Roulade
While this lemon curd meringue roulade presents an elegant facade, the process of making it is surprisingly straightforward, with just one “technical” step that can be easily mastered. Don’t let the thought of rolling deter you from creating this show-stopping dessert! Follow my detailed steps below for success. For an in-depth guide on making the perfect homemade lemon curd, refer to my dedicated recipe here.
Crafting Your Meringue Base
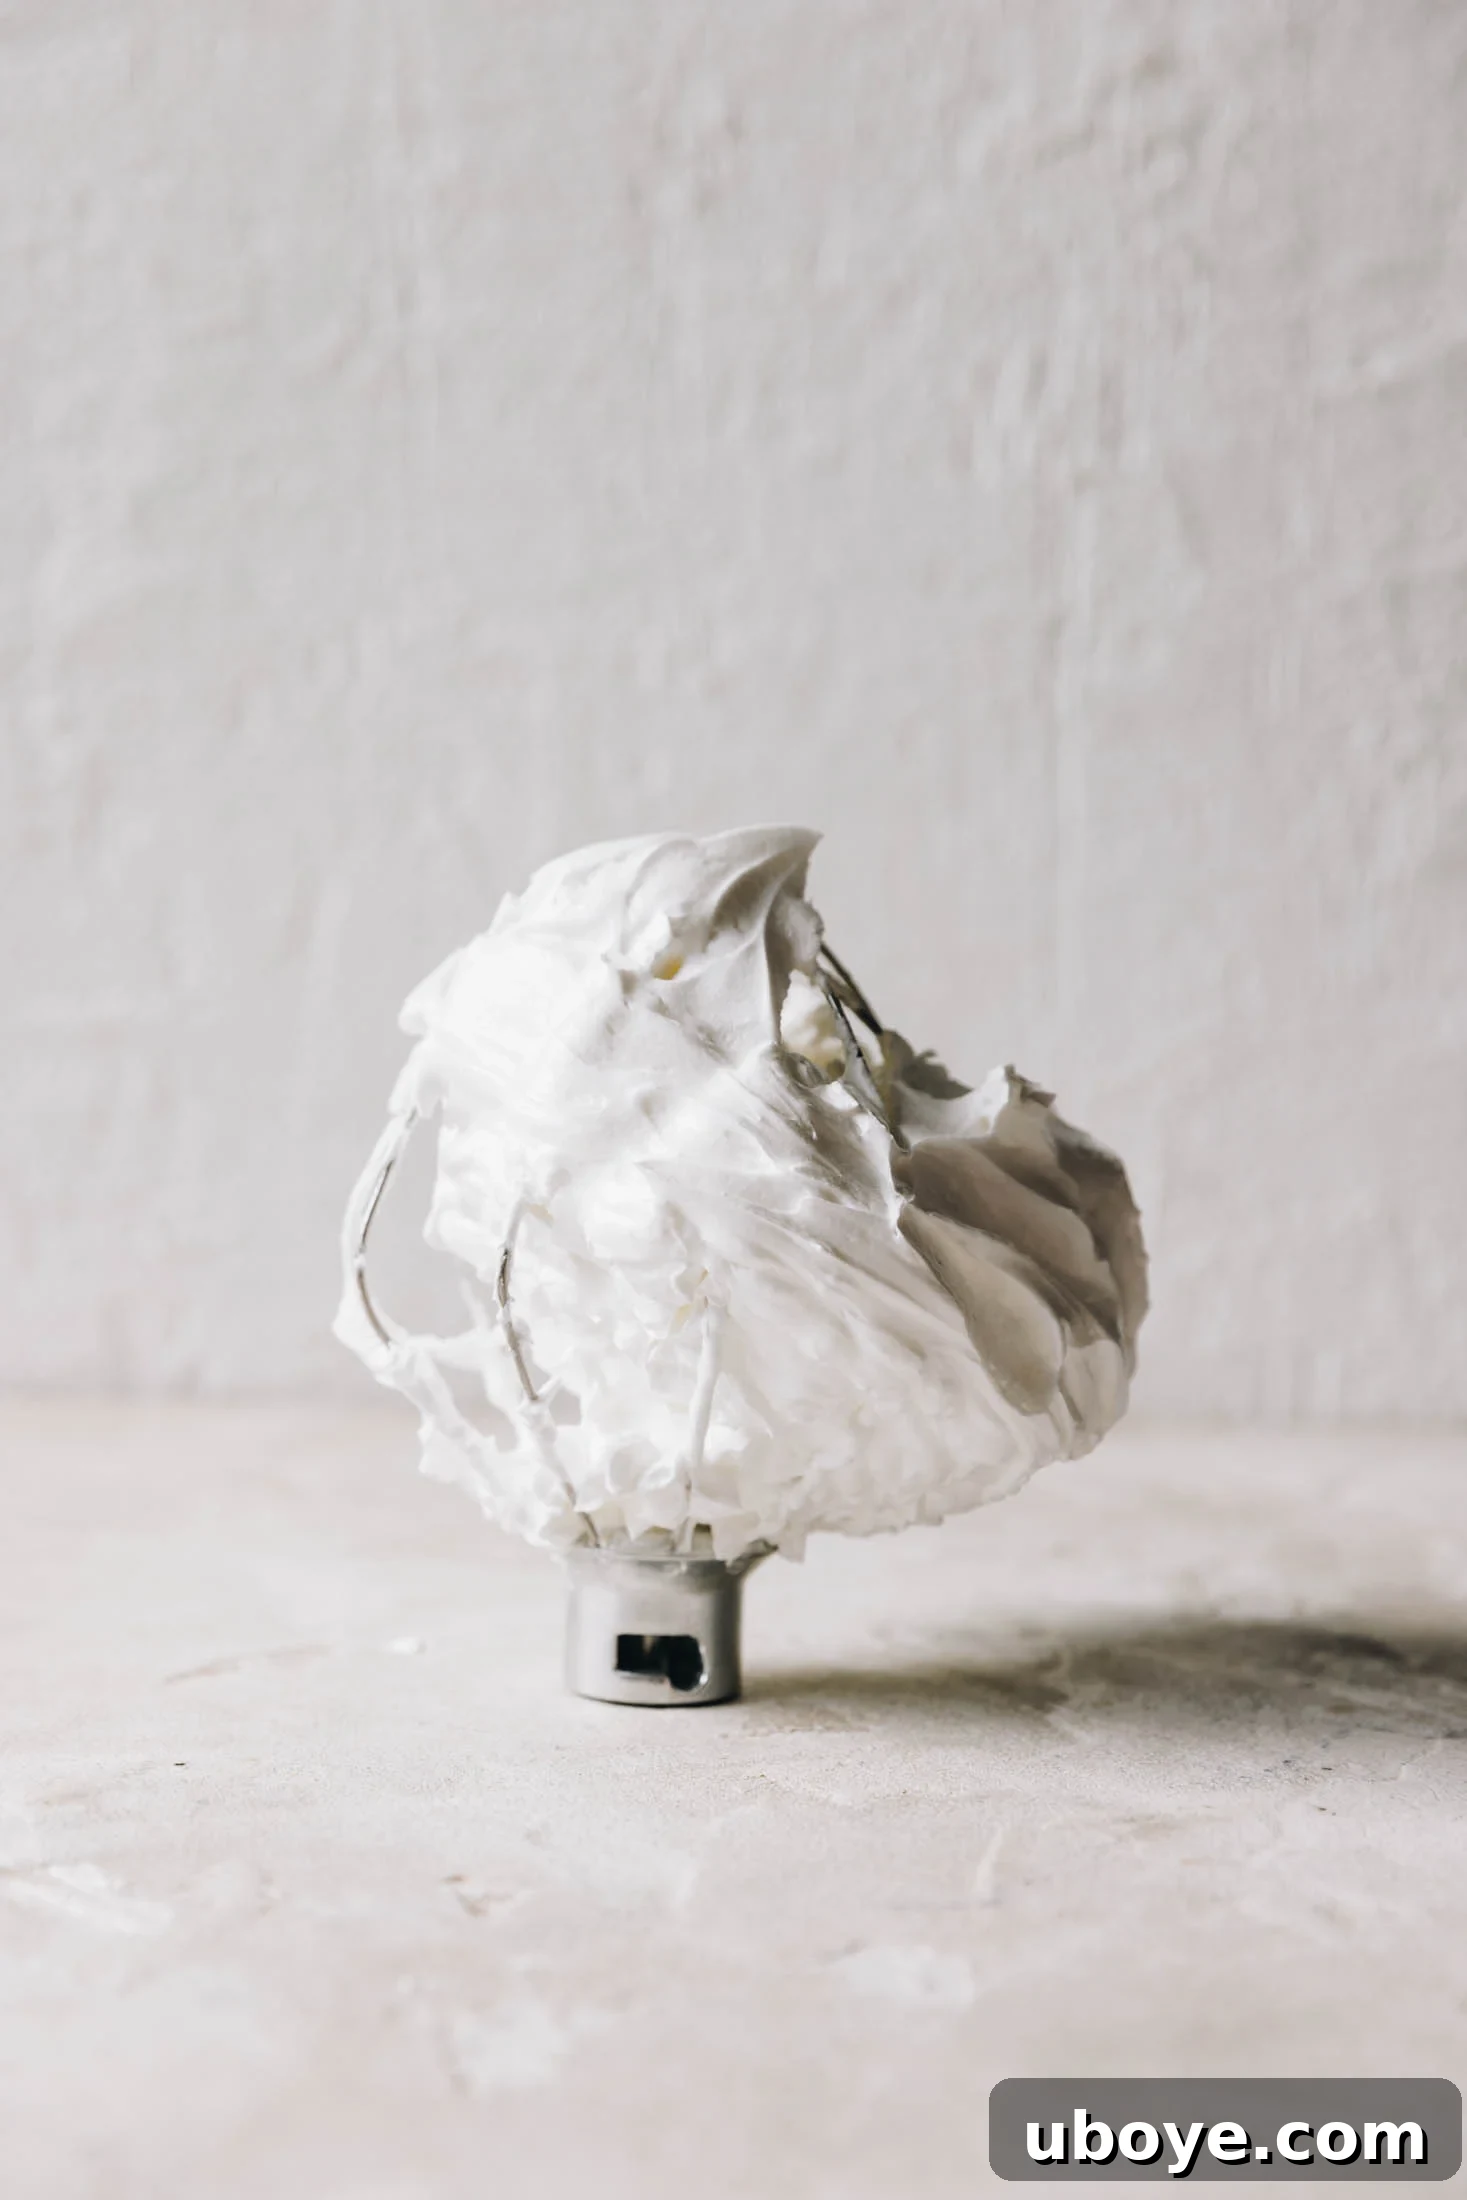
Step 1: Whisking the Meringue to Perfection. Begin by ensuring your egg whites are at room temperature, as this significantly aids in achieving maximum volume. In a clean stand mixer bowl (ensure it’s free of any grease, which can prevent stiff peaks), fitted with the whisk attachment, beat the egg whites on the highest speed. Continue whisking until they form stiff peaks – they should hold their shape when the whisk is lifted. Once you’ve reached this stage, gradually introduce the caster sugar, one tablespoon at a time, allowing about a minute between each addition. This slow introduction helps the sugar dissolve properly and stabilizes the meringue. Keep whisking until the meringue is incredibly stiff, smooth, and beautifully glossy. Finally, gently fold through the cornflour slurry (a mixture of cornflour and lemon juice/white vinegar) with a spatula. This slurry is key to creating that desirable soft, marshmallowy center.
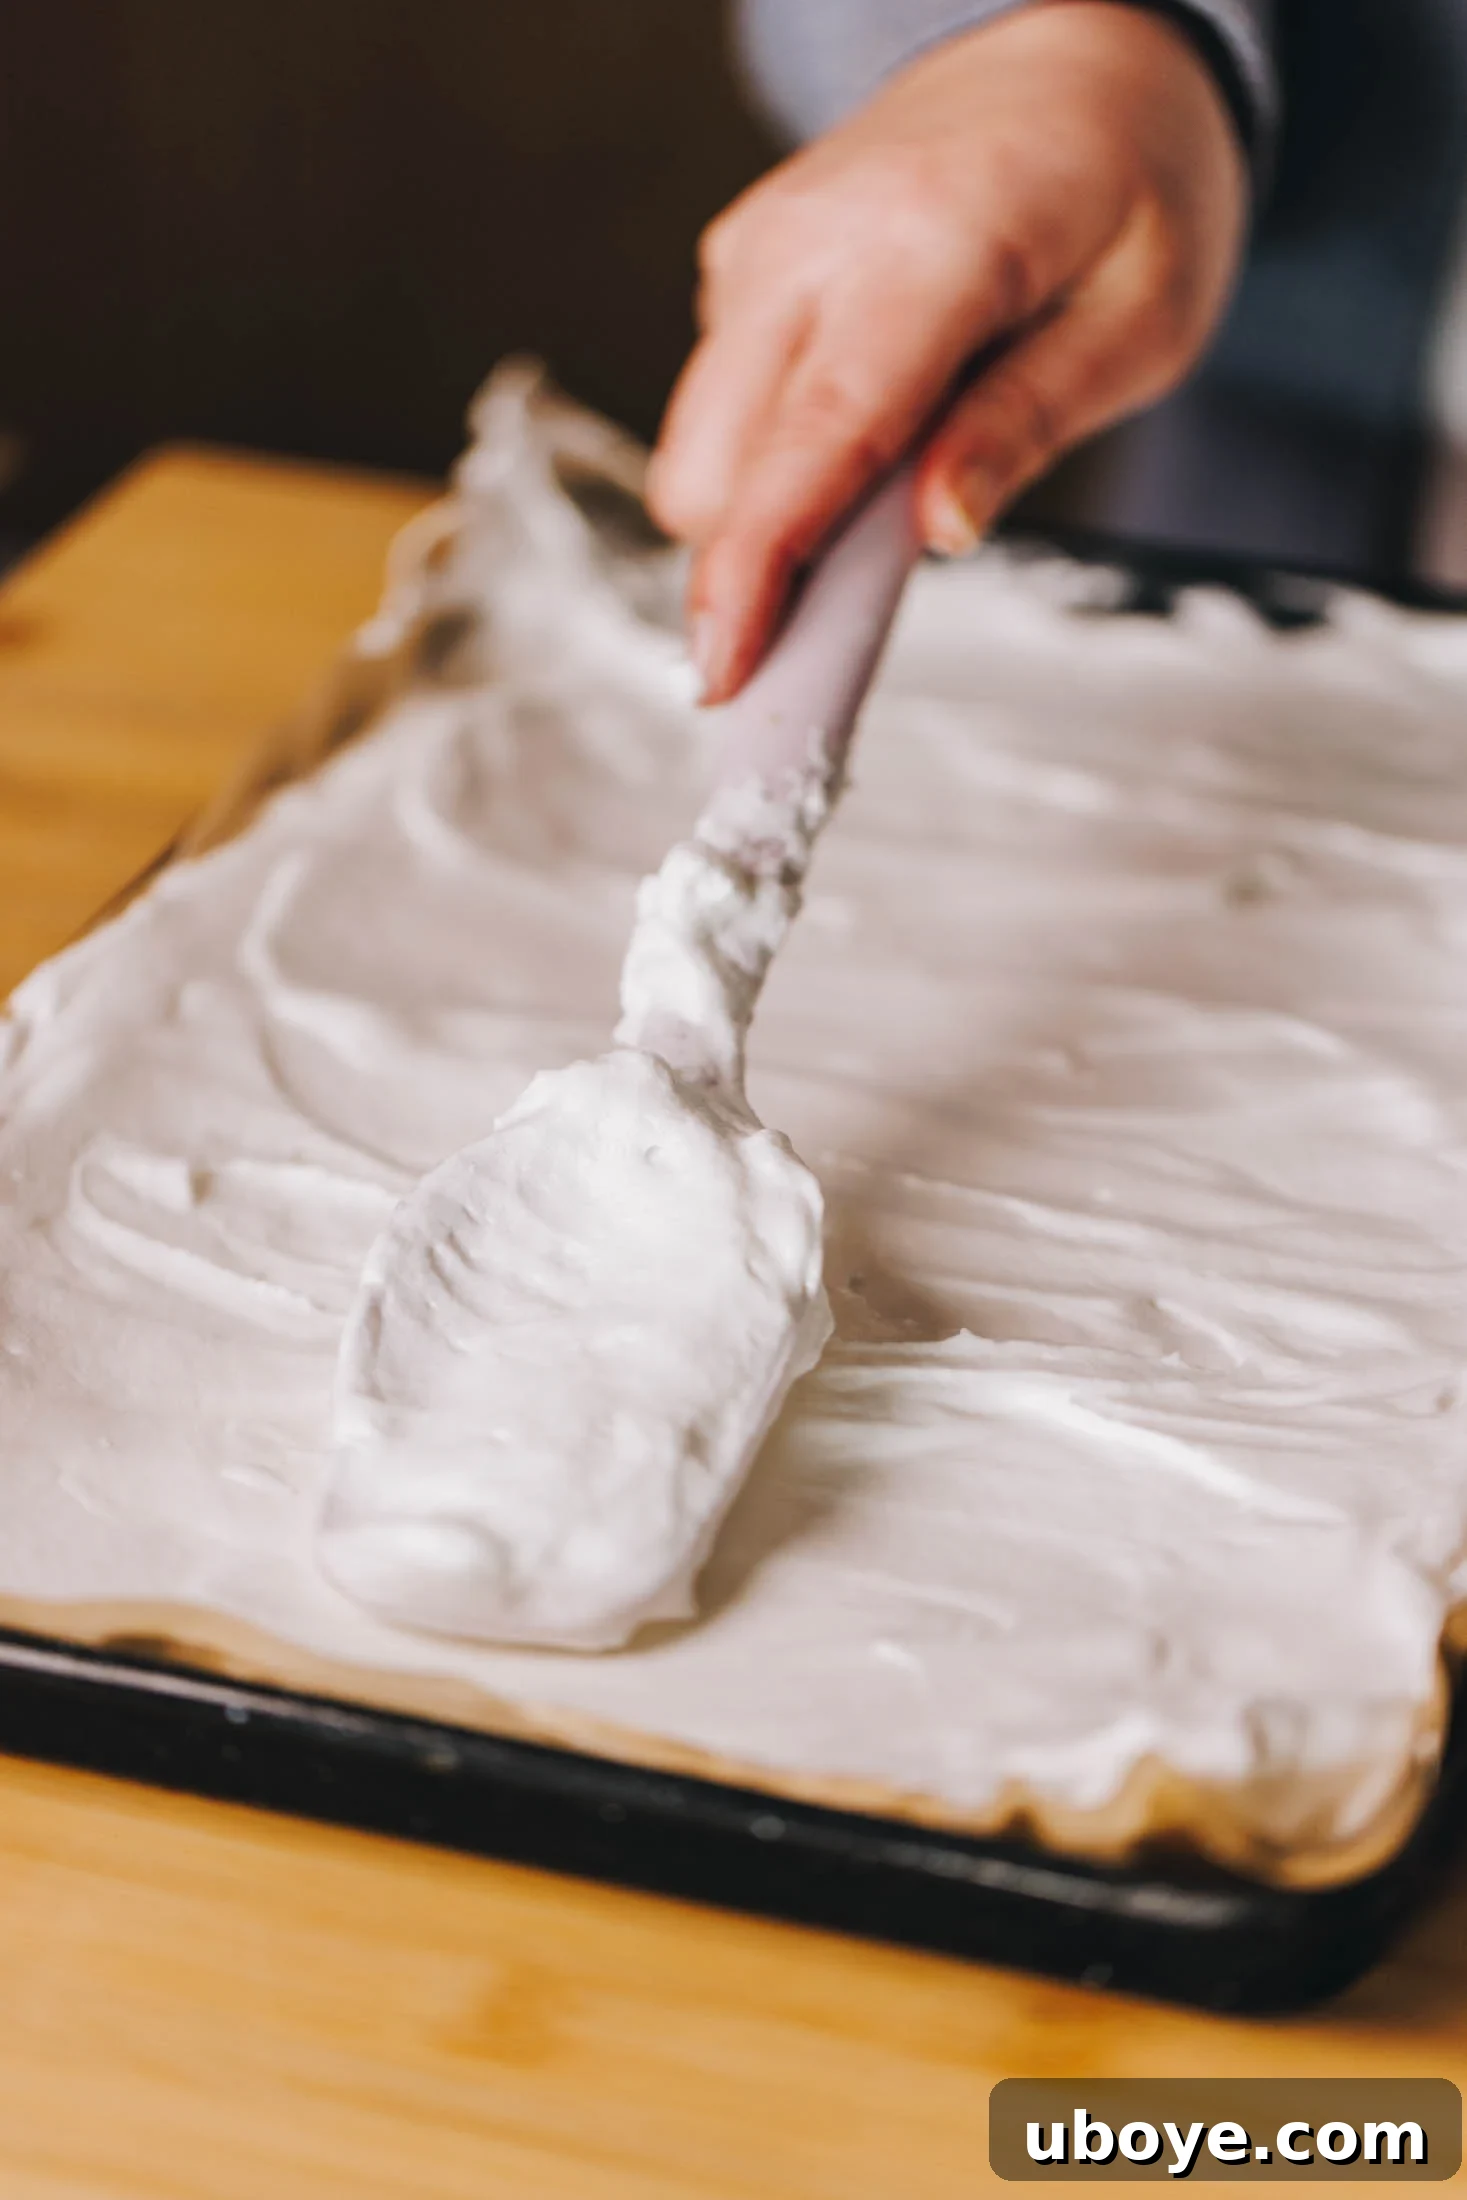
Step 2: Spreading the Meringue Evenly. Prepare a 23 x 33cm baking tray by lining it with baking paper. For extra security against sticking, you can lightly grease the tray with a tiny bit of olive oil before placing the paper. Carefully spread the whipped meringue mixture onto the pre-lined baking tray using a spatula or an offset palette knife. It’s crucial to ensure the meringue is spread as evenly as possible, reaching right up to the edges or lip of the baking tray. An even layer will ensure uniform baking and an easier roll later on.
Baking and Preparing for Assembly
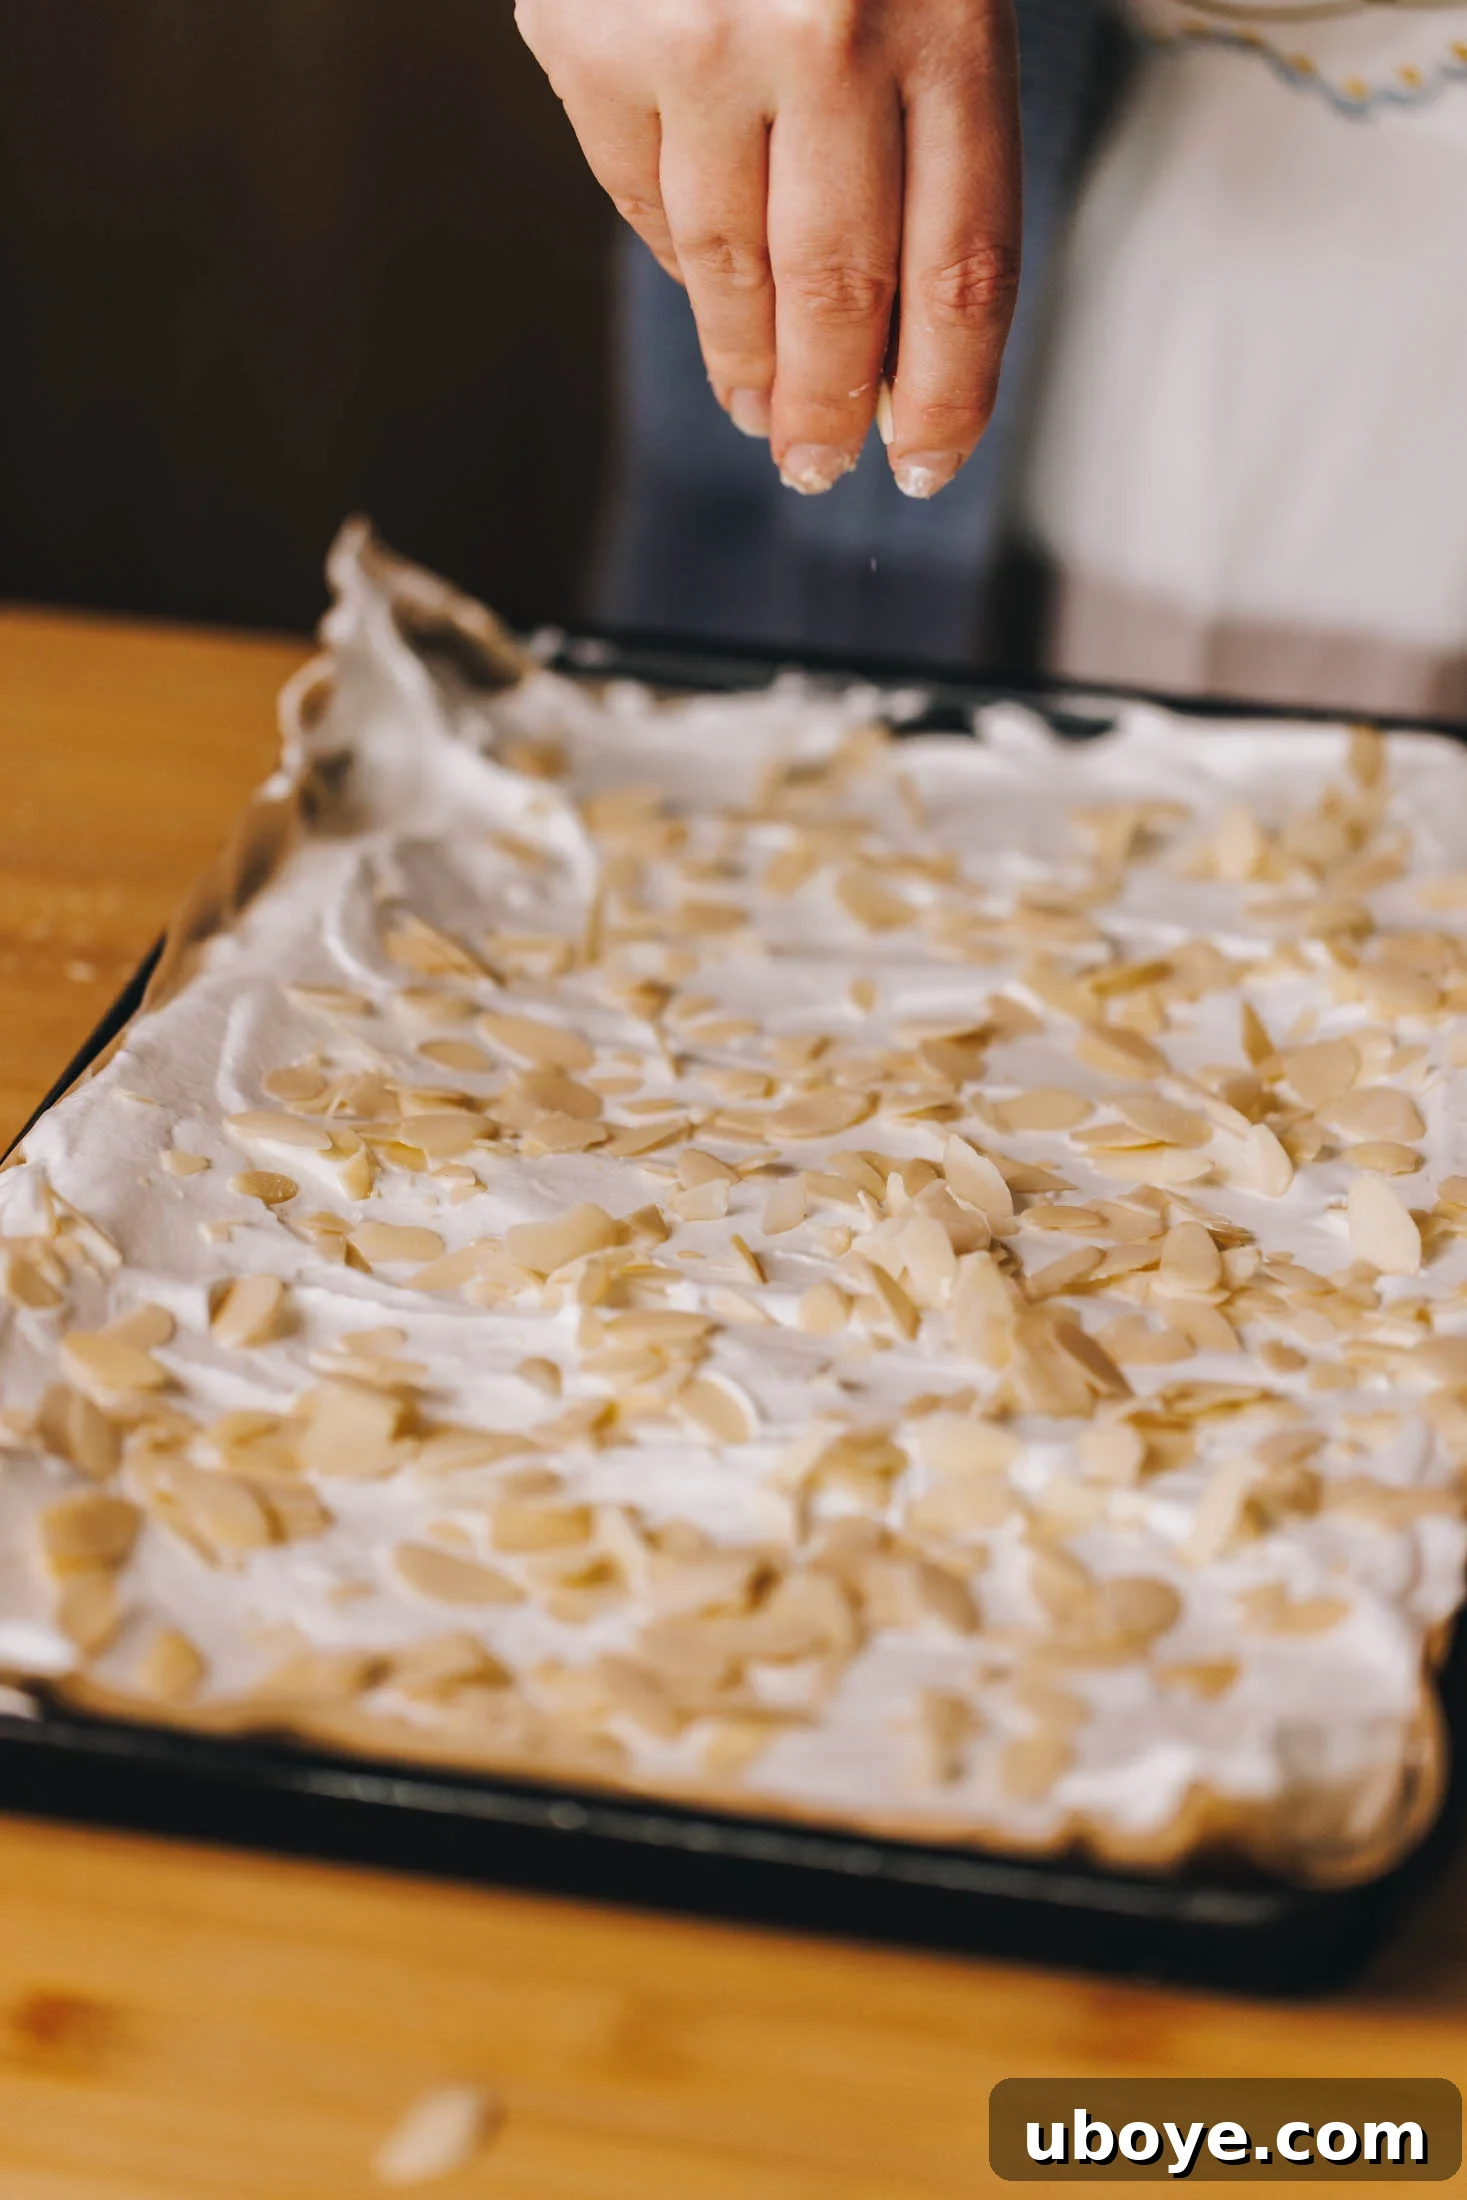
Step 3: Baking to a Golden Finish. Generously sprinkle the flaked or slithered almonds all over the surface of the spread meringue. This step isn’t just for aesthetics; the almonds help prevent the meringue from sticking to the baking paper, which is a common challenge. Bake in your preheated oven at 350°F/180°C for an initial 8 minutes. Then, reduce the oven temperature to 285°F/140°C and continue baking for another 20 minutes. The meringue is perfectly baked when the almonds are golden brown, and the meringue feels firm to the touch with a slight, gentle springiness. It should not be overly dry or brittle, as this will lead to excessive cracking during rolling.
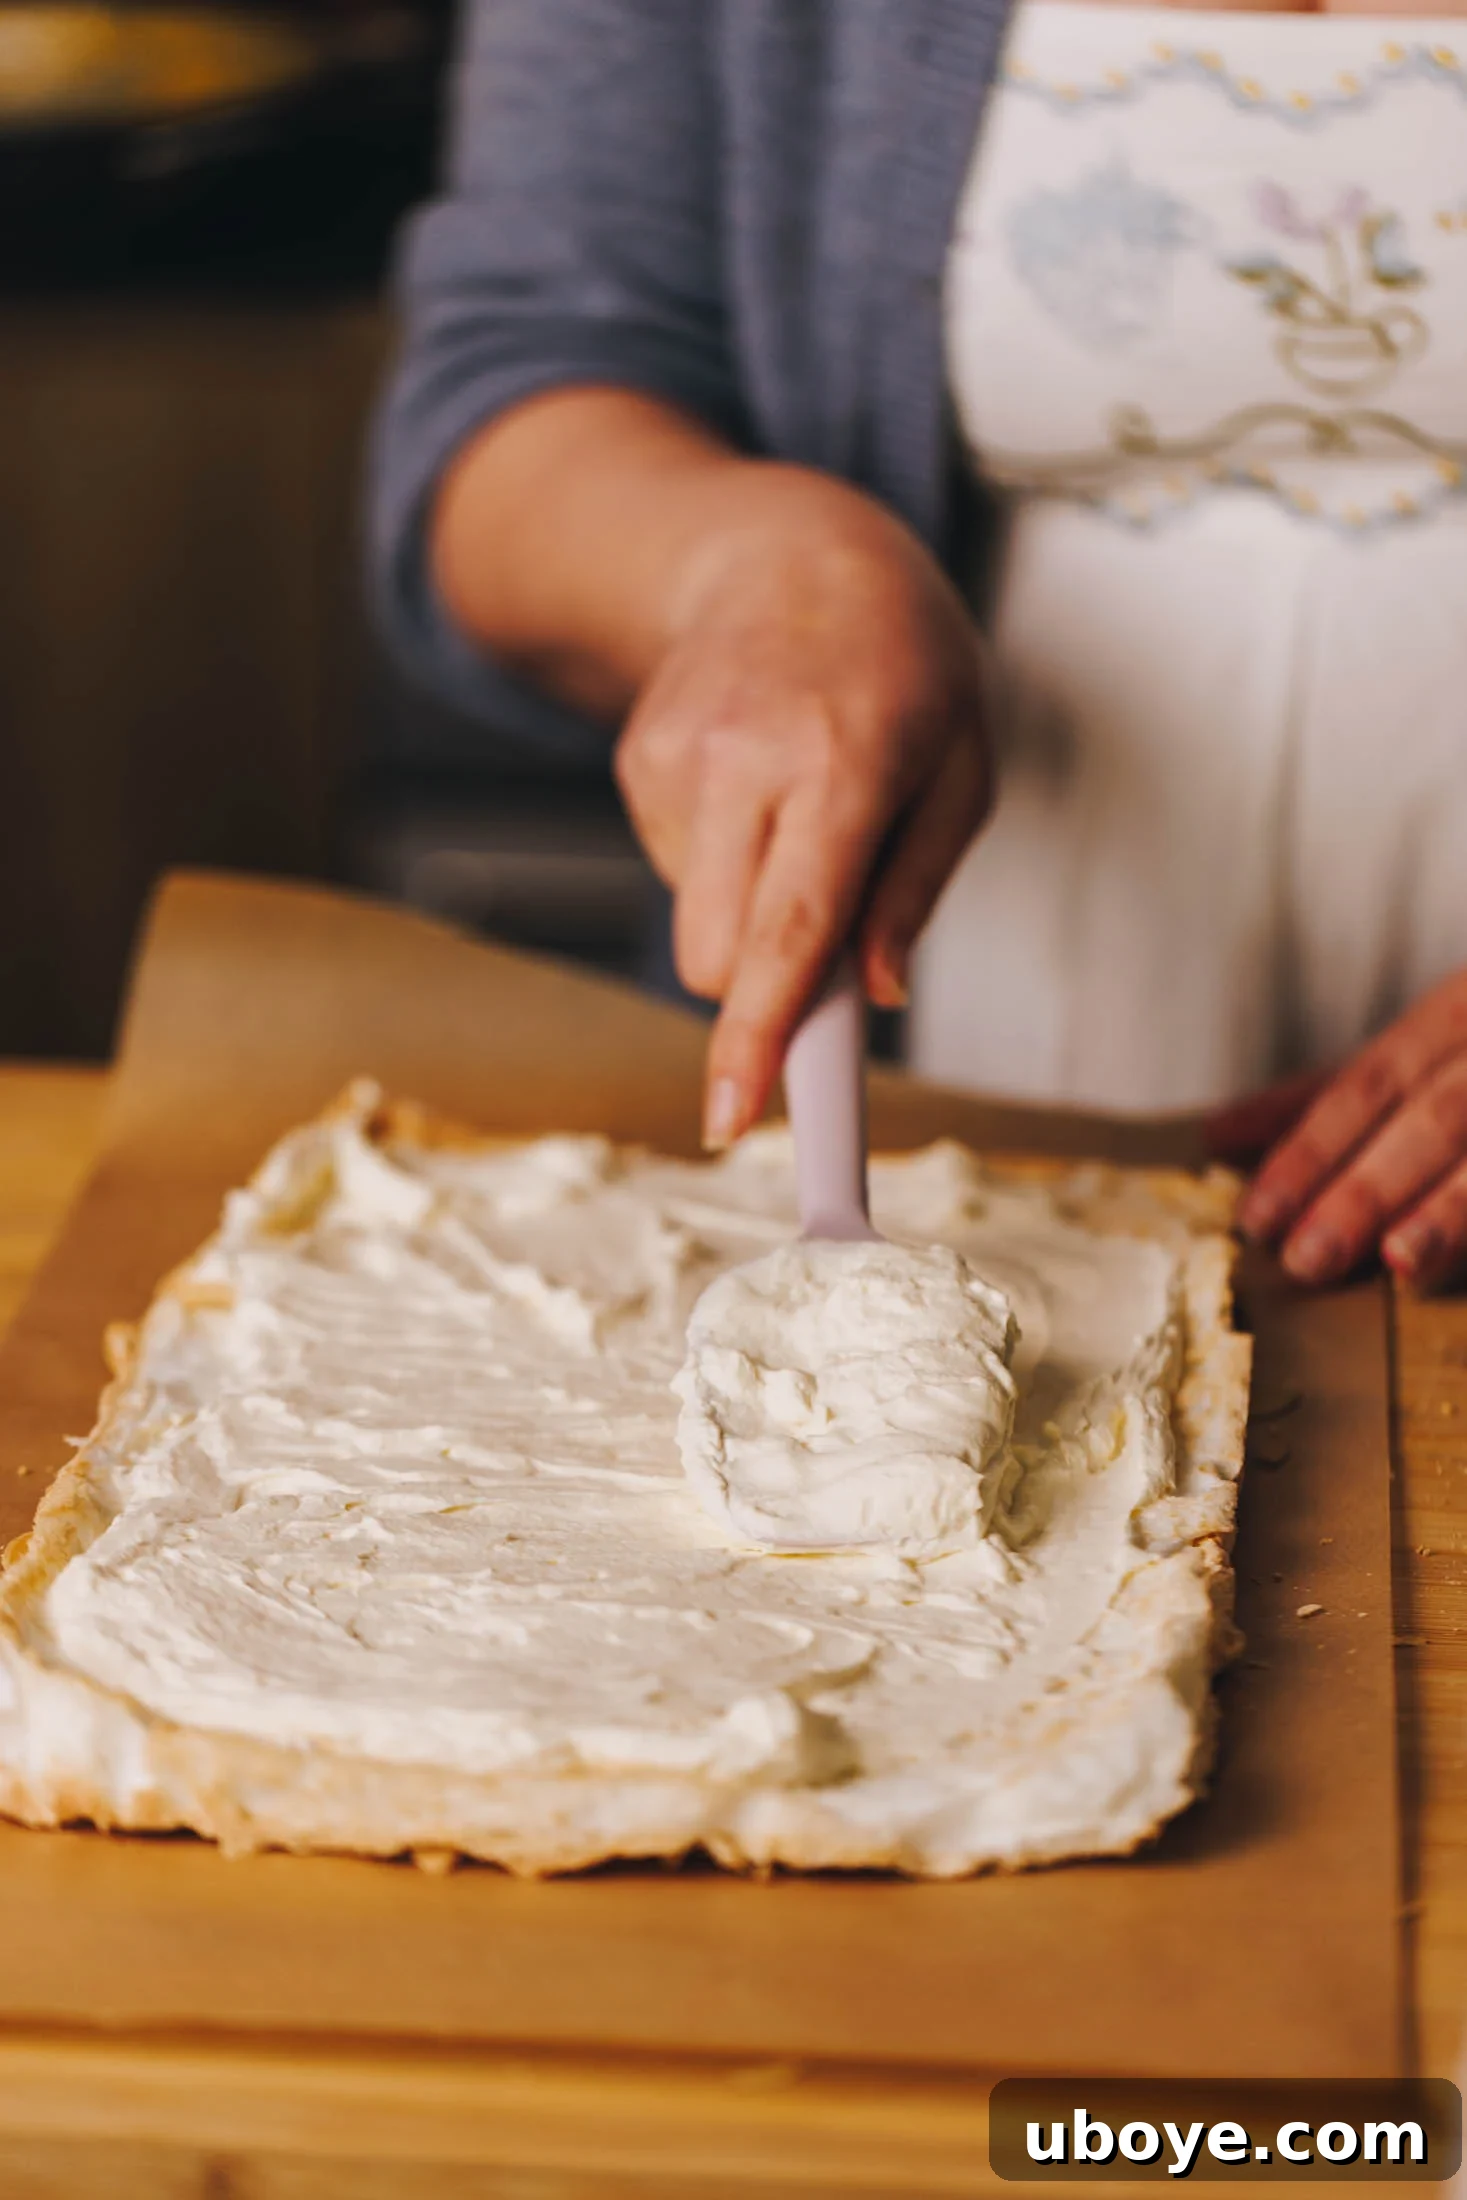
Step 4: Cooling and Whipped Cream Prep. As soon as the meringue is out of the oven, immediately flip the entire baking tray over onto a fresh, clean piece of baking paper. The baked meringue side should now be facing down onto the new paper. Carefully remove the original baking tin, then gently peel off the baking paper that was used for baking. This quick flip helps to keep the meringue flexible. Allow the meringue to cool for about 10 minutes. While it’s cooling, prepare your whipped cream by whisking thickened cream with icing sugar in a stand mixer until it forms soft peaks. Be mindful not to over-whisk, as it can quickly turn grainy. Once cooled, spread an even layer of the freshly whipped cream over the meringue.
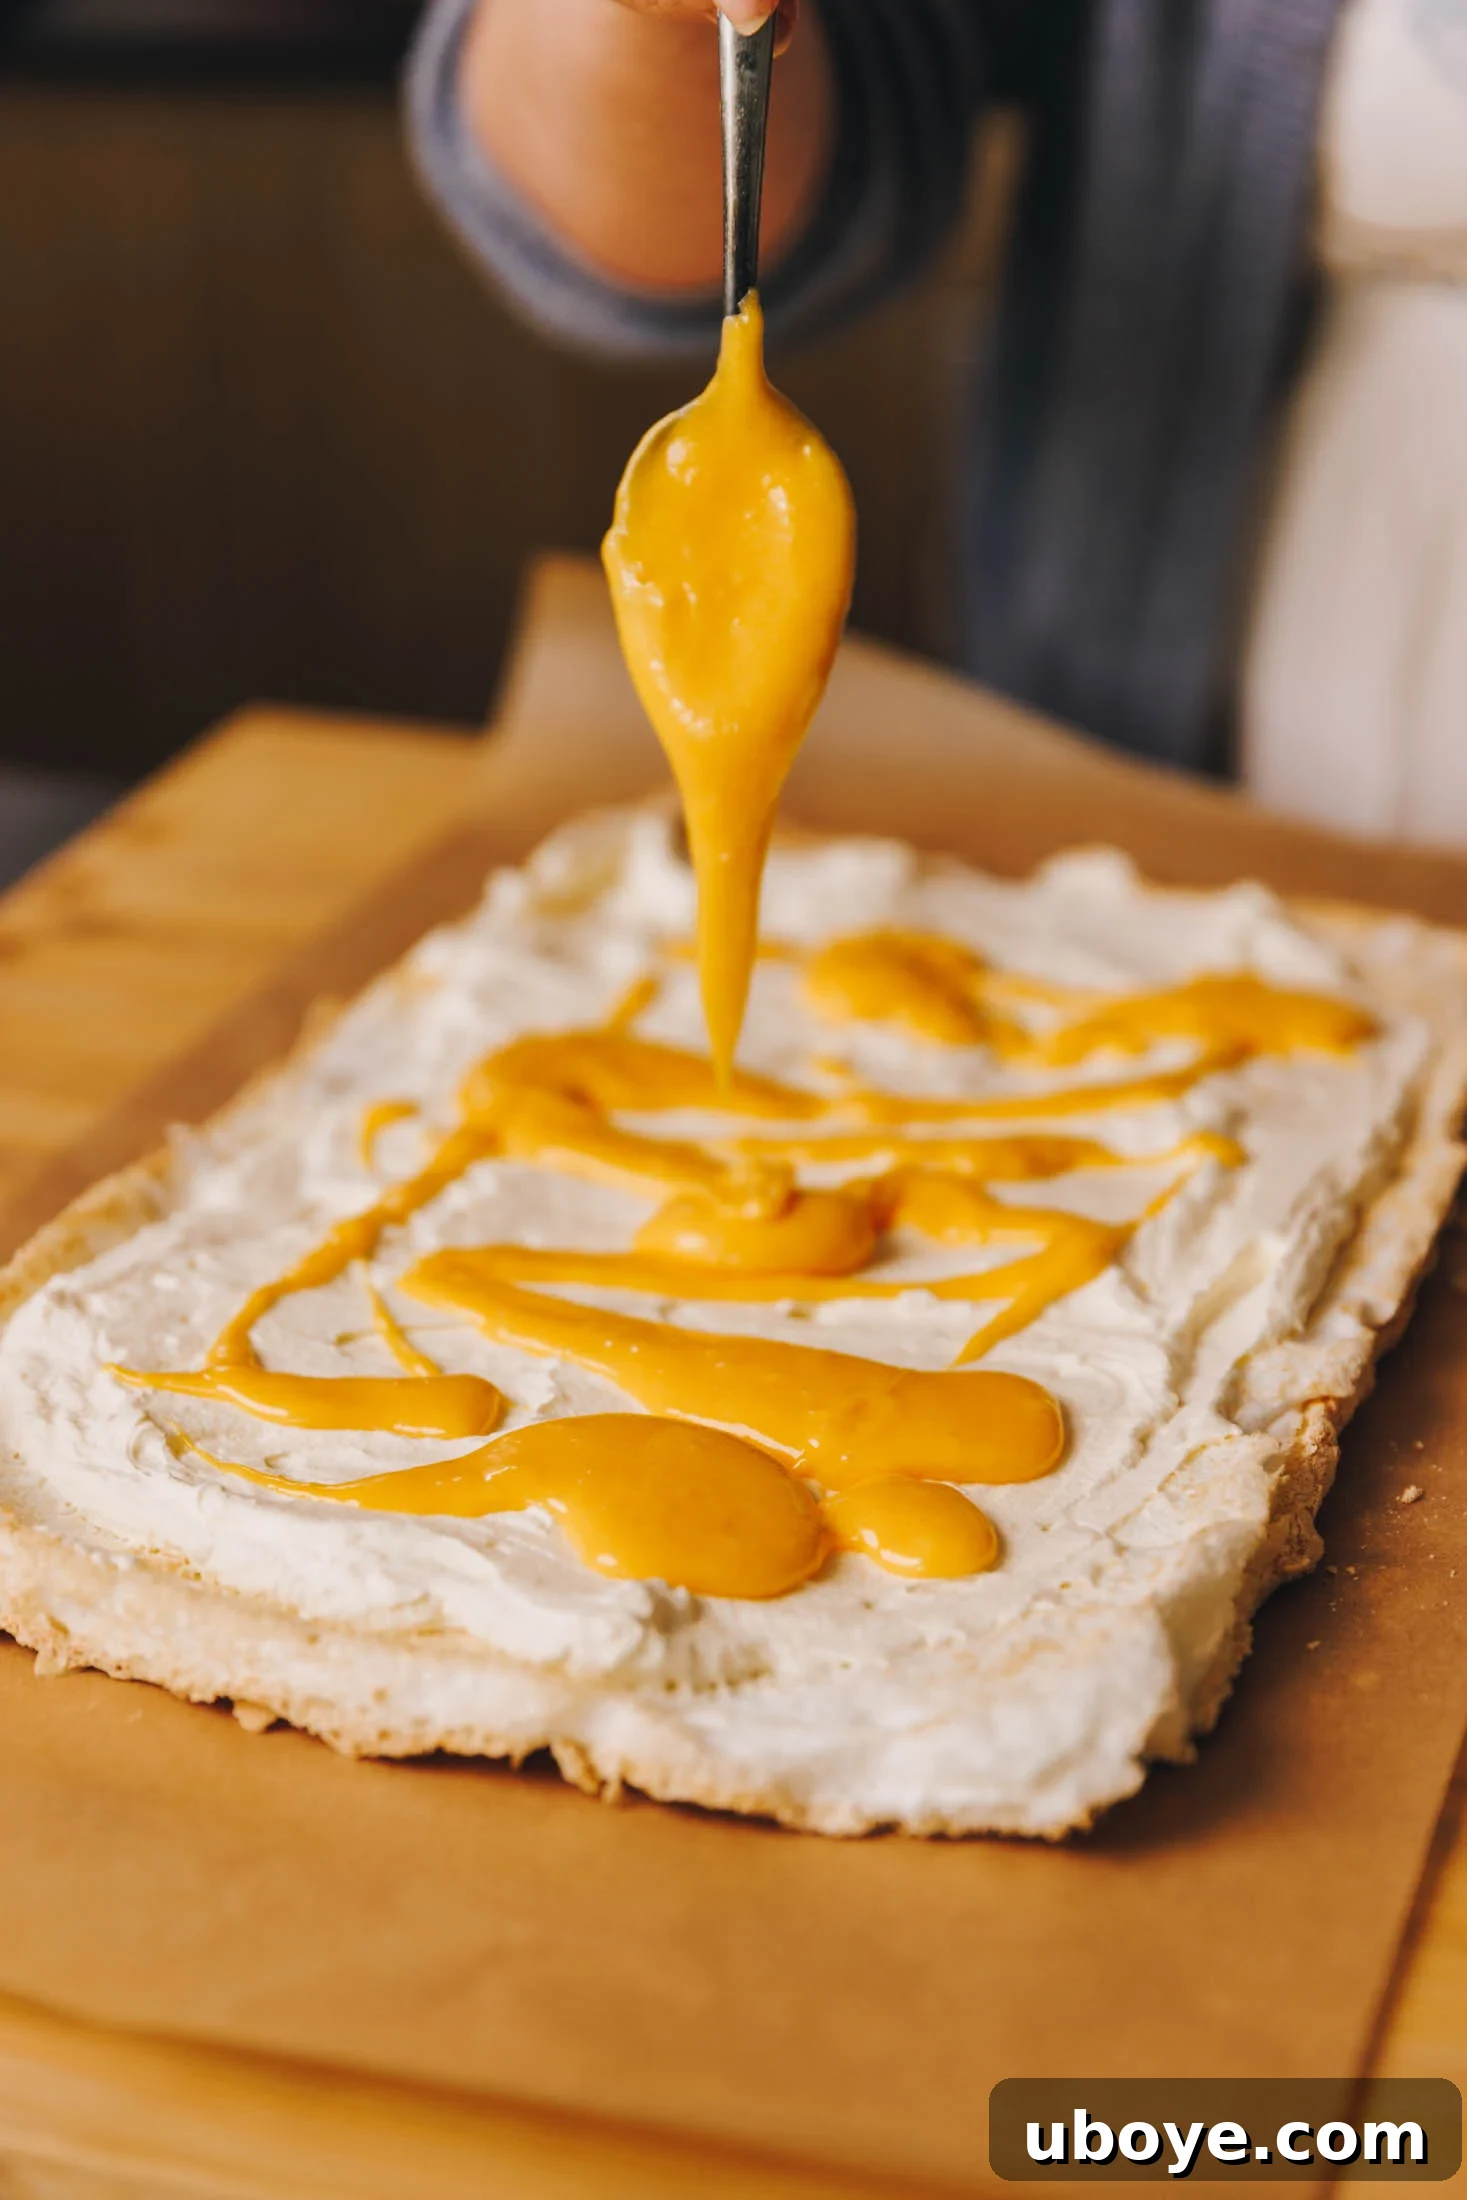
Step 5: Adding the Zesty Lemon Curd. Once the whipped cream layer is spread, generously dollop and gently spread the lemon curd over the cream. The contrast between the rich cream and the tangy curd is what makes this roulade so delightful. Be careful not to spread too close to the edges, as the filling will naturally push out slightly when rolled. Remember to reserve a portion of whipped cream for topping.
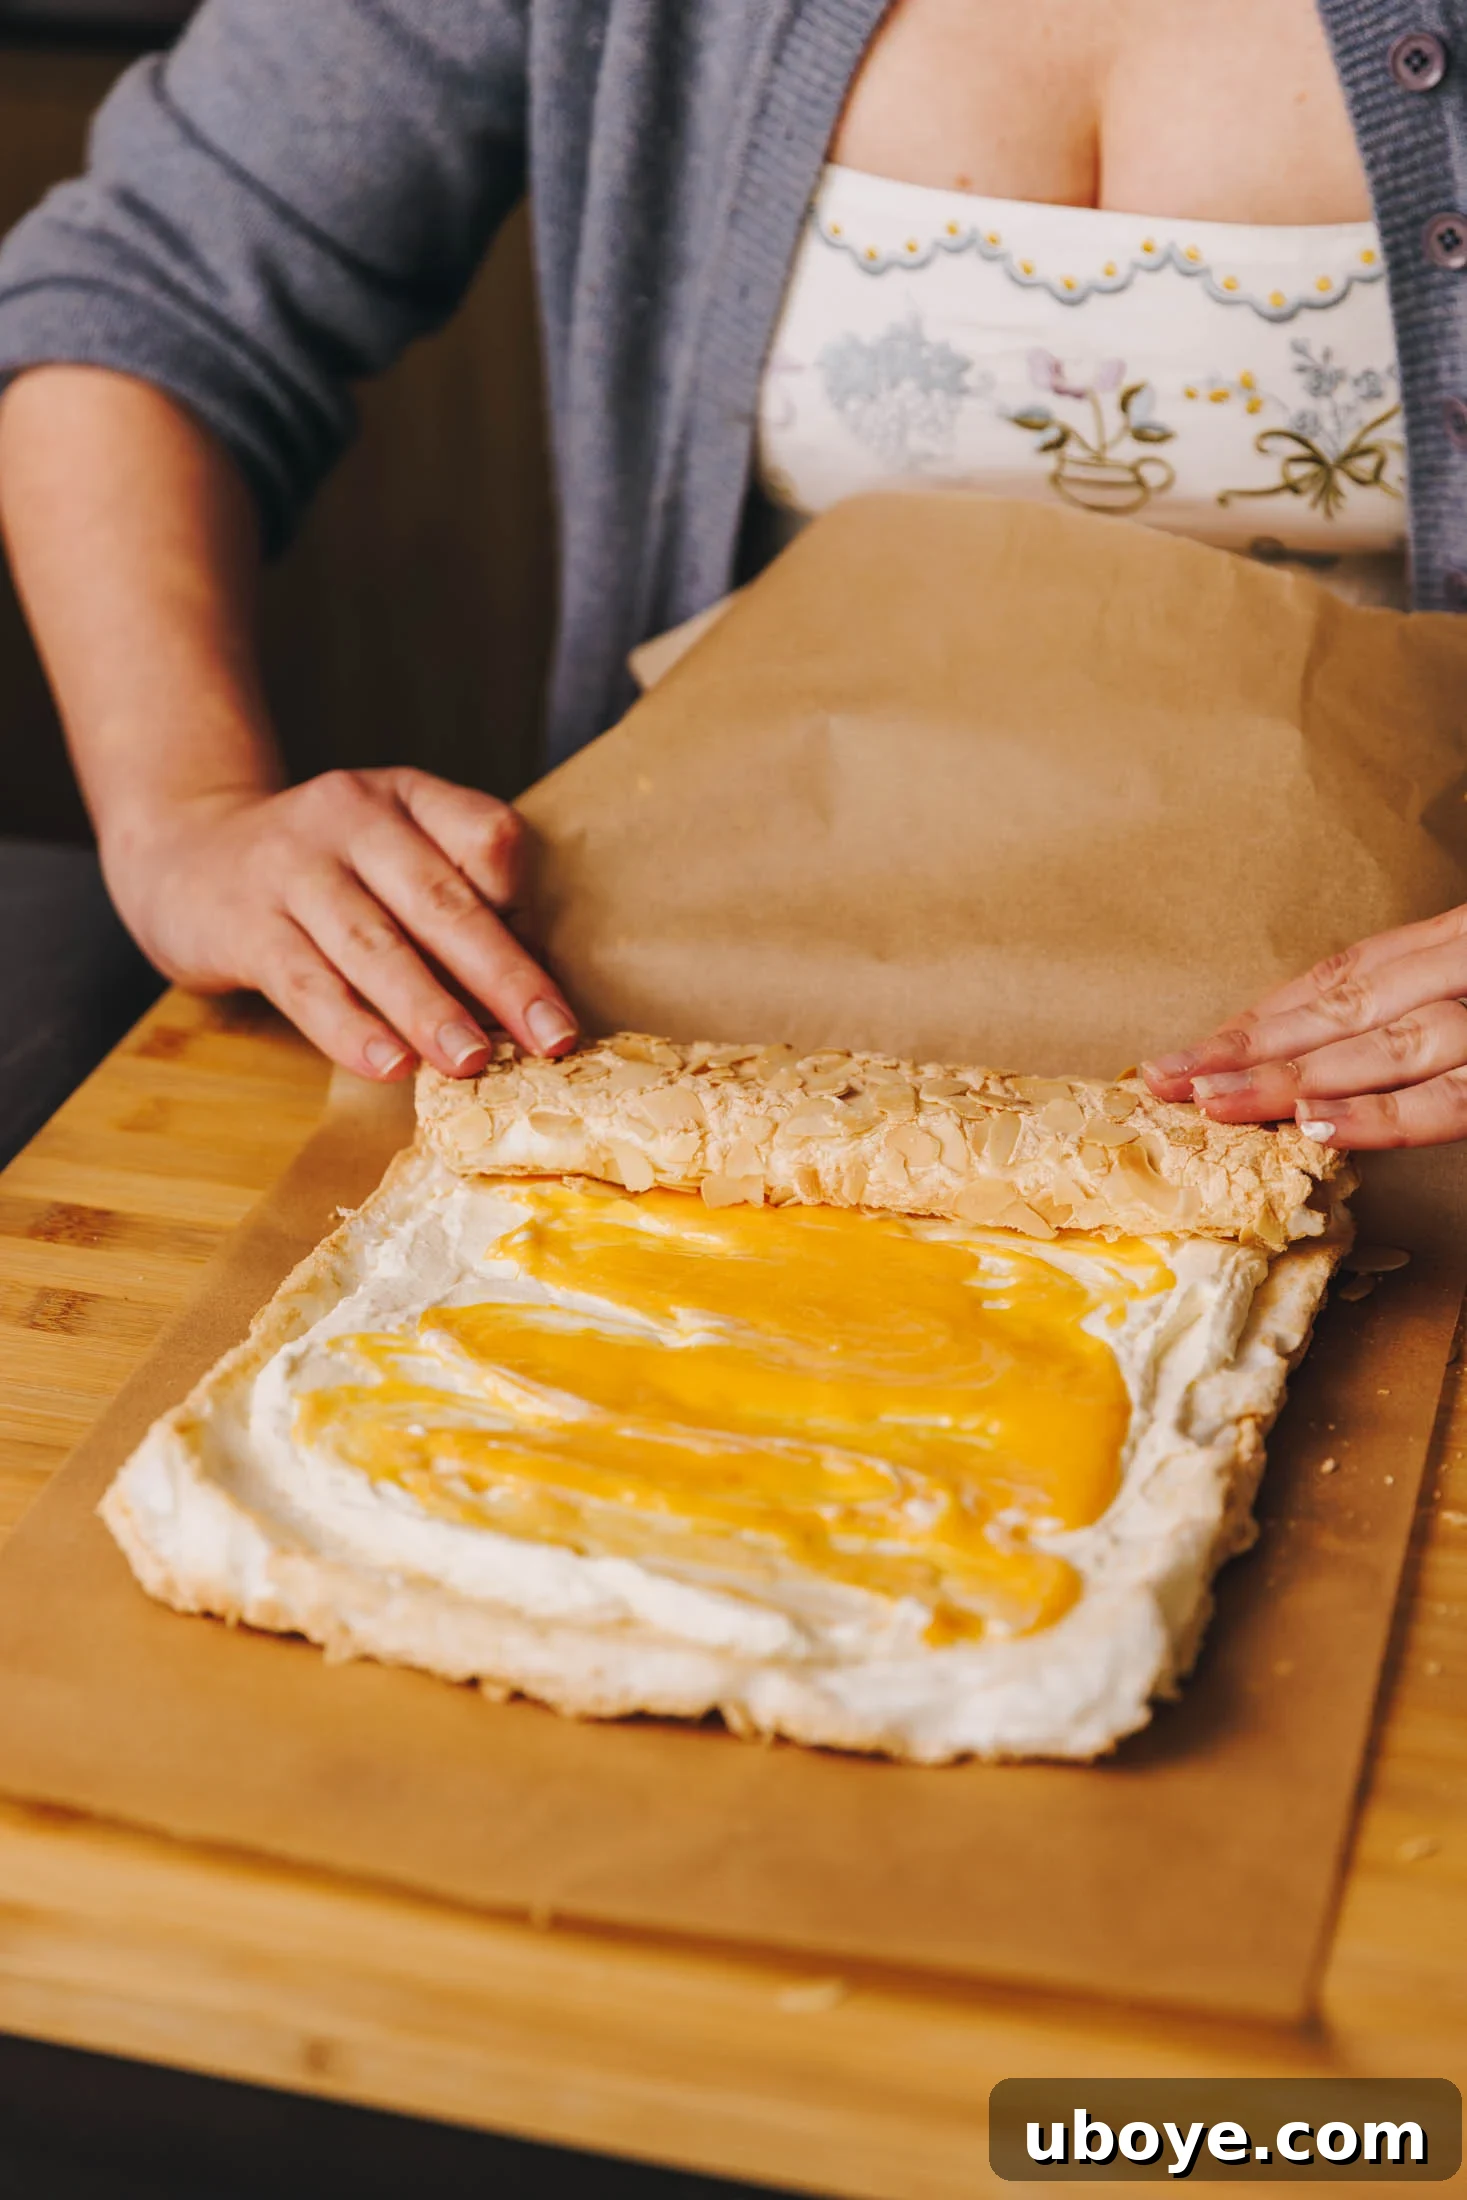
Step 6: The Scoring Secret for Effortless Rolling. This is the crucial, “technical” step that makes rolling significantly easier. Using a sharp knife, gently score the meringue approximately 5 cm (about 2 inches) in from one of the shorter edges. The key is to score only part-way through the meringue, creating a hinge, rather than cutting all the way. This initial score provides a starting point, encouraging the meringue to fold cleanly and initiating the roll without tearing.
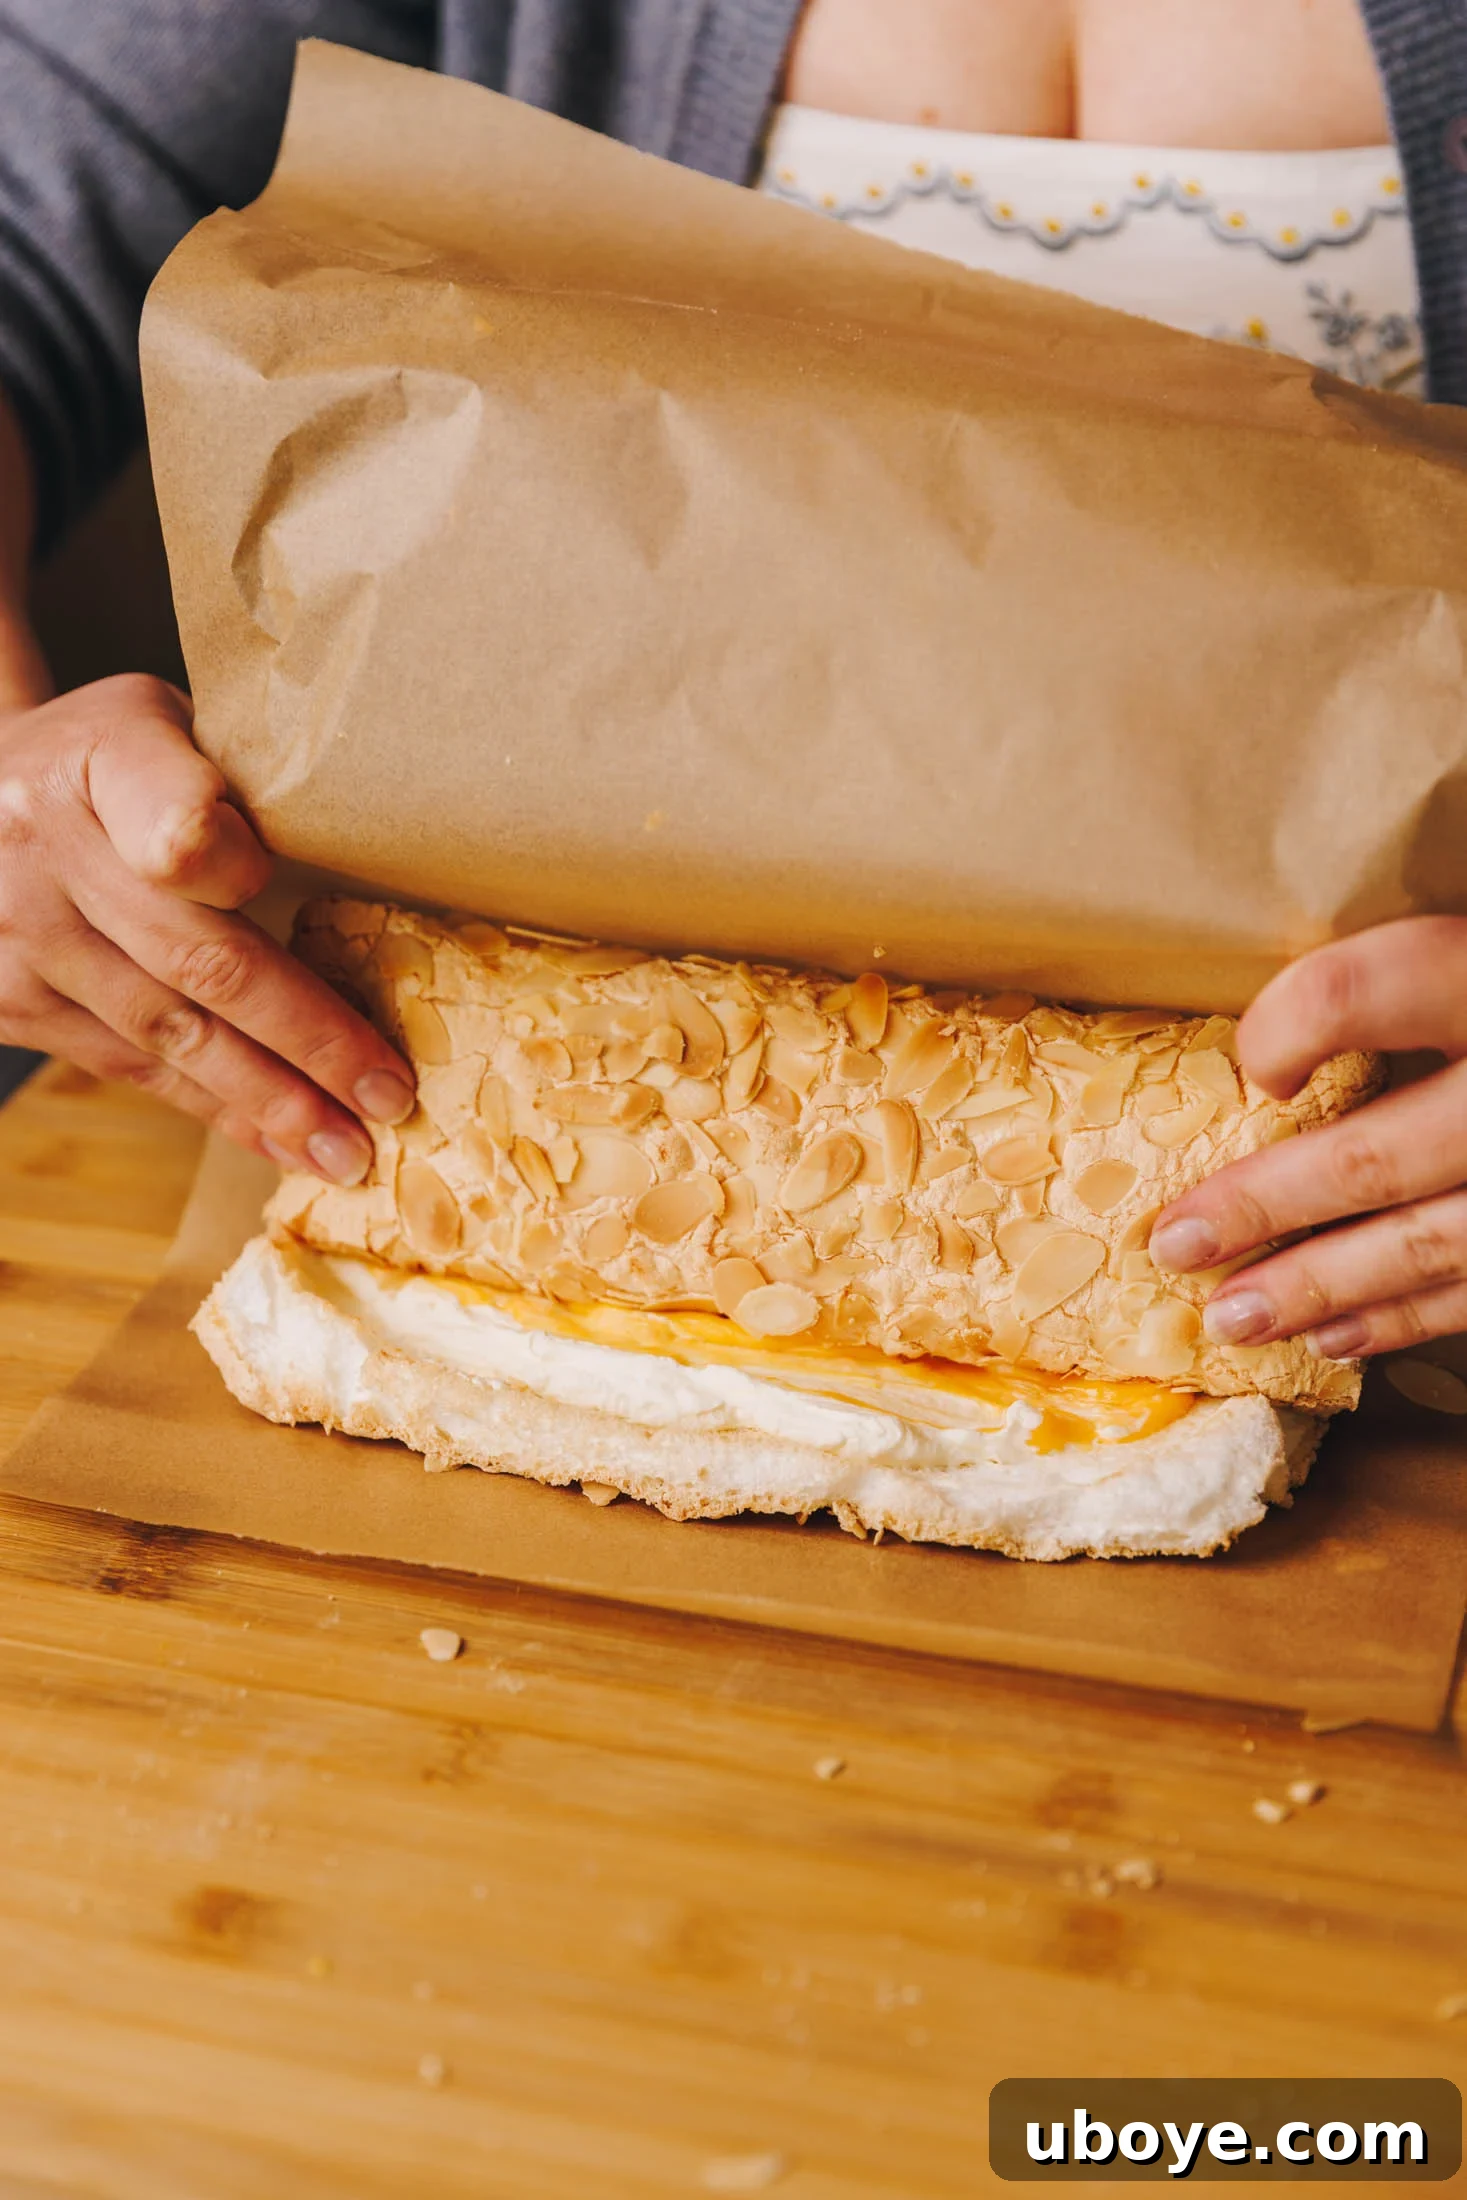
Step 7: The Gentle Art of Rolling. Now for the grand finale – the rolling! Using the clean piece of baking paper underneath as your guide and support, carefully lift and start to roll the meringue from the scored edge. Roll it tightly but gently. The baking paper is your best friend here; as you roll the meringue away from you, pull the baking paper back towards yourself to keep the roll compact. You should only need about 3 rolls to create a beautifully formed roulade. Don’t worry if you see minor cracks – they are perfectly normal and add to its rustic charm, easily hidden by the final garnishes.
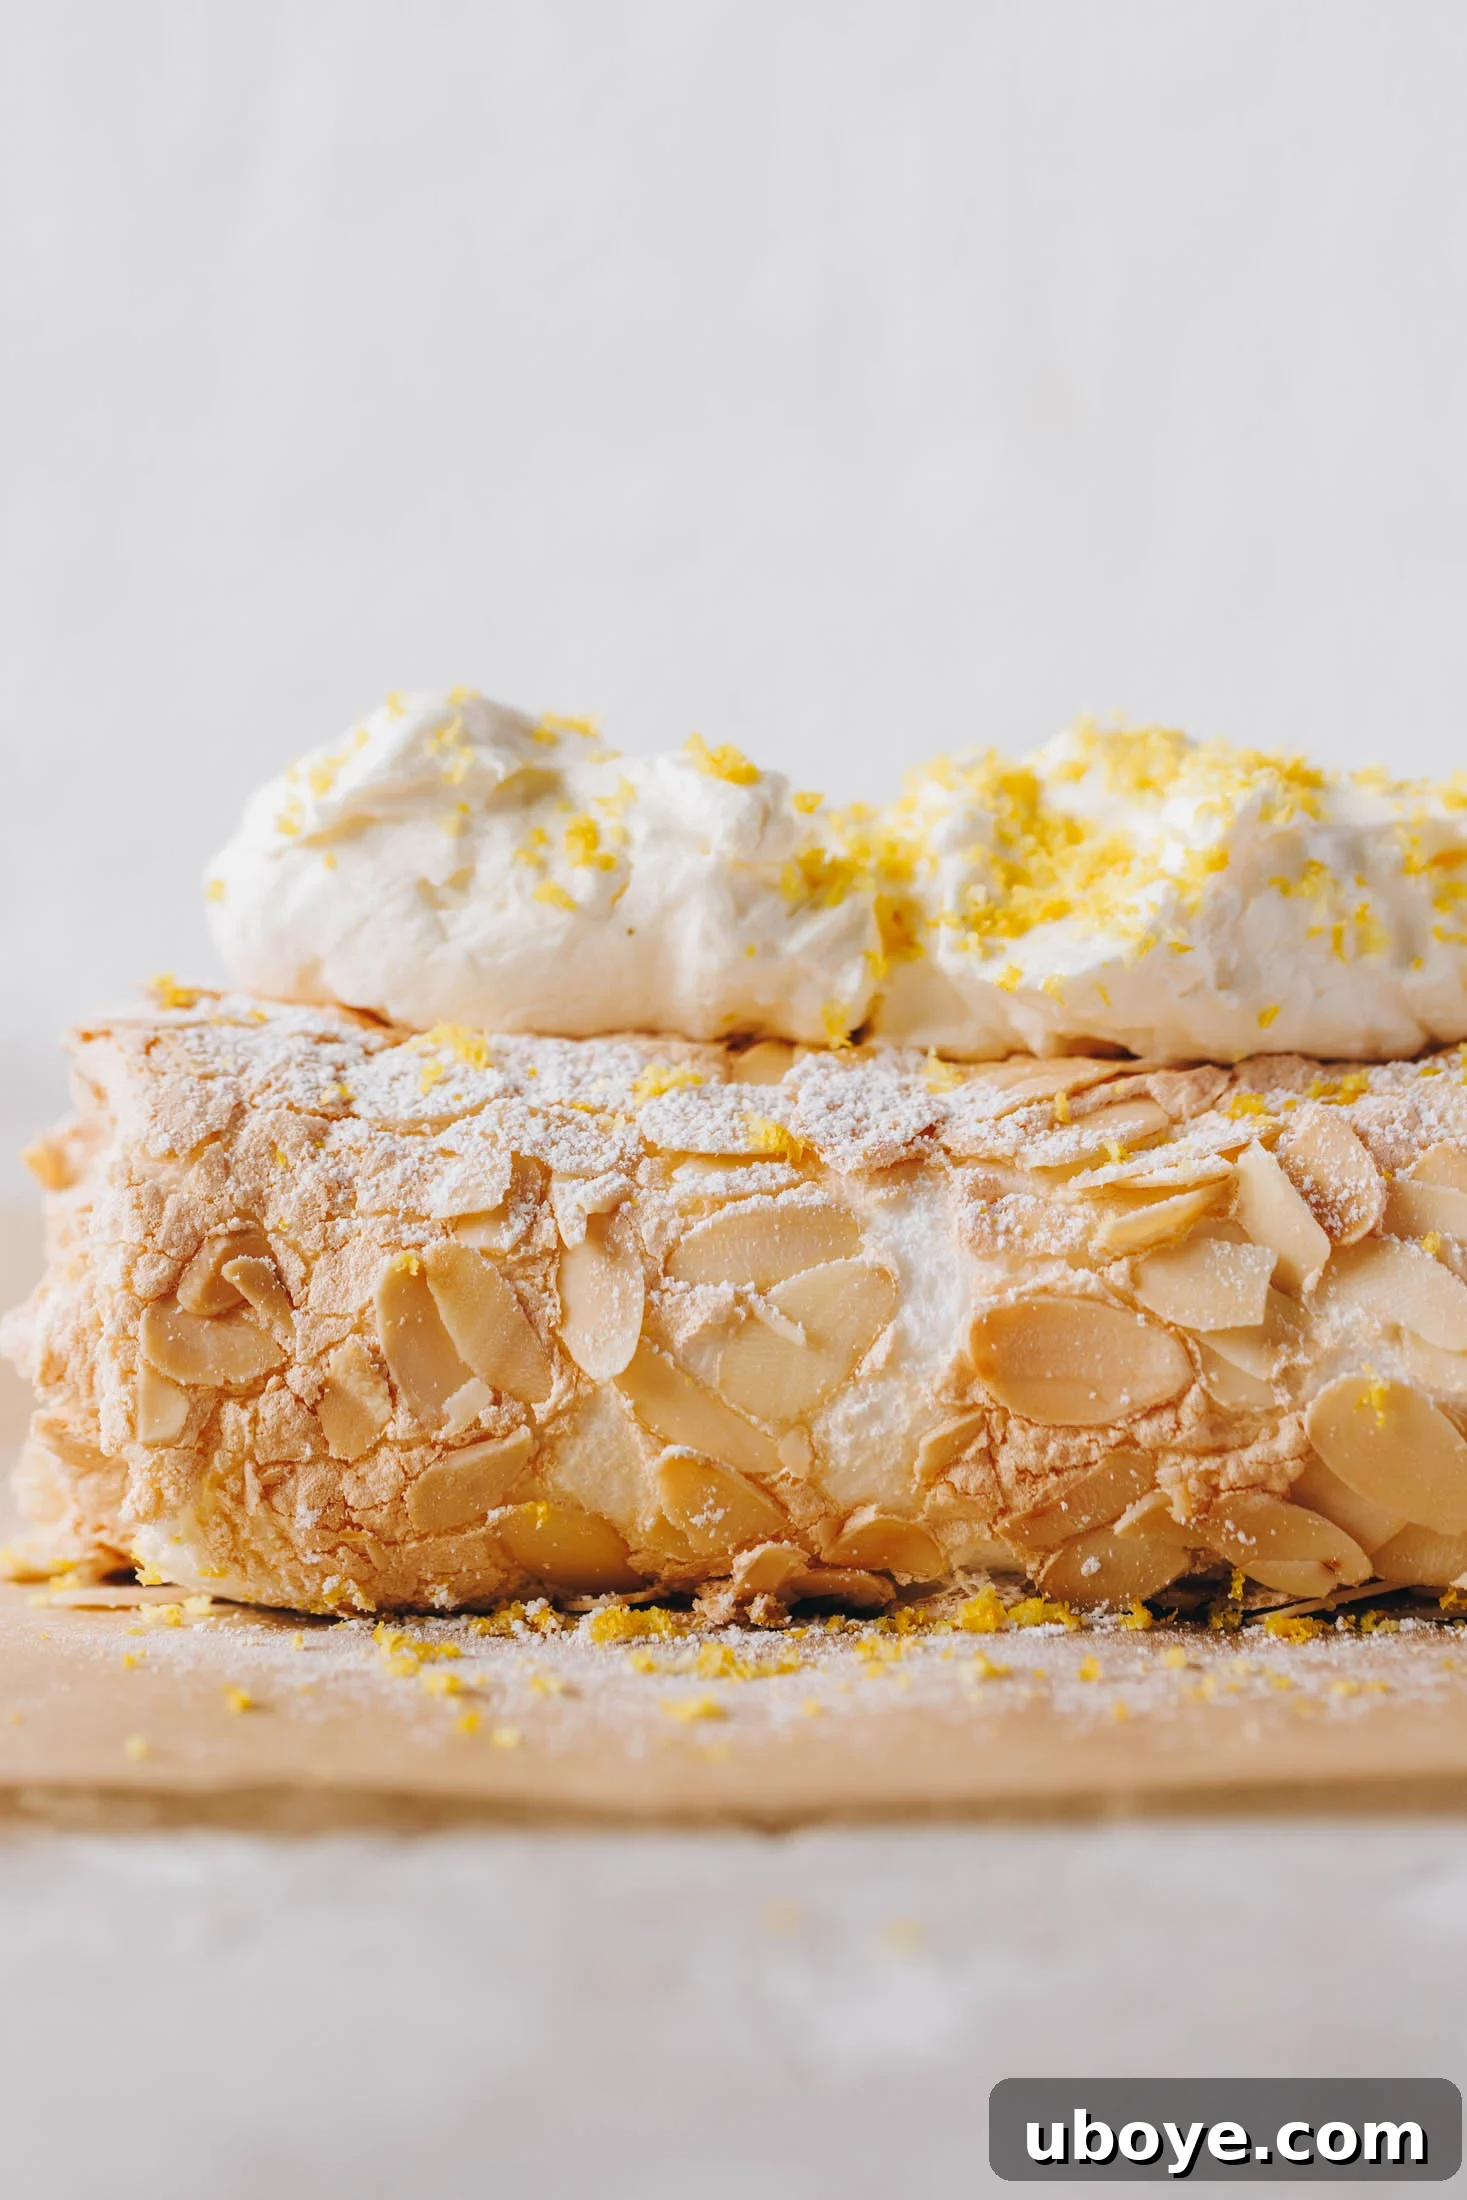
Step 8: Finishing Touches and Serving. Once rolled, transfer your exquisite roulade to a serving platter. Dollop the reserved whipped cream on top, then spoon over any extra lemon curd for an additional burst of flavor and visual appeal. Finish with a delicate sprinkling of fresh lemon zest to enhance the aroma and vibrancy. Now, it’s ready to be sliced into generous portions and enjoyed! Each slice reveals those beautiful swirls of cream and curd, promising a delightful treat.
Expert Tips & Tricks for Achieving the Perfect Roulade
Making a roulade is often considered an art form, but with a few clever tips and a dose of patience, you’ll master this skill and be whipping up impressive desserts with absolute confidence. These insights will help you avoid common pitfalls and ensure a perfect outcome every time:
- The Mary Berry Rolling Technique: This technique is a game-changer for stress-free rolling. Mary Berry, the queen of baking, advises making a shallow score (a few centimeters in from the bottom edge) with a sharp knife across the baked meringue before filling. Crucially, do not cut all the way through; this creates a ‘hinge.’ This initial score acts as a starting point, guiding your first fold and preventing the meringue from tearing or breaking. Once this first fold is made, use the baking paper beneath to assist you: pull the paper back towards yourself while simultaneously rolling the meringue over itself, away from you. This motion helps to create a tight, compact roll. Repeat this action gently, and you’ll find that only about three rolls are usually sufficient to form a complete roulade.
- Utilize Flaked Almonds on the Meringue Before Baking: This simple step is incredibly effective. Sprinkling flaked or sliced almonds over the meringue before it goes into the oven provides a natural barrier. This crunchy layer prevents the delicate meringue from sticking stubbornly to the baking paper, which can often lead to breakage when attempting to peel it off. Based on my experience, whenever I’ve skipped the almonds, the meringue invariably adheres to the paper, making the flip and peel a far more challenging task.
- Bake Until Lightly Golden, Not Dry or Brittle: The visual and tactile cues for a perfectly baked meringue are key. You’re aiming for a meringue that is lightly golden on the outside, indicating a crisp shell, but still feels soft and wonderfully marshmallowy to the touch in the center. An overly dry or hard meringue will inevitably crack extensively when you try to roll it. It needs that slight elasticity and tenderness in its core to be pliable.
- Cool Completely Before Filling: This tip cannot be stressed enough. Attempting to fill a warm meringue is a recipe for disaster. The heat from the meringue will quickly melt the delicate whipped cream and potentially warm the lemon curd, leading to a runny, unstable filling that will slide out and make rolling impossible. Always allow the meringue to cool down entirely to room temperature before adding any fillings.
- Prepare a Fresh Sheet of Baking Paper for Rolling: After baking, you’ll need to transfer the meringue onto a clean sheet of baking paper. This fresh sheet is indispensable for the rolling process. It provides the necessary friction and support to guide the roulade as you fold and turn it, making the process much smoother and more controlled. Never try to roll directly on a counter or without this crucial aid.
- The Right Baking Tin Size Matters: For optimal results, use a baking tin or sheet that measures approximately 23 x 33 cm (9 x 13 inches) and has a slight lip around the edges. This specific size ensures that your meringue bakes to the ideal thickness – thin enough to roll without excessive cracking, yet thick enough to hold its shape and offer a satisfying bite. Using a larger tray might result in a meringue that is too thin and fragile, while a smaller one could make it too thick and prone to breaking.
- Master Your Lemon Curd: While store-bought lemon curd offers convenience, making your own transforms this roulade into an extraordinary dessert. My fool-proof guide on how to make easy lemon curd ensures a vibrant, perfectly tangy, and creamy filling that perfectly complements the sweet meringue. Homemade curd offers a freshness and depth of flavor that is truly unmatched.
Frequently Asked Questions (FAQ’s) About Lemon Curd Meringue Roulade
Absolutely, yes! This meringue roulade is inherently gluten-free, making it a wonderful option for those with gluten sensitivities or dietary preferences. It’s crafted without any flour; the meringue base is made purely from whipped egg whites and sugar. The small amount of cornflour (cornstarch) used in the meringue for added stability and a soft texture is also naturally gluten-free. This means you can enjoy this delightful dessert without any concerns about gluten.
While very similar in ingredients and base concept, a meringue roulade and a pavlova are distinct in their final form. Both are made from whipped egg whites and sugar, resulting in a crisp exterior and a soft, marshmallowy interior. However, a pavlova is typically baked as a thick, round, or oval “nest” designed to be piled high with cream and fruit. A meringue roulade (often fondly called a pavlova roll in Australia) is baked thinner, spread into a rectangle, filled, and then carefully rolled up. The rolling gives it a different presentation and eating experience, showcasing beautiful spirals of filling.
Many bakers find a roulade to be less intimidating than a traditional pavlova. Pavlovas often require precise shaping and can be prone to cracking if handled incorrectly or cooled too rapidly. A roulade, while looking equally impressive, doesn’t demand the same level of structural perfection in its initial bake. The main “technical” aspect is the rolling, but with the scoring technique and proper cooling, it’s quite achievable. Plus, minor cracks on a roulade are easily embraced as part of its rustic charm and hidden by toppings, whereas cracks on a pavlova are often more noticeable.
Don’t fret if your meringue cracks a little when rolling – some cracking is entirely normal and expected, even for experienced bakers! It’s a delicate balance of crispness and flexibility. As long as your meringue has that crucial soft, marshmallowy center and you apply gentle pressure while using the baking paper to guide your roll, any small cracks won’t affect the delicious taste or texture. These natural fissures often add character and are easily concealed by the final dollops of cream and lemon zest. Embrace the rustic beauty and don’t let it stress you out!
For the absolute best texture, where the meringue is perfectly crisp yet soft, it’s ideal to assemble and roll the roulade on the day of serving. However, you can certainly prepare components in advance to save time. The baked meringue base can be made a day ahead and stored at room temperature (tightly wrapped to prevent moisture absorption) or in an airtight container. The lemon curd can be made up to two weeks in advance and stored in a sterilized jar in the fridge. The whipped cream should always be prepared just before assembly for optimal freshness and stability.
While a stand mixer makes the process much easier, you can absolutely make meringue with a good quality hand mixer. It will simply take a bit longer for the egg whites to reach stiff peaks, typically around 10-15 minutes of continuous whisking. Ensure your bowl and beaters are impeccably clean and grease-free for best results. Alternatively, a large, deep bowl and a sturdy balloon whisk, combined with plenty of arm strength, can also work, though it requires significant effort.
Absolutely! While lemon curd is a classic and highly recommended pairing for its tangy contrast, meringue roulades are incredibly versatile. You could experiment with other fruit curds like passion fruit or lime curd. Alternatively, fresh berries (raspberries, strawberries, blueberries), stewed fruits (like spiced apples or peaches), or even chocolate ganache combined with cream make wonderful fillings. Just ensure your chosen filling isn’t too liquidy, which could make the meringue soggy or difficult to roll.
Serving Suggestions: Presenting Your Stunning Roulade
This lemon curd meringue roulade is so much more than just a dessert; it’s a celebration centerpiece ready to impress. While it truly shines as the perfect Christmas dessert, offering a lighter, zesty alternative to traditional heavy puddings and taking away all the fuss of a classic pavlova, its versatility extends beyond the holidays.
Serve it generously sliced, allowing each portion to reveal its beautiful, intricate swirls of golden lemon curd and creamy white meringue. For an extra touch of elegance, dust it lightly with powdered sugar just before serving, or add a few fresh mint leaves for a pop of color. It pairs wonderfully with a warm cup of tea or coffee, and on a hot day, a scoop of vanilla bean ice cream could provide a delightful contrast. Whether it’s a casual family gathering, a sophisticated dinner party, or a festive holiday feast, this roulade is guaranteed to draw gasps of delight and satisfied smiles.
Storage Tips: Keeping Your Roulade Fresh
To enjoy your lemon curd meringue roulade at its peak perfection, proper storage is key. Here’s how to ensure it remains delicious for as long as possible:
- Store the assembled roulade in the fridge, lightly covered with plastic wrap or foil, for up to 24 hours. While it will still be delicious beyond this, its texture will gradually begin to change.
- It’s important to note that after approximately 24 hours, the delicate meringue will naturally start to soften as it absorbs moisture from both the whipped cream and the lemon curd. This is normal and doesn’t affect its flavor, but the crisp exterior will diminish.
- If you plan to make this dessert ahead of time, the best approach is to prepare the meringue base and the lemon curd separately. The baked meringue, once cooled, can be stored in an airtight container at room temperature for up to two days. The homemade lemon curd can be stored in a sterilized, airtight jar in the fridge for up to two weeks. Assemble and fill the roulade on the day you intend to serve it for the freshest and most vibrant results.
- For optimal taste and texture, this lemon curd meringue roulade is truly at its best when served fresh, ideally within a few hours of assembly.
More Irresistible Desserts for the Sweet Tooth!
If you’ve enjoyed the delightful zest of this Lemon Curd Meringue Roulade, you’re in for a treat! Explore more of my favorite sweet creations that are perfect for any occasion:
Sweets
White Chocolate, Pistachio & Raspberry Olive Oil Cake
Sweets
Lemon Olive Oil Cake
Sweets
Blueberry, Lemon & Ricotta Olive Oil Cake
Focaccia
Cinnamon Scroll Sweet Focaccia
If you embark on the delightful journey of making this lemon curd meringue roulade, I would absolutely love to see your beautiful creations! Please feel free to tag me on Instagram, TikTok, or Pinterest. Your culinary triumphs inspire me!
Should you have any questions about the recipe, or simply wish to share your experience and feedback, please don’t hesitate to leave a comment below. I always enjoy connecting with fellow food enthusiasts and answering your recipe-related queries.
Enjoy this recipe!
Lemon Curd Meringue Roulade Recipe
Daen Lia
This lemon curd meringue roulade is a delightful balance of light and sweet with a perfect amount of citrus tang. It features a soft, marshmallowy center, a crunchy exterior, and is generously topped with extra whipped cream and fresh lemon zest.
15 mins
1 hr
8
Equipment
- Stand mixer
- Large bowl
- Medium saucepan
- Spatula
- Whisk
- 23 x 33cm (9 x 13 inch) baking tin/tray
- Baking paper
- Palette knife (optional)
Ingredients
For the Lemon Curd
- 6 egg yolks
- 3/4 cup sugar
- 8 tbsp unsalted butter
- 1/2 cup lemon juice
- 1 tbsp lemon zest
For the Meringue Roulade
- 6 egg whites, room temperature
- 3/4 cup caster sugar
- 1 tsp lemon juice, or white vinegar
- 1 tsp cornflour (cornstarch)
- 1 cup flaked or slithered almonds
- 10 oz thickened cream
- 1 tbsp icing sugar (powdered sugar)
- 6 tbsp lemon curd (from the prepared batch)
- Extra lemon zest for garnish
Measurements provided in Imperial (US) units.
Instructions
Homemade Lemon Curd
- Whisk: In a large heatproof bowl, combine the egg yolks, lemon zest, and sugar. Whisk by hand or with an electric mixer until the mixture is pale yellow and smooth, ensuring no frothing.
- Thicken: In a medium saucepan, melt the butter over low heat. Once melted and gently foaming, add the lemon juice and stir well. Pour the egg yolk and sugar mixture into the pan. Stir constantly with a heatproof spatula for 7-10 minutes over low heat until the curd thickens significantly and turns a rich, deep yellow color. To test for doneness, dip the back of a spoon into the curd; it should be thick enough to coat the spoon and leave a clear trail when a finger is drawn across it.
- Cool: Remove the lemon curd from the heat and allow it to cool slightly. Transfer it to a sterilized jar or airtight container and refrigerate until thoroughly chilled and firm. The curd can be made up to 2 weeks in advance.
Meringue Roulade Assembly
- Preheat: Preheat your oven to 350°F / 180°C.
- Pre-line: Line a 23 x 33cm (9 x 13 inch) baking tin or tray with baking paper. For extra security, you can lightly grease the tray with a tiny amount of olive oil before laying the baking paper; this helps prevent the paper from shifting.
- Meringue: In a very clean stand mixer bowl (free of any grease), whisk the room temperature egg whites on the highest speed until they form stiff peaks. Gradually add the caster sugar, one tablespoon at a time, allowing approximately 1 minute between each addition. Continue whisking until the meringue is incredibly stiff, smooth, and beautifully glossy.
- Cornflour Slurry: In a small separate bowl, combine the cornflour and lemon juice (or white vinegar) to create a smooth slurry. Gently fold this slurry into the prepared meringue using a spatula until just combined.
- Bake: Carefully spread the meringue mixture evenly onto the pre-lined baking tray, ensuring it reaches the edges or lip of the tray. Sprinkle generously with flaked almonds. Bake for 8 minutes at 350°F/180°C, then reduce the oven temperature to 285°F/140°C and bake for an additional 20 minutes. The meringue should be lightly golden, firm to the touch, and have a slight spring when gently pressed.
- Flip & Cool: Immediately upon removing from the oven, invert the entire baking tray onto a fresh piece of clean baking paper. Carefully lift off the baking tin, then gently peel away the baking paper that was used for baking. Allow the meringue to cool completely for at least 10-15 minutes.
- Whipped Cream: While the meringue cools, prepare the whipped cream. In a stand mixer on medium speed, whisk the thickened cream and icing sugar for 3-4 minutes, or until it forms soft, firm peaks. Be careful not to over-whisk, as it can separate.
- Spread Fillings: Using a palette knife or spatula, spread an even layer of the prepared whipped cream over the cooled meringue. Follow this with approximately 6 tablespoons of the chilled lemon curd, spreading it gently over the cream. Remember to reserve about one-third of the whipped cream for the top of the finished roulade. Any remaining lemon curd can be stored in the fridge.
- Score & Roll: To aid in rolling, lightly score the meringue roughly 5 cm (2 inches) in from one of the shorter edges, being careful not to cut all the way through. Using the fresh baking paper underneath as a guide and support, gently but firmly roll the meringue from the scored edge, pulling the paper back towards you as you roll the meringue away. Aim for about 3 neat rolls.
- Serve: Transfer the rolled roulade to a serving platter. Dollop the reserved whipped cream on top, drizzle with a little extra lemon curd if desired, and finish with a generous sprinkling of fresh lemon zest. Slice and enjoy your magnificent dessert!
Video Guide
Recipe Notes
- Rolling the roulade: Follow Mary Berry’s technique: make a small score with a sharp knife a few centimeters in from the bottom edge of the cooked meringue (don’t cut all the way through). This helps initiate the roll. Then, use the baking paper to guide you by pulling it back as you roll the meringue away from yourself. Aim for about 3 rolls.
- Using flaked almonds on the meringue: Sprinkling flaked almonds before baking is crucial. It not only adds a lovely crunch and flavor but also prevents the meringue from sticking to the baking paper, making it much easier to peel off and roll.
- Baking consistency: Bake until the meringue is lightly golden and firm to the touch, but still feels soft and marshmallowy in the center. Avoid over-baking, as a dry meringue will crack excessively.
- Cooling completely: Ensure the meringue is fully cooled to room temperature before adding the cream and lemon curd. A warm meringue will melt the fillings, making the roulade messy and difficult to roll.
- Fresh baking paper: Always flip the baked meringue onto a fresh sheet of baking paper. This new sheet will be used to facilitate the rolling process.
- Baking tin dimensions: A baking tin or sheet measuring 23 x 33cm (9 x 13 inches) with a slight lip is ideal for achieving the correct meringue thickness and ease of handling.
- Lemon curd quantities: This recipe for homemade lemon curd typically yields more than needed for a single roulade. Store any remaining lemon curd in a sterilized, airtight jar in the fridge for up to 4 weeks. Alternatively, feel free to use high-quality store-bought lemon curd for convenience.
Nutrition Information (Approximate Per Serving)
Calories: 354 kcal
Carbohydrates: 48g
Protein: 5g
Fat: 16g
Saturated Fat: 9g
Polyunsaturated Fat: 1g
Monounsaturated Fat: 5g
Trans Fat: 0.5g
Cholesterol: 176mg
Sodium: 177mg
Potassium: 73mg
Fiber: 0.2g
Sugar: 47g
Vitamin A: 546 IU
Vitamin C: 7mg
Calcium: 25mg
Iron: 0.4mg
Nutrition information is automatically calculated and should only be used as an approximation. Actual values may vary based on specific ingredients and preparation methods.
 Like this recipe? Leave a comment below or share your thoughts!