
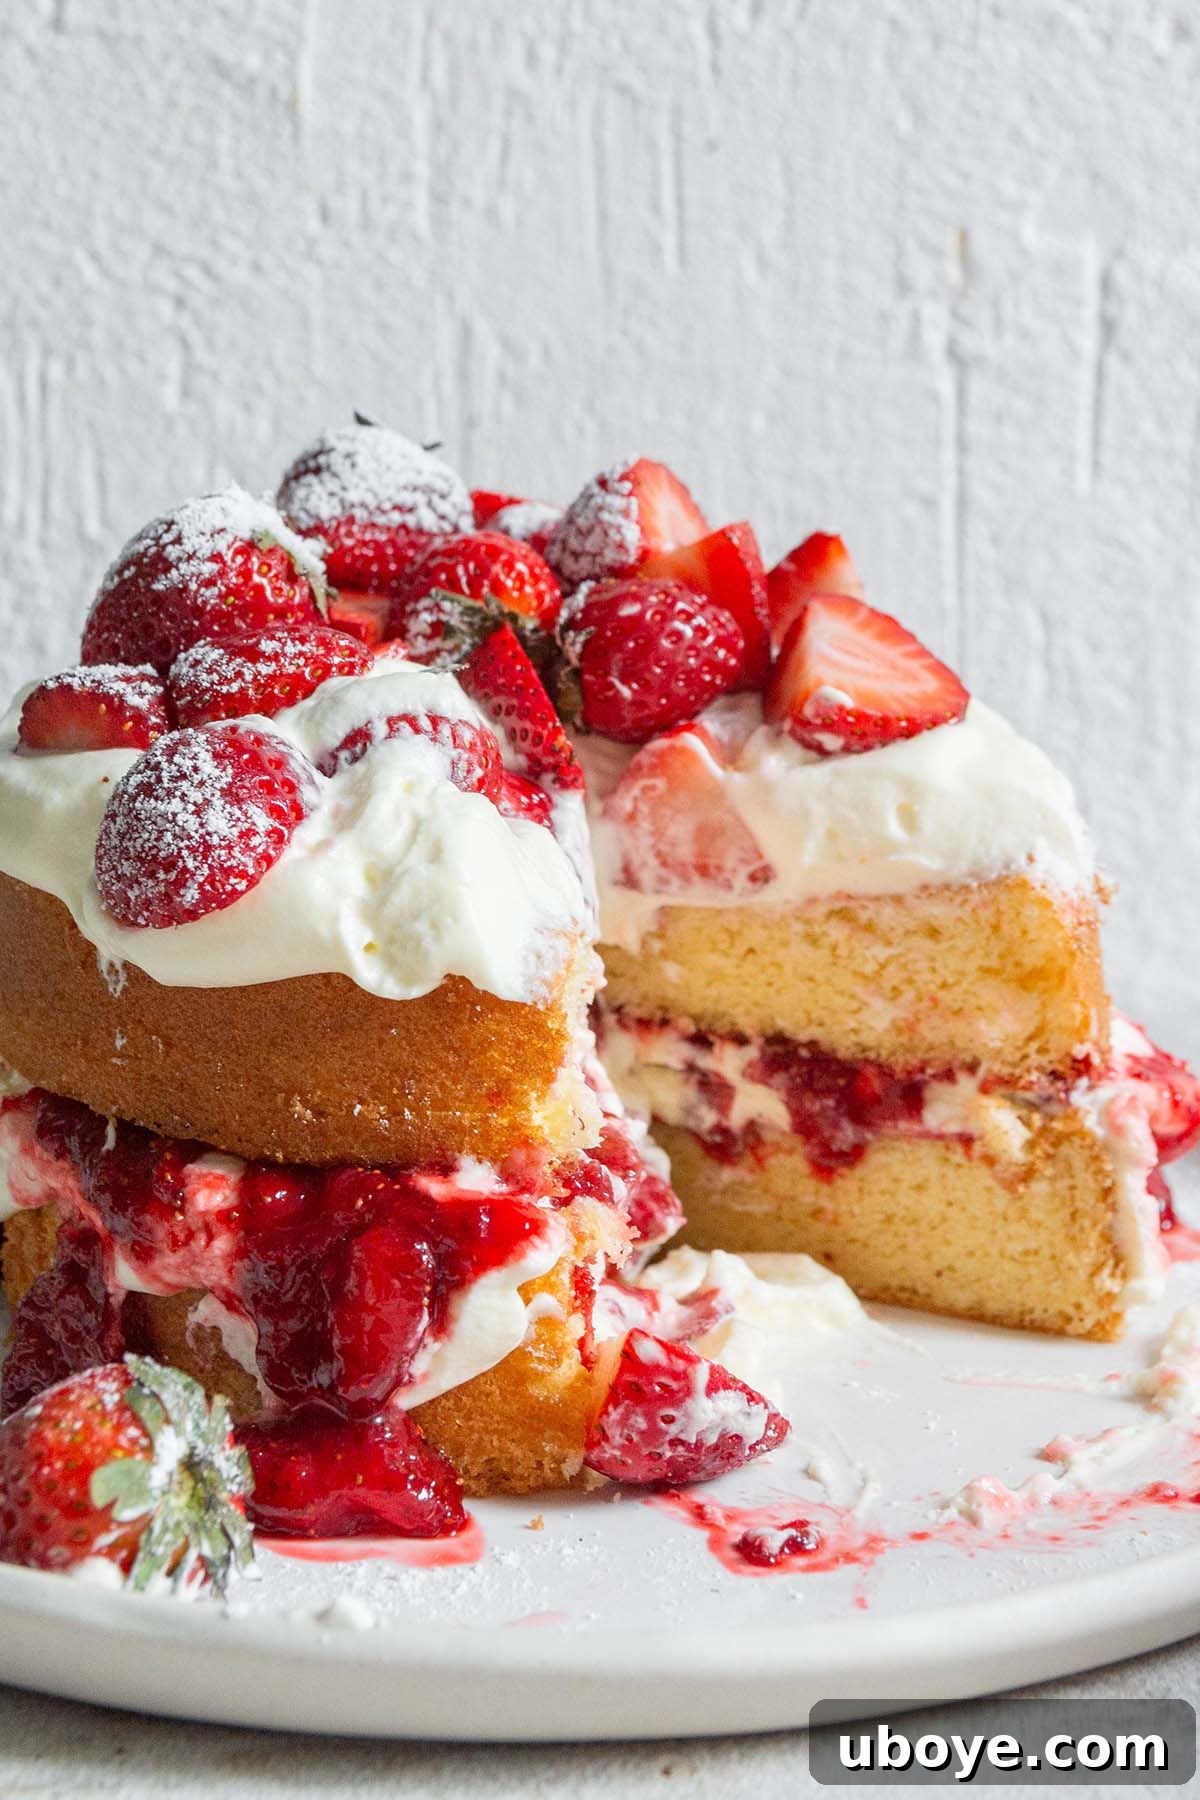
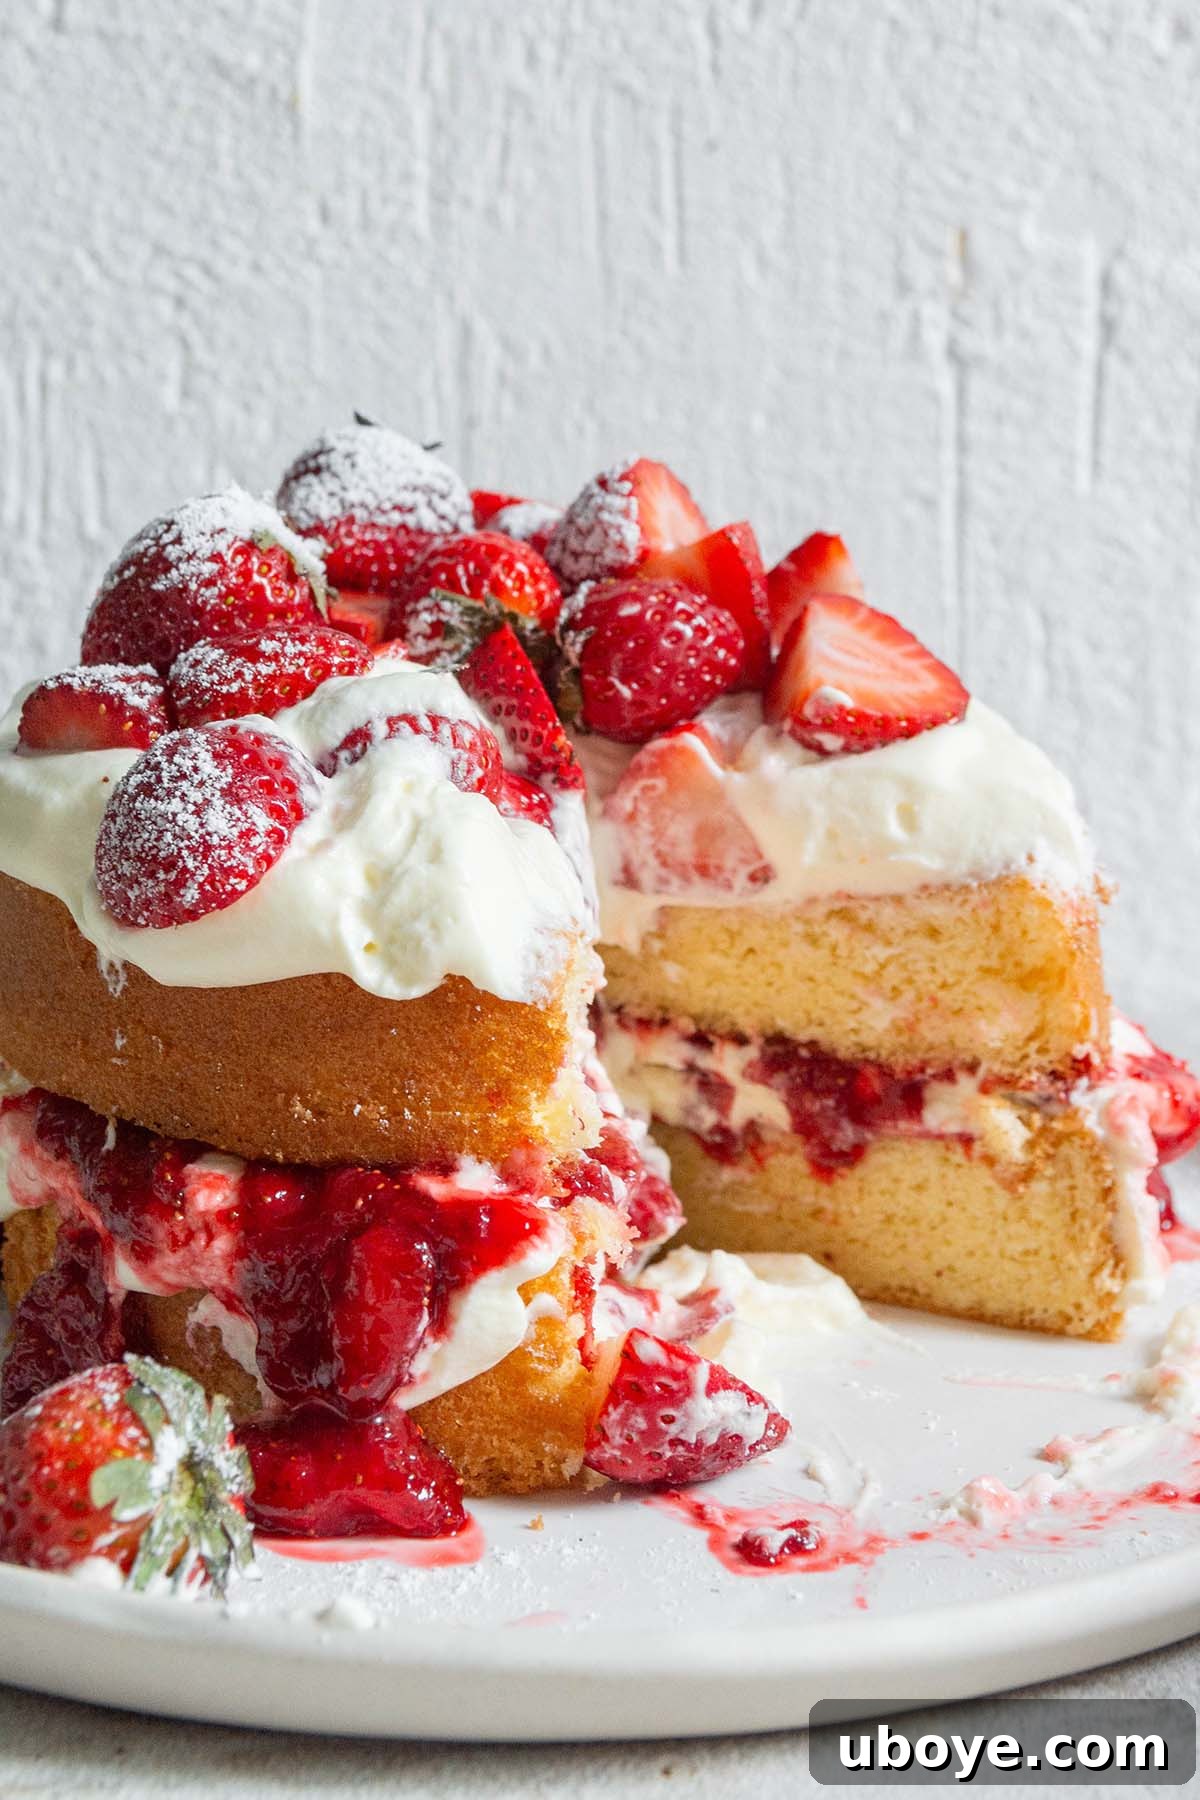
Step into a world where baking dreams come true with this exquisite Strawberries and Cream Sponge Cake. Forget the dense, heavy desserts of yesteryear and embrace a masterpiece of lightness and flavor. This isn’t just a cake; it’s a celebration, a showstopping centerpiece that promises to delight every palate with its perfectly airy sponges, luscious homemade strawberry jam, and clouds of decadent whipped cream. It’s the ideal treat for any occasion, from a festive Christmas gathering to a joyful summer afternoon tea, offering an irresistible combination of fresh, sweet, and tangy notes.
Looking to diversify your dessert spread for the holidays? While this sponge cake will undoubtedly steal the show, you might also love these recipes for an apple cinnamon galette with cheesy pastry and delightful lemon olive oil cookies. They offer wonderful contrasts and are sure to be a hit with family and friends.
Quick Navigation
- Jump to Recipe Card
- Key Ingredients
- Recipe Variations
- Step-by-Step Instructions
- FAQs
- Expert Baking Tips
Why This Strawberries and Cream Sponge Cake is a Must-Try
Many home cooks often find baking, especially cakes from scratch, a bit daunting. The common refrain, “I’m a good cook, but not a good baker,” often stems from the perceived precision and science involved. However, creating a magnificent sponge cake doesn’t have to be intimidating! While baking does indeed involve science, the art of whisking up a beautifully light and airy sponge is far more achievable than it appears. With the detailed guidance and expert tips we’re about to share, you’ll find that making this stunning centrepiece for your dining table is incredibly easy and rewarding.
This recipe focuses on simplicity and technique, ensuring even novice bakers can achieve spectacular results. Imagine the pride of presenting a cake that not only looks professionally made but tastes utterly divine. Its delicate texture and fresh flavors make it versatile enough for any occasion, from an elegant brunch to a casual family dessert. The delightful contrast between the soft cake, the rich cream, and the fruity jam is truly unparalleled.
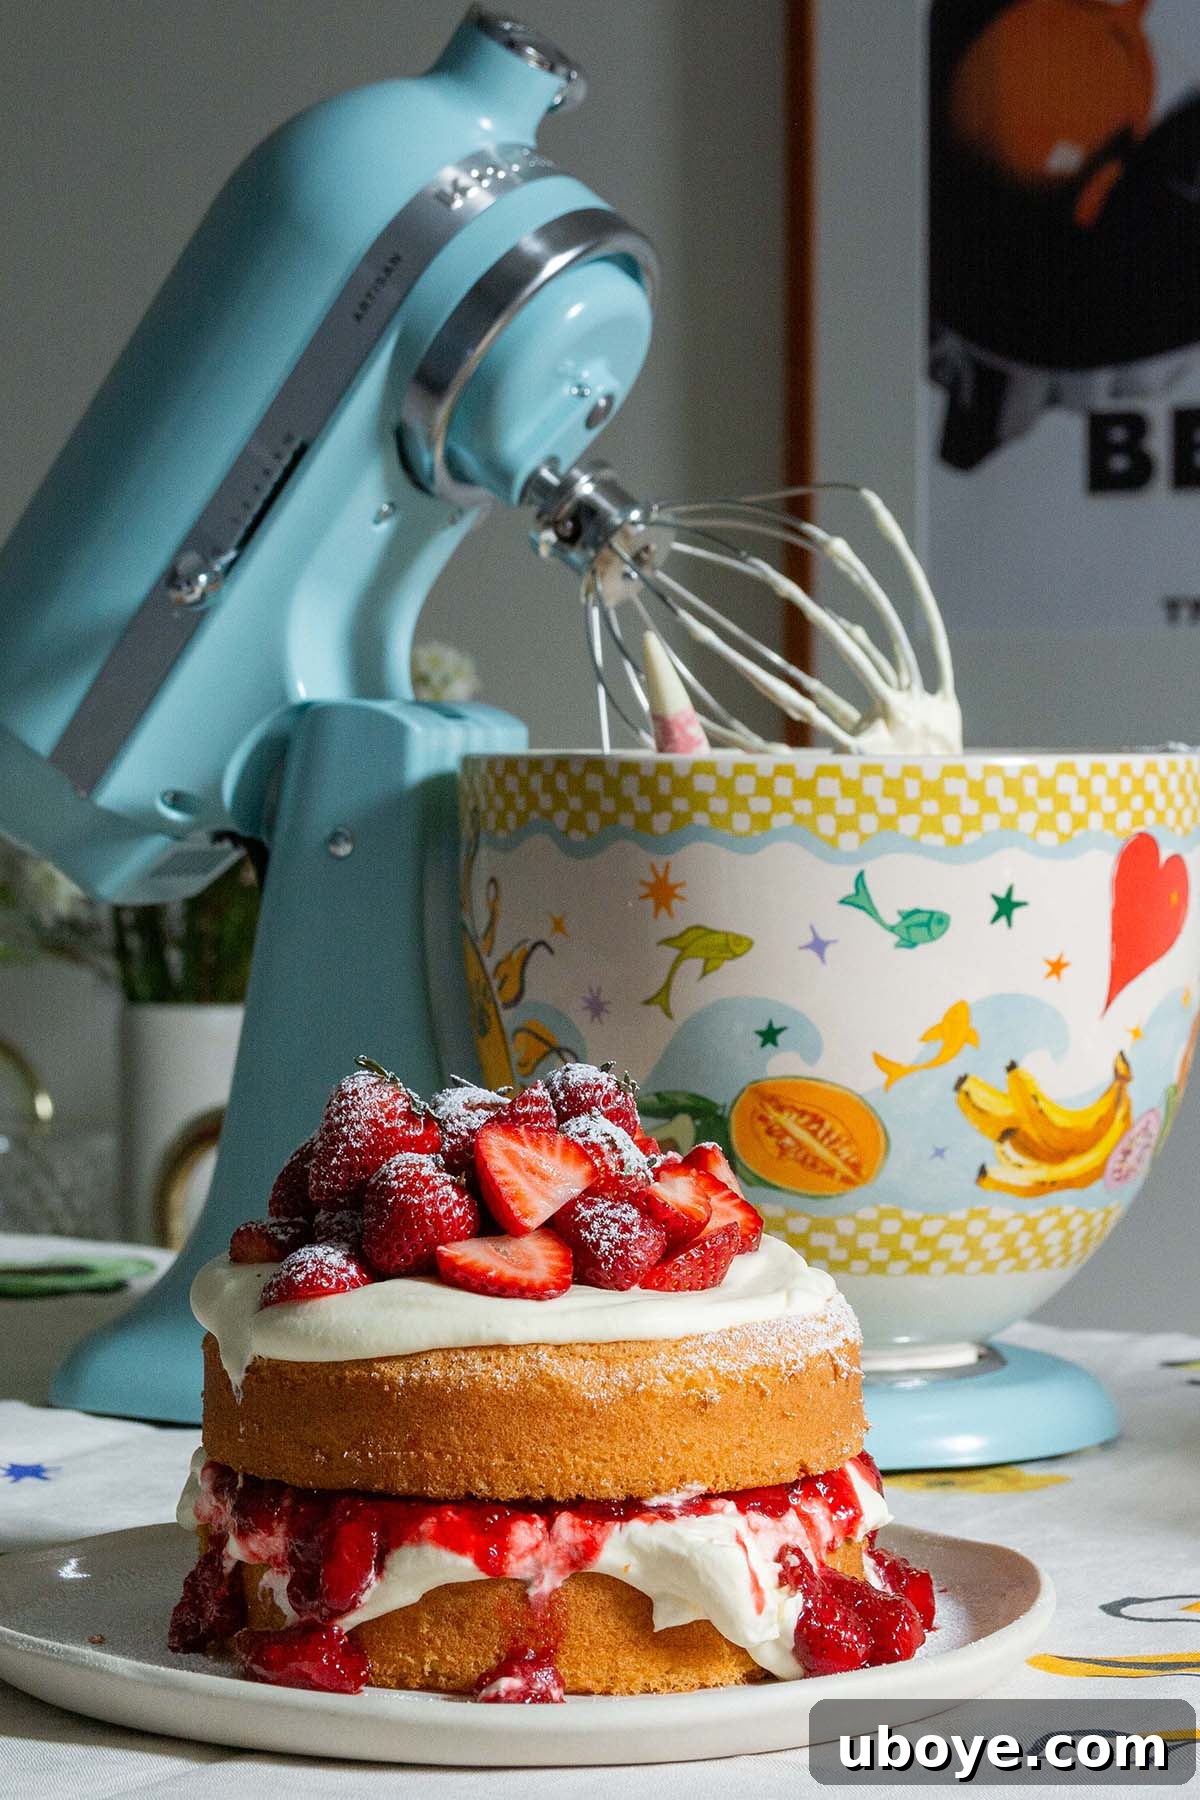
For an even more delightful baking experience, I used the incredibly cool and stylish Alémais x KitchenAid stand mixer. It’s not just a kitchen appliance; it’s a statement piece that blends functionality with high-end design – definitely something to add to your Christmas wish list or any special occasion!
Essential Ingredients for Your Sponge Cake
Curious about what goes into whipping up this Christmas showstopper? You’ll be pleased to know that all you need are a few fundamental ingredients. But let’s dive deeper into the key components that elevate this sponge cake from good to truly unforgettable, ensuring a perfectly balanced flavour and texture.
- Strawberries: The star of our homemade jam, fresh, ripe strawberries provide that vibrant colour and sweet acidity essential for balancing the richness of the cream. Choosing the best berries will make all the difference in your jam’s flavor profile. While store-bought jam can be used in a pinch, making your own homemade strawberry jam, as detailed in our recipe, allows you to control the sweetness and texture, resulting in a fresher, more intense strawberry flavor.
- Caster Sugar (Superfine Sugar): This fine-grained sugar dissolves quickly, which is crucial for achieving a smooth, light sponge and a perfectly balanced jam. Its rapid dissolving qualities ensure that the eggs and sugar beat into a voluminous, stable mixture, providing the structure and airy quality unique to sponge cakes.
- Large Eggs: Eggs are undoubtedly one of the most critical ingredients for a gloriously light and fluffy sponge cake. They provide structure, richness, and, most importantly, the ability to incorporate air when beaten with sugar. The air trapped within the egg-sugar mixture is what gives sponge cakes their signature airy texture. For optimal results, always ensure your eggs are at room temperature before using them. This helps them emulsify more effectively with other ingredients, creating a smoother, more stable batter. A quick trick if you’re short on time: soak your eggs in a bowl of hot tap water for about 10 minutes to bring them up to temperature quickly!
- All-Purpose Flour: The foundation of our cake’s structure. Sifting the flour is key to preventing lumps and ensuring an even distribution throughout the batter, contributing to the cake’s delicate crumb. Using all-purpose flour provides the right balance of protein for a tender yet supportive structure.
- Baking Powder: Our primary leavening agent, baking powder works to create additional lift in the cake, complementing the air incorporated by the eggs. Sifting it along with the flour ensures it’s evenly dispersed, allowing the cake to rise uniformly.
- Unsalted Butter: Melted butter adds richness and moisture to the sponge, contributing to its tender texture and subtle flavor. Using unsalted butter gives you complete control over the salt content in your recipe. Make sure it’s melted and slightly cooled before folding it into the batter to avoid cooking the eggs or deflating the air you’ve worked so hard to incorporate.
- Heavy Whipping Cream (Thickened Cream): Known as thickened cream in Australia or heavy whipping cream in the US, this is the best choice for our decadent filling. Its high fat content is paramount for achieving the fluffiest, most stable whipped cream with the richest flavor. Always opt for cream with the highest fat content available to ensure it whips up beautifully and holds its shape without collapsing.
- Icing Sugar (Powdered Sugar): Used to sweeten the whipped cream, icing sugar also helps stabilize it, preventing it from weeping. A light dusting on the finished cake adds a touch of elegance and extra sweetness.
- Lemon Juice & Zest: These components are vital for our strawberry jam, providing a bright, tangy counterpoint to the sweetness of the strawberries and sugar. Lemon zest adds a wonderful aromatic quality, enhancing the overall fruitiness of the jam.
Refer to the recipe card below for precise measurements and quantities of all ingredients.
Creative Variations for Your Sponge Cake
While the classic Strawberries and Cream Sponge Cake is perfection itself, it’s also incredibly versatile! Feel free to experiment with these delicious variations to suit different tastes or dietary needs:
- Gluten-Free Delight: Easily transform this recipe by swapping the all-purpose flour for a high-quality gluten-free baking flour blend. Brands like Bob’s Red Mill and King Arthur Flour offer excellent GF flours in the US that work wonderfully in sponge cakes, ensuring a tender crumb without compromising on texture.
- Dairy-Free Indulgence: For a dairy-free version, simply substitute the melted butter in the sponge batter with an equal amount of melted coconut oil. For the cream, use chilled full-fat coconut cream (the thick cream from a can of coconut milk, chilled overnight) instead of heavy cream. Ensure the coconut cream is very cold for best whipping results.
- Berry Mix Extravaganza: Elevate the jam’s flavor profile by incorporating a mix of your favorite berries. Replace a portion of the strawberries with an equal amount of fresh blueberries, raspberries, or blackberries. This adds complexity and a beautiful medley of colors and flavors.
- Zesty Lemon Curd Layers: Introduce a delightful citrusy zing by adding layers of homemade lemon curd alongside the whipped cream. The tartness of the lemon curd perfectly complements the sweet cream and sponge. If you’re keen to make your own, you can find a fantastic curd recipe in my lemon curd meringue roulade post!
- Chocolate Lover’s Dream: For those who adore chocolate, consider making a rich chocolate whipped cream to fill your cake. Garnish this decadent version with elegant chocolate shards and perhaps some luscious chocolate-covered strawberries for an extra touch of luxury.
- Tropical Twist: For a refreshing summer vibe, replace the strawberry jam with a homemade mango or passion fruit curd. You could also fold finely diced fresh mango into the whipped cream for added texture and flavor.
- Nutty Notes: For an added layer of flavor and slight crunch, you can lightly toast and chop some almonds or pistachios and sprinkle them between the cream and jam layers. This adds a sophisticated touch.
- Individual Mini Cakes: Instead of baking two large sponges, divide the batter into a muffin tin or small ramekins to create charming individual sponge cakes. These are perfect for portion control and make elegant single servings for a party.
How to Bake a Flawless Strawberries & Cream Sponge Cake
Baking this cake is a delightful journey, and breaking it down into manageable steps makes the process enjoyable and ensures a perfect outcome. Follow these instructions carefully for a truly showstopping dessert.
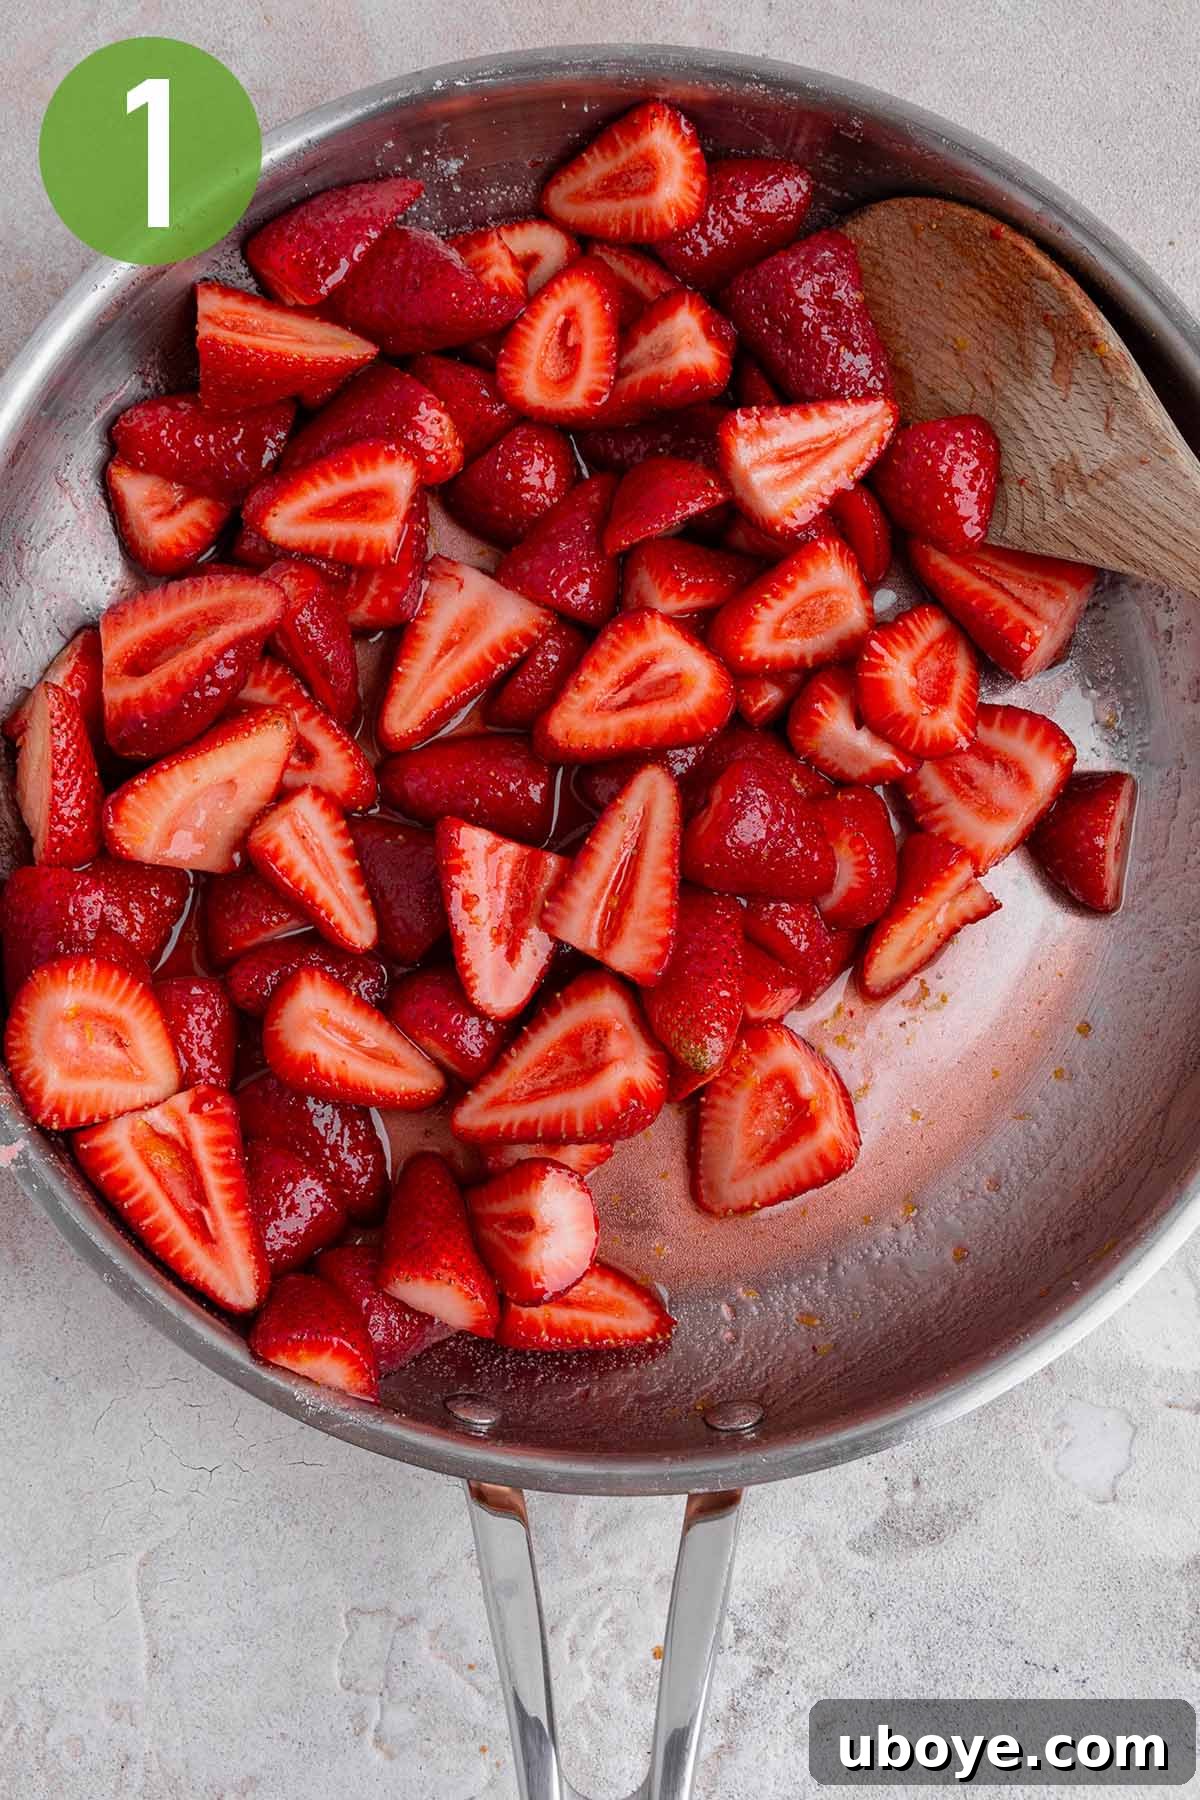
- Prepare Your Homemade Strawberry Jam: Begin by slicing your fresh strawberries. In a saucepan, toss the sliced berries with lemon juice, lemon zest, and sugar. Gently massage the sugar and juice into the strawberries with your hands; this initial step is called macerating. Allow the mixture to sit for about an hour, giving the strawberries time to naturally release their juices. This process intensifies the fruit flavor and helps create a richer jam.
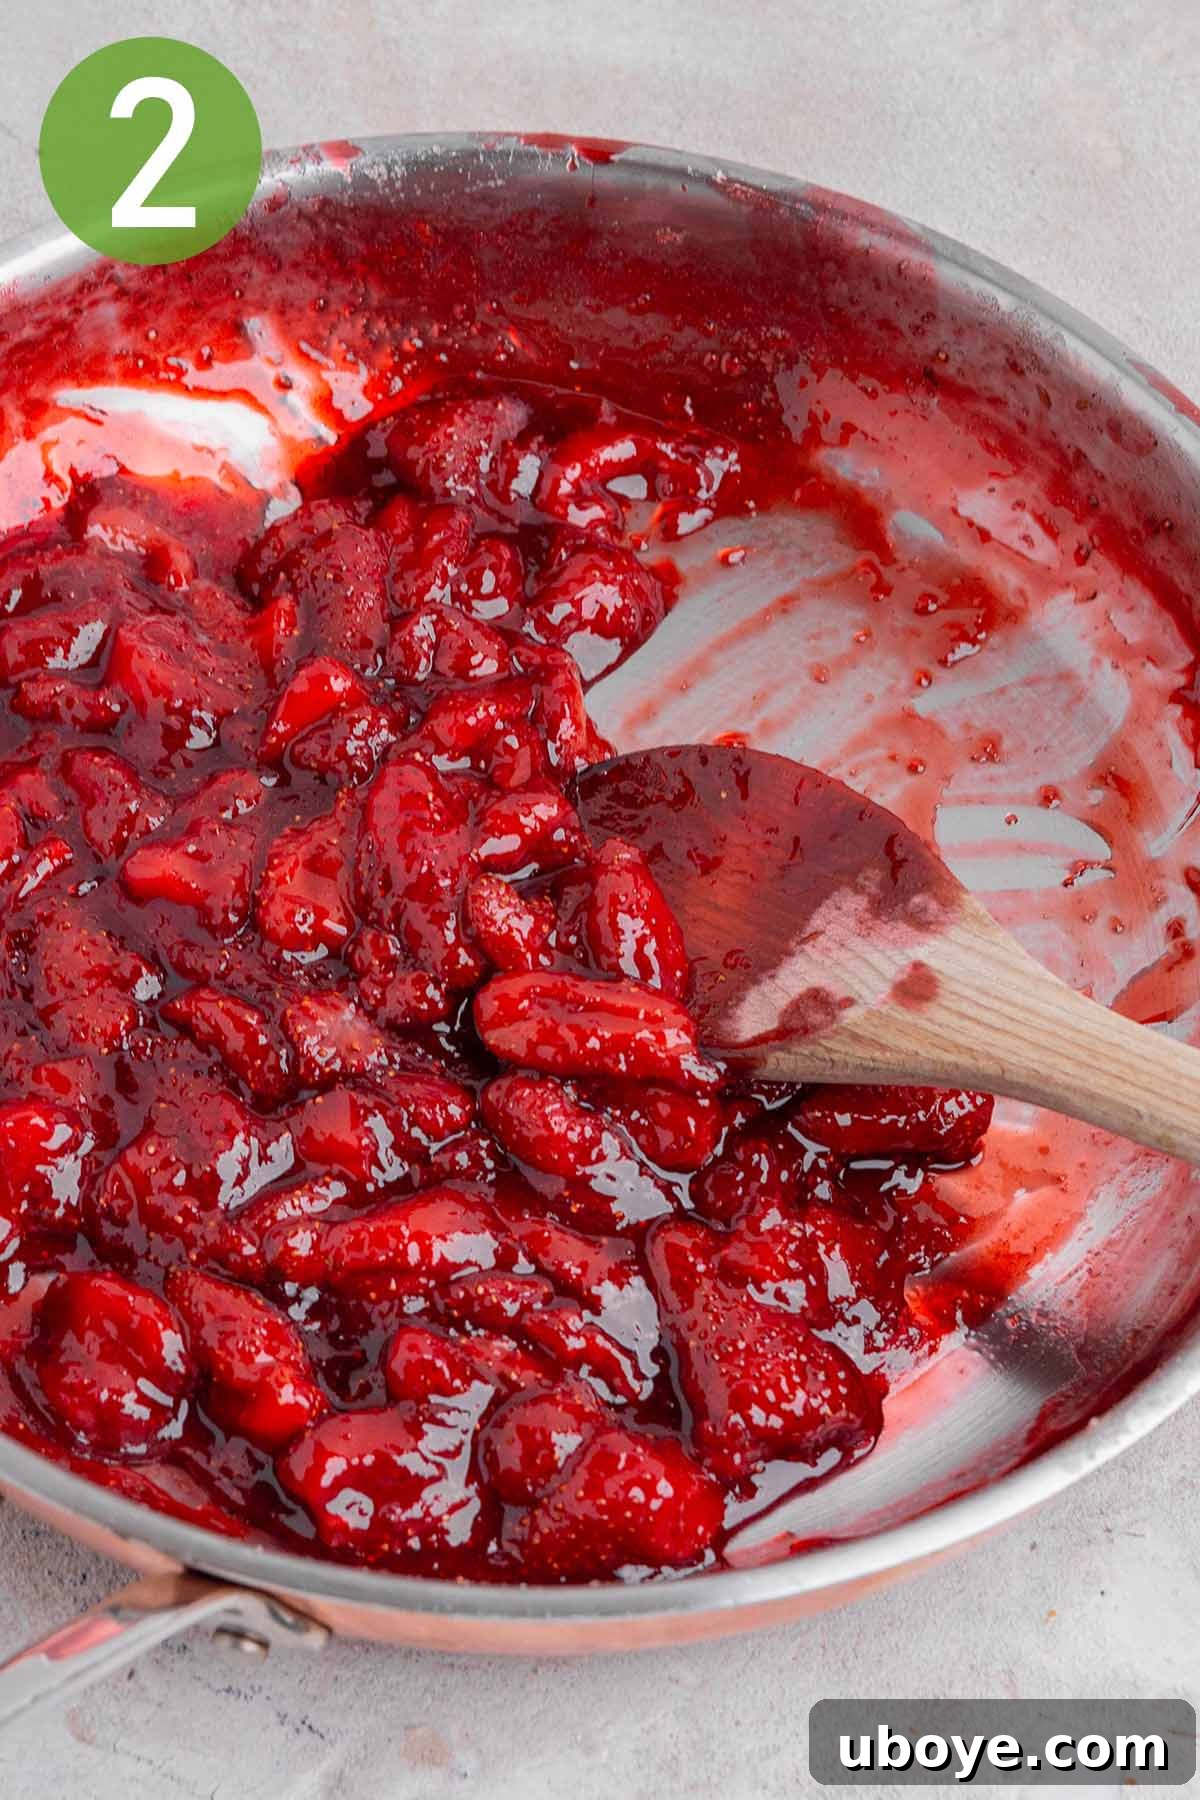
- Cook the Jam to Perfection: Place the saucepan with the macerated berries over medium heat and bring it to a gentle simmer. Cook for approximately 20 minutes, stirring occasionally to prevent sticking. Continue cooking until the jam has thickened to your desired consistency. For a smoother texture, use a potato masher to break up the berries as they cook. Once it reaches your preferred thickness, remove it from the heat and set aside to cool completely. You won’t need all of the jam for the cake, so store the remainder in a sterilized jar in the fridge for up to 14 days. It’s delicious on toast or yogurt!
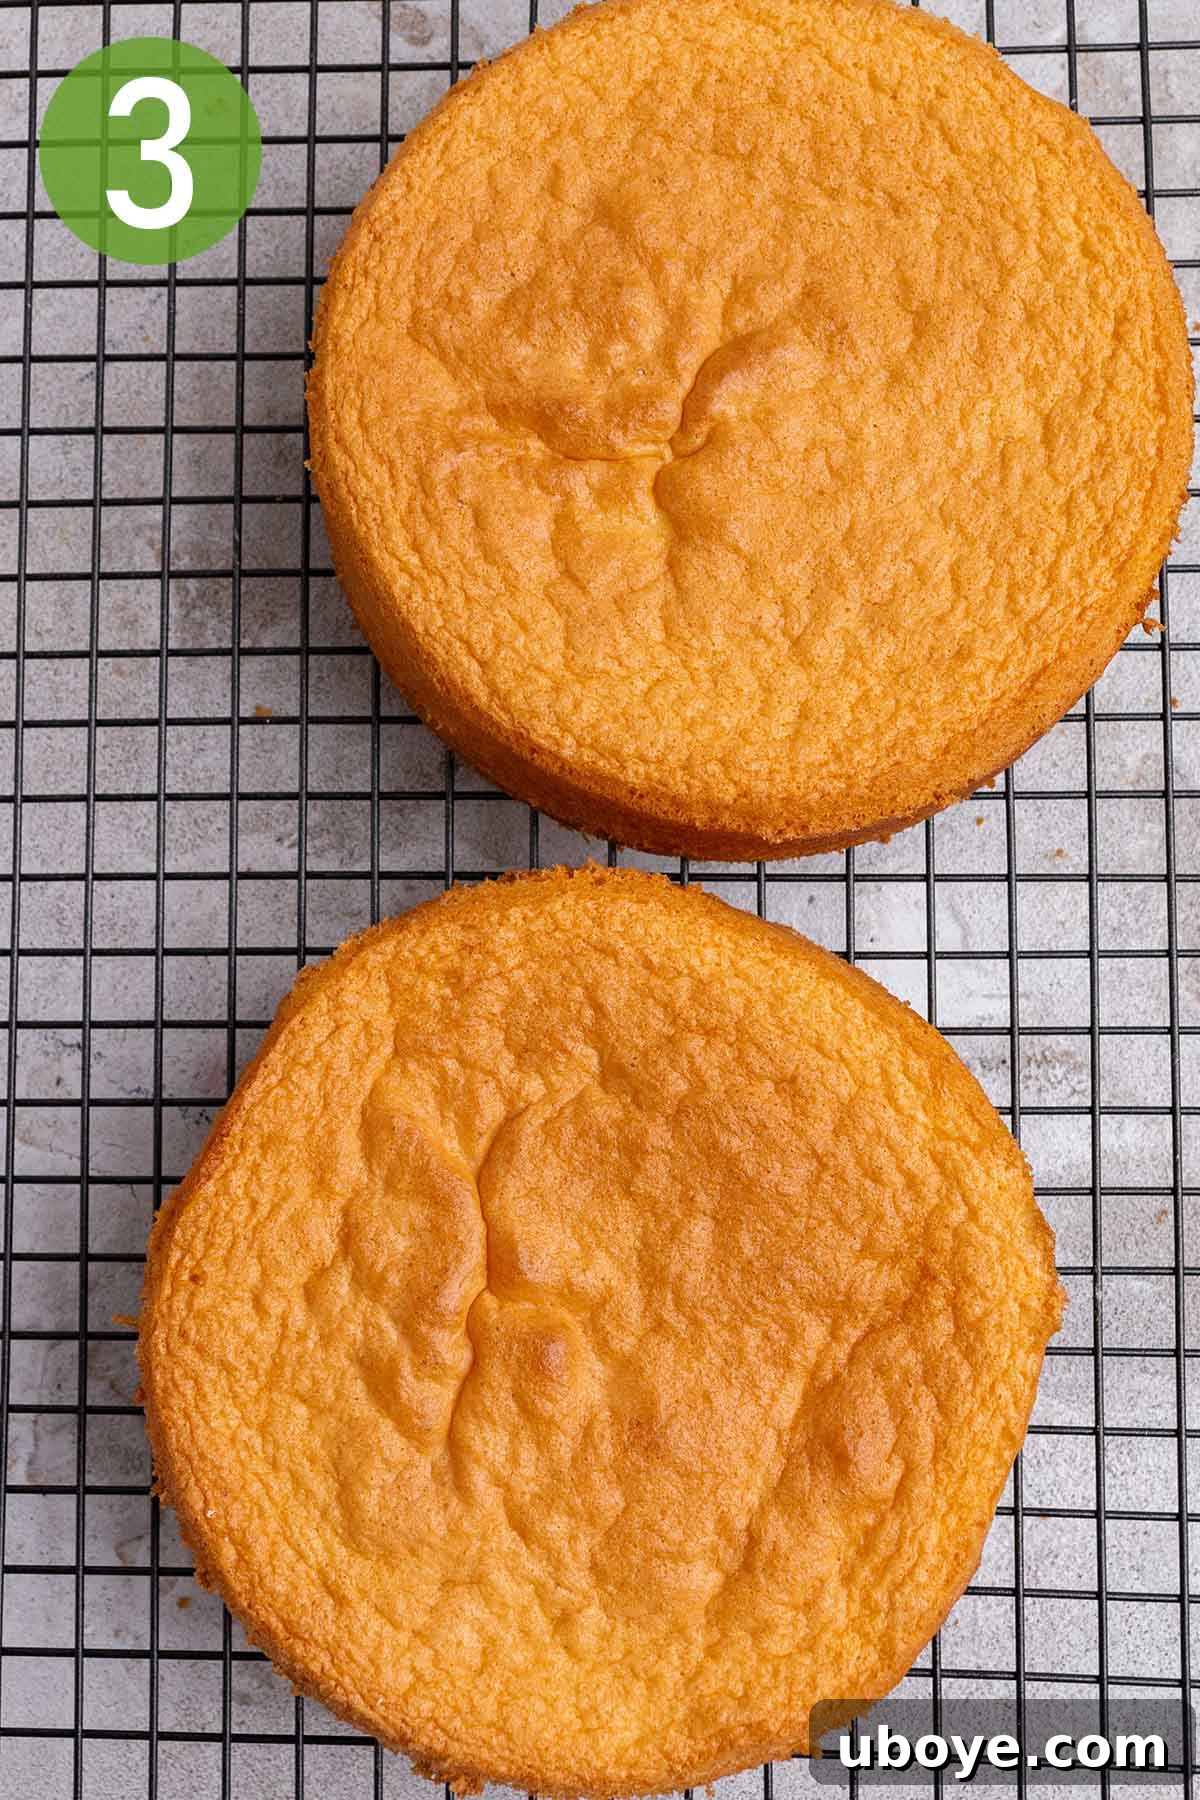
- Bake the Light and Fluffy Sponges: Preheat your oven to 355°F (180°C). Prepare two 6-inch baking tins by greasing them well and lining their bases with parchment paper for easy release. In the bowl of a stand mixer fitted with the whisk attachment, combine the room-temperature eggs and caster sugar. Beat on high speed for a full 10 minutes. This extensive beating is crucial; it incorporates a significant amount of air, causing the mixture to double in size and become pale, thick, and ribbon-like. This aerated mixture is the secret to a light sponge. Next, gently add the sifted all-purpose flour and baking powder in three separate additions, carefully folding it in with a spatula after each addition. Be extremely gentle to avoid deflating the air you’ve built up. Ensure there are no pockets of unincorporated flour. Finally, carefully fold in the melted and slightly cooled unsalted butter, again being mindful not to overmix. Divide the batter evenly between your two prepared tins and bake for 15-16 minutes, or until a toothpick inserted into the center of each sponge comes out clean. Remove the cakes from the oven and let them cool in their tins for about 5 minutes before carefully turning them out onto a wire rack. Allow them to cool completely, at least 20 minutes, before assembling. Cooling thoroughly prevents the cream from melting.
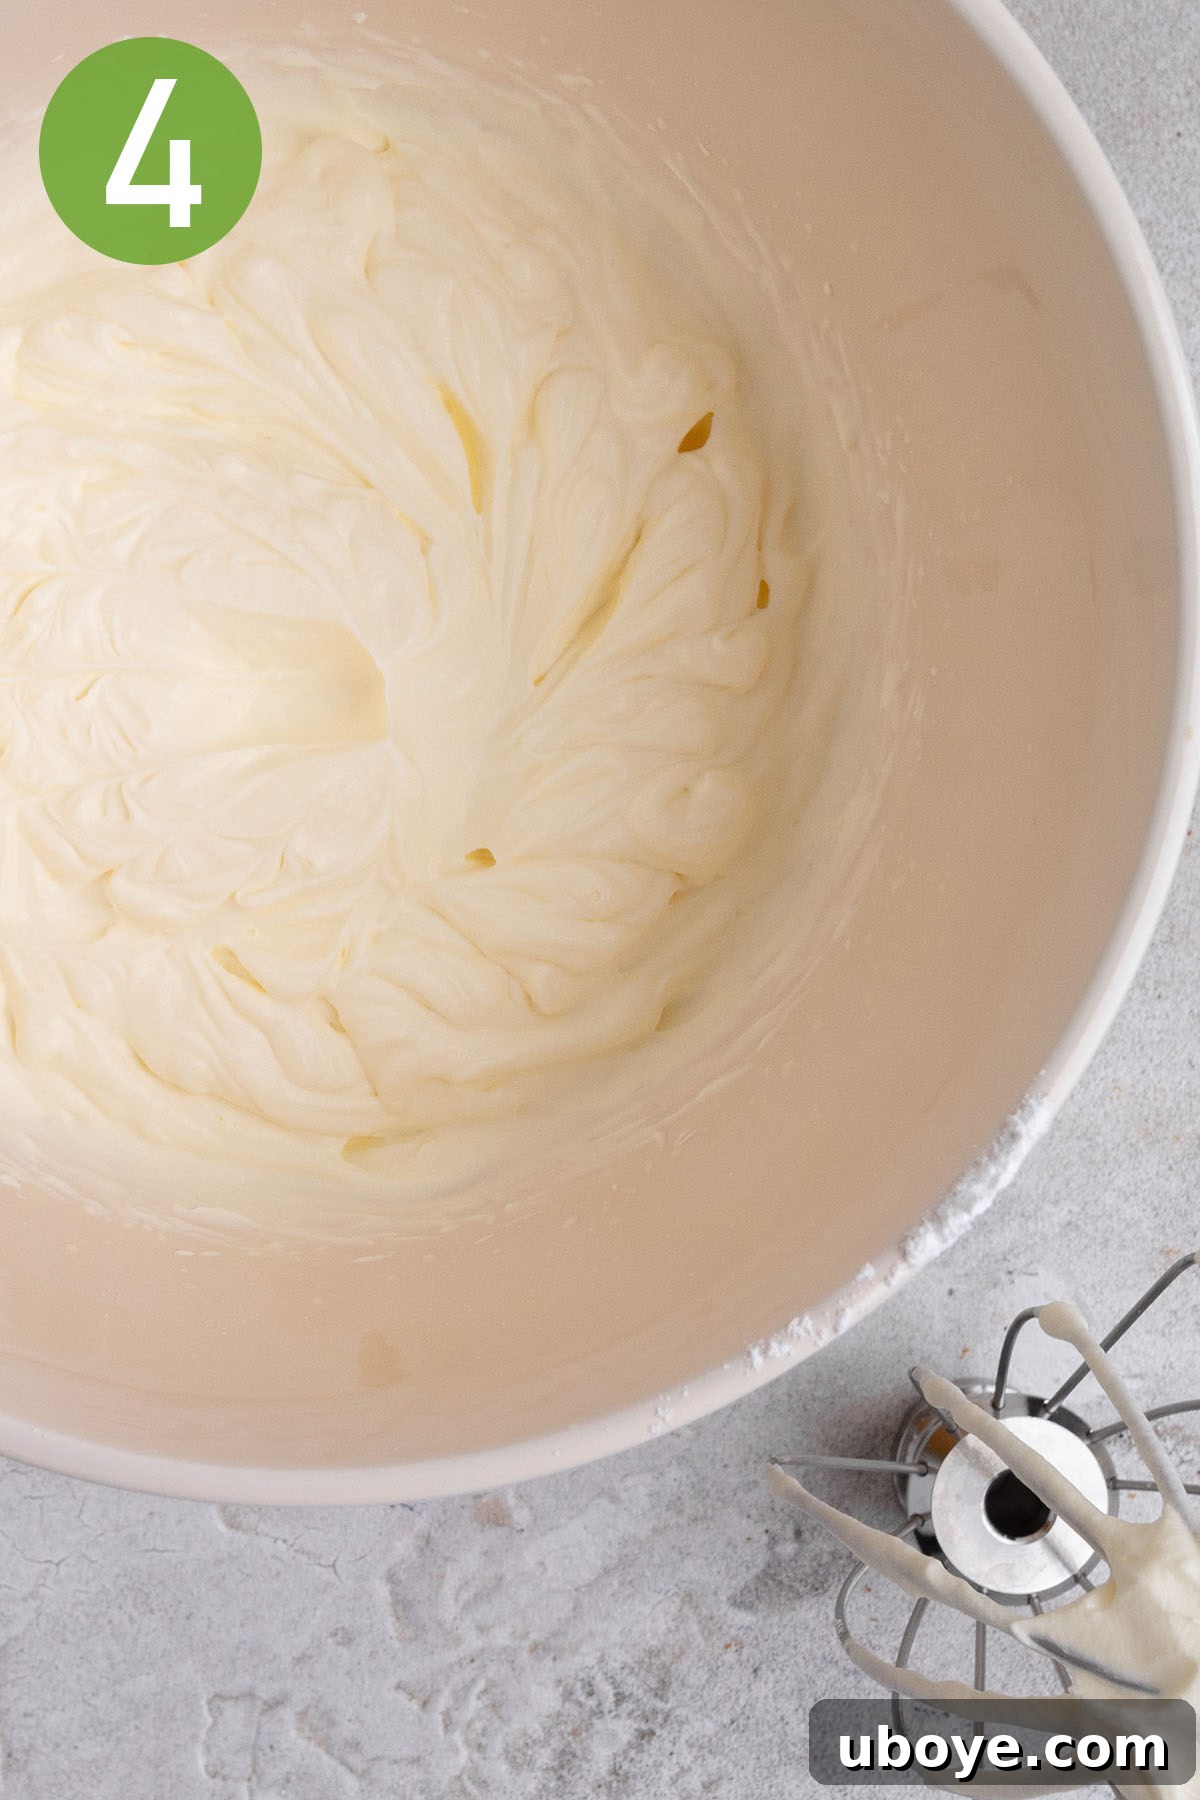
- Whip the Decadent Cream: While your cakes are cooling, prepare the whipped cream. In a large mixing bowl, combine the chilled heavy whipping cream with a little sifted icing sugar. Using a stand mixer or hand-held mixer, whisk the cream on medium-high speed until it holds stiff peaks. This usually takes just a couple of minutes. It’s important to watch it closely; you want firm peaks that stand up on their own, but be careful not to over-whip, as it can quickly turn grainy or curdled. The perfect whipped cream should be smooth, airy, and luscious.
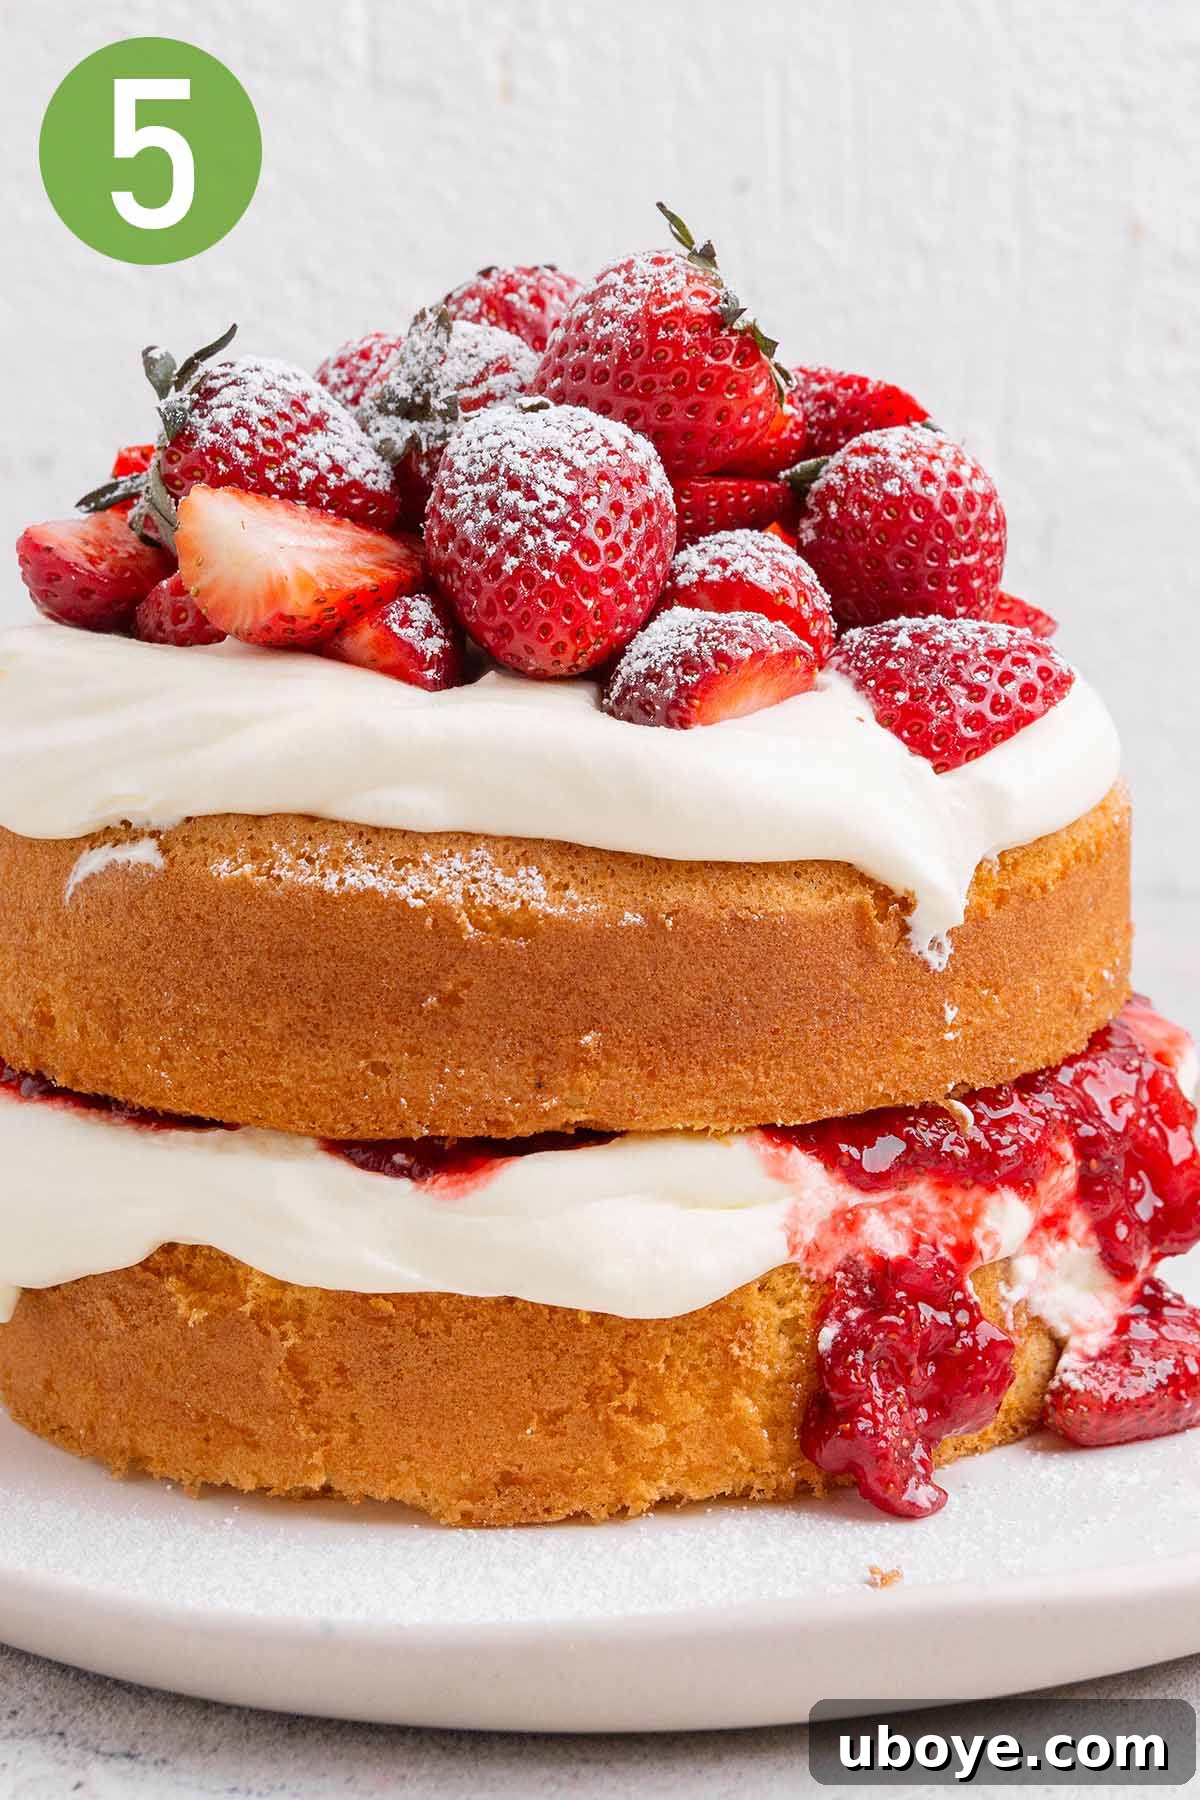
- Assemble and Garnish Your Masterpiece: Once the sponge cakes are completely cool, it’s time for the exciting part – assembly! Place one of the cakes, flat side up, on your chosen serving plate or cake stand. Spread half of the sweetened whipped cream evenly over the top of the first sponge layer. Next, spoon and gently spread the homemade strawberry jam over the cream. Carefully place the second sponge cake, flat side up, on top of the jam layer. Spread the remaining whipped cream over the top of the second cake. To finish, artfully garnish your beautiful cake with a few fresh berries and a generous dusting of icing sugar for that elegant, snowy look. Serve and enjoy your magnificent Strawberries and Cream Sponge Cake right away for the freshest taste and best texture!
Frequently Asked Questions About Sponge Cake
How do I ensure a light and airy sponge cake?
Achieving that desirable light and airy texture in a sponge cake relies on a few critical steps. First, it’s paramount to ensure all your cake ingredients, especially eggs and butter, are at room temperature. This allows them to emulsify and incorporate properly, creating a smoother, more stable batter. Second, the beating of eggs and sugar in a mixer is crucial. You need to beat them until they are significantly increased in volume, pale in color, and form a thick ribbon when the whisk is lifted. This process incorporates a vast amount of air, which is the primary leavening for a sponge. Lastly, once you add the dry ingredients and melted butter, handle the batter very gently. Use a folding technique with a spatula to preserve as much of that incorporated air as possible. Overmixing at this stage will deflate the batter, resulting in a dense cake.
How can I prevent a sponge cake from sinking in the middle?
A sunken sponge cake is a common baking frustration, often caused by two main culprits: an incorrect amount of raising agent or premature oven door opening. To avoid these issues, always measure your baking powder (or baking soda/bicarb) accurately according to the recipe. Too much can cause the cake to rise too quickly and then collapse. Secondly, resist the urge to open the oven door during baking, especially in the first two-thirds of the recommended baking time. A sudden drop in temperature can shock the delicate cake structure, causing it to fall. Ensure your oven temperature is accurate (an oven thermometer can be helpful) and only open the door to check for doneness once the cake has mostly set.
Can I make a sponge cake ahead of time?
Yes, you absolutely can prepare the sponge cake layers in advance, which can be a huge time-saver! For making them a day or two ahead, allow the baked cakes to cool completely. Then, wrap each cooled layer tightly in cling film (plastic wrap) and place them in an airtight container. Store them at room temperature until you’re ready to assemble. For longer storage, you can freeze the cake layers. After wrapping in cling film, wrap them again in aluminum foil to prevent freezer burn. They can be frozen for up to 3 months. Thaw them overnight in the refrigerator, then bring them to room temperature before assembling for the best texture.
What’s the trick to making perfect homemade whipped cream?
Many assume homemade whipped cream is time-consuming or difficult, but it’s surprisingly simple! The key is to start with very cold heavy cream. If you like, you can also chill your mixing bowl and whisk attachment for 10-15 minutes beforehand, as this helps the cream whip up faster and more stably. Add a touch of sifted icing sugar (and optionally a drop of vanilla extract for Chantilly cream). Then, simply whip the cream with a hand-held mixer or stand mixer on medium-high speed until it holds stiff peaks. This will typically take just a couple of minutes, depending on your mixer’s power. The most crucial part is to avoid over-whipping; watch it carefully, as cream can go from perfect to grainy or curdled in a matter of seconds. Stop once the peaks are firm and hold their shape.
What kind of baking tins should I use for sponge cake?
For this recipe, two 6-inch round baking tins are ideal to achieve the classic layered sponge cake look. Ensure they are springform or have removable bottoms, or at least grease and line them well with parchment paper to prevent sticking. You can also use two 8-inch tins, but the cakes will be thinner, and baking time might be slightly reduced. For individual cakes, a muffin tin or small ramekins work perfectly, adjusting baking time accordingly.
Serving Your Strawberries & Cream Sponge Cake
This Strawberries and Cream Sponge Cake isn’t just a dessert; it’s an experience. For a truly festive Aussie Christmas celebration, or any gathering where you want to impress, this cake makes an absolutely perfect centrepiece. Its vibrant colors and fresh flavors are particularly suited for warmer climates or anytime you crave a lighter, yet utterly satisfying, sweet treat.
Beyond its festive appeal, this cake shines at a variety of events:
- Afternoon Tea: A quintessential classic, it pairs beautifully with a hot cup of English breakfast tea or a fragrant Earl Grey. Arrange it alongside delicate finger sandwiches and scones for a traditional spread.
- Summer Garden Party: Its fresh berry notes make it ideal for an outdoor celebration. Serve it chilled, perhaps with extra fresh berries on the side, and a sparkling elderflower cordial.
- Birthday Celebrations: A crowd-pleaser for all ages, this cake can easily be personalized with candles or a custom topper for a memorable birthday dessert.
- Brunch or Dessert Bar: Offer individual slices as part of a lavish brunch spread, or include it on a dessert bar with other delightful sweets.
To create a truly unforgettable meal, consider pairing your sponge cake with a delicious main course. We recommend a flavourful main like a tender garlicky slow-cooked lamb shoulder or succulent honey garlic butter lamb cutlets. Complement these with a refreshing side dish such as a vibrant rainbow antipasto pasta salad or a unique peach salad with garlic confit dressing. Finish your feast with your favorite summer drink – perhaps a crisp rosé, a homemade lemonade, or a sparkling non-alcoholic punch – for a fun and complete culinary experience.
Expert Baking Tips for a Perfect Sponge Cake
Achieving a bakery-quality sponge cake at home is easier than you think with these professional insights. Follow these expert tips to ensure your Strawberries and Cream Sponge Cake turns out perfectly every time:
- Gentle Hand is Key: When incorporating the sifted flour and melted butter into the egg mixture, the golden rule is to handle the batter as gently as possible. Use a large spatula and a folding technique, bringing the mixture from the bottom of the bowl over the top. Overmixing will deflate the air that you’ve painstakingly whisked into the eggs, resulting in a dense, heavy cake instead of a light and airy one.
- Patience with Cooling: This is a crucial step often overlooked! There is one golden rule when icing and decorating any cake: let it cool down completely before decorating! Attempting to spread whipped cream on even a slightly warm cake will lead to a melty, runny mess. The cream will absorb into the cake, ruining both the appearance and texture. Ensure your cake layers are thoroughly cooled, ideally at room temperature for at least 20-30 minutes, or even longer if your kitchen is warm.
- Embrace Your Creativity in Decorating: Decorating a cake is an art form, but it’s also an opportunity for fun and personal expression. Don’t feel pressured to achieve perfection – focus on enjoying the process and finding your unique style. For an easy yet elegant effect, try piping the whipped cream using a star tip; it instantly elevates the cake’s presentation. You can also play with fresh berry arrangements, a dusting of cocoa powder, or even a few edible flowers.
- Room Temperature Ingredients: As mentioned, for the sponge layers, ensure eggs and butter are at room temperature. This promotes better emulsification and a more stable, airy batter.
- Accurate Measurements: Baking is a science, so precision matters. Use kitchen scales for dry ingredients like flour and sugar for the most accurate results, as cup measurements can vary.
- Don’t Skimp on Whipping Time for Eggs: Beating the eggs and sugar for the full 10 minutes (or until pale and ribbon-like) is vital. This is where the majority of the cake’s lightness comes from.
- Chill Your Cream & Bowl: For the whipped cream, make sure both the heavy cream and your mixing bowl (and whisk attachment) are thoroughly chilled. This helps the cream whip up faster and hold its stiff peaks longer.
- Perfect Jam Consistency: When making the strawberry jam, aim for a consistency that is thick enough to spread but still soft. It should not be too runny, or it will seep into the cake, and not too thick, or it will be hard to spread. A good test is to put a small spoonful on a cold plate; if it wrinkles when pushed with a finger, it’s ready.
Other Irresistible Dessert Recipes You’ll Love
If you’ve enjoyed baking and tasting this delightful sponge cake, then you’re in for a treat with these other fantastic dessert recipes from our kitchen. Expand your repertoire and discover new favorites that are perfect for any occasion:
- Homemade Lemon Curd (4 Ingredients!)
- Lemon Curd Meringue Roulade
- White Chocolate, Pistachio & Raspberry Olive Oil Cake
- Arroz Con Leche (Abuelo’s Spanish Rice Pudding)
Have questions about this recipe or want to share your thoughts? Please feel free to leave a comment or review below the recipe card! I always appreciate hearing your feedback and love answering your questions to help you perfect your baking.
If you make this gorgeous Strawberries and Cream Sponge Cake, please follow me and tag me on Instagram, TikTok, or Pinterest. I can’t wait to see your wonderful creations and celebrate your baking success!
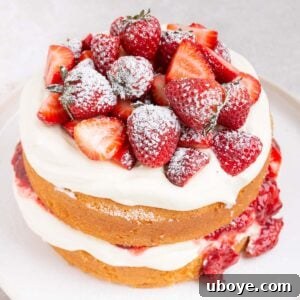
Strawberries and Cream Sponge Cake
Daen Lia
This light, fluffy Strawberries and Cream Sponge Cake is elegantly layered with rich whipped cream and luscious homemade strawberry jam. It’s the ultimate dessert for any occasion, serving as a showstopping centrepiece for your festive spread or a refreshing treat for summer. With its soft, delicate sponges and sweet, tangy jam, this cake is a guaranteed crowd-pleaser that looks as impressive as it tastes!
45 mins
35 mins
25 mins
1 hr 45 mins
8
Average rating: 5 stars from 5 votes
Print Recipe
Ingredients
For the Homemade Strawberry Jam
- 18 ounces fresh strawberries, sliced
- 3/4 cup caster sugar
- 2 tablespoons lemon juice, from 1 lemon
- 1 tablespoon lemon zest, from 1 lemon
For the Light Sponge Cakes
- 1/2 cup caster sugar
- 4 large eggs, at room temperature
- 3/4 cup all-purpose flour, sifted
- 3/4 teaspoon baking powder, sifted
- 4 tablespoons unsalted butter, melted and slightly cooled
For the Cream & Garnish
- 1 1/4 cup heavy whipping cream, chilled
- 1/4 cup sifted icing sugar, plus extra for garnish
- 1/3 cup homemade strawberry jam (from the batch prepared above)
- Fresh strawberries, for garnish
Instructions
Making the Homemade Strawberry Jam
-
Macerate: In a saucepan, combine the sliced strawberries, sugar, lemon juice, and lemon zest. Gently massage the sugar and juice into the strawberries with your hands until well combined. Allow the mixture to sit at room temperature for approximately 1 hour, or until the strawberries have released their natural juices. This step is crucial for developing a rich, deep strawberry flavor.
-
Simmer: Place the saucepan over medium heat and bring the strawberry mixture to a gentle simmer. Cook for about 20 minutes, stirring occasionally to prevent sticking and ensure even cooking. Continue to cook until the jam has thickened to your desired consistency. For a smoother jam texture, use a potato masher to break up the strawberries while they cook. Remove from heat and set aside to cool completely before using.
-
Store: You will only need approximately 1/3 cup of this jam for the cake recipe. Transfer the remaining jam to a sterilized jar. It can be stored in the refrigerator for up to 14 days and is wonderful on toast, scones, or yogurt.
Making the Light Sponge Cakes
-
Preheat Oven & Prepare Tins: Preheat your oven to 355°F (180°C). Lightly grease two 6-inch round baking tins. For easier removal, line the bases of the tins with parchment paper if desired.
-
Beat Eggs & Sugar: In the bowl of a stand mixer fitted with the whisk attachment (or using a large bowl and a hand-held mixer), combine the 4 large room-temperature eggs and 1/2 cup caster sugar. Beat on high speed for approximately 10 minutes. The mixture should become very pale, thick, and greatly increased in volume, forming a “ribbon” when the whisk is lifted – this indicates sufficient aeration, which is key to a light sponge.
-
Fold in Dry Ingredients & Butter: Sift the 3/4 cup all-purpose flour and 3/4 teaspoon baking powder together. Add the sifted dry ingredients to the egg mixture in thirds, gently folding them in with a spatula after each addition. Be careful not to deflate the airy egg mixture. Once the flour is just incorporated, carefully pour in the 4 tablespoons of melted and slightly cooled unsalted butter, folding it in gently until no streaks remain. Avoid overmixing.
-
Bake: Divide the sponge cake batter evenly between the two prepared 6-inch baking tins. Transfer the tins to the preheated oven and bake for 15-16 minutes, or until a wooden toothpick inserted into the center of each sponge comes out clean. The cakes should be golden brown and spring back when lightly touched.
-
Cool: Once baked, remove the tins from the oven and allow the cakes to cool in their tins for 5 minutes. After 5 minutes, carefully invert the sponges onto a wire rack and let them cool completely. This cooling process usually takes at least 20 minutes and is essential before assembly to prevent the cream from melting.
Assembling the Elegant Cake
-
Whip the Cream: In a clean, chilled mixing bowl, combine the 1 1/4 cups heavy whipping cream and 1/4 cup sifted icing sugar. Using a stand mixer or hand-held mixer, whisk on medium-high speed until the cream holds firm, stiff peaks. Be vigilant and avoid overmixing, as whipped cream can quickly become dry and curdled if overdone.
-
Decorate & Serve: Once both sponge layers are completely cool, place one cake layer flat side up on your desired serving plate or cake stand. Spread half of the freshly whipped cream evenly over the surface of this cake layer. Next, spoon and gently spread the 1/3 cup of homemade strawberry jam over the whipped cream. Carefully place the second sponge cake layer, flat side up, on top of the jam. Spread the remaining whipped cream over the top of the second cake. Garnish generously with fresh strawberries and a light dusting of icing sugar for a beautiful finish. Slice and enjoy your delightful Strawberries and Cream Sponge Cake immediately!
Video Tutorial
Notes
- When making the sponge mixture, handle the batter gently and avoid overmixing. This crucial step helps retain the air incorporated into the eggs, ensuring your baked cake is wonderfully light and fluffy.
- There is one golden rule when it comes to icing and decorating any cake: always ensure the cake has cooled down completely before attempting to decorate! This simple rule prevents the whipped cream from melting, seeping into the cake, and ruining the aesthetic and texture.
- Decorating a cake is a creative outlet and doesn’t need to be intimidating. Have fun experimenting and finding your own personal style. For an effortlessly elegant touch, try piping the whipped cream using a star tip – it creates a beautiful, professional-looking effect with minimal effort!
Nutrition Information
Calories: 357kcal
Carbohydrates: 37g
Protein: 5g
Fat: 22g
Saturated Fat: 13g
Polyunsaturated Fat: 1g
Monounsaturated Fat: 6g
Trans Fat: 0.2g
Cholesterol: 140mg
Sodium: 87mg
Potassium: 92mg
Fiber: 0.5g
Sugar: 25g
Vitamin A: 848IU
Vitamin C: 1mg
Calcium: 66mg
Iron: 1mg
Nutrition information is an estimate based on ingredients and calculation. It should only be used as an approximation.

Loved this recipe? Leave a comment and rating below!
Images captured by Alanna Penna Photography