
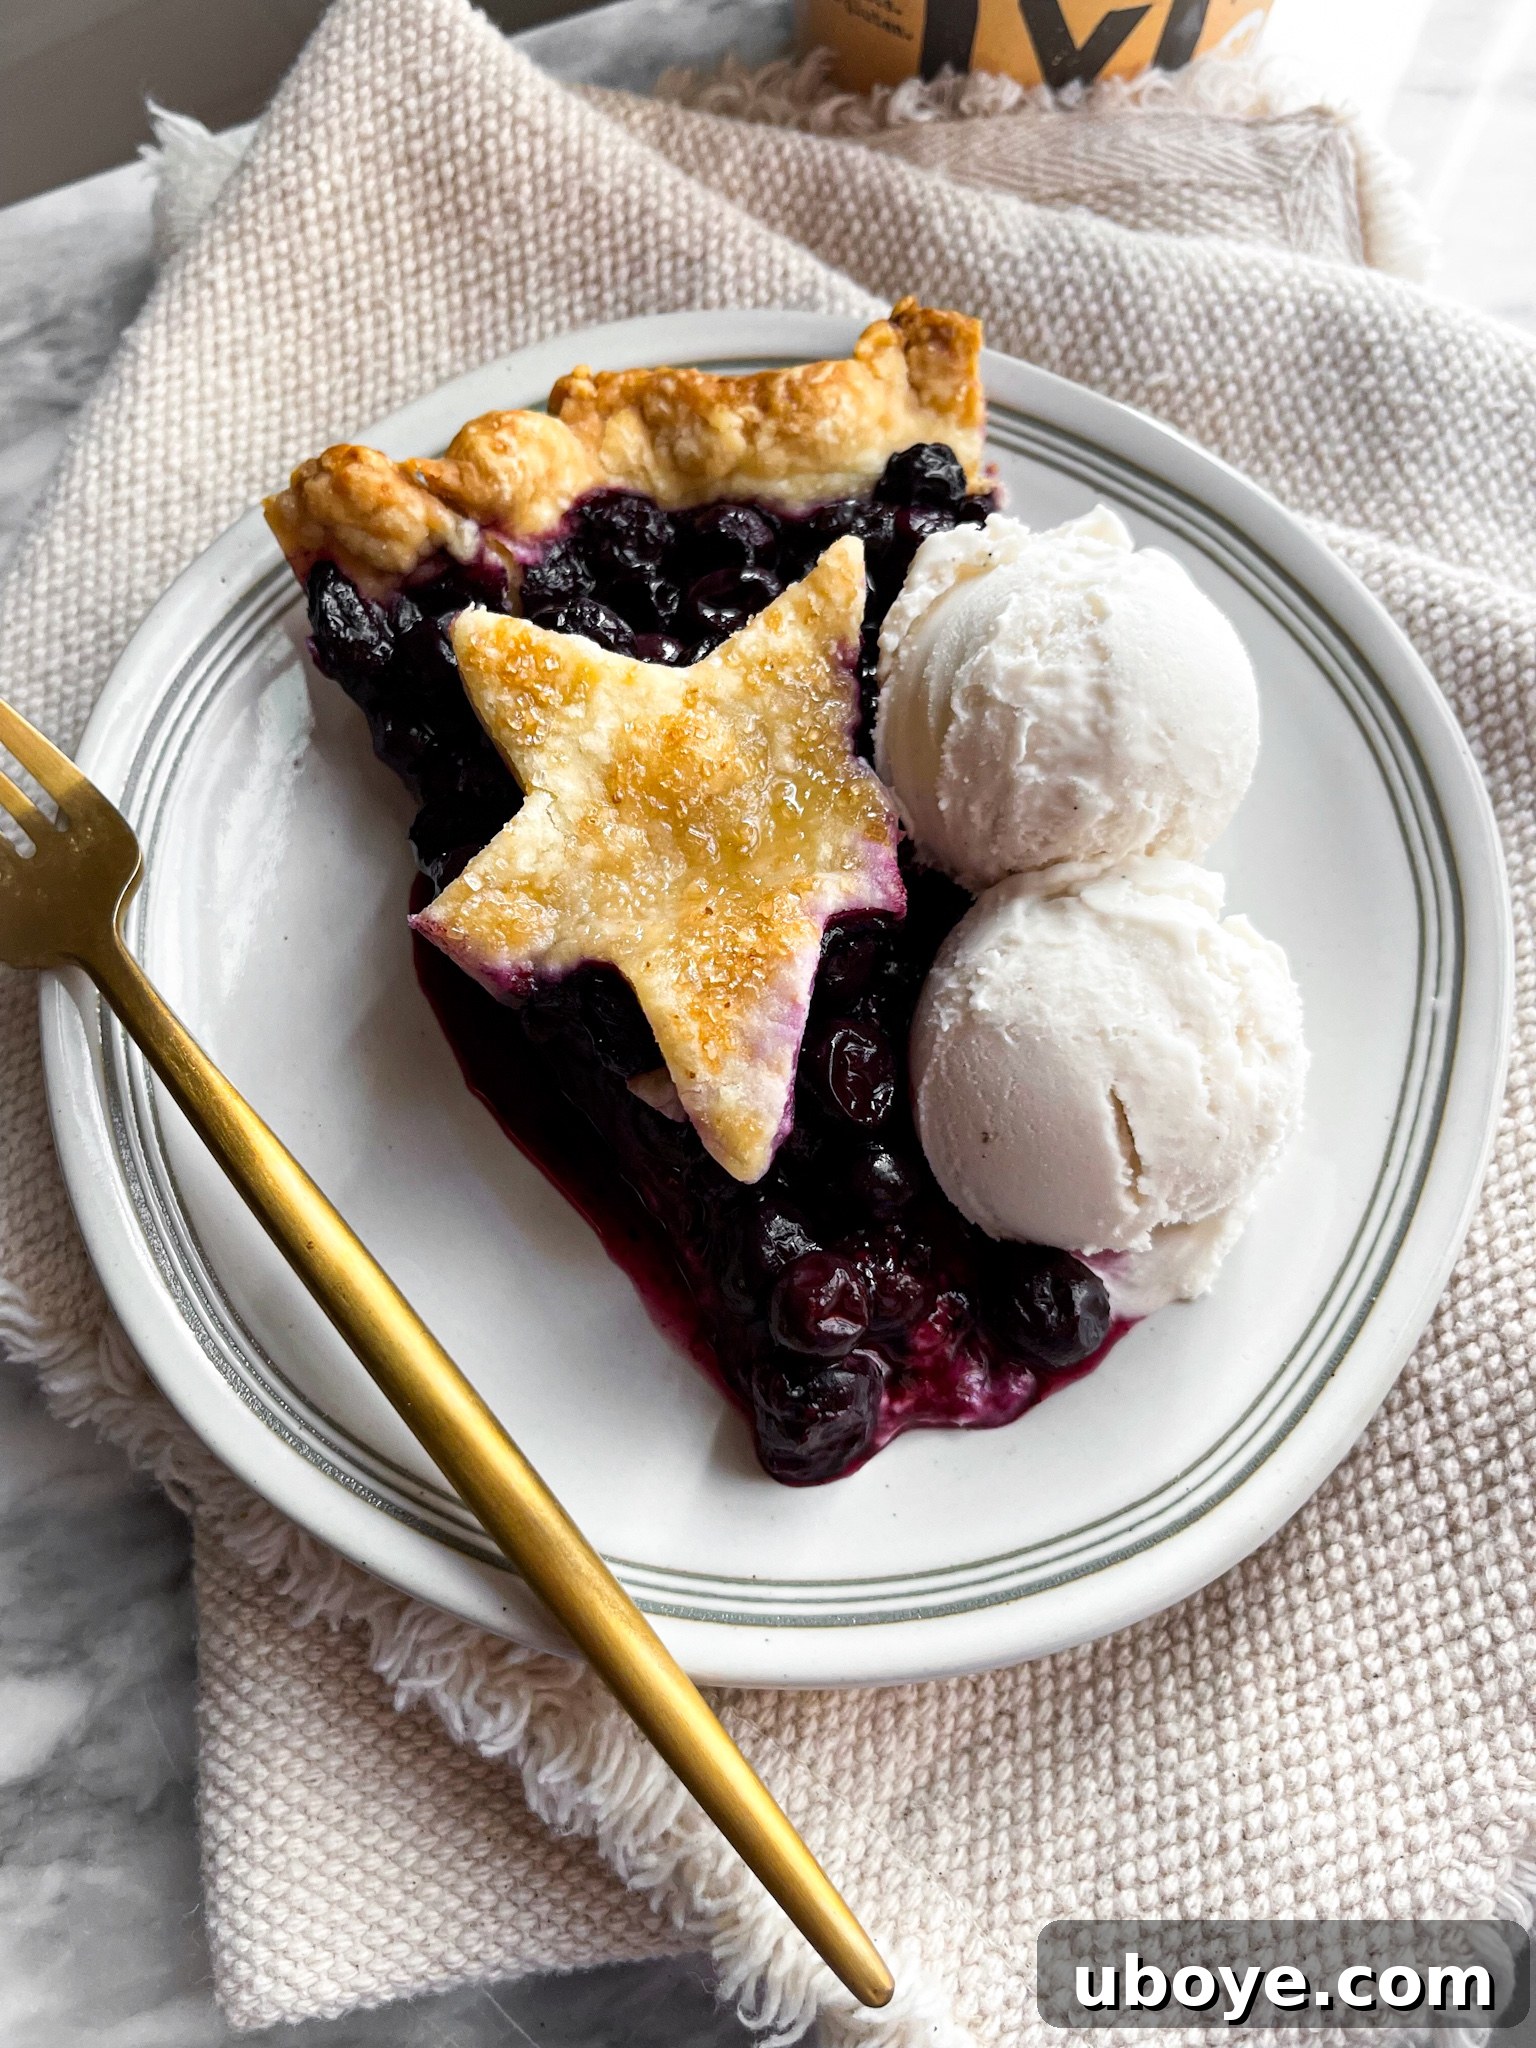
Ultimate Vegan Blueberry Jam Pie with a Flaky, Dairy-Free Crust
Prepare to embark on a delightful culinary adventure with this ultimate vegan blueberry jam pie recipe. Imagine a golden, impossibly flaky “all-butter” crust – completely dairy-free, of course – enveloping a rich, luscious blueberry jam filling. This isn’t just a dessert; it’s a comforting masterpiece, crafted with love and designed to bring a touch of old-fashioned charm to your table. Whether you’re a seasoned baker or new to the plant-based kitchen, you’ll find this recipe enjoyable to make and utterly irresistible to eat!
The magic truly happens when this warm, fruity pie is served with a generous scoop of creamy vegan vanilla ice cream. The sweet contrast between the jammy blueberries and the tender, buttery crust creates a symphony of flavors and textures that evoke pure bliss. It’s the kind of homemade treat that instantly makes any moment feel special, filling your home with an aroma that speaks of comfort and cherished traditions.
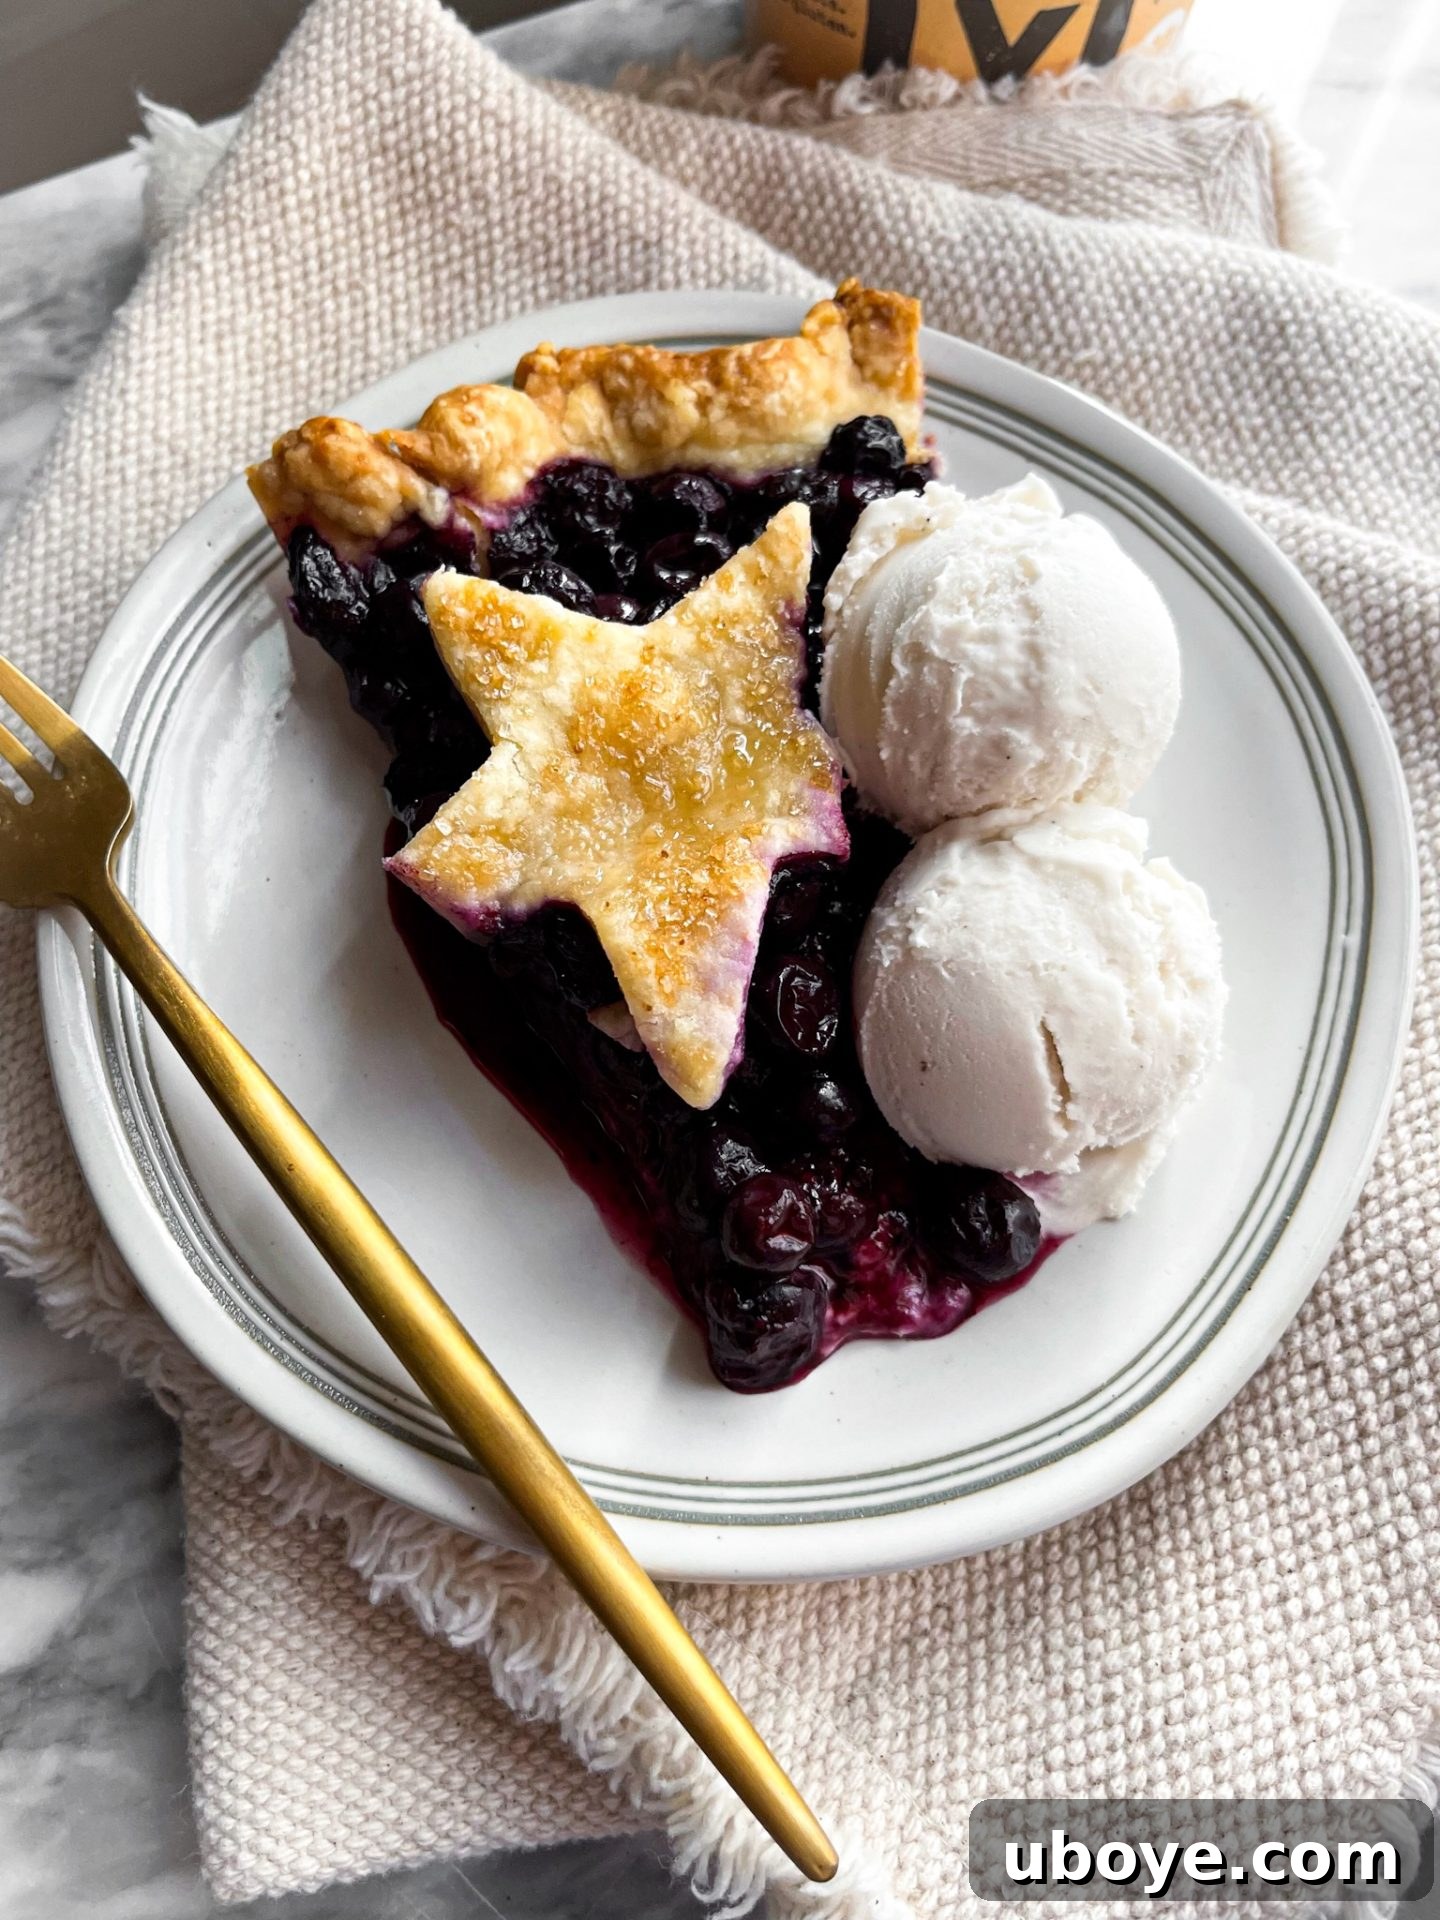
The Enduring Charm of Homemade Vegan Pie
My journey into the world of pie baking, particularly vegan pies, began with a hint of trepidation. For a long time, I found myself sticking to simpler, less intimidating recipes like easy peach and raspberry crumbles or hearty blueberry breakfast crumbles. The notion of crafting pie dough from scratch seemed like an enormous undertaking. However, the allure of a truly homemade pie – especially a delicious vegan one, which can be surprisingly elusive even in food-centric cities – eventually won me over. The idea of dedicating an afternoon to creating a cozy, old-fashioned dessert became less of a chore and more of a cherished, relaxing baking project.
My initial attempt, while wonderfully tasty, wasn’t a picture-perfect creation. Yet, its aesthetic imperfections faded into the background as I savored the entire baking experience. The process of transforming simple ingredients into a beautiful pie from start to finish proved incredibly enjoyable and almost meditative. It allowed me to slow down, focus intently, and find a profound sense of calm. There’s truly nothing quite like the comforting scent of a freshly baked pie cooling on the counter; it instantly infuses your home with warmth and a profound sense of welcome.
It is my sincere hope that this recipe brings you the same sense of joy and relaxation it brings me. Dive into the simple pleasures of creating a phenomenal vegan blueberry pie, and don’t forget to share your delightful experiences! 🫐🥧😊
What Makes This Vegan Blueberry Jam Pie So Special?
This “Old-Fashioned Blueberry Jam Pie” is a celebration of classic dessert principles, meticulously adapted for a vegan and dairy-free lifestyle. It embodies a straightforward, no-fuss approach, allowing the quality of its simple ingredients to shine. The cornerstone of this pie is its incredible crust, requiring just five basic components: all-purpose flour, a touch of salt, a hint of sugar, premium vegan butter, and ice-cold water. When combined with the right technique, these ingredients yield a remarkably tender, golden-brown, and exquisitely flaky crust that provides the perfect textural and flavor balance to the vibrant filling.
The Secret to a Deeply Jammy Filling
The true heart of this pie lies within its irresistibly luscious blueberry filling. What sets it apart? We purposefully choose frozen blueberries over fresh ones for a crucial reason: frozen berries inherently contain less excess moisture than fresh fruit. This characteristic is vital in pie baking, as it prevents a watery filling that can lead to a soggy bottom crust. Frozen berries also maintain their structural integrity better during baking, resulting in a more consistent and robust texture. To intensify the natural blueberry flavor and achieve that coveted thick, “jammy” consistency, we incorporate a generous amount of high-quality blueberry jam. The jam deepens the fruit’s natural sweetness and contributes a beautiful richness, creating a filling that beautifully clings to each slice.
Further enhancing this decadent filling is a precise amount of cornstarch, acting as a natural thickener to ensure the pie sets perfectly without becoming overly firm or gelatinous. A sprinkle of cane sugar balances the natural tartness of the blueberries, while a splash of pure vanilla extract infuses the mixture with a subtle warmth and aromatic depth, elevating the entire flavor profile. This delightful concoction is then carefully spooned into our prepared bottom crust, ready to be topped with its decorative counterpart.
A Charming Touch: Star-Shaped Crust Topping
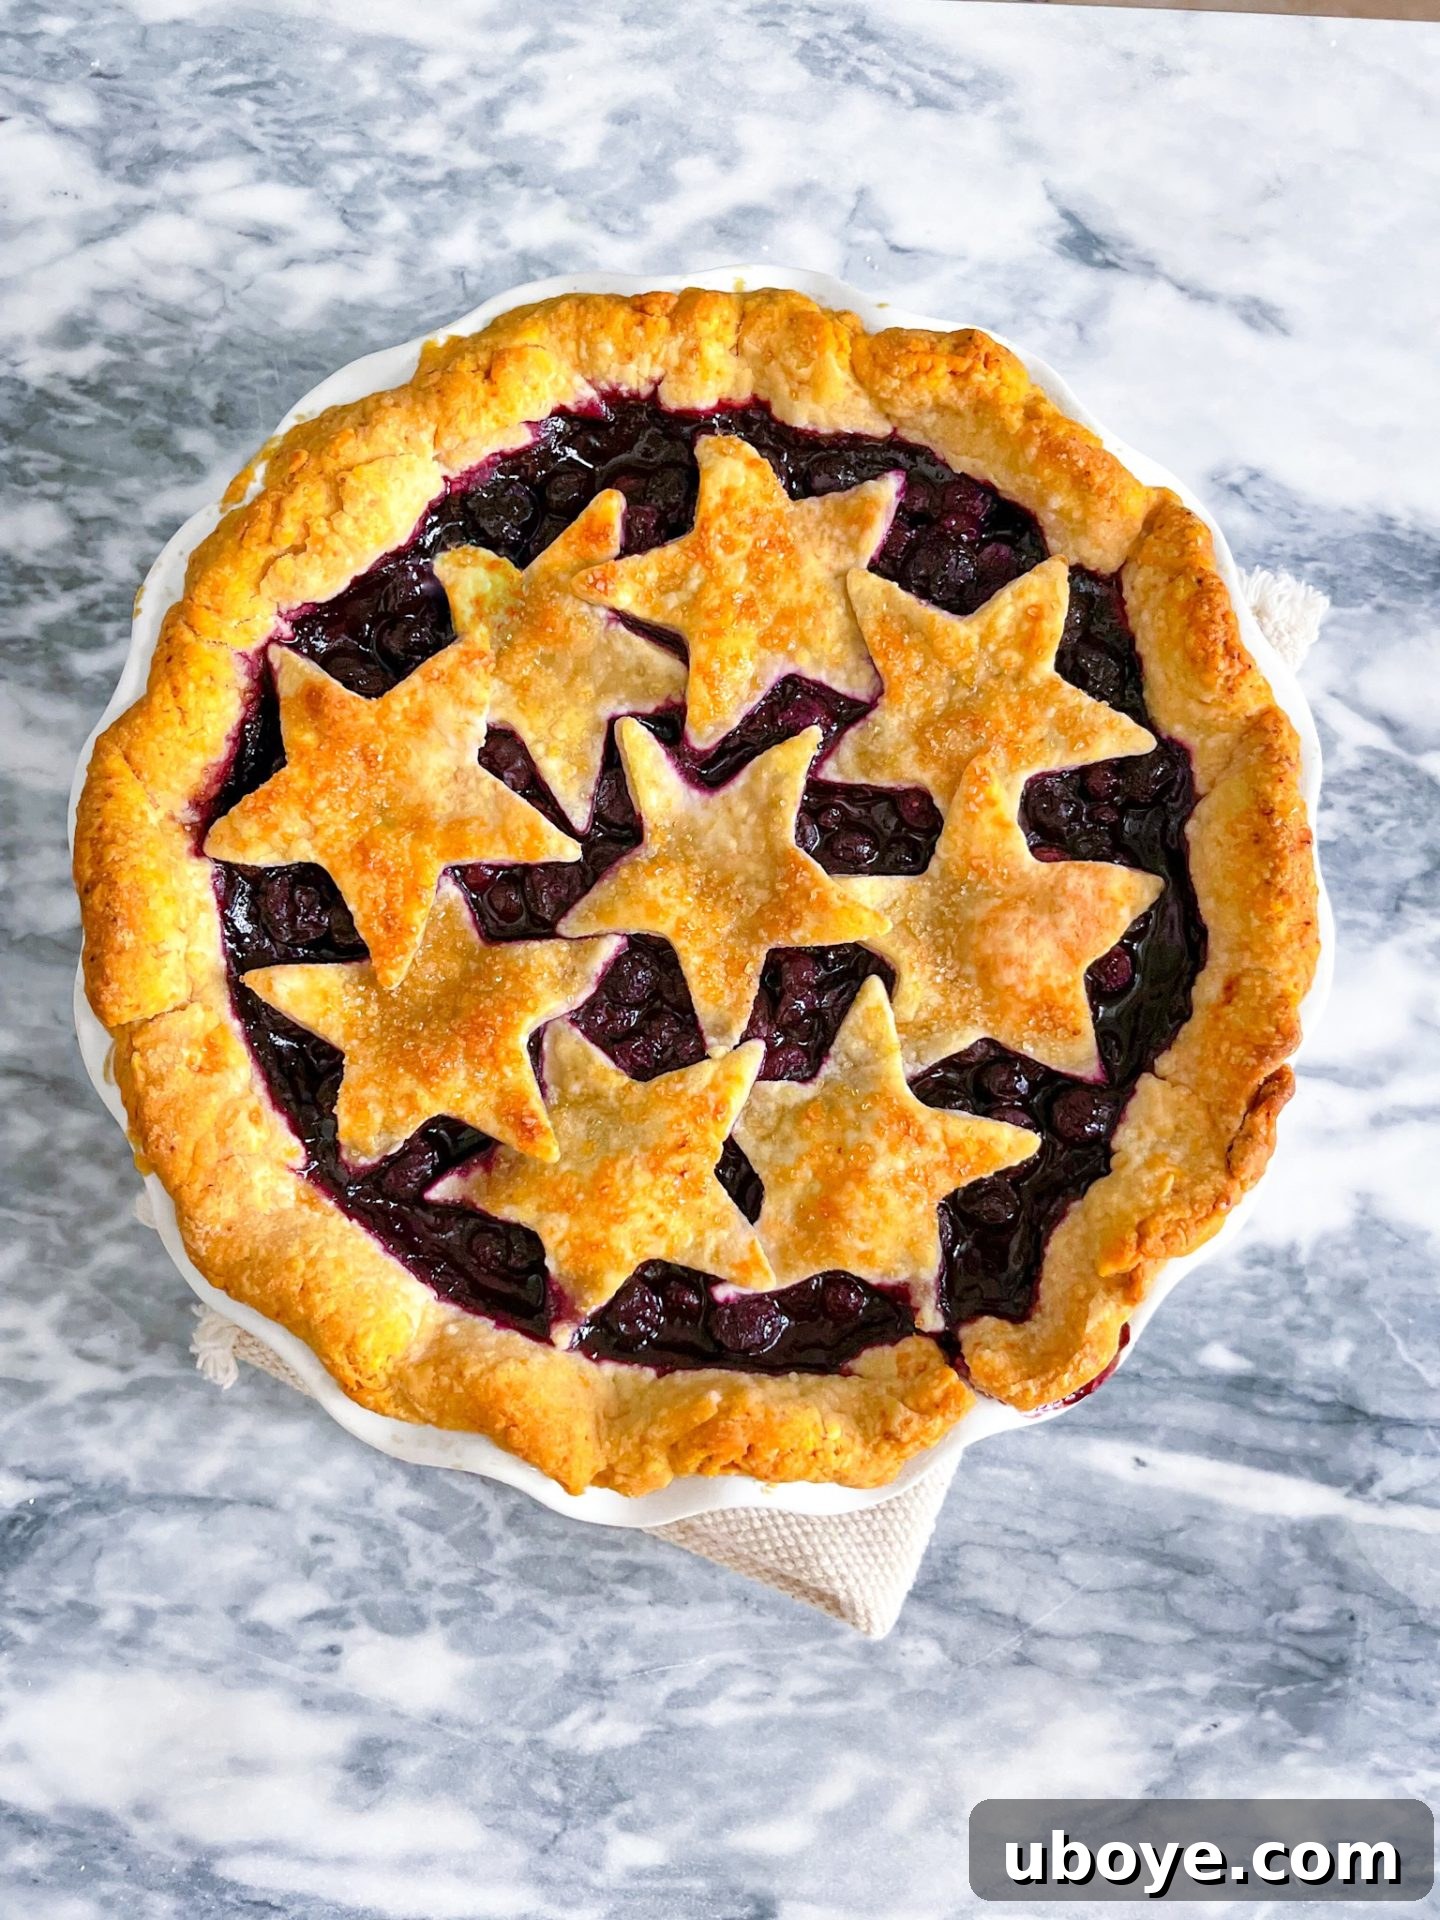
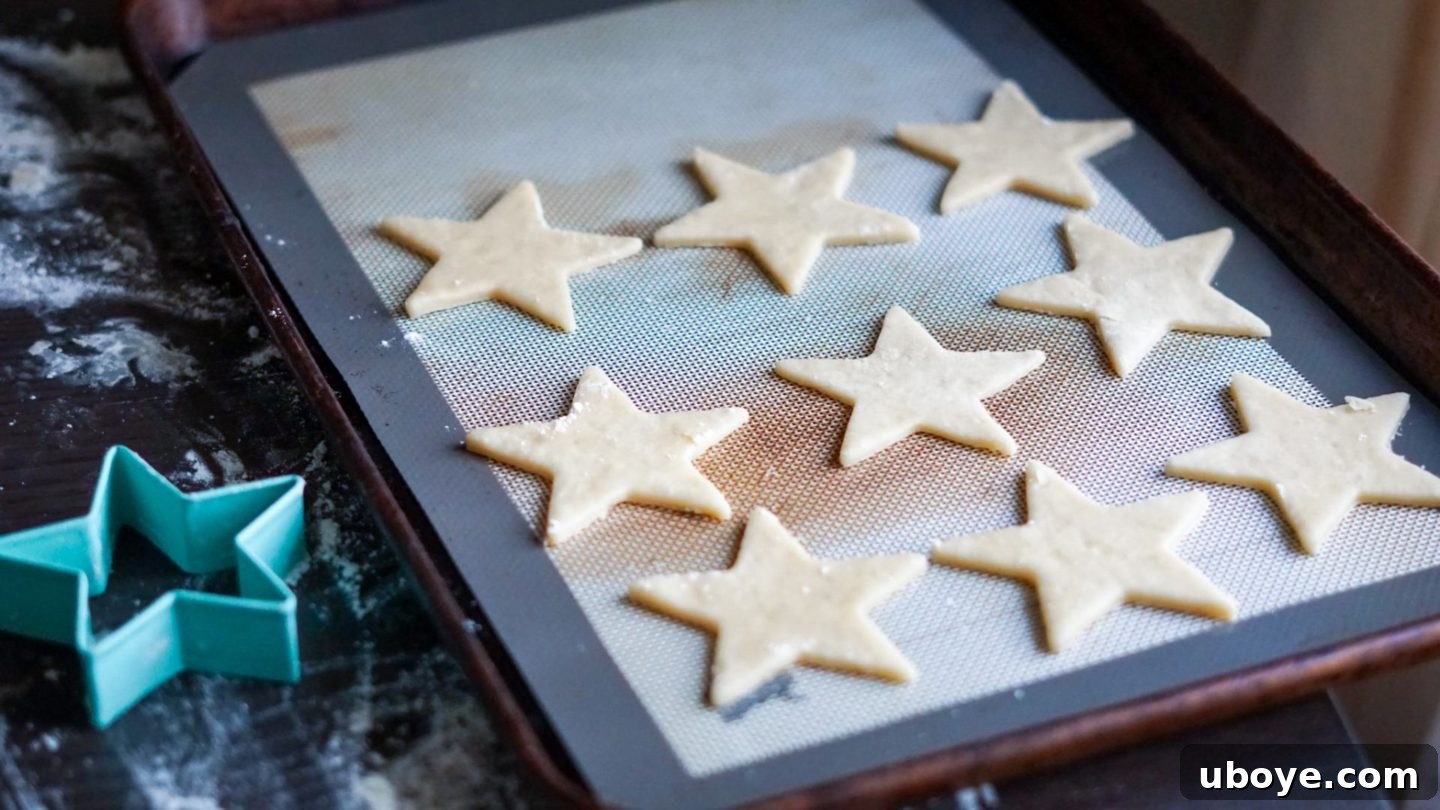
While an intricate lattice top is undeniably elegant, for this particular vegan blueberry pie, we opt for a charming and equally impressive alternative: delightful star shapes cut from the top layer of pie dough. Instead of the time-consuming weaving of a lattice, using a simple cookie cutter to create these festive stars offers a whimsical yet refined aesthetic. Arranged in a slightly overlapping pattern, these golden-brown stars create a visually appealing top crust that looks professionally crafted with minimal fuss. It’s a simple technique that adds a celebratory flourish, inviting everyone to enjoy a slice of this homemade wonder.
Essential Ingredients for Your Ultimate Vegan Blueberry Pie
Creating this exceptional vegan blueberry pie requires a surprisingly concise list of common ingredients. The beauty of this recipe lies in its simplicity, allowing each component to contribute its unique essence to the overall flavor and texture. You’ll only need these nine pantry staples:
- Frozen Blueberries: The primary fruit for our filling, chosen for their intense flavor and ideal moisture content for baking, ensuring a rich, non-watery result.
- Blueberry Jam: A crucial ingredient that significantly deepens the blueberry flavor and contributes to the desirable “jammy” consistency of the filling. Opt for a high-quality jam.
- Cornstarch: The essential thickening agent for the pie filling, ensuring it sets perfectly into a luscious, sliceable texture.
- Vanilla Extract: A fragrant enhancer that adds a warm, aromatic dimension, beautifully complementing the sweet and tart blueberries.
- All-Purpose Flour: The structural backbone of our flaky pie crust, providing both tenderness and stability.
- Kosher Salt: A fundamental seasoning that balances the sweetness of both the crust and the filling, enhancing all other flavors.
- Cane Sugar: Used in both the crust and the filling to provide sweetness and aid in browning for a golden finish.
- Cold Vegan Butter: Absolutely critical for achieving a truly flaky, rich, and tender pie crust. Stick-form butter is highly recommended.
- Ice Water: Used to bind the pie dough together without over-activating gluten, which ensures a tender, rather than tough, crust.
Mastering the Art of Flaky Vegan Pie Crust
The idea of making pie crust from scratch, especially a vegan version, can often feel intimidating. I completely understand that initial apprehension! However, I can assure you that crafting a vegan pie crust is far more achievable and forgiving than it might seem. With just five simple ingredients and a focused 15 minutes of hands-on preparation, you can create a spectacular, dairy-free crust that boasts unparalleled flakiness and a rich, buttery flavor. The secret lies in understanding a few key principles and executing them with care.
Step-by-Step Guide to a Perfect Vegan Pie Crust:
Achieving a tender, flaky vegan pie crust is fundamentally about precise temperature control and gentle handling. Follow these crucial steps for success:
- Prepare the Butter: Begin by cutting your very cold vegan butter sticks into small, uniform cubes. Place these butter cubes back into the refrigerator to ensure they remain thoroughly chilled until the moment you need them.
- Combine Dry Ingredients: In a large mixing bowl, whisk together the all-purpose flour, kosher salt, and cane sugar. This initial step ensures that all the dry components are evenly distributed throughout the mixture.
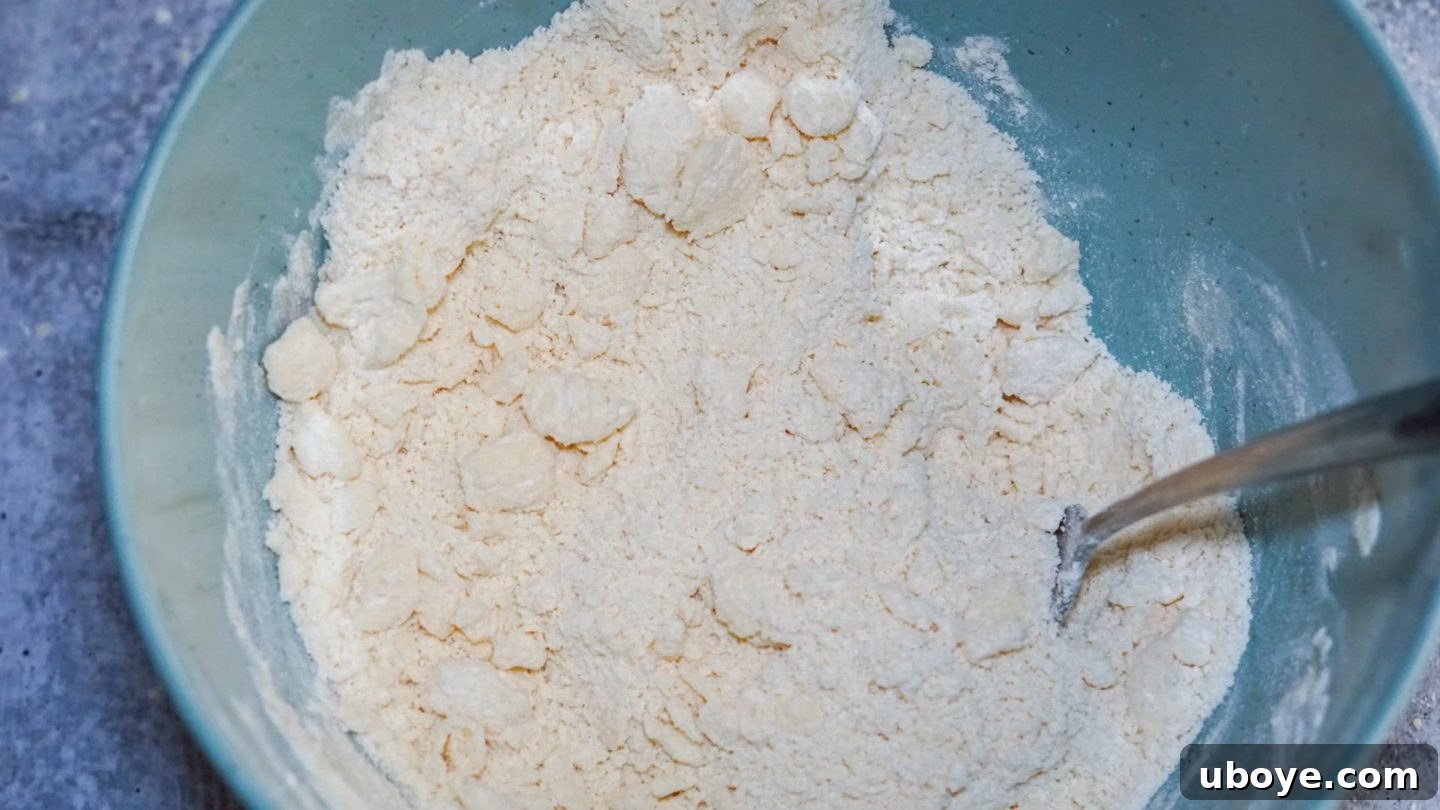
- Incorporate Cold Butter: Add the pre-chilled butter cubes to the dry mixture. Using a fork, a pastry blender, or even your clean, cool fingertips, swiftly mash and cut the butter into the flour. The objective is to work the butter until it forms large pea-sized pieces, with some almond-sized chunks still visible. It’s vital not to overmix or fully incorporate the butter; these distinct pieces of cold butter are what create steam pockets during baking, resulting in an incredibly flaky crust. If the butter melts or is too finely mixed, the crust will lose its signature flakiness.
- Add Ice Water Gradually: Create a small well in the center of your flour and butter mixture. Slowly pour in 6 tablespoons of ice-cold water. Mix the dough gently with a fork or your hands just until it begins to come together in a shaggy, crumbly consistency. If the mixture still seems too dry to form a ball, add the remaining 1 tablespoon of water, one teaspoon at a time, being careful not to add too much, as excess water can toughen the crust.
- Gentle Kneading and Crucial Chilling: Turn the crumbly dough out onto a lightly floured countertop. Gently knead the dough just enough to bring it into a cohesive ball. Work quickly to ensure the butter remains as cold as possible. Overworking the dough at this stage develops excessive gluten, which leads to a tough crust. If at any point the butter starts to look soft, melty, or shiny, immediately place the entire bowl or dough back into the refrigerator for 5-10 minutes to re-chill. Divide the dough into two disks (one slightly larger for the bottom crust, one smaller for the top decorations), wrap each tightly in plastic wrap, and refrigerate for at least 1-2 hours, or ideally 4 hours, or even overnight. This chilling period is absolutely crucial; it allows the flour to fully hydrate, the gluten to relax, and the butter to firm up, all contributing to a tender, stable, and wonderfully flaky baked crust. You can even double-wrap and freeze the dough for up to a month for future baking projects!
Expert Tips for Rolling and Shaping Your Pie Crust:
Once your dough has been sufficiently chilled, the next stage is rolling it out. This step also requires careful attention to detail for a flawless crust:
- Optimal Dough Temperature: While your dough must be cold, it shouldn’t be rock-hard straight from the refrigerator. Allow the dough disk to sit at room temperature for approximately 10-15 minutes, just until it becomes pliable enough to roll without excessive cracking, but still feels very cold to the touch. If the dough becomes too warm, it will be soft, sticky, and difficult to manage, potentially exhibiting a glossy sheen. Should this occur, simply return it to the fridge for 5-10 minutes to firm up.
- Generously Flour Your Workspace: Ensure both your countertop and rolling pin are liberally dusted with all-purpose flour. This is your primary defense against the dough sticking and tearing, which can compromise the integrity of your crust.
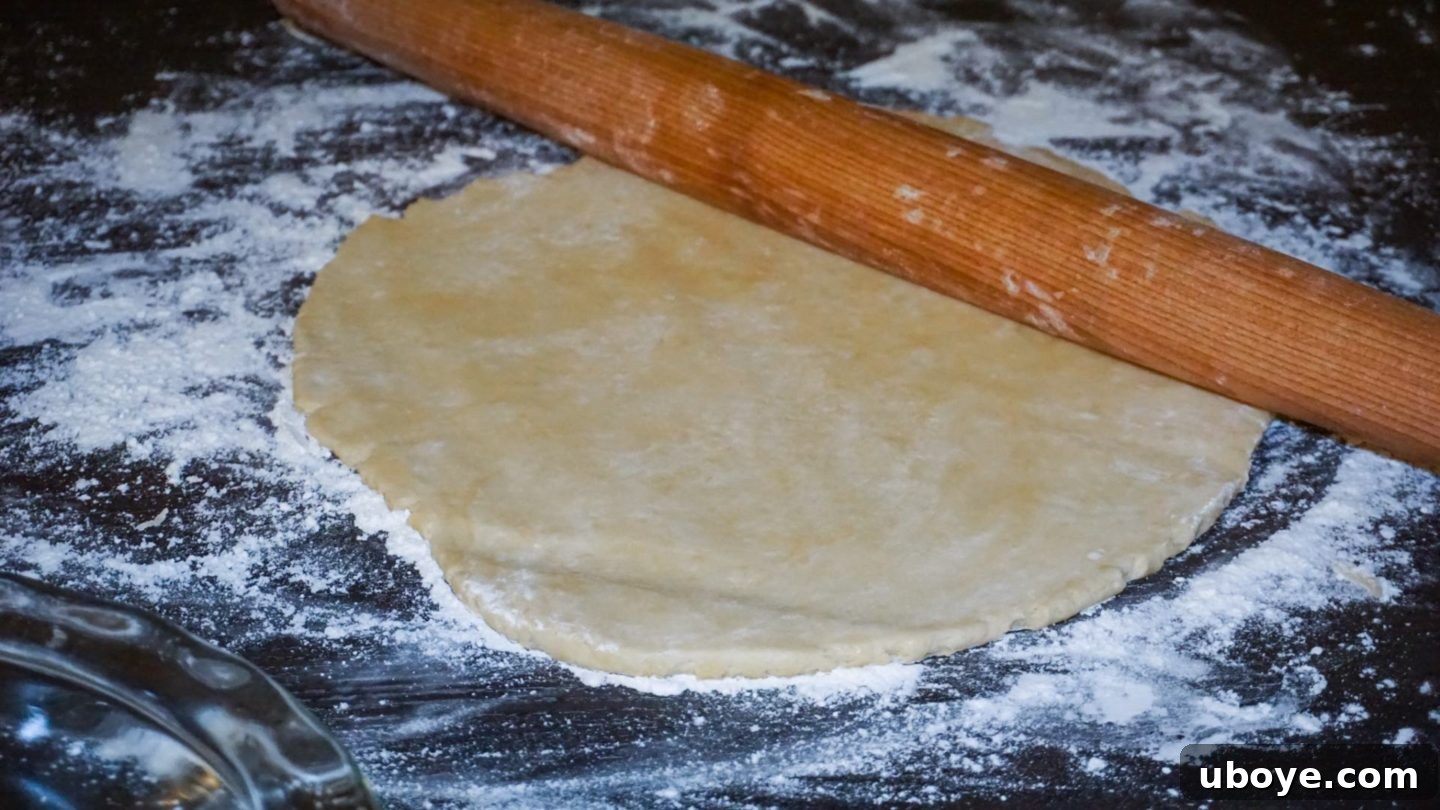
- Roll with Purpose and Even Pressure: Begin rolling from the center of your dough disk outwards, applying consistent and even pressure. Roll forward, then backward, then to one side, and then to the other. After every few rolls, rotate the dough 90 degrees and re-flour your surface as needed. This methodical approach helps ensure an evenly circular shape and prevents the dough from sticking or stretching unevenly in one spot.
- The “Flip Trick” for Non-Stick Success: A highly effective technique to prevent sticking and ensure even rolling is to gently flip your dough over every fourth rotation. This helps to redistribute the flour on both sides of the dough and prevents the underside from adhering to your work surface.
- Achieve Extra Flakiness with Folding: For an exceptionally flaky and layered crust, consider this optional step: after rolling the dough out once into a rough circle, gently fold it in half, then fold it in half again to create a stacked quarter circle. Then, roll it out once more into your desired 13-14 inch circle. This layering technique creates even more delicate, buttery layers in the baked crust.
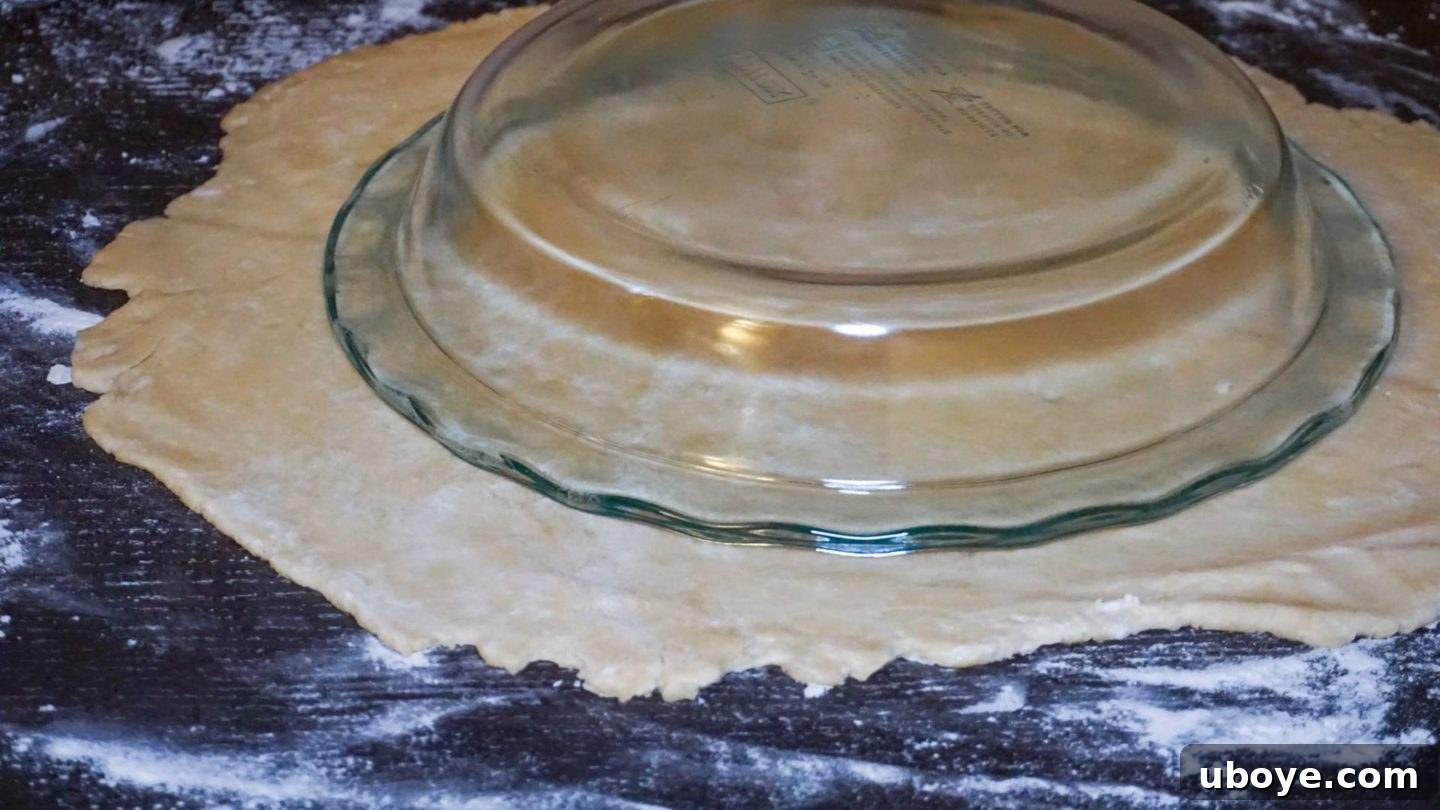
- Preventing Crust Shrinkage: A common frustration in pie baking is when the crust shrinks down the sides of the dish. To prevent this, always roll your dough larger than the pie plate itself. Aim for a circle with about a 14-inch diameter for a standard 10.5-inch pie dish, ensuring at least a 2-inch overhang around the edges. An easy visual check is to invert your pie plate on top of the rolled-out dough – you should see a generous margin of dough extending well beyond the plate’s perimeter.
Assembling Your Pie Crust in the Dish:
Once your dough is perfectly rolled out, it’s time for the delicate task of transferring and shaping it within your pie dish:
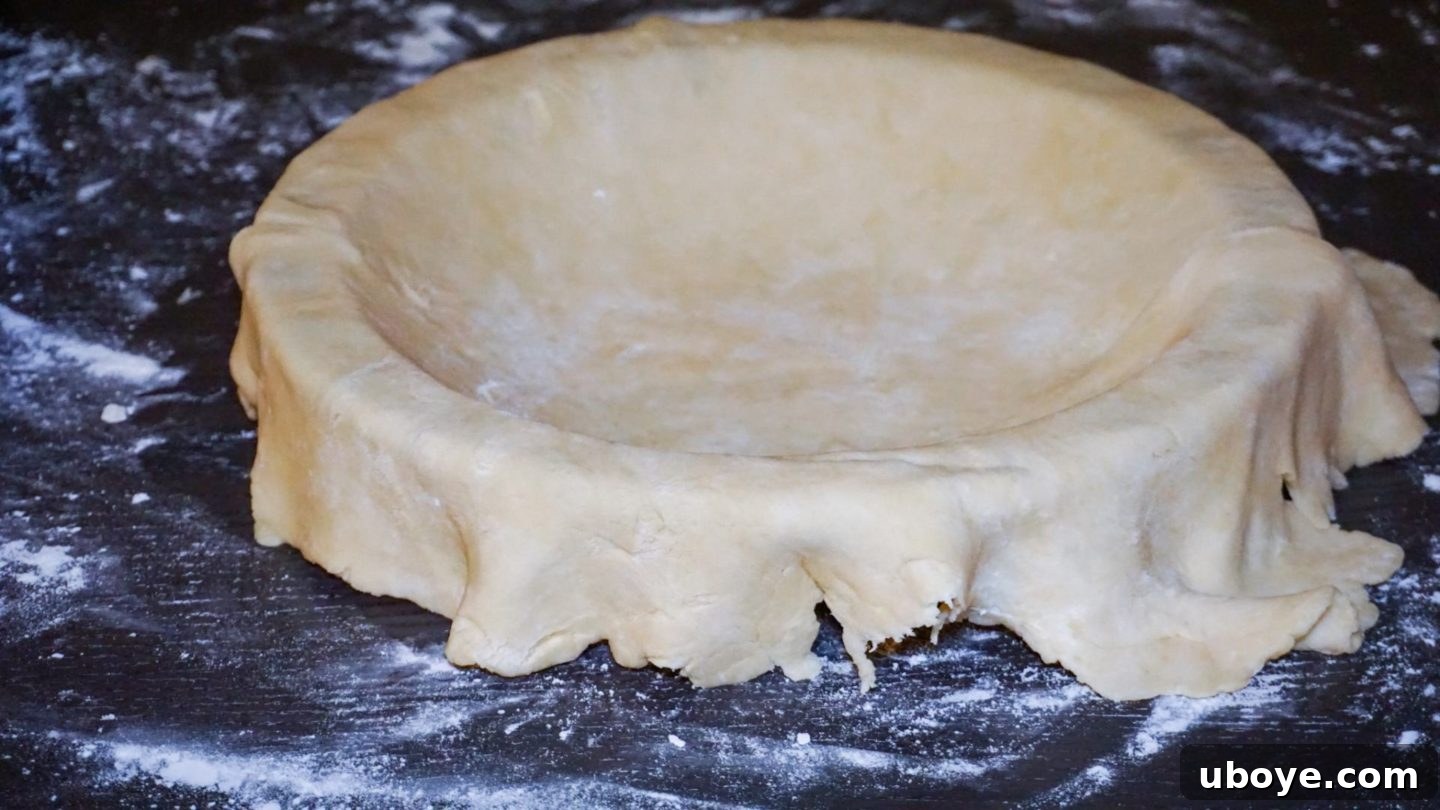
- Careful Dough Transfer: To transfer the fragile rolled dough, gently roll it around your rolling pin. This allows you to easily lift it from the counter and then unroll it smoothly into your pie dish (a 10.5″ Dia. x 2.36″ H dish is ideal). Allow the dough to softly drape down into the bottom and along the sides of the pan.
- Press and Trim: Carefully press the dough into the contours of the pie dish, ensuring there are no trapped air bubbles beneath. Leave a generous 1-inch overhang around the entire edge of the dish. If you have significantly more than this, gently trim the excess.
- Creating the Sturdy Rim: Fold the remaining 1-inch overhang of pie dough underneath itself, creating a thick, robust rim along the top lip of the pie plate. This substantial rim is crucial for preventing the crust from cooking too quickly or burning, and it also offers a more satisfying bite.
- Final Chill and Crimping: Cover the pie crust loosely with a clean kitchen towel and place it back into the refrigerator for 5-10 minutes. This quick chill allows the dough to firm up slightly before you crimp. Once chilled, use your fingers to gently crimp the edges into an attractive wavy or fluted pattern. A thicker, well-defined crimp not only looks beautiful but also helps the crust bake more evenly.
Choosing the Best Vegan Butter for Your Pie Crust
When it comes to baking, particularly pie crusts, not all vegan butters are created equal. As various baking experiments and taste tests have shown, the specific type of vegan butter you choose can significantly influence the final flavor and texture of your pie crust. For this ultimate vegan blueberry pie recipe, I’ve consistently achieved the most outstanding results – in terms of both rich, buttery flavor and incredibly flaky texture – by using Earth Balance baking sticks. It’s important to use the solid stick form, not the softer variety that comes in a tub. Earth Balance sticks impart a wonderful, authentic buttery taste that even my non-vegan friends have found indistinguishable from traditional butter pie. It also maintains its structure well during mixing and rolling, contributing beautifully to the layers.
If you’ve previously encountered difficulties with pie dough cracking or being challenging to roll, you might find success with Melt Organic Vegan Butter Sticks. Melt butter tends to be slightly softer even when cold, which can make the dough more pliable and easier to handle, particularly for novice bakers who might be concerned about cracks. While Melt does produce a delicious crust, in my experience, it yields a slightly less flaky and less intensely flavored result compared to Earth Balance. Ultimately, it’s worth experimenting with what’s available to you, but for optimal flakiness and rich flavor, prioritize a firm, stick-form vegan butter.
Selecting the Perfect Blueberry Jam
The blueberry jam is a key ingredient in our pie filling, contributing immense depth of flavor and that desired “jammy” consistency. Therefore, selecting a high-quality, flavorful blueberry jam is paramount for the success of this pie. My top recommendation for this recipe is the wild blueberry preserves from Bonne Maman. Its rich fruitiness, balanced sweetness, and lovely texture beautifully complement the frozen blueberries, elevating the pie’s overall taste to an extraordinary level. Never underestimate the impact a good jam can have on your finished pie!
Comprehensive Instructions for Assembling and Baking Your Vegan Blueberry Pie
With your impeccably prepared crust and flavorful filling ready, it’s time to bring all the components together and bake your masterpiece to golden perfection. Follow these detailed steps for a truly stunning and delicious outcome.
Equipment You’ll Need:
- 1 x 10.5-inch Pie Dish (approximately 10.5″ Diameter x 2.36″ Height)
- 1 Rolling Pin
- Large Mixing Bowls (at least two)
- Cookie Cutter (star-shaped or your preferred decorative design)
- Slotted Spoon
- Baking Sheet
Vegan Pie Crust Ingredients:
- 2.5 cups all-purpose flour
- 1 tsp kosher salt (Morton’s Kosher Salt is recommended for its crystal size)
- 2 tsp cane sugar
- 2 sticks (equivalent to 1 cup) cold vegan butter, in stick form (not from a tub)
- 6-7 tbsp ice-cold water
Blueberry Pie Filling Ingredients:
- 5 cups frozen blueberries (no need to thaw)
- 2/3 cup high-quality blueberry jam (Bonne Maman wild blueberry preserves are highly recommended)
- 2.5 tbsp cornstarch
- 1.5 tsp vanilla extract
- 1 tbsp cane sugar
Toppings:
- 1-2 tbsp unsweetened soy milk (for brushing the crust)
- 2 tbsp turbinado sugar (optional, for added sparkle and a delightful crunch)
Detailed Step-by-Step Instructions:
Part 1: Make the Vegan Pie Dough
- Begin by cutting the very cold vegan butter sticks into small, uniform cubes. Immediately place these cubes back into the refrigerator to ensure they remain thoroughly chilled until needed.
- In a large mixing bowl, combine the all-purpose flour, kosher salt, and cane sugar. Whisk these dry ingredients together thoroughly to ensure an even distribution.
- Add the chilled butter cubes to the dry ingredients. Using a fork, a pastry blender, or your clean, cool fingertips, quickly mash and cut the butter into the flour. Aim for a shaggy mixture where large pea-sized and almond-sized pieces of butter remain, with some flour still visible. Avoid overmixing; these distinct cold butter pieces are crucial for a flaky crust.
- Create a well in the center of the flour-and-butter mixture. Pour in 6 tablespoons of ice-cold water. Mix gently with a fork or your hands just until the dough begins to come together into a shaggy, crumbly consistency. If it appears too dry, add the remaining 1 tablespoon of water, one teaspoon at a time, until it barely holds together.
- Turn the crumbly dough out onto a lightly floured countertop. Gently knead it just long enough to bring it into a cohesive ball. Work quickly to prevent the butter from warming too much. If at any point the butter starts to look soft or shiny, immediately place the dough (or the bowl it’s in) in the fridge for 5-10 minutes to re-chill.
- Divide the dough into two pieces: one piece should be roughly 2/3 of the total dough (for the bottom crust) and the other 1/3 (for the top decorations). Form each piece into a flat disk, wrap tightly with plastic wrap, and refrigerate for at least 1-2 hours. For the best results and flakiest crust, a chilling time of 4 hours or even overnight is ideal. This chilling process is fundamental for hydrating the flour, relaxing the gluten, and firming up the butter.
Part 2: Prepare the Blueberry Pie Filling
- In a large mixing bowl, combine the frozen blueberries, blueberry jam, cornstarch, cane sugar, and vanilla extract. Toss all the ingredients together thoroughly until the blueberries are evenly coated. Set this mixture aside to allow the flavors to meld while you prepare and assemble the crust.
Part 3: Roll Out the Dough and Assemble the Pie
- Preheat your oven to 425°F (220°C). Place a sturdy baking sheet on the center rack of your oven while it preheats. This helps to create a hot surface, ensuring a crisp, golden-brown bottom crust.
- Remove the larger dough disk (for the bottom crust) from the refrigerator. Allow it to sit at room temperature for about 10-15 minutes, or just until it’s pliable enough to roll without cracking excessively, but still feels very cold to the touch.
- Lightly flour your countertop and rolling pin. Begin rolling the dough from the center outwards, turning the dough 90 degrees after every few rolls. Aim for a large 14-inch diameter circle. To prevent sticking, gently flip the dough over every fourth rotation and re-flour your surface as needed. For an even flakier crust, you can gently fold the rolled dough in half, then in half again, and roll it out one more time into a 13-14 inch circle.
- To transport the rolled dough, carefully roll it around your rolling pin. Then, gently unroll it into your 10.5-inch pie dish. Press the dough carefully into the bottom and sides of the dish, ensuring no air bubbles are trapped underneath. Leave approximately a 1-inch overhang around the entire edge of the pie plate.
- Trim off any excess dough that extends beyond the 1-inch overhang. Fold the remaining overhang underneath itself, creating a thick, even rim around the edge of the pie plate. Use your fingers to crimp this rim into a decorative wavy pattern. Cover the prepared pie crust with a clean kitchen towel and place it back into the refrigerator to chill while you prepare the top crust.
- Take the smaller dough disk and any trimmed dough scraps. Combine and roll them out to about 1/4-inch thickness. Use a star-shaped cookie cutter (or any preferred design) to cut out 8-12 decorative shapes for the top of the pie.
- Retrieve the chilled pie crust from the refrigerator. Using a slotted spoon, carefully spoon the blueberry filling into the pie crust, allowing as much of the released blueberry liquid to remain in the mixing bowl as possible. This step helps prevent a soggy bottom crust.
- Arrange the decorative star shapes (or other cutouts) artfully on top of the blueberry filling. Lightly brush the tops of the stars and the crimped edge of the pie crust with unsweetened soy milk. For an appealing sparkle and a delightful crunch, sprinkle the turbinado sugar generously over the brushed dough.
Part 4: Bake to Golden Perfection
- Carefully place the assembled pie onto the preheated baking sheet in your oven. Bake at 425°F (220°C) for an initial 15 minutes.
- Without removing the pie from the oven, reduce the oven temperature to 375°F (190°C) and continue baking for another 1 hour to 1 hour and 15 minutes. The pie is done when the crust is deeply golden brown and the blueberry filling is visibly bubbling thickly around the edges. Your kitchen should be filled with an absolutely amazing aroma at this point!
Part 5: Chill to Set (A Crucial Step for Success!)
- Once baked, carefully remove the pie from the oven. This next step is perhaps the most critical for a perfectly sliceable pie: you must allow the pie to cool completely and chill thoroughly to set. If you attempt to slice the pie while it’s still warm, the filling will be runny and will seep out. Allow the pie to cool at room temperature for at least 4 hours, or preferably chill it in the refrigerator until it is completely firm and set. Patience here will be greatly rewarded!
Part 6: Serve and Savor
- Once the pie is fully chilled and set, slice and serve. For the ultimate indulgence, serve each slice warm or at room temperature with a generous scoop of creamy vegan vanilla ice cream. Enjoy the sweet, comforting rewards of your baking efforts!
Expert Baking Tips for Your Vegan Blueberry Pie
Beyond the detailed instructions, these additional insights and expert tips will help ensure your homemade vegan blueberry pie turns out perfectly every single time:
- Embrace Frozen Berries: As previously emphasized, frozen blueberries are truly superior for this pie recipe. They release less moisture than fresh berries during baking, which is key to preventing a watery filling and a soggy bottom crust. Plus, they offer convenience, consistent quality, and are available year-round and often more cost-effective!
- No Need to Thaw Blueberries: For optimal results, use your frozen blueberries directly from the freezer; there is no need to thaw them beforehand. Simply toss them with the other filling ingredients as instructed.
- The Unsung Hero: Cornstarch: Do not skip or reduce the amount of cornstarch. It is the primary thickening agent that transforms the juicy berries into that wonderfully rich, jammy, and perfectly set consistency. It’s critical for a sliceable pie.
- Generous Dough Overhang: Seriously, roll your bottom pie dough larger than you think is necessary. That generous overhang (at least 2 inches beyond the pie plate’s edge) is your best insurance policy against crust shrinkage during baking. It also provides ample dough to create a beautiful, thick, and sturdy crimped edge.
- Preheat Oven with a Baking Sheet: Placing a baking sheet in the oven while it preheats creates a super-hot surface that the pie dish sits on. This direct, intense heat immediately begins baking the bottom crust, which is crucial for achieving a perfectly crisp, golden-brown underside and preventing any sogginess.
- Ensure Adequate Ventilation: If you choose to use a full top crust instead of decorative stars, it is absolutely essential to cut several slits or create decorative vents in the dough before baking. These openings allow steam to escape during the baking process, preventing the crust from puffing up excessively and creating an unsightly gap between the crust and the filling.
- Prevent Over-Browning: If you notice the edges of your pie crust browning too quickly during the longer baking time, you can easily remedy this by loosely tenting the edges of the pie with strips of aluminum foil. This will protect the delicate edges while allowing the rest of the pie to continue baking.
- Patience is a Virtue (Especially for Setting!): I cannot stress enough the importance of allowing the pie to cool and set completely before attempting to slice it. It’s incredibly tempting to dig in when it’s still warm, but trying to slice a hot pie will invariably result in a messy, runny disaster. Resist the urge, let it cool for at least 4 hours (or chill until firm), and you will be rewarded with perfectly neat, delicious slices.
Storage, Serving Suggestions, and Creative Variations
Storing Your Vegan Blueberry Pie:
Once your homemade vegan blueberry pie has completely cooled and set, it can be stored at room temperature, loosely covered, for up to 2 days. For extended freshness, refrigerate the pie, covered tightly, for up to 4-5 days. To enjoy a warm slice, gently reheat individual portions in a microwave or a low oven for a few minutes until just warm, being careful not to overcook.
Creative Variations to Try:
- Mixed Berry Medley: Feel free to experiment by incorporating other frozen berries into your filling! A delightful mix of blueberries, raspberries, and blackberries creates a complex and vibrant flavor profile.
- Warm Spiced Pie: For an autumnal or cozy twist, add a pinch of ground cinnamon, a dash of nutmeg, or a hint of allspice to your blueberry filling. These warm spices beautifully complement the fruit.
- Lemon Zest Brightness: To introduce a brighter, zesty note, finely grate the zest of half a lemon directly into your blueberry filling. The citrus essence will perfectly cut through the sweetness and enhance the berry flavors.
- Alternative Crust Toppings: While the star cutouts are charming, don’t hesitate to explore other top crust options. A classic woven lattice top, a simple full crust with a few decorative vents, or even a crunchy vegan crumble topping can all be delicious alternatives.
- Gluten-Free Adaptation: If you’re seeking a gluten-free version, use a high-quality gluten-free all-purpose flour blend (one that specifically contains xanthan gum for structure) for your pie crust. Adjust water content as needed, as GF flours can absorb liquids differently.
More Irresistible Homemade Vegan Desserts to Explore:
If you’ve thoroughly enjoyed the rewarding process of creating this incredible vegan blueberry pie, you’re in for a treat with these other delightful plant-based dessert recipes. Expand your vegan baking repertoire and discover new favorites!
- Vegan Earl Grey Yogurt Cake: A wonderfully fragrant and moist cake infused with subtle, elegant tea notes.
- One Bowl Fudgy Vegan Brownies: Rich, intensely chocolatey, dense, and incredibly simple to whip up using just one bowl.
- Fluffy Vegan Apple Muffins: The perfect breakfast or snack, these muffins are packed with tender apple pieces and a delightful cinnamon aroma.
- Peanut Butter Pretzel Nice Cream Sandwiches: A refreshing, playful, and utterly addictive frozen treat combining salty pretzels with creamy peanut butter ‘nice cream’.
Final Thoughts and Encouragement for Your Baking Journey
Baking, especially the creation of a homemade pie from scratch, is much more than just following a set of instructions; it is a deeply rewarding experience. It’s an unparalleled opportunity to craft something beautiful and utterly delicious with your own hands, to fill your home with the most comforting and inviting aromas, and to share warmth and joy with those you cherish. This vegan blueberry jam pie stands as a testament to the incredible potential of plant-based desserts – they can be every bit as rich, flavorful, and wonderfully satisfying as their traditional counterparts.
I wholeheartedly encourage you to dive into this recipe without fear. Embrace the process, learn from each step, and even celebrate any small, delicious mistakes you might make along the way. Every baking session is a valuable learning experience, and the ultimate reward of that first perfect, flaky bite of your homemade creation is truly incomparable. I invite you to try this recipe, share your magnificent creations with friends and family (and perhaps online!), and most importantly, savor every single moment of baking and indulging in this truly incredible vegan blueberry pie. Happy baking, and enjoy every sweet, jammy slice!