
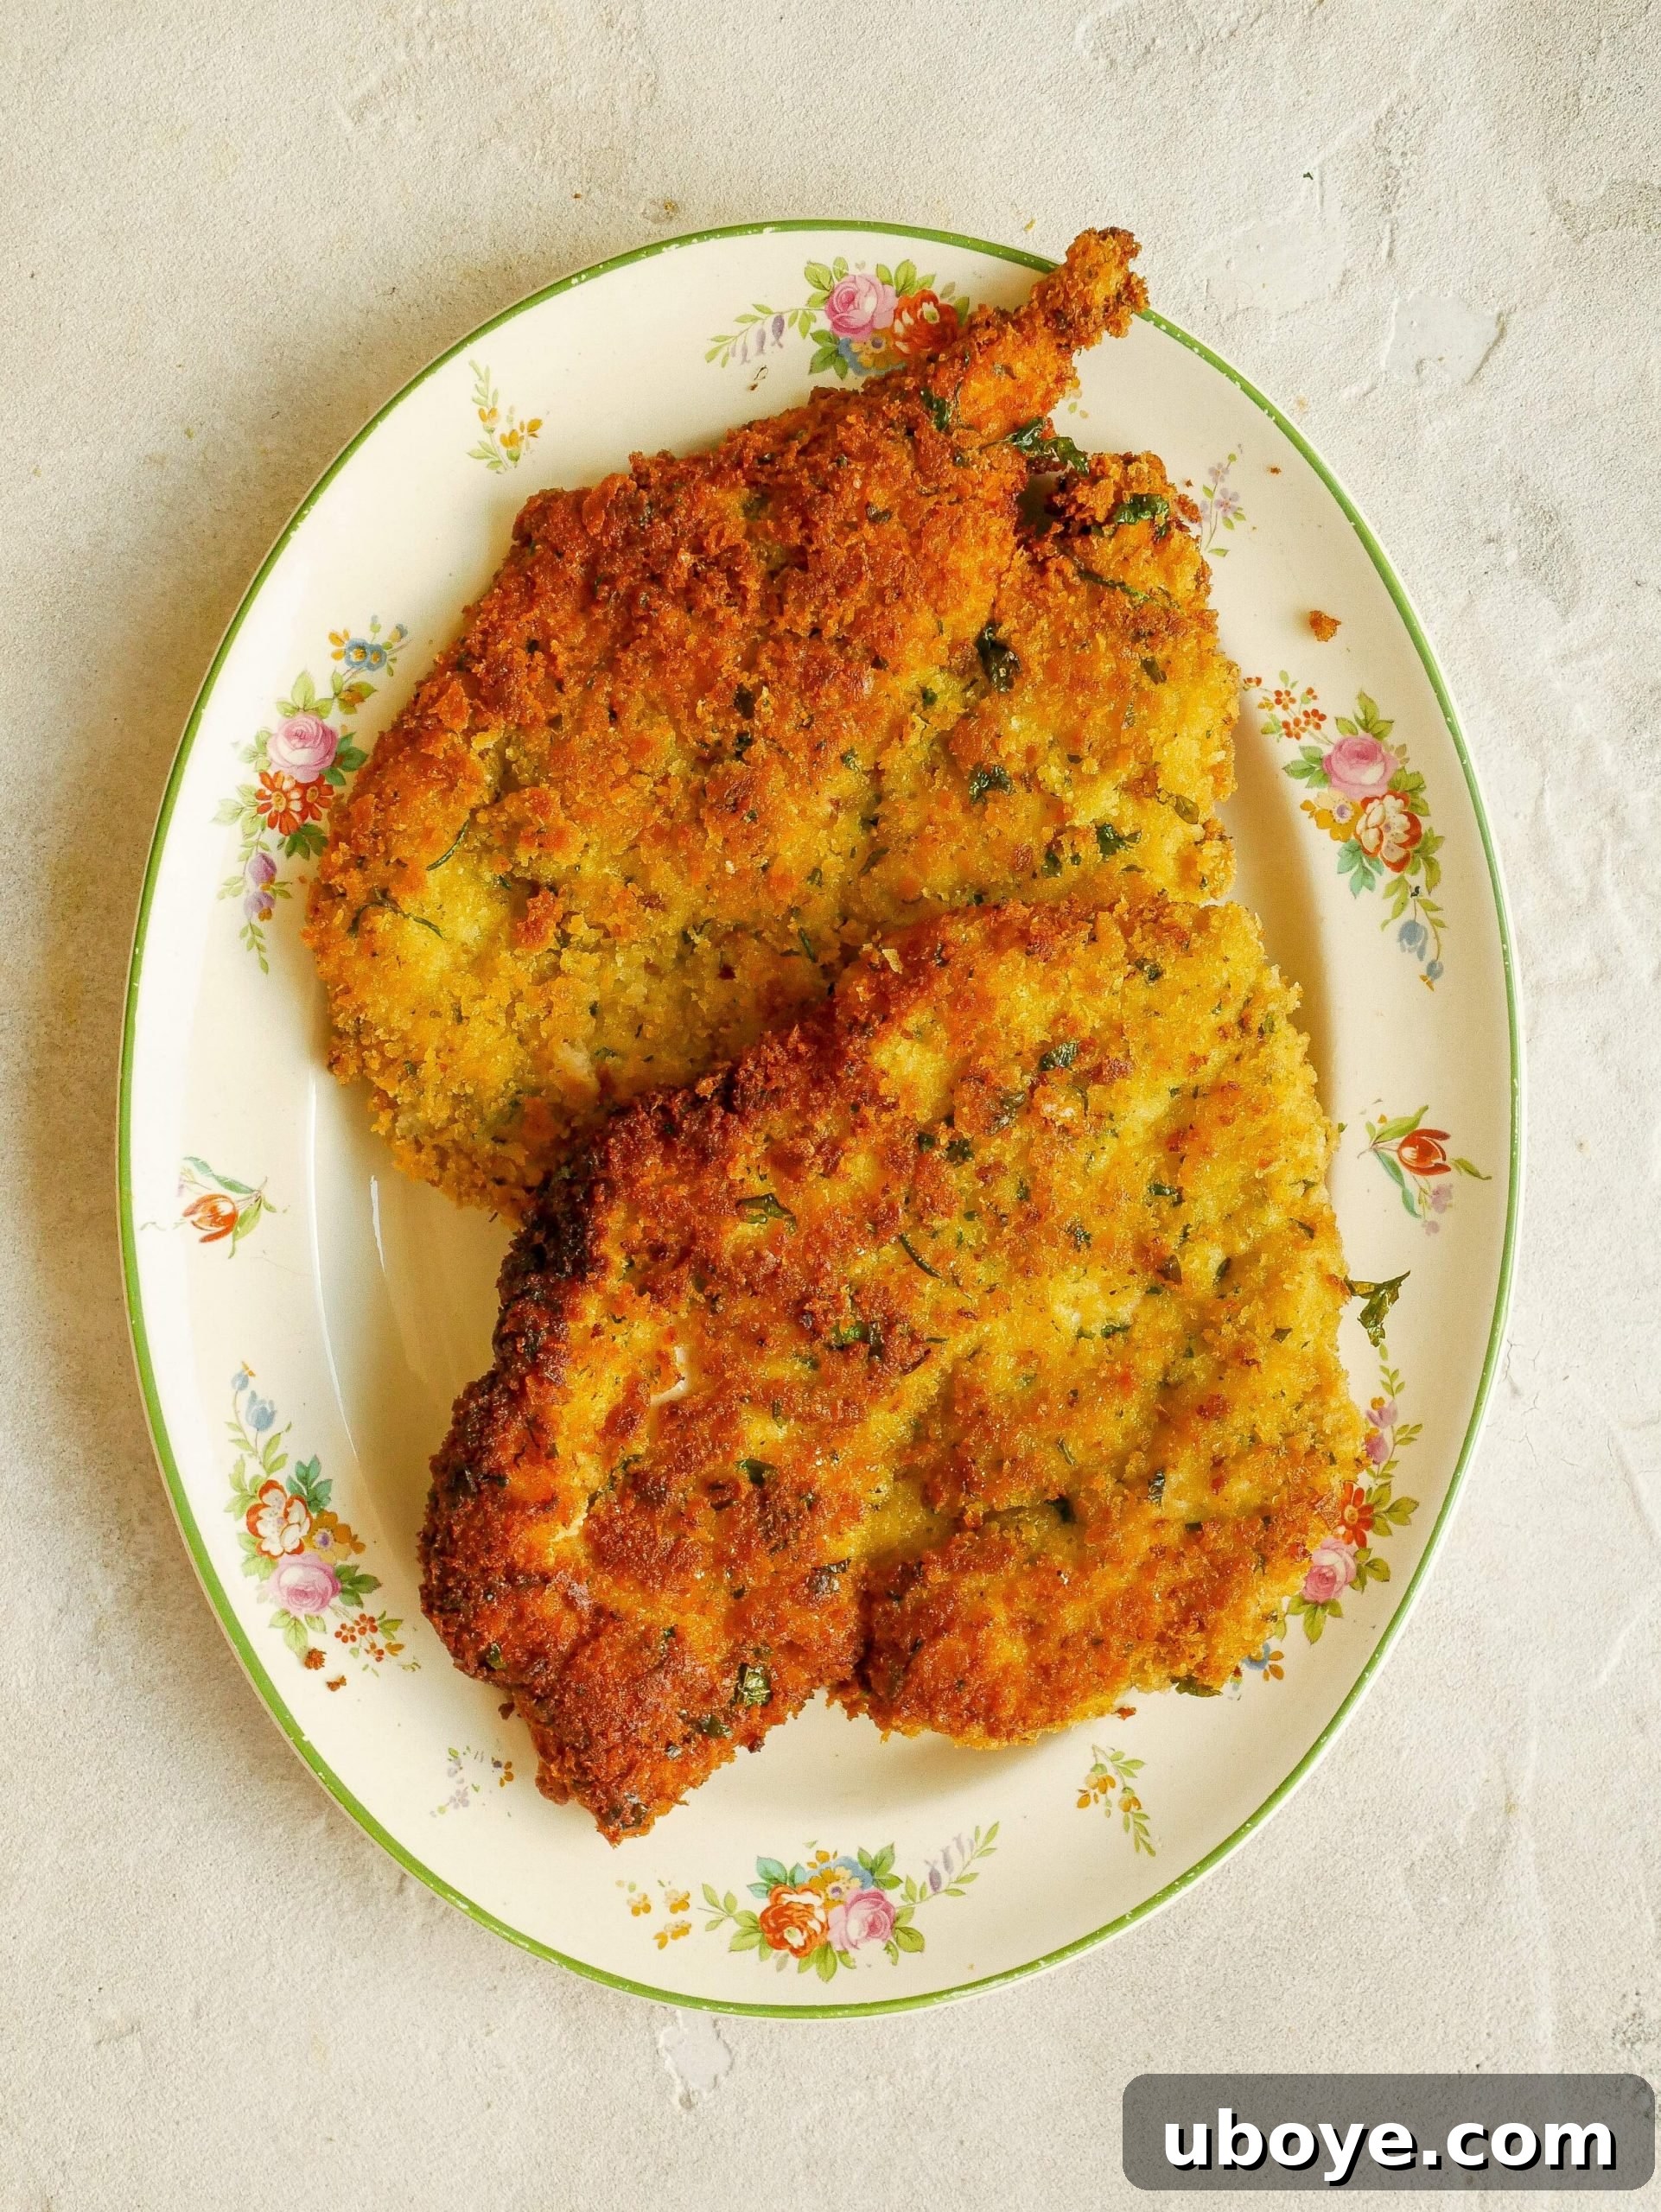
The Ultimate Crispy Breaded Chicken Recipe: Your New Family Favorite
Prepare to elevate your dinner game with this sensational crispy breaded chicken recipe, renowned for its incredible flavor and irresistible crunch. With millions of views and saves across various platforms, this recipe isn’t just famous; it’s a culinary revelation. We’re talking about chicken that boasts a golden, crunchy crust, achieved through a unique combination of homemade breadcrumbs and a deeply flavorful garlicky egg wash, perfectly fried in olive oil. Whether you prefer the classic pan-fried method or a lighter approach by baking or air-frying, this recipe guarantees perfection every single time.
This isn’t just another chicken recipe; it’s an experience. The secret lies in fresh, high-quality ingredients and a few simple techniques that transform ordinary chicken breast into an extraordinary meal. Imagine succulent, juicy chicken encased in a perfectly seasoned, shatteringly crisp coating – that’s what awaits you. It’s truly a game-changer for anyone seeking the ultimate crispy breaded chicken at home.
Looking for creative ways to enjoy this delicious creation? This versatile crispy crumbed chicken is a fantastic base for numerous dishes. Try it in our crispy chicken parmesan focaccia sandwich for a hearty meal, or in a refreshing chicken and bacon salad for a lighter option. The possibilities are endless, making this recipe a staple in any kitchen.
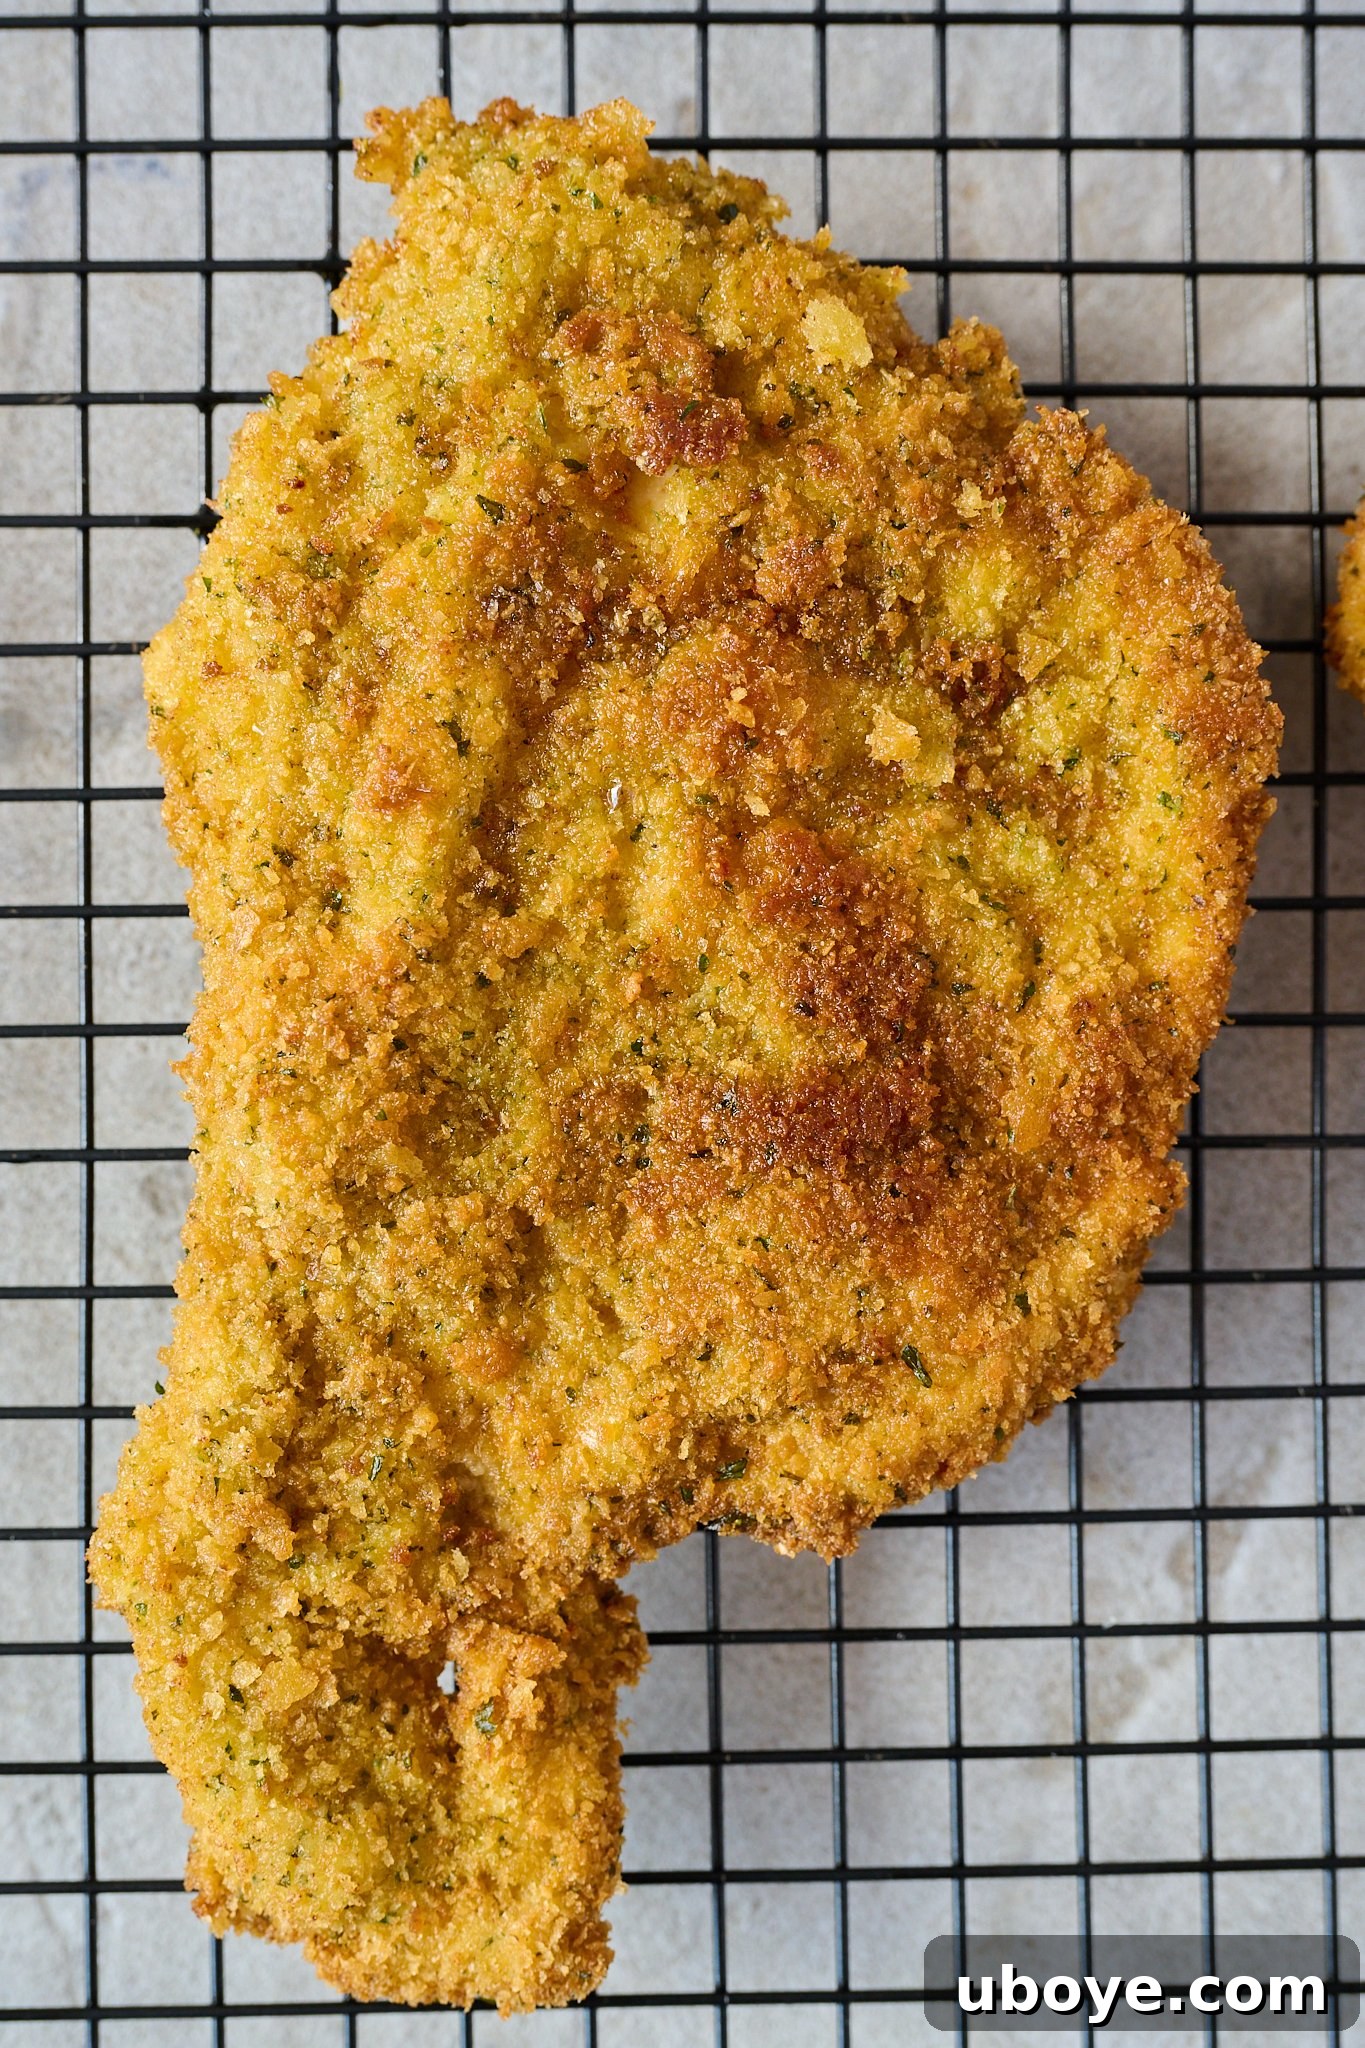
The cornerstone of this recipe’s unparalleled crispiness is the use of **homemade breadcrumbs**. Forget those dry, flavorless store-bought varieties; these fresh, vibrant breadcrumbs are incredibly easy to make and are absolutely worth the minimal extra effort. Crafted from just three simple ingredients – stale bread, fresh parsley, and a hint of fragrant rosemary – they deliver a textured, flavorful coating that elevates the entire dish. Using the crusts of the bread ensures every bite offers a delightful “mini crouton” crunch, adding depth and character that you simply can’t achieve otherwise.
Beyond being the star of the show for chicken, these exceptional breadcrumbs are incredibly versatile. They can be used to create a delightful chicken and bacon salad, a comforting lemon chicken orzo pasta, or even a decadent chicken parmesan focaccia sandwich. Their magic extends to other proteins too, working wonders on breaded pork cutlets, lamb cutlets, and authentic veal cotoletta or cotoletta alla Milanese. Once you experience the difference homemade breadcrumbs make, you’ll find it impossible to go back to pre-packaged options.
Why You’ll Adore This Crispy Breaded Chicken Recipe
This recipe isn’t just about cooking; it’s about creating memorable meals and enjoying the process. Here’s why this crispy breaded chicken will quickly become a cherished favorite in your kitchen:
- Unbeatable Crispy, Flavorful Coating: The star of this dish is undoubtedly the coating. Our homemade breadcrumbs, infused with fresh herbs, don’t just add crunch; they impart a rich, aromatic flavor that makes every mouthful an absolute delight. This homemade touch truly sets it apart from any other breaded chicken you’ve tasted.
- Effortlessly Make-Ahead Friendly: Life is busy, and we understand the need for convenience. This recipe is perfect for meal prepping! You can bread and freeze the chicken in advance, ensuring you have stress-free, delicious meals ready to cook whenever hunger strikes. It’s ideal for weeknights or impromptu gatherings.
- Incredibly Versatile & Family-Friendly: Whether you’re feeding picky eaters or gourmet palates, this chicken is a crowd-pleaser. It’s perfect for classic chicken parm, tossed into vibrant salads, shaped into homemade nuggets for the kids, or even used with other meats. Think deliciously crispy pork cutlets, breaded lamb cutlets, or even a sophisticated veal cotoletta. Its adaptability ensures it always fits your meal plan.
- Better Than Takeout: Why order in when you can create a superior, healthier, and more flavorful version at home? This recipe delivers that satisfying crunch and juiciness that often eludes restaurant versions, giving you full control over the quality of your ingredients.
- Simple, Wholesome Ingredients: Despite its gourmet taste, this recipe relies on readily available, wholesome ingredients. This simplicity not only makes it accessible but also allows the natural flavors to shine through beautifully.
Essential Recipe Ingredients for Crispy Perfection
Achieving maximum flavor with minimal effort is at the heart of this recipe. We keep the ingredient list simple, focusing on key components that deliver a powerful punch. Each ingredient plays a crucial role in creating that signature crispy coating and tender, juicy chicken.
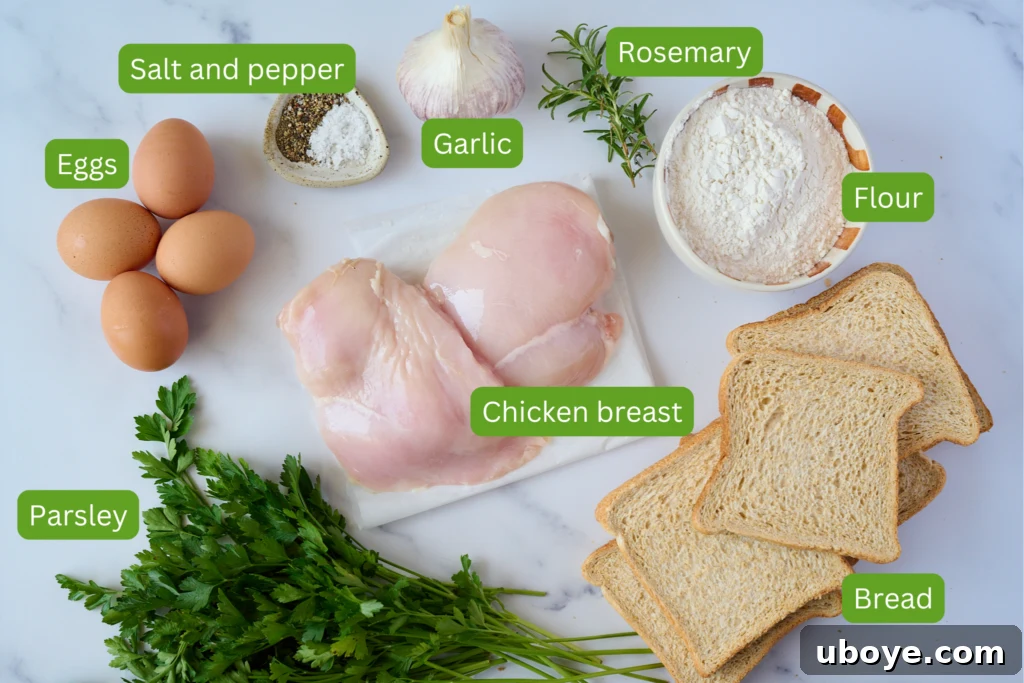
Chicken Breast: For the most tender and evenly cooked results, we recommend using boneless, skinless chicken breast. The key here is to remove the tenderloin and then slice the breast horizontally. This method creates thinner, uniform pieces that cook quickly, preventing them from drying out, and ensures a perfect ratio of crispy coating to juicy chicken in every bite. It’s essential for that melt-in-your-mouth texture.
Stale Bread: This is a non-negotiable secret weapon for truly crispy breadcrumbs! Fresh bread retains too much moisture, which can lead to a soggy coating. Stale bread, preferably a simple white sandwich loaf, dries out beautifully, creating light, airy crumbs that crisp up magnificently when fried. (See FAQs for tips on using fresh bread).
Fresh Herbs: The vibrant flavors of fresh parsley and rosemary are what give our homemade breadcrumbs their aromatic depth and beautiful green flecks. Parsley offers a bright, herbaceous note, while rosemary introduces a subtle, earthy warmth. Together, they transform plain bread into a fragrant, flavorful coating that is irresistible.
Garlic: Minced garlic added directly to the egg wash is a game-changer. As the chicken is coated, the garlic infuses every piece with a rich, savory aroma and a delicious kick. This simple step layers flavor directly onto the chicken, ensuring a delicious bite every time.
Eggs: The binding agent for our breadcrumbs. Whisked eggs create the perfect sticky surface for the flour and breadcrumbs to adhere, ensuring a thick, even coating.
All-Purpose Flour: The first layer in our dredging station, flour helps create a dry surface that allows the egg wash to stick efficiently, forming a robust foundation for the breadcrumbs.
Olive Oil: For frying, we recommend a generous amount of extra virgin olive oil. It not only contributes to a beautifully golden and flavorsome crust but also imparts a delicious, delicate flavor that complements the chicken perfectly. You can also use light olive oil or avocado oil for its high smoke point.
A full ingredient list with exact amounts can be found in the recipe card below for your convenience.
Exciting Recipe Modifications & Variations for Your Palate
This crispy breaded chicken recipe is a fantastic canvas for culinary creativity. Feel free to experiment with these delicious modifications and variations to suit your taste and dietary preferences:
- Herb Swap: Don’t limit yourself to parsley and rosemary! Explore other fresh herbs like fragrant basil, earthy thyme, aromatic oregano, or a mix of Italian herbs for a different flavor profile. Each herb brings its unique character to the breadcrumbs.
- Cheesy Crunch: For an extra layer of savory richness and an even crisper texture, mix in finely grated Parmesan cheese (or pecorino romano) into your homemade breadcrumbs. The cheese adds a salty, umami depth that is simply divine.
- Spice It Up: If you love a little heat, add a pinch of chili flakes or a generous dash of smoked paprika to your breadcrumbs or flour mixture. This will introduce a subtle warmth and a beautiful smoky aroma. For a bolder flavor, try a touch of cayenne pepper.
- Global Flavors: Experiment with different spice blends. Incorporate a blend of Japanese panko breadcrumbs with a dash of Togarashi for an Asian twist, or try a Mediterranean blend with sumac and za’atar.
- Gluten-Free Option: To make this recipe gluten-free, simply substitute the white bread with your favorite gluten-free bread for the breadcrumbs, and use a gluten-free all-purpose flour blend in your dredging station.
- Versatile Coating: These incredible homemade breadcrumbs aren’t just for chicken! Use them to coat pork cutlets, lamb cutlets, veal cotoletta, or even vegetables like slices of eggplant or zucchini for a delicious vegetarian option.
How to Master the Art of Crispy Breaded Chicken: A Step-by-Step Guide
Crafting this incredibly crispy breaded chicken is surprisingly simple, even for novice cooks. Follow these clear, detailed steps, and you’ll achieve delicious, perfectly golden results every time, whether you’re cooking it right away or prepping it for later.
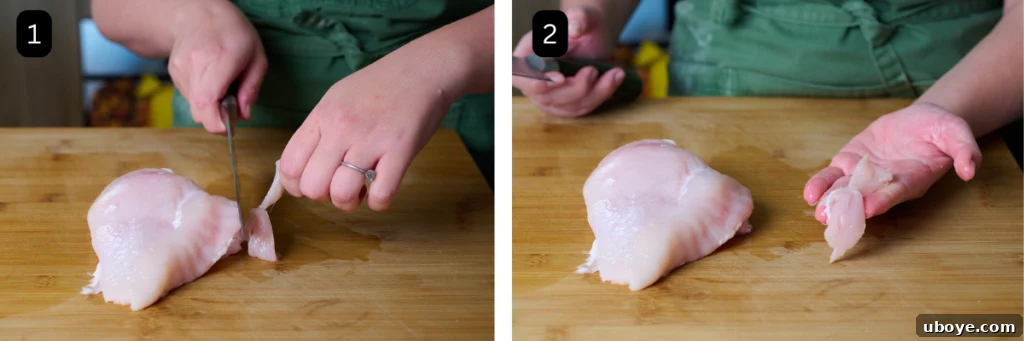
Step 1: Prepare the Chicken Breast for Even Cooking
Begin by carefully removing the tenderloin from each chicken breast using a sharp knife. Don’t discard these smaller pieces; they are just as delicious when breaded and fried! This initial step ensures the main breast portion can be butterflied and pounded more uniformly. (Images 1 & 2)
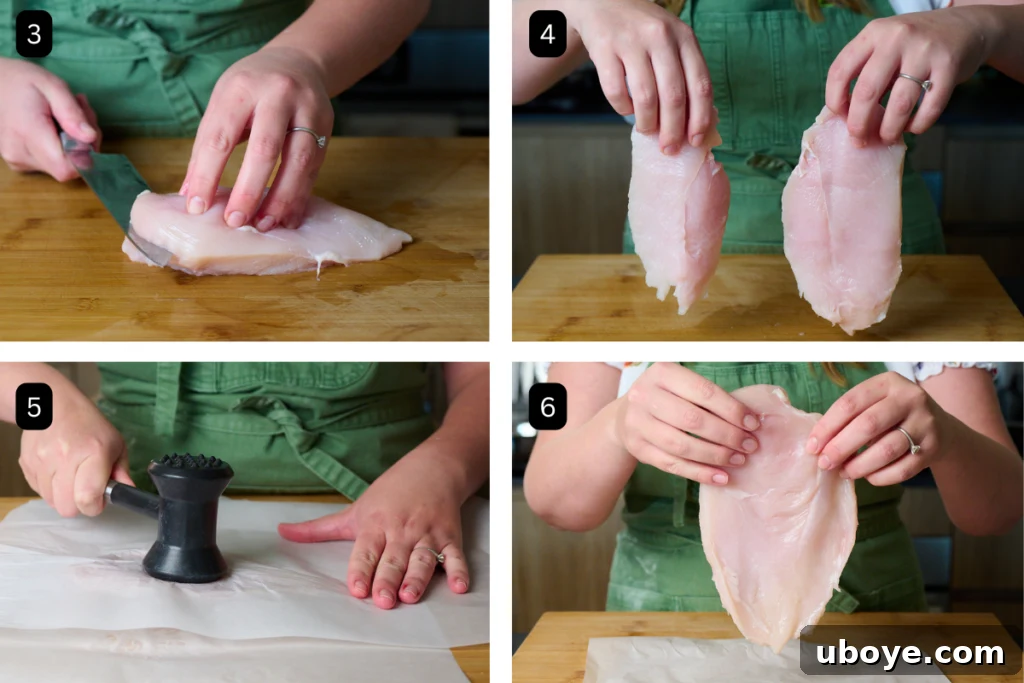
Next, prep the chicken for optimal crispiness and even cooking. Place one hand flat on top of a chicken breast and, using a sharp knife, carefully slice through the middle horizontally to create two thinner cutlets. Allow the knife to do most of the work, applying gentle, consistent pressure as it glides crosswise. Don’t worry if the cuts aren’t perfectly even; a little variation adds character! (Images 3 & 4)
To achieve uniform thickness, place each chicken piece (and the tenderloins) between two sheets of plastic wrap or baking paper. Using the smooth side of a meat mallet, gently pound the chicken from the center outwards. Aim for a thickness of roughly 2cm (about ¾ inch) throughout. This ensures even cooking and maximum tenderness. (Images 5 & 6) Season both sides of the flattened chicken generously with salt and pepper.
Step 2: Craft Your Signature Homemade Breadcrumbs
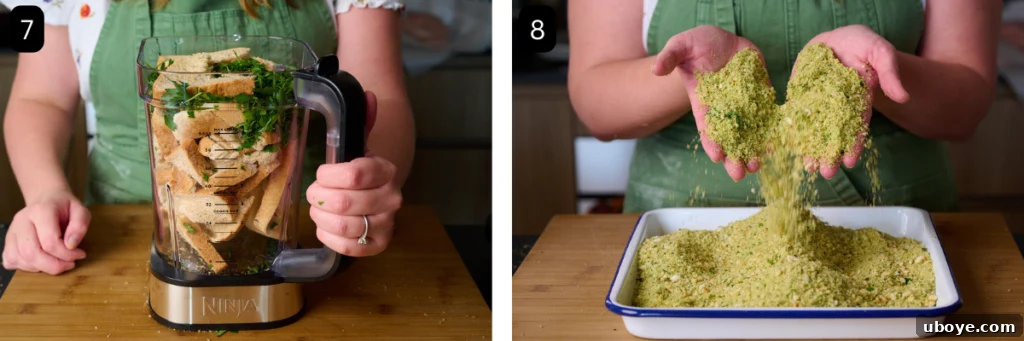
This is where the magic begins! Roughly tear your stale bread into smaller pieces and place them into a food processor or blender. Add the fresh parsley and rosemary. Pulse until the bread forms chunky, textured crumbs and the herbs are well incorporated. We’re not aiming for fine dust; those chunky bits are essential for the ultimate crunch! If you’re using a smaller blender, work in batches to avoid overcrowding. (Images 7 & 8) Once blended, transfer the fragrant breadcrumbs to a shallow baking tray.
Step 3: Prepare Your Flavorful Egg Wash and Flour Station
In a shallow, wide bowl, whisk together the eggs and minced garlic. This allows the garlic to infuse the egg wash with its savory flavor, ensuring every part of the chicken gets a delicious coating. Set this aside. In another shallow baking tray or plate, whisk together the all-purpose flour with a generous amount of salt and pepper. This seasoned flour will be the first layer of protection and adherence for our coating.
Step 4: Set Up Your Efficient Dredging Station
For a clean and efficient process, arrange your dredging station in this order: start with the seasoned flour, followed by the garlicky egg wash, then the homemade breadcrumbs, and finally, a large clean plate or tray to hold the breaded chicken. This assembly line approach makes breading quick and mess-free.
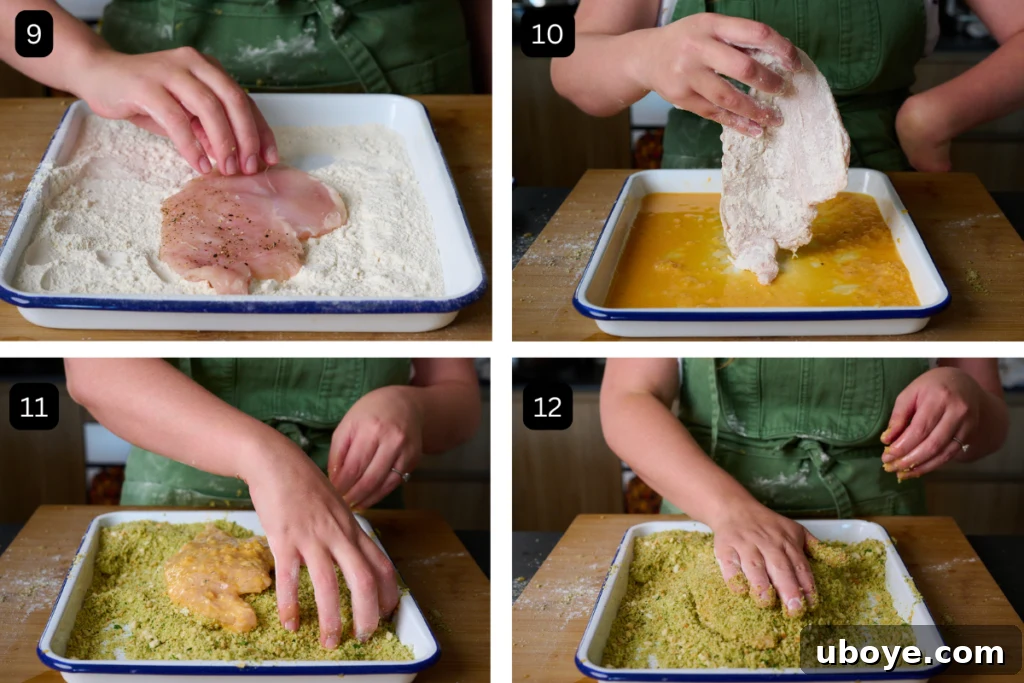
- Take one piece of prepared chicken breast and coat both sides evenly with the flour. Gently shake off any excess flour. (Image 9)
- Next, submerge the floured chicken into the egg wash, ensuring both sides are fully coated. (Image 10)
- Finally, place the egg-washed chicken into the breadcrumb mixture. Apply firm pressure with your hands, flipping the chicken over to ensure the breadcrumbs adhere evenly and thickly to every surface. This pressure is key to a robust, crispy crust. (Images 11 & 12)
- Transfer the fully breaded chicken to the clean plate and repeat this process with the remaining chicken pieces.
Step 5: Achieve Golden Perfection by Frying
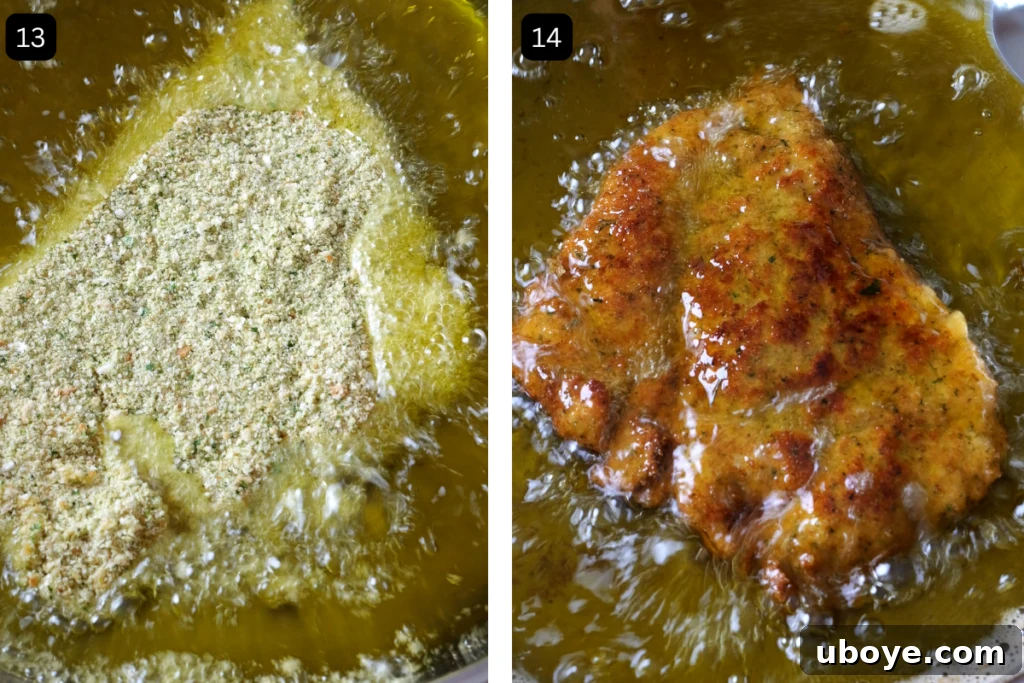
For an authentically golden and flavorsome crust, use extra virgin olive oil for shallow frying. In a large frying pan, add a generous amount of olive oil, ensuring it’s about 2-3cm (1 inch) deep. Heat the olive oil over medium heat. You can test if the oil is hot enough by inserting a wooden skewer; if small bubbles form steadily around the skewer, it’s ready. (Image 13)
- Once the oil is hot, reduce the heat to low-medium. Fry 1-2 pieces of chicken at a time to avoid overcrowding the pan and dropping the oil temperature. Cook each side for 2-3 minutes, or until deeply golden brown and gloriously crispy.
- It’s always a good idea to test the first piece to ensure your cook time and heat levels are accurate. Remember, the chicken will continue to cook slightly after it’s removed from the heat, so take it off a few seconds before you think it’s perfectly done. (Image 14)
Step 6: Rest for Maximum Crispiness and Juiciness
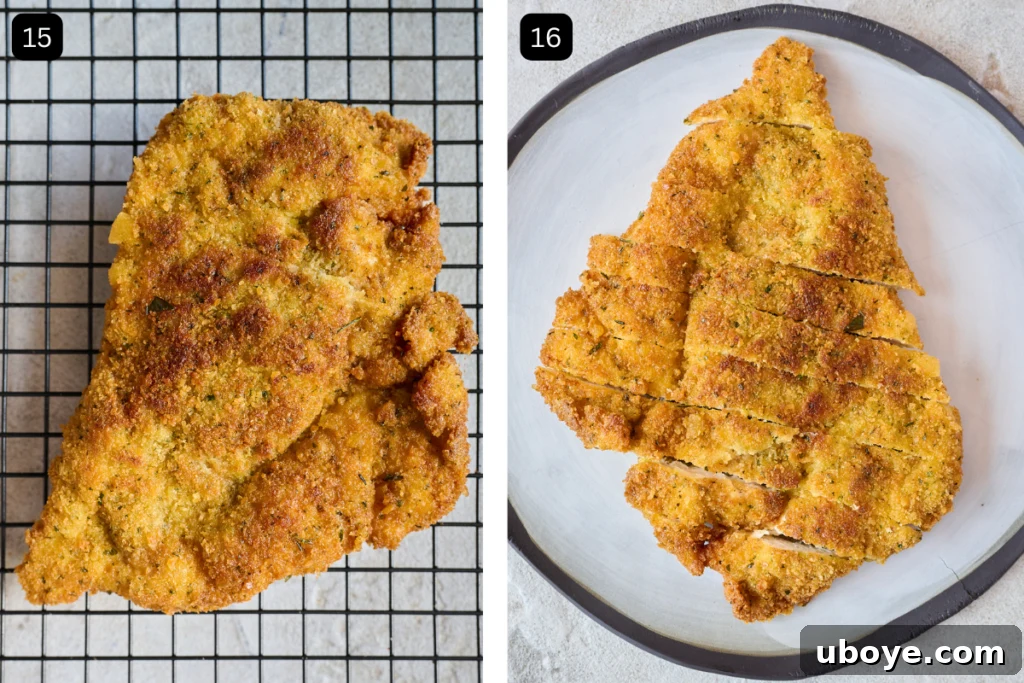
Once cooked, transfer the crispy chicken to a cooling rack set over a plate lined with absorbent paper. Resting the chicken on a rack is crucial as it allows air to circulate, preventing the bottom from becoming soggy and maintaining that desirable crispy exterior. (Image 15)
Allow the chicken to rest for at least 5 minutes before slicing into it. This resting period allows the juices to redistribute throughout the meat, ensuring every bite is tender and succulent. (Image 16)
Creative Ways to Serve Your Crispy Breaded Chicken
The beauty of this crispy breaded chicken lies in its incredible versatility. It can be the star of a meal or a delightful component in a larger dish. Here are some fantastic ways to serve it:
- Simply Delicious: Enjoy it on its own with a generous squeeze of fresh lemon, which brightens the flavors and cuts through the richness. A side of your favorite dipping sauce, like a creamy aioli or spicy mayo, is also a fantastic addition.
- Salad Sensation: Slice the crispy chicken over a fresh, vibrant salad for a satisfying and texture-rich meal. It pairs beautifully with a Caesar salad, a garden salad with a tangy vinaigrette, or even a warm roasted vegetable salad. The crispiness of the chicken contrasts wonderfully with fresh greens.
- Hearty Sandwiches and Wraps: Layer slices of crispy chicken into a warm focaccia for a classic veal parm focaccia sandwich (substituting veal with chicken!), or tuck it into a soft tortilla with your favorite fillings for a delicious wrap. Add some fresh lettuce, tomato, and a drizzle of sauce for an ultimate handheld meal.
- Classic Italian Pairing: Serve it alongside a comforting pasta dish like our lemon chicken orzo pasta or with a simple yet flavorful marinara sauce. A sprinkle of fresh basil and Parmesan cheese completes the experience.
- Comfort Food Feast: For a truly comforting meal, pair your crispy chicken with creamy side dishes. Think creamy mashed potatoes (perhaps with olive oil for a twist!) and some tender garlicky green beans or steamed asparagus.
- Kid-Friendly Nuggets: Cut the cooked chicken into strips or bite-sized pieces for homemade chicken nuggets that kids (and adults!) will adore. Serve with their favorite dipping sauces for a fun and easy meal.
Storing and Reheating Your Crispy Breaded Chicken
This crispy crumbed chicken is an ideal candidate for making in bulk and storing for future meals, saving you precious time during busy weeks. With just one standard sandwich loaf, you can easily create enough homemade breadcrumbs to coat up to 2kg (approximately 4.4 lbs) of chicken, ensuring you have plenty on hand.
For Uncooked, Breaded Chicken: To maintain the crispness of the coating and prevent sogginess, it’s crucial to wrap each breaded chicken piece individually in plastic wrap as soon as it’s been coated. This method locks in freshness and prevents moisture transfer. Store these wrapped pieces in the refrigerator for up to three days, or freeze them for up to three months. When freezing, place the individually wrapped pieces on a baking sheet to freeze solid, then transfer them to a freezer-safe bag or container to save space. Always remember to wrap each piece separately to prevent the breadcrumbs from becoming damp.
For Cooked Crispy Chicken: Once cooked, allow the chicken to cool completely before storing. Place leftovers in an airtight container and refrigerate for up to 3-4 days.
Reheating Instructions for Maximum Crispiness: To restore that desirable crispy, golden coating, we highly recommend reheating cooked chicken in an air fryer or oven. Avoid the microwave, as it will make the crust soggy. In an air fryer, cook at 180°C (350°F) for 5-7 minutes, flipping halfway, until heated through and crispy. In a conventional oven, place the chicken on a wire rack set over a baking sheet and bake at 200°C (400°F) for 10-15 minutes, or until piping hot and re-crisped.
Crispy Breaded Chicken FAQs: Your Questions Answered
The ultimate secret to achieving a perfectly crispy breaded chicken lies almost entirely in your breadcrumbs: use stale or old bread! Moisture is the arch-nemesis of crunch. Ensuring that your bread is thoroughly dried out before blending into crumbs is absolutely essential. This creates light, airy breadcrumbs that fry up beautifully golden and shatteringly crisp, giving you that irresistible texture in every bite. Fresh bread contains too much moisture and will result in a softer, less satisfying coating, often soaking up more oil. So, for the best results, always prioritize dry, stale bread.
It’s best to avoid using fresh bread for your breadcrumbs, as its high moisture content will prevent them from sticking properly and crisping up when fried. However, if you find yourself with only fresh bread and need to make this recipe immediately, there’s a quick workaround. Lightly toast the bread in a toaster or oven until it’s golden and dry, then let it cool completely to room temperature. Once cooled and dry, proceed with blending it into breadcrumbs. Planning ahead is ideal; if possible, buy your bread a day or two in advance, slice it, and leave it out on baking trays overnight to air-dry naturally. This passive drying method yields the best results for perfectly dry, crispy breadcrumbs.
While dried herbs are convenient, I strongly recommend against using them for this particular recipe’s homemade breadcrumbs. Given that we use a minimal number of ingredients for the breadcrumbs, the quality and freshness of each component are paramount. Fresh herbs like parsley and rosemary provide a vibrant color, intense aroma, and a burst of flavor that dried herbs simply cannot replicate. They contribute significantly to the overall taste and visual appeal, making every bite truly special. For the best possible flavor and appearance, stick with fresh herbs.
For shallow frying, I personally prefer using light olive oil or extra virgin olive oil. It imparts a beautiful golden color to the crust and adds a rich, yet subtle, underlying flavor that wonderfully complements the chicken and herbs. If you’re looking for alternatives, avocado oil is an excellent choice due to its high smoke point and neutral flavor, making it great for high-heat cooking. You could also combine light olive oil with avocado oil for a balanced approach that leverages both flavor and heat stability. Ensure you use enough oil to generously cover at least half of the chicken for even frying.
Absolutely! For a healthier alternative to shallow frying, you can achieve wonderfully crispy, golden chicken using either an air fryer or a conventional oven. Both methods significantly reduce the amount of oil while still delivering a satisfying crunch.
- Air Frying: This is an excellent option for minimal oil. Simply spray the breaded chicken lightly but evenly with cooking oil (a misting bottle works best) on both sides. Cook in a preheated air fryer at 200°C (400°F) for approximately 10-15 minutes, flipping halfway through, until the chicken is golden brown, crispy, and cooked through to an internal temperature of 74°C (165°F).
- Baking: For oven-baked perfection, place the breaded chicken on a wire rack set over a baking tray. This allows air to circulate around the chicken, ensuring crispiness on all sides. Lightly spray the chicken with oil, then bake in a preheated oven at 220°C (425°F) for about 20-25 minutes, flipping halfway through. Bake until golden, crispy, and cooked to a safe internal temperature. Both methods ensure delicious, crunchy results without the excess oil!
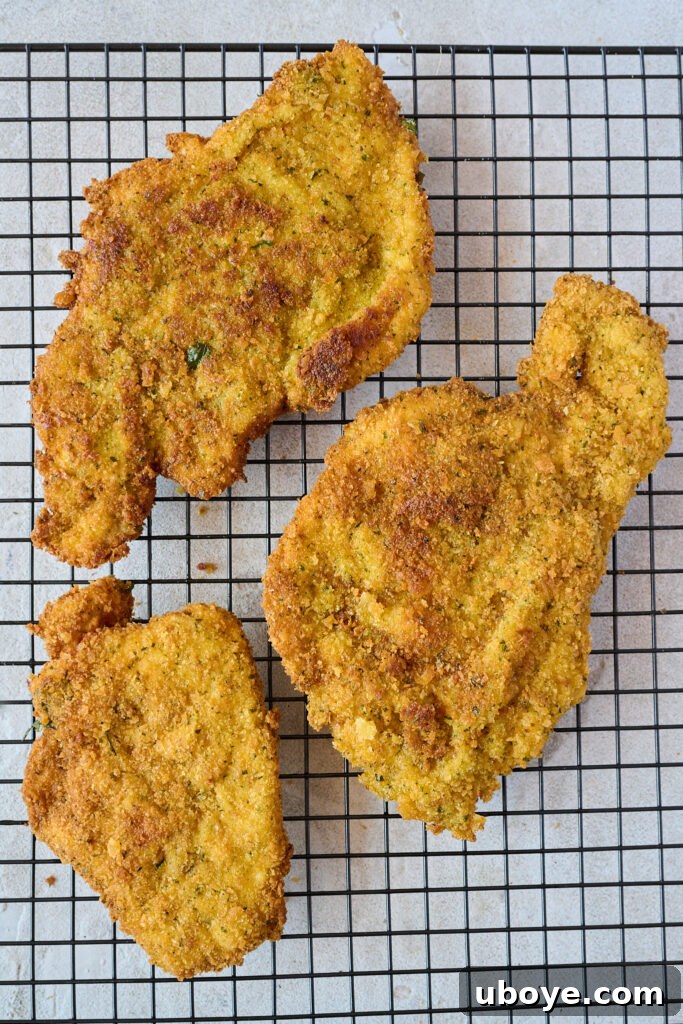
More Delicious Breaded Recipes You Will Love
If you’ve fallen in love with the crispy perfection of this breaded chicken, you’re in for a treat! Our kitchen is filled with more incredible breaded recipes that will tantalize your taste buds and expand your culinary repertoire. From comforting pasta dishes to hearty meat cutlets, these recipes showcase the versatility and irresistible texture that a perfectly crumbed coating can bring to any meal. Explore these delightful options and discover your next favorite:
Pasta
Lemon Chicken Orzo Pasta
Meat
Veal Cotoletta or Cotoletta alla Milanese
Meat
Veal Schnitzel Focaccia Sandwich
Meat
Crumbed Pork Cutlets
If you create this Crispy Breaded Chicken recipe, I would be absolutely thrilled to see your delicious creations! 😍📸 Tag me on Instagram, TikTok, YouTube or Pinterest so I can admire your culinary masterpieces!
Should you have any questions, or if you’d like to share your experience with a star review, please drop a comment below! ⭐ I always cherish your feedback and love answering any food or recipe-related queries you might have. Happy cooking, and enjoy every golden, crunchy bite! 🍗✨
Pin Recipe
Print Recipe
Crispy Breaded (Crumbed) Chicken
Ingredients
Crispy Crumbed Chicken
- 2 lbs chicken breast
- 1.7 lbs sandwich loaf, white bread (stale, see note)
- 4 eggs
- 4 garlic cloves, minced
- 1 cup flour, white all purpose
- 1 tsp kosher sea salt
- 1 tsp black pepper
- 1 tbsp fresh rosemary, finely chopped
- 1.4 oz fresh parsley, 1 large bunch
- 2 cups olive oil (for frying)
Instructions
Crumbed chicken
-
Preparation the day before (if needed): If your bread is fresh, lay it out onto a baking tray and leave it to air dry overnight to ensure it becomes stale. This is crucial for crispiness.
-
Prepare the Egg Wash: In a shallow, wide bowl, whisk together the eggs and minced garlic until well combined. Set this mixture aside; allowing it to sit will help the garlic infuse its flavor into the eggs.
-
Prep the Chicken: Using a sharp knife, carefully cut through the middle of each chicken breast horizontally, creating two thinner cutlets from each breast. Place each piece of chicken between two sheets of plastic wrap or baking paper. Using the smooth side of a meat mallet, pound the chicken from the center outwards until each breast is roughly 2cm (¾ inch) thick and has an even thickness throughout. Place all the prepped chicken onto a large baking tray and season generously with salt and pepper on both sides.
-
Make the Breadcrumbs: Roughly tear the stale bread into pieces and place them into a food processor or blender along with the fresh parsley and rosemary. Blend until the bread forms chunky crumbs and the herbs are evenly mixed through. Transfer the homemade breadcrumbs to a shallow baking tray.
-
Prepare the Flour: In another shallow baking tray, whisk together the all-purpose flour with a generous amount of salt and pepper.
-
Set up the Dredging Station: Arrange your breading station in an assembly line: start with the seasoned flour, followed by the garlicky egg wash, then the homemade breadcrumbs, and finally, a large clean plate or tray to place the breaded chicken.
-
Bread the Chicken: Take one chicken breast and coat both sides evenly with the flour, shaking off any excess. Next, immerse it in the egg wash, ensuring complete coverage. Lastly, place it into the breadcrumb mixture, applying firm pressure with your hands as you flip it to ensure the breadcrumbs adhere thickly and evenly all over. Transfer the fully breaded chicken to your clean plate and repeat this process for the remaining chicken pieces.
-
Fry the Chicken: In a large frying pan, add the olive oil, ensuring it’s about 2-3cm deep. Heat the olive oil over medium heat until hot (test with a wooden skewer – bubbles should form). Reduce the heat to low-medium and fry 1-2 pieces of chicken at a time for 2-3 minutes on each side, or until they are golden brown and perfectly crispy. Once cooked, transfer the chicken to a cooling rack set over absorbent paper to drain excess oil and maintain crispiness.
-
Rest the Chicken: Allow the cooked chicken to rest on the cooling rack for 5 minutes before slicing and serving. This resting period ensures the juices redistribute, resulting in tender, succulent chicken.
Video
Notes
Breadcrumb Texture: For our homemade breadcrumbs, we are specifically aiming for a chunky, rustic texture, not a fine, powdery one. It’s those irregularly shaped, crusty parts that create an extra special crunch and flavor. If you’re using a smaller food processor or blender, make sure to process the bread and herbs in batches to achieve the desired consistency without over-blending.
Testing Oil Temperature: A simple trick to check if your olive oil is hot enough for frying is to insert the end of a wooden skewer or handle into the oil. If small, steady bubbles form around the wood, your oil is ready. If it bubbles too violently, it’s too hot; if no bubbles appear, it needs more time to heat up.
Perfect Cooking Timing: When frying, it’s always best to test out one piece of chicken first to accurately gauge your cook time and ideal heat levels. Remember that chicken will continue to cook for a few seconds after it’s removed from the heat (carry-over cooking), so take it off the heat just before you feel it’s perfectly done to avoid overcooking.
Nutrition
Carbohydrates: 63g
Protein: 71g
Fat: 151g
Saturated Fat: 35g
Polyunsaturated Fat: 15g
Monounsaturated Fat: 93g
Trans Fat: 1g
Cholesterol: 385mg
Sodium: 813mg
Potassium: 1297mg
Fiber: 3g
Sugar: 5g
Vitamin A: 2056IU
Vitamin C: 19mg
Calcium: 257mg
Iron: 5mg
Nutrition information is automatically calculated, so should only be used as an approximation.
 Like this? Leave a comment below!