
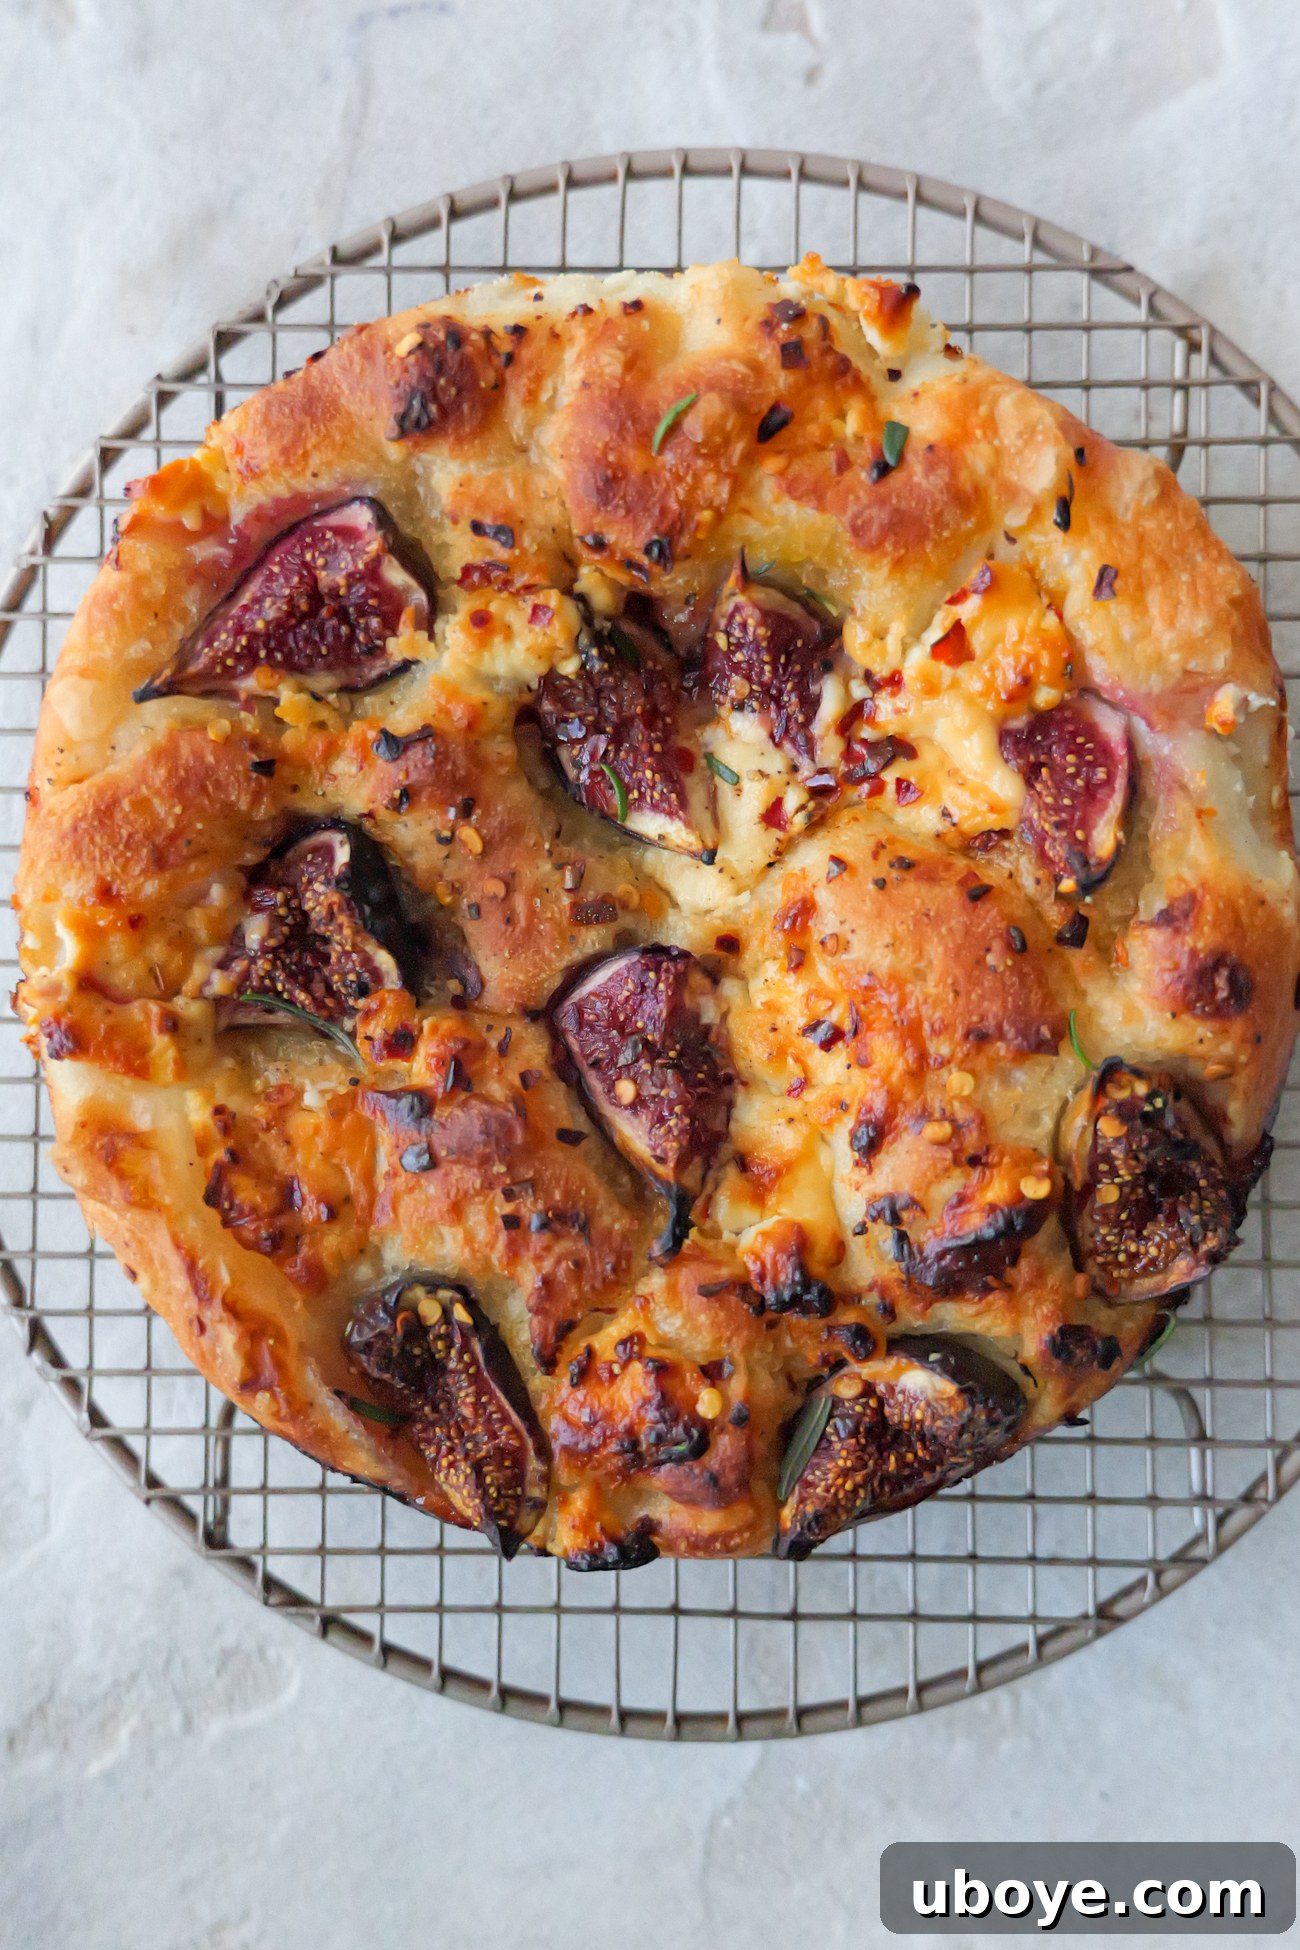
Fig and Goat Cheese Focaccia: A Sweet & Savory No-Knead Delight
There’s a special kind of satisfaction that comes with baking homemade bread, and focaccia holds a particularly cherished spot in my heart. The process of transforming simple ingredients into a golden, aromatic, and delightfully textured loaf is nothing short of magical. Over the years, I’ve perfected my no-knead focaccia recipe, making it accessible even for beginners, and opened up a world of endless topping possibilities.
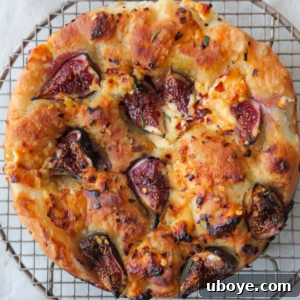
Among my favorite creations, this Fig and Goat Cheese Focaccia stands out as a true masterpiece. It beautifully marries the natural sweetness of ripe figs with the tangy creaminess of goat cheese, all brought together by a delicate drizzle of honey on a perfectly soft, golden base. Each bite offers a harmonious blend of flavors and textures that is both comforting and sophisticated.
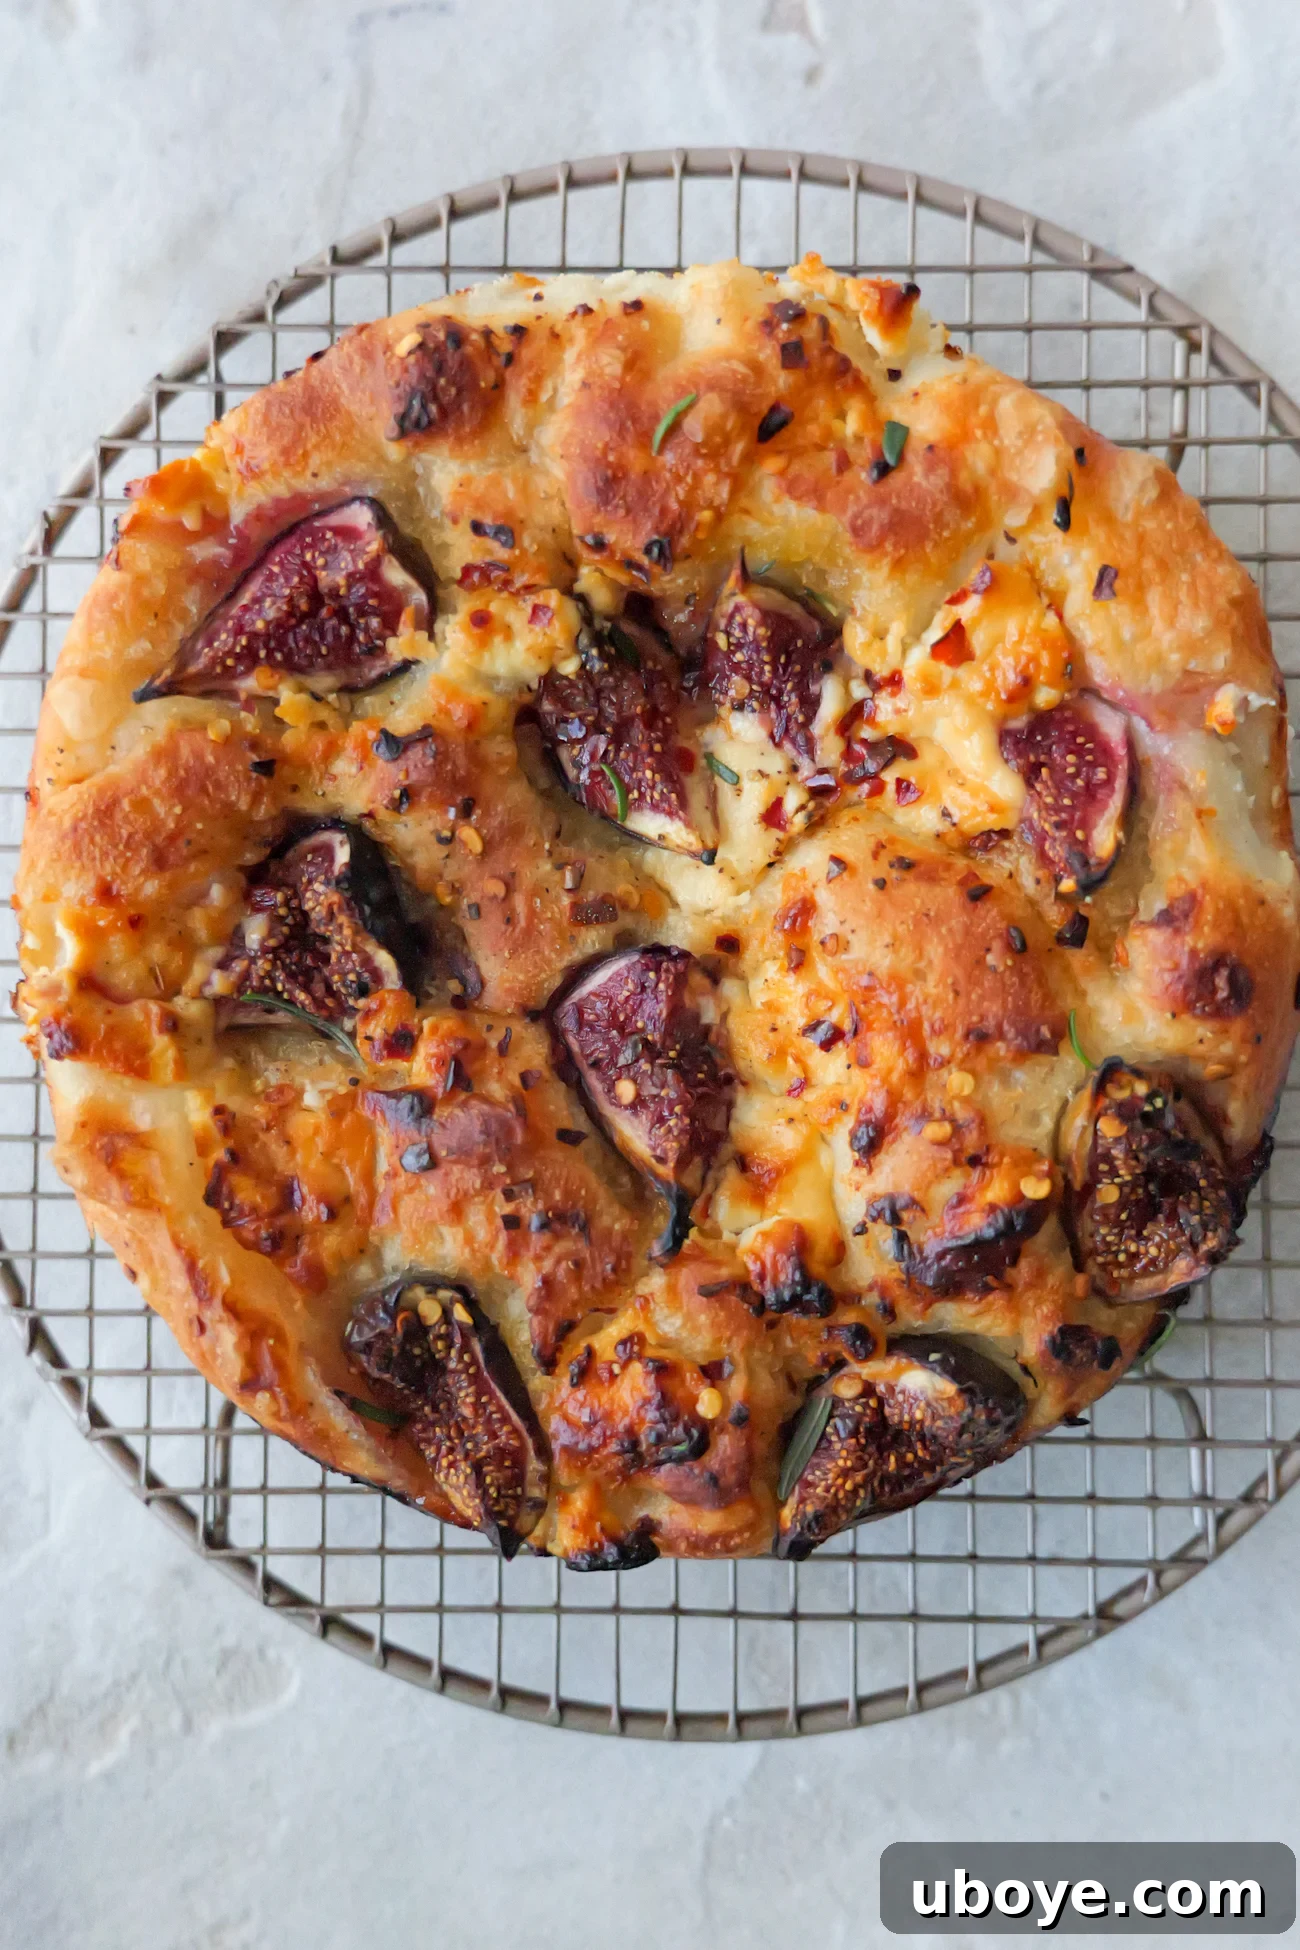
If you’re as passionate about focaccia as I am, you might also love exploring my pizza-style focaccia, a vibrant creation loaded with juicy tomatoes, melted mozzarella, and fresh basil, or perhaps the indulgent richness of my garlic butter focaccia. But for a truly unique and irresistible experience, this fig and goat cheese combination is an absolute must-try.
Why You’ll Love This Fig & Goat Cheese Focaccia Recipe
This fig, goat’s cheese, and honey focaccia isn’t just another bread recipe; it’s a delightful culinary experience that’s surprisingly easy to achieve. Here’s why it’s destined to become a staple in your baking repertoire:
- Effortless No-Knead Focaccia Dough: Say goodbye to strenuous kneading! Our foolproof recipe relies on simple stretch-and-fold techniques and a long, slow fermentation process to develop incredible flavor and texture. This makes it perfect for both novice bakers and seasoned pros looking for an easy, hands-off approach to artisan bread. You’ll spend less time in the kitchen and more time enjoying the results.
- Exquisite Sweet and Savory Flavor Harmony: This focaccia is a masterclass in balance. The luscious, jammy sweetness of roasted figs perfectly complements the bright, tangy notes of creamy goat cheese. A delicate drizzle of honey enhances the fruit’s natural sugars and adds a beautiful golden sheen. This unique flavor profile is both comforting and elegantly sophisticated, making it a standout dish.
- Impressive & Versatile for Any Occasion: Despite its gourmet appeal, this focaccia is incredibly simple to prepare, making it ideal for a variety of settings. Serve it warm as an impressive appetizer at your next dinner party, pack it for a luxurious picnic spread, offer it alongside a charcuterie board, or enjoy it as a sophisticated brunch item. Its beautiful presentation and irresistible taste are sure to impress your guests every time.
- Seasonal Celebration: Fresh figs are a seasonal delicacy, and this recipe allows you to celebrate their short but sweet window. When baked, they transform into soft, almost candied pockets that elevate the entire focaccia experience, bringing a taste of summer or early autumn to your table.
This recipe truly feels a bit fancy, but it’s secretly so easy to pull off, making it perfect for sharing with loved ones, enjoying as a gourmet snack, or enhancing any meal.
Essential Ingredients for Your Focaccia
Crafting this irresistible fig and goat cheese focaccia begins with a selection of simple, wholesome ingredients. Each component plays a vital role in achieving the perfect sweet and savory harmony and the signature airy texture of focaccia.
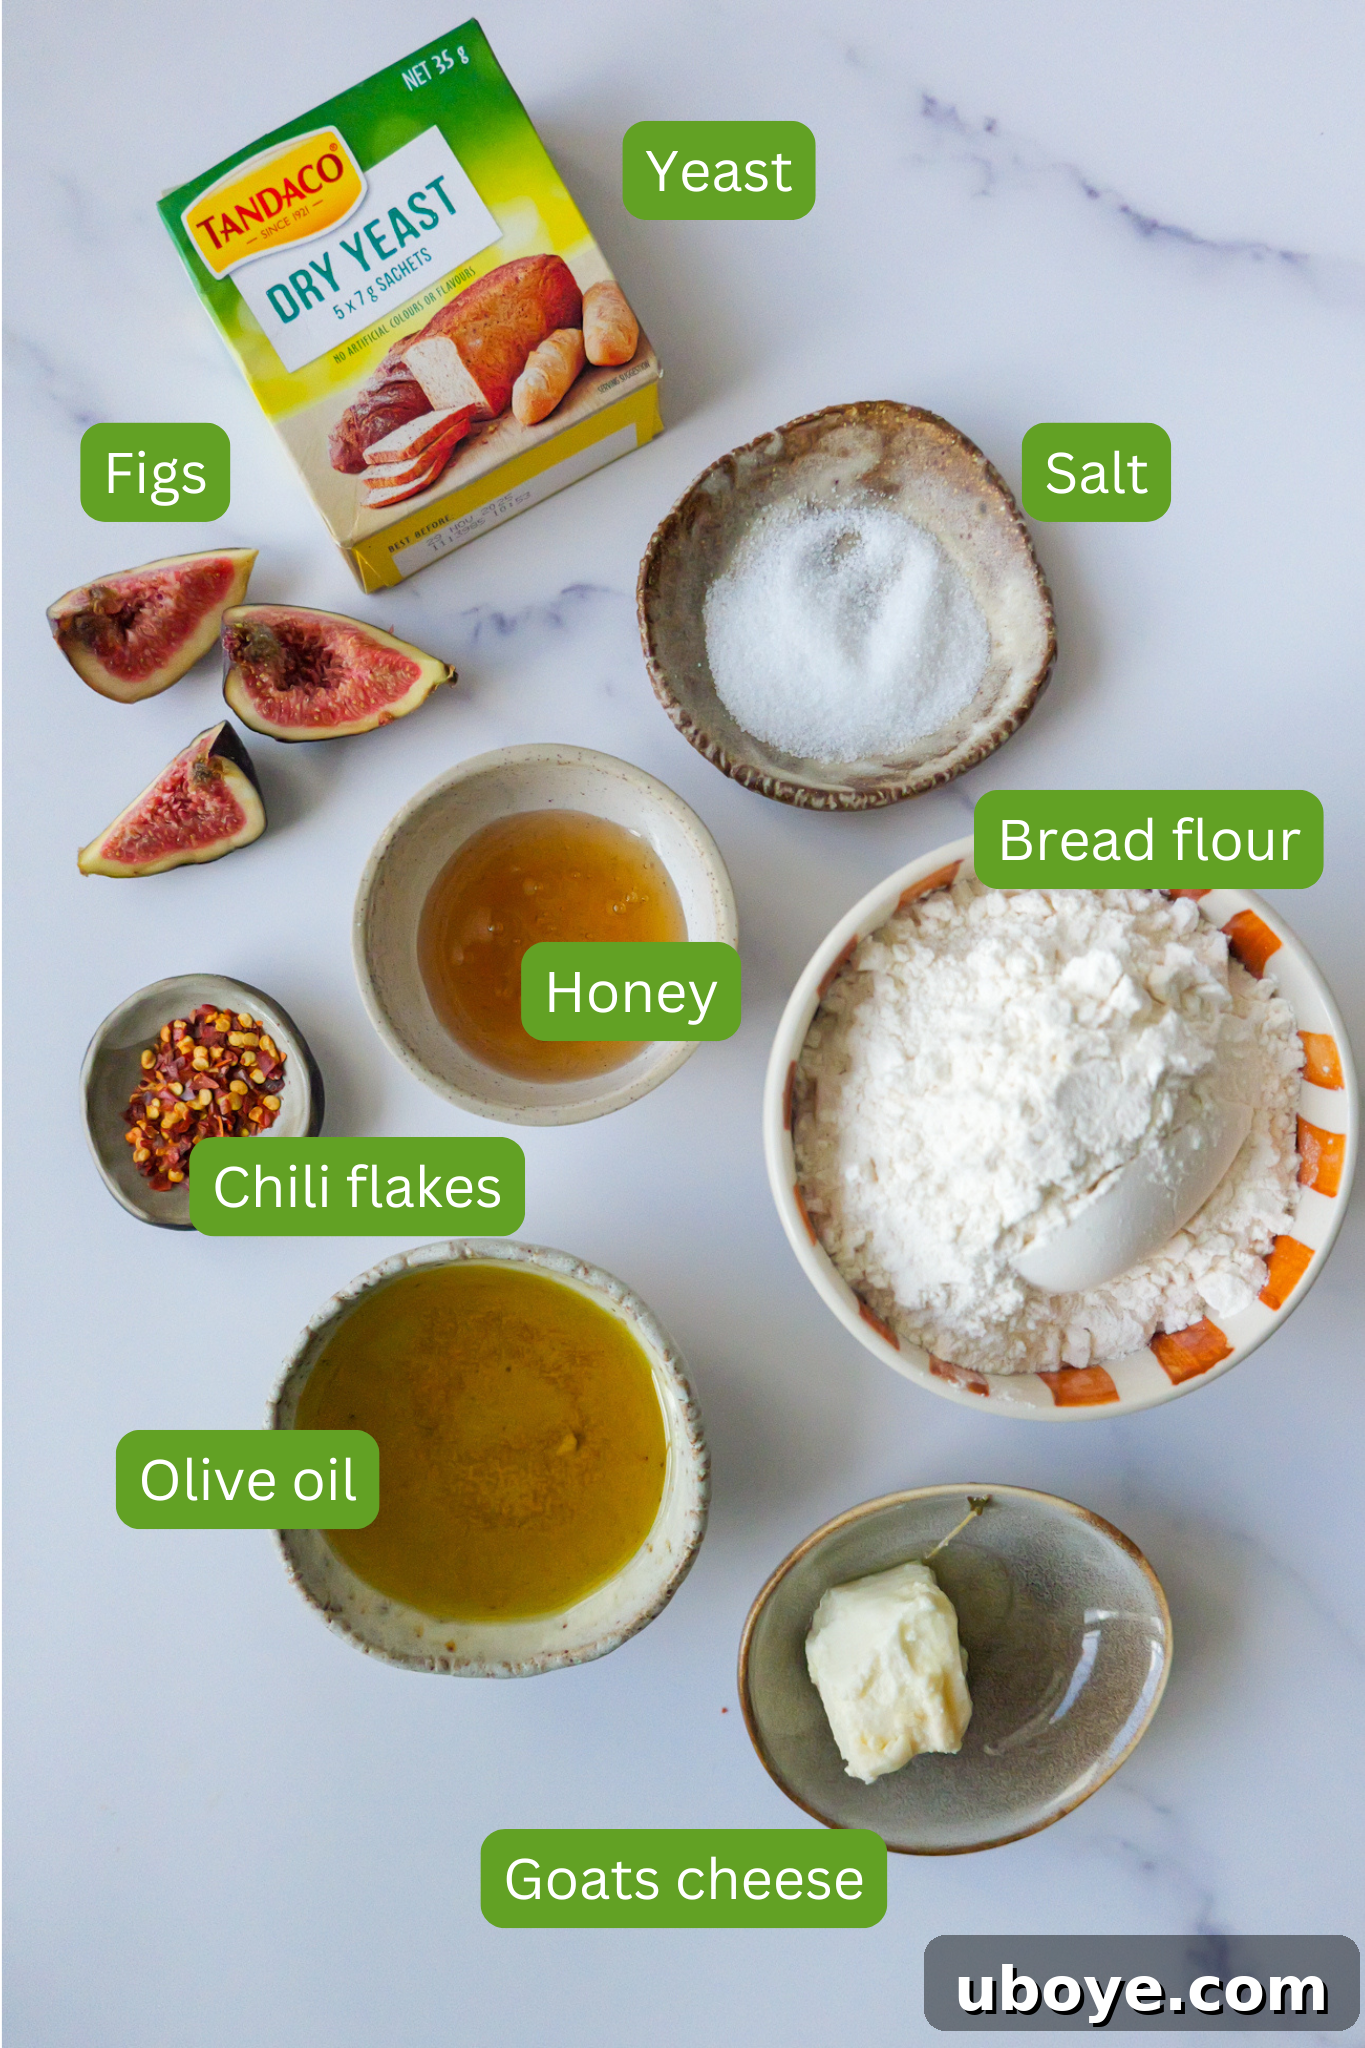
- Fresh Figs: The star of our topping! When baked, fresh figs caramelize and soften into luscious, jammy pockets of sweetness. Their unique texture and rich, fruity flavor are indispensable for this recipe. Choose figs that are plump, soft to the touch, and free from bruises for the best results.
- Goat Cheese: This creamy, tangy cheese provides the perfect counterpoint to the figs’ sweetness. As it bakes, goat cheese melts beautifully, infusing the focaccia with its characteristic piquant flavor, which balances the overall profile and adds a delightful richness.
- Honey: A touch of natural honey is drizzled over the focaccia before baking, creating a subtly sweet, golden glaze that enhances the figs and ties all the flavors together. It also contributes to the beautiful browning of the crust.
- Olive Oil (Extra Virgin): Beyond just coating the pan, high-quality extra virgin olive oil is integral to the focaccia itself. It adds moisture, flavor, and contributes to the golden, crisp crust. Don’t skimp on this ingredient; a good olive oil makes a noticeable difference.
- Bread Flour: While all-purpose flour works, bread flour is preferred for its higher protein content, which develops gluten more effectively through the no-knead method. This results in a chewier, more structured crumb that is characteristic of excellent focaccia.
- Dry Yeast: The leavening agent that gives focaccia its airy, open texture. Ensuring your yeast is fresh and active is crucial for a successful rise. We’ll activate it in lukewarm water to guarantee its vitality.
- Fine Sea Salt: Essential for flavor development in the dough and for seasoning the toppings. Sea salt provides a clean, briny taste that enhances all other ingredients.
- Chili Flakes (Optional): For those who appreciate a hint of warmth and subtle spice, a sprinkle of chili flakes adds an exciting layer of flavor, beautifully cutting through the richness of the cheese and sweetness of the figs.
A complete ingredient list with precise measurements can be found in the detailed recipe card below.
Creative Variations & Customizations for Your Focaccia
While this fig and goat cheese focaccia recipe is perfect as is, it also serves as an excellent canvas for culinary creativity. Feel free to experiment with these variations to suit your taste preferences or to utilize seasonal ingredients:
- Cheese Swaps: Not a fan of goat cheese, or simply looking for a different flavor profile? Consider these delicious alternatives:
- Feta: Crumbly and salty, feta cheese offers a sharper tang that pairs wonderfully with sweet figs.
- Blue Cheese: For a more pungent and sophisticated kick, a small amount of crumbled blue cheese can be transformative.
- Brie or Camembert: These creamy, rich cheeses melt into decadent pools, providing a luxurious contrast to the figs.
- Ricotta: Dollops of fresh ricotta can add a light, milky sweetness and a soft texture.
- Mozzarella or Provolone: For a milder, more familiar cheesy flavor, shredded mozzarella or provolone can work beautifully, especially if serving to a less adventurous crowd.
- Fig Alternatives: If fresh figs are out of season or hard to find, don’t let that stop you:
- Dried Figs: Sliced dried figs work remarkably well. Just be sure to soak them in warm water for about 10-15 minutes prior to use to soften them, allowing them to plump up and bake nicely.
- Other Fruits: Explore other fruits that complement savory notes, such as thinly sliced pears, grapes (especially red or black varieties), or even roasted apple slices.
- Herb Additions: Elevate the aroma and flavor with fresh herbs:
- Rosemary: A classic focaccia pairing, fresh rosemary sprigs or finely chopped leaves add a fragrant, piney note.
- Thyme: Delicate and earthy, thyme can subtly enhance the sweet and savory flavors.
- Basil: A sprinkle of fresh basil after baking can add a vibrant, peppery finish.
- Nutty Crunch: Add texture and richness with toasted nuts:
- Walnuts: Coarsely chopped walnuts provide a rustic crunch and earthy flavor that complements figs.
- Pistachios: For a touch of elegance and vibrant green color, shelled pistachios are a great addition.
- Aromatic Boosts:
- Balsamic Glaze: A swirl of balsamic glaze after baking can add a beautiful acidic sweetness and shine.
- Lemon Zest: A little grated lemon zest can brighten up the flavors.
Step-by-Step Guide: Crafting Your Fig & Goat Cheese Focaccia
Creating this delicious focaccia is a rewarding process, made surprisingly simple by our no-knead method. Follow these detailed steps to achieve a perfectly airy, flavorful loaf with a golden crust and irresistible toppings. Remember, the key to great focaccia is patience and good quality ingredients.
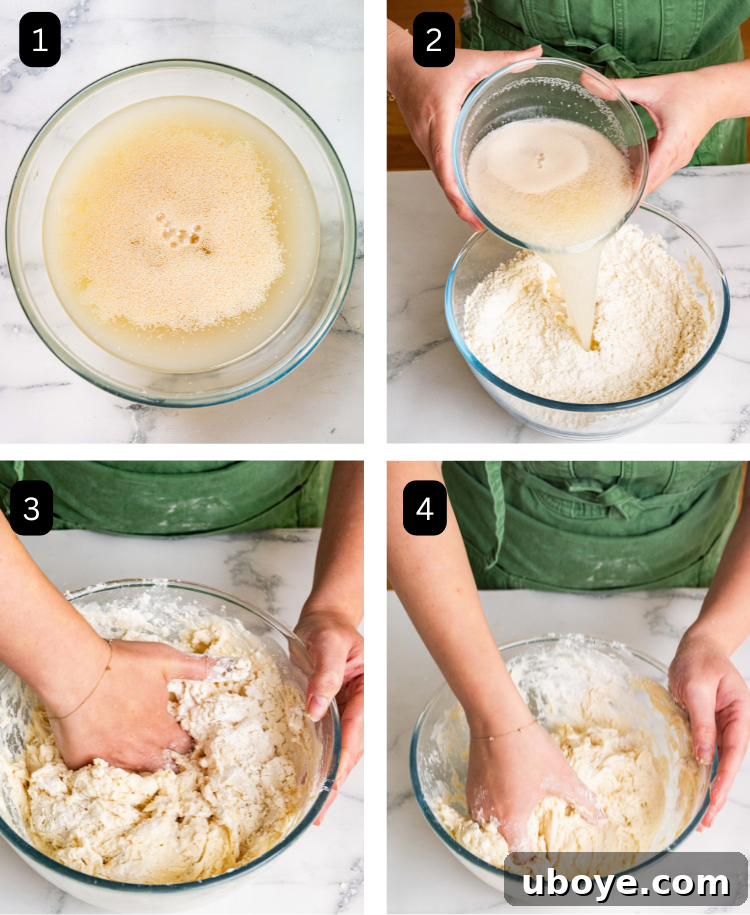
- Step 1: Activate the Yeast. In a medium-sized mixing bowl, combine the lukewarm water (around 100°F / 34°C is ideal – warm to the touch but not hot), dry yeast, and honey. Whisk gently until everything is well combined. Allow this mixture to sit undisturbed for about 5 to 10 minutes. You’ll know the yeast is active and ready when a frothy layer forms on the surface, indicating that the yeast is feasting on the honey and producing carbon dioxide.
- Step 2: Combine Dry and Wet Ingredients. In a separate, larger bowl, whisk together the bread flour and fine sea salt, ensuring they are evenly distributed. Once your yeast mixture is frothy, pour it directly into the bowl with the dry ingredients.
- Step 3: Form the Dough. Using a sturdy spoon or, even better, your hands, mix the wet and dry ingredients together. Continue mixing until all the flour is hydrated and there are no dry spots remaining. At this stage, the dough will be quite wet and sticky due to its high hydration. Avoid overmixing; simply combine until just incorporated.
- Step 4: Initial Rest and Hydration. Cover the bowl tightly with plastic wrap or a damp kitchen towel. Let the dough rest at room temperature for 10 minutes. This crucial resting period, often called autolyse, allows the flour to fully absorb the water, beginning the gluten development process and making the dough more extensible for the subsequent stretch-and-folds.
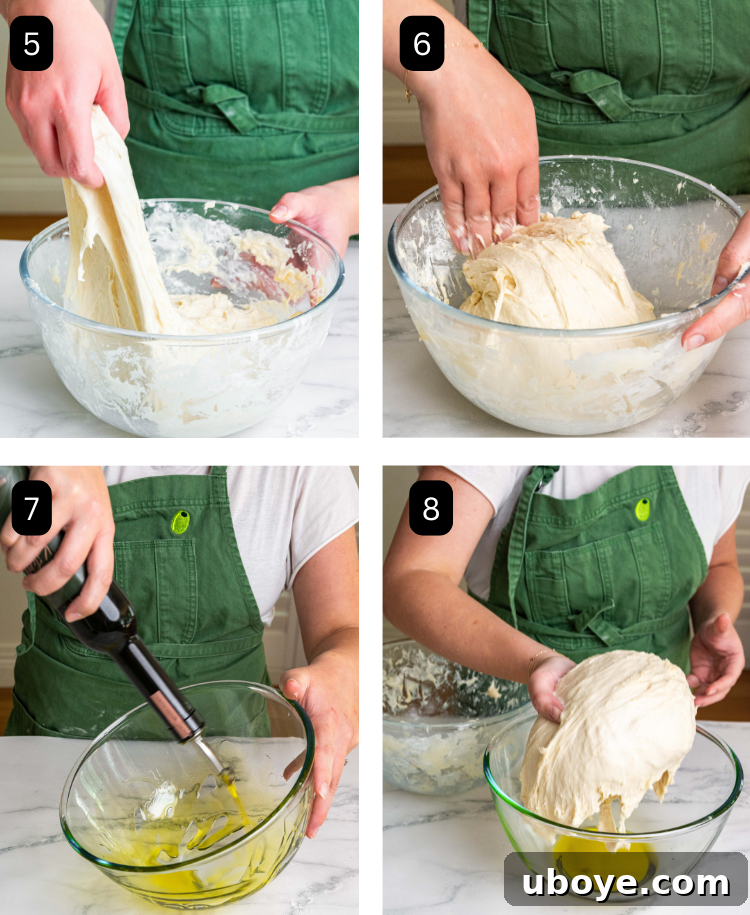
- Step 5: Perform the First Stretch and Fold. After the 10-minute rest, lightly dampen your hands with water. Reach into the bowl, grab a section of the dough from the edge, gently stretch it upwards, and then fold it back over itself towards the center of the bowl. Rotate the bowl a quarter turn and repeat this stretch-and-fold action three more times. This entire process should be repeated every 10 minutes for a total of four sets of stretch and folds. This technique builds strength and structure in the dough without traditional kneading.
- Step 6: Continue Strengthening the Dough. Repeat the stretch-and-fold process (Step 5) three more times, with 10-minute rests in between each set. As you continue, you’ll notice the dough becoming progressively smoother, more elastic, and easier to handle, eventually forming a cohesive ball. This indicates excellent gluten development.
- Step 7: First Proof (Cold Fermentation). Lightly coat a new, clean bowl with 20g of extra virgin olive oil, ensuring the bottom and sides are well covered. Gently transfer the dough ball into the oiled bowl, turning it once to coat it completely. Cover the bowl tightly with plastic wrap, creating an airtight seal. Place the dough in the refrigerator for a long, slow proof, anywhere from 12 to 72 hours. This cold fermentation is key to developing focaccia’s complex flavor and signature airy crumb. When you’re ready to bake, remember that this recipe only uses half of the dough. You can save the other half for another delicious focaccia creation later!
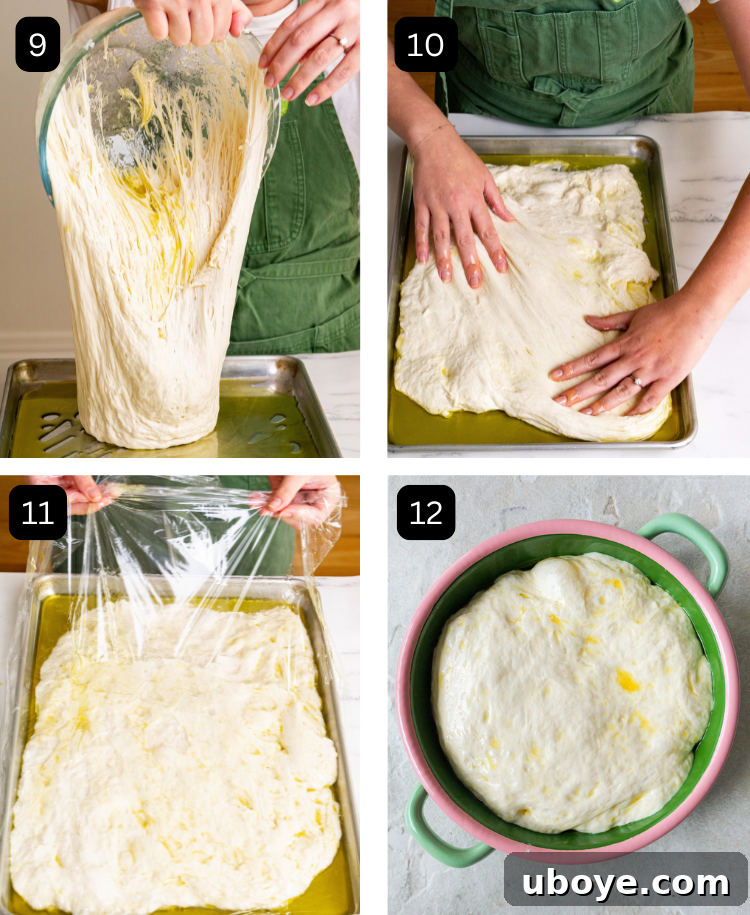
- Step 8: Prepare for the Second Proof. Once the first proof is complete (after 12-72 hours), take half of the dough out of the fridge and let it come to room temperature for about 30 minutes. Drizzle a baking tin (approximately 9×13 inches or similar) with another 20g of olive oil, ensuring the entire surface is generously coated. Gently transfer your half portion of the dough into the oiled baking tin.
- Step 9: Shape and Second Proof. With lightly oiled fingers, gently coax and stretch the dough into a rough rectangle within the tin. Don’t force it to reach the edges immediately; it will naturally spread as it rises. Once lightly shaped, cover the tin loosely with a damp cloth or plastic wrap. Allow the dough to rise in a warm spot for approximately 2 hours, or until it has visibly doubled in size and appears puffy and airy. This second proof builds the final volume and characteristic bubbly texture.
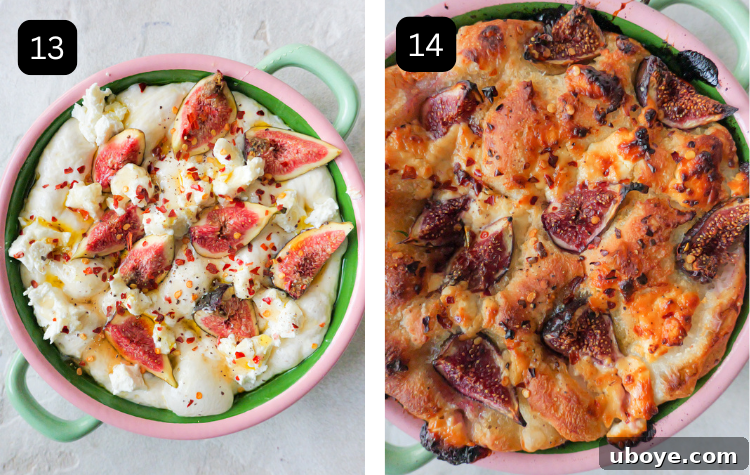
- Step 10: Preheat Oven and Dimple the Dough. While the dough finishes its second proof, preheat your oven to 400°F (200°C). Once the dough has risen beautifully, use your oiled fingertips to gently but firmly dimple the entire surface of the focaccia. These dimples help create pockets for the olive oil and toppings, contributing to the focaccia’s iconic texture.
- Step 11: Add the Toppings. Arrange the sliced fresh figs evenly over the dimpled dough. Crumble the goat cheese generously over the figs. Sprinkle with chili flakes (if using), a pinch of sea salt, and freshly ground black pepper. Finish with an extra drizzle of high-quality olive oil over all the toppings.
- Step 12: Bake to Golden Perfection. Carefully transfer the baking tin to the preheated oven. Bake for approximately 30 minutes, or until the focaccia is golden brown and crisp on the outside, and cooked through. The exact baking time may vary slightly depending on your oven.
- Step 13: Cool and Serve. Once baked, remove the focaccia from the oven. Allow it to cool slightly in the tin for about 5-10 minutes before carefully transferring it to a wire rack to cool completely. This resting period helps the internal structure set. Slice into squares or rectangles and serve immediately while still warm for the best experience.
Frequently Asked Questions About Focaccia
Whether you’re new to baking focaccia or looking to perfect your technique, here are answers to some common questions that arise when making this delightful bread:
Does Focaccia need to be kneaded?
No, traditional focaccia recipes often involve kneading, but this no-knead method is designed to be completely hands-off in that regard. Instead of strenuous kneading, we rely on a combination of high hydration (lots of water), minimal handling through gentle stretch-and-fold techniques, and a long, slow fermentation period. This approach allows the gluten to develop naturally over time, resulting in an incredibly light, airy crumb with characteristic large holes, and a wonderfully crisp crust without any hard work.
Can I make Focaccia without bread flour?
Absolutely! While bread flour is often recommended for its higher protein content, which contributes to a chewier texture, you can certainly achieve excellent results with all-purpose flour. All-purpose flour will still give you a soft, fluffy crumb with a beautiful golden crust, albeit perhaps a slightly less chewy bite than bread flour. For this particular no-knead recipe, all-purpose flour is a fantastic and readily available substitute, making focaccia accessible to everyone.
What is the Secret to Great Focaccia?
The “secret” to truly exceptional focaccia lies in a few key elements working in harmony. Firstly, a **high-hydration dough** is crucial; the generous amount of water creates that characteristic open, airy interior. Secondly, **plenty of good-quality extra virgin olive oil** is non-negotiable—it’s used both in the dough and generously in the pan to achieve a beautifully crisp, golden crust and rich, complex flavor. Thirdly, **time** is your best friend. Allowing the dough to undergo a long, slow, cold fermentation (the first proof) develops deep, nuanced flavors and improves the dough’s structure. Finally, those signature **dimples** created with your fingertips are not just for aesthetics; they create pockets for the olive oil and toppings to gather, infusing every bite with deliciousness.
What do I do if my focaccia doesn’t rise?
If your focaccia dough isn’t rising as expected during proofing, don’t despair! Here are several troubleshooting tips to help:
- Check the Temperature: Yeast thrives in warmth. Ensure your dough is in a warm spot, ideally between 75-80°F (24-27°C). If your kitchen is cool, try placing the bowl in a turned-off oven with the light on, near a sunny window, or in a draft-free warm cabinet.
- Give it More Time: Dough sometimes just needs extra time, especially in cooler conditions or with less active yeast. Be patient and let it proof for another 30-60 minutes beyond the suggested time.
- Verify Yeast Activity: Always check your yeast’s expiration date. If it’s old or improperly stored, it may be inactive. You can test new yeast by blooming it in warm water with a pinch of sugar; if it doesn’t foam within 5-10 minutes, it’s likely dead.
- Warm Water Bath: For a gentle boost, place your dough bowl over a larger bowl of warm (not hot!) water. The gentle heat will help kickstart fermentation.
- Hydration Check: Ensure your dough isn’t too dry. If it feels stiff, it might struggle to rise. The dough should be very wet and sticky.
If none of these help, it’s possible the yeast was inactive from the start. For future bakes, always bloom your yeast first to confirm its vitality before mixing with flour.
Can I use dried figs for the topping?
Yes, absolutely! Dried figs are a fantastic alternative when fresh figs are not in season or readily available. To use them, simply slice them thinly and then soak them in warm water for about 10-15 minutes. This step rehydrates and softens them, allowing them to bake beautifully and release their concentrated sweetness. They’ll still provide that wonderful chewy texture and rich, fruity flavor that makes this focaccia so special.
How far in advance can I make focaccia dough?
One of the beauties of no-knead focaccia is its flexibility! You can prepare the dough for its first proof and store it in the refrigerator for anywhere from 12 hours up to 72 hours (3 days). This long, cold fermentation significantly enhances the flavor and complexity of the bread. Just take it out a couple of hours before you plan to bake to allow it to come to room temperature and begin its second proof.
Serving Suggestions for Fig & Goat Cheese Focaccia
This fig and goat cheese focaccia is wonderfully versatile and can elevate any meal or gathering. Its unique sweet and savory profile makes it suitable for a variety of serving styles:
- As an Appetizer or Starter: Serve warm slices as an elegant appetizer before a meal. It pairs beautifully with a vibrant red pepper dip, a platter of olives, cured meats, or even a drizzle of high-quality balsamic glaze.
- For Brunch or Breakfast: A delightful addition to any brunch spread. Enjoy it simply with a cup of coffee, or alongside scrambled eggs, fresh fruit, and a side of crispy bacon for a decadent morning treat.
- Picnics and Lunches: Pack it up for a sophisticated picnic. It travels well and remains delicious at room temperature. It also makes for an extraordinary packed lunch, perhaps alongside a simple green salad.
- Accompaniment to Main Courses: Serve it as a side dish to complement a range of main courses. It’s particularly fantastic with roasted chicken, grilled fish, or even a rich pasta dish. The sweetness of the figs can cut through heavier flavors.
- With Salads: The rich flavors of the focaccia are a perfect match for a crisp, fresh green salad dressed with a light vinaigrette. It also works well crumbled as croutons for a more textural salad.
- Cheese Boards and Charcuterie: An excellent bread component for any cheese or charcuterie board, offering a sweet element that complements various cheeses, especially pungent blues or creamy bries.
- Seafood Pairings: Don’t be afraid to serve it alongside seafood. The subtle sweetness and savory tang can surprisingly enhance dishes like BBQ seafood or grilled prawns.
Enjoy it warm from the oven for the ultimate experience, or toast leftovers for a quick, satisfying snack.
Storing and Reheating Your Focaccia
To ensure your delicious fig and goat cheese focaccia remains fresh and flavorful, proper storage is key. Whether you plan to enjoy it over a few days or save it for later, here’s how to store and reheat it effectively:
- Room Temperature (Short-Term): Once the focaccia has cooled completely, wrap it tightly in aluminum foil or store it in an airtight container at room temperature. It will stay fresh and delicious for up to 2 days. Keeping it well-sealed prevents it from drying out.
- Freezing (Long-Term): For longer storage, freezing is an excellent option. Allow the focaccia to cool completely. You can freeze the entire loaf or slice it into individual portions. Wrap each portion tightly in plastic wrap, then an additional layer of aluminum foil to prevent freezer burn. Store in the freezer for up to 1 month.
- Reheating from Room Temperature: To refresh focaccia that has been stored at room temperature, preheat your oven to 320°F (160°C) and warm it for about 5-10 minutes. This will restore its crisp crust and soft interior. Alternatively, a toaster oven or air fryer works wonderfully for individual slices, making them beautifully golden and crisp in just a few minutes.
- Reheating from Frozen: If reheating from frozen, it’s best to allow the focaccia to thaw at room temperature first (this can take a few hours for a whole loaf, or less for slices). Once thawed, reheat it in a preheated oven at 350°F (175°C) for 10-15 minutes, or until warmed through and crisped to your liking. Individual slices can also be gently toasted directly from frozen, though keeping an eye on them is advised to prevent burning.
Always let the focaccia cool fully before storing to avoid condensation, which can make it soggy. Reheating it properly will bring back that irresistible aroma and texture, almost like it’s fresh from the oven!
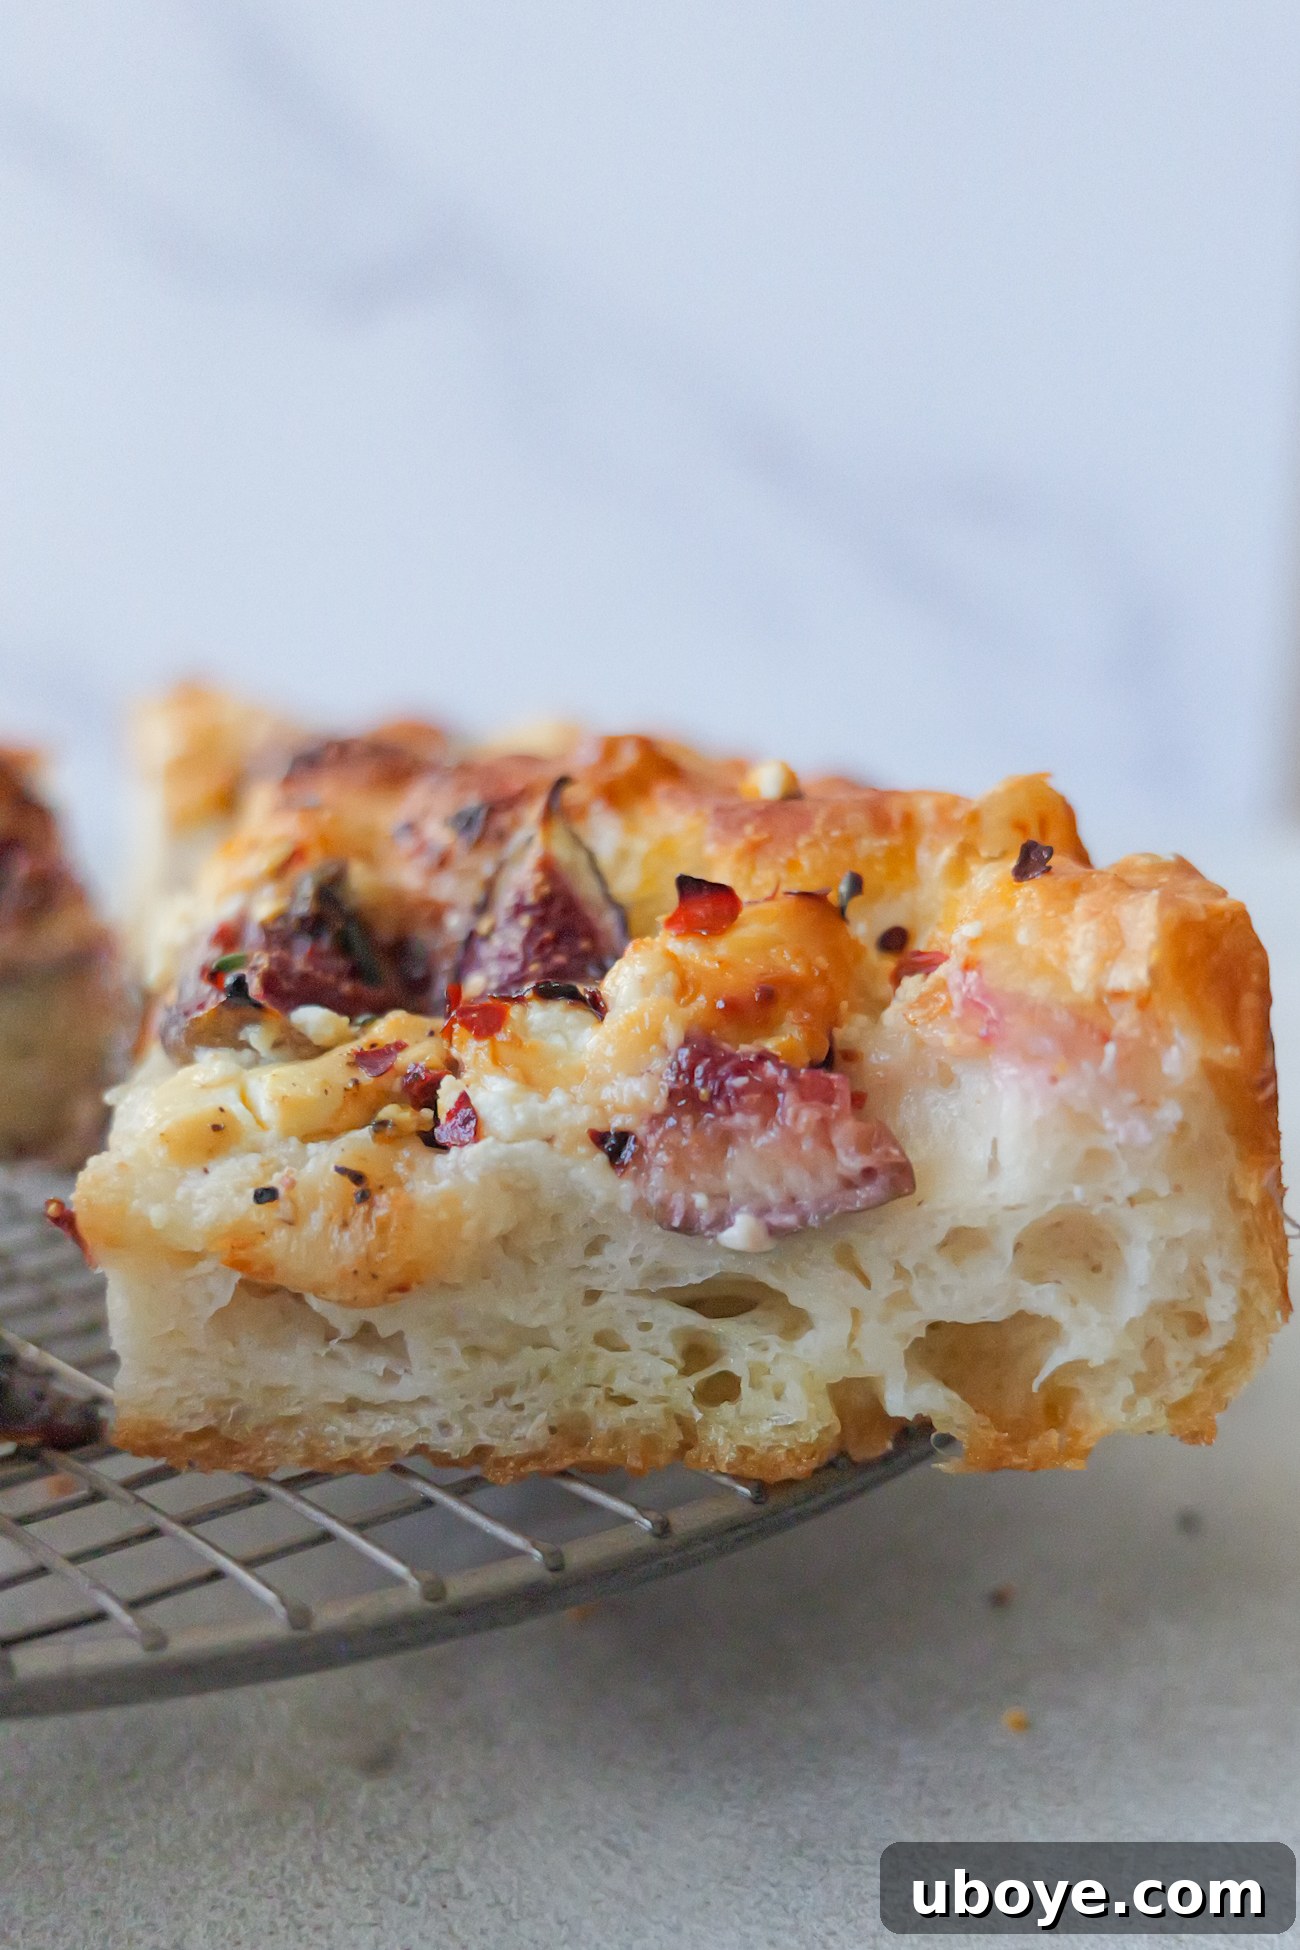
Explore More No-Knead Focaccia Recipes You’ll Love
If you’ve fallen in love with the ease and deliciousness of this no-knead fig and goat cheese focaccia, you’ll be thrilled to discover more simple yet spectacular focaccia variations. These recipes follow the same beginner-friendly principles, allowing you to explore different flavor profiles with minimal effort.
Recipes
Garlic & Rosemary No-Knead Focaccia
A classic combination that never disappoints. This focaccia is infused with fragrant garlic and earthy rosemary, making it the perfect accompaniment to any Italian meal or a delightful snack on its own.
Focaccia
Mini No-Knead Focaccia
Perfect for individual servings or party appetizers, these mini focaccia loaves are just as easy to make and offer endless possibilities for personalized toppings. Great for impressing guests!
Focaccia
Pizza-Style Focaccia
Combine the best of both worlds with this pizza-style focaccia. Loaded with classic pizza toppings, it’s a fun and flavorful twist on traditional focaccia that’s a hit with everyone.
Focaccia
Garlic Butter No-Knead Focaccia
Indulge in the rich aroma and taste of roasted garlic butter infused into a soft, airy focaccia. This recipe makes an unbelievably flavorful bread that’s perfect for garlic lovers.
Have questions about this recipe or want to share your culinary success? Please leave a comment or review below the recipe card! I always look forward to hearing your feedback and answering any queries you might have.
If you create this delightful Fig and Goat Cheese Focaccia, I’d love to see your wonderful creations! Please follow me and tag me on Instagram, TikTok, or Pinterest so I can celebrate your baking triumphs!
Print Recipe
Fig and Goat Cheese Focaccia
Daen Lia
This fig and goat cheese focaccia is the perfect balance of sweet and savory flavors. A no-knead method ensures an airy, soft bread, while fresh figs, creamy goat cheese, and a hint of honey create an unforgettable topping. Ideal for appetizers, picnics, or a delightful side dish.
1 day
30 mins
30 mins
6
Ingredients
Focaccia Dough
- 700 g bread flour
- 680 g lukewarm water, (100°F / 34°C) – 95% hydration
- 7 g dry yeast
- 12 g fine sea salt
- 1 tsp honey
- 60 g olive oil, extra virgin
Fig and Goat Cheese Topping
- 3 figs, fresh, sliced
- 2 oz goat cheese, crumbled
- 1 tbsp honey, for drizzling
- 1 tbsp olive oil, extra virgin, for drizzling
- 1 tsp chili flakes, optional
- salt and pepper, to taste
Instructions
Focaccia Dough Preparation
-
Activate Yeast: In a medium bowl, stir together lukewarm water, dry yeast, and 1 tsp honey. Let stand for about 5-10 minutes until frothy, indicating active yeast.
-
Combine Ingredients: In a large bowl, whisk bread flour and fine sea salt. Pour the activated yeast mixture into the flour. Mix with a spoon or your hands until a wet, sticky dough forms with no dry spots.
-
Initial Rest & Stretch and Fold: Cover the bowl with plastic wrap or a damp cloth and let rest for 10 minutes. Then, with damp hands, perform the stretch and fold method: grab a piece of dough, stretch it up, and fold it over itself. Rotate the bowl and repeat three more times. Cover and rest for another 10 minutes. Repeat this stretch and fold cycle three more times (total of 4 sets) until the dough starts to form a ball and builds strength.
-
First Proof (Cold Fermentation): Coat a new bowl with 20g of olive oil. Place the dough inside, turning to coat. Cover tightly with plastic wrap and refrigerate for 12 to 72 hours for the first proof. Note: This recipe uses only half of the dough; save the other half for another focaccia!
-
Second Proof: After the first proof, let half of the dough come to room temperature for 30 minutes. Oil a baking tin with another 20g of olive oil. Transfer the dough to the tin, gently stretching it to a rough rectangle (it will spread as it rises). Cover with a damp cloth or plastic wrap and let rise in a warm spot for 2 hours, or until doubled in size.
Baking Fig and Goat Cheese Focaccia
-
Preheat Oven: Preheat your oven to 400°F (200°C).
-
Add Toppings: Once the dough has risen, gently dimple the surface with oiled fingers. Scatter the sliced figs, crumbled goat cheese, and chili flakes (if using) evenly over the dough. Season with salt and pepper, and drizzle with extra virgin olive oil and 1 tbsp honey.
-
Bake & Serve: Bake for 30 minutes, or until the focaccia is golden brown and crunchy on the outside. Allow to cool slightly in the tin, then transfer to a wire rack to rest for 15 minutes before slicing and serving warm.
Notes
- Dough Portion: This recipe yields a generous amount of dough. Remember to slice the dough in half after the first proof in the fridge. You’ll only use one half for this fig and goat cheese focaccia, leaving the other half ready for another delicious recipe or to bake a second plain focaccia later.
- Yeast Type: I prefer using dry yeast that needs activation in water. However, if you opt for instant yeast, there’s no need to activate it separately. Simply add it directly to the dry ingredients along with the water and honey.
- Flour Alternatives: While bread flour gives the best chewy texture, all-purpose flour can be used as a convenient substitute. It will still result in a wonderfully soft and airy focaccia.
- Dried Figs: If fresh figs are unavailable, sliced dried figs are a great alternative. Just soak them in warm water for 10-15 minutes to rehydrate them before adding to the focaccia.
Nutrition
Carbohydrates: 94g
Protein: 16g
Fat: 16g
Saturated Fat: 3g
Polyunsaturated Fat: 2g
Monounsaturated Fat: 10g
Cholesterol: 4mg
Sodium: 819mg
Potassium: 197mg
Fiber: 4g
Sugar: 8g
Vitamin A: 234IU
Vitamin C: 1mg
Calcium: 42mg
Iron: 2mg
Nutrition information is automatically calculated, so should only be used as an approximation.
 Like this? Leave a comment below!