
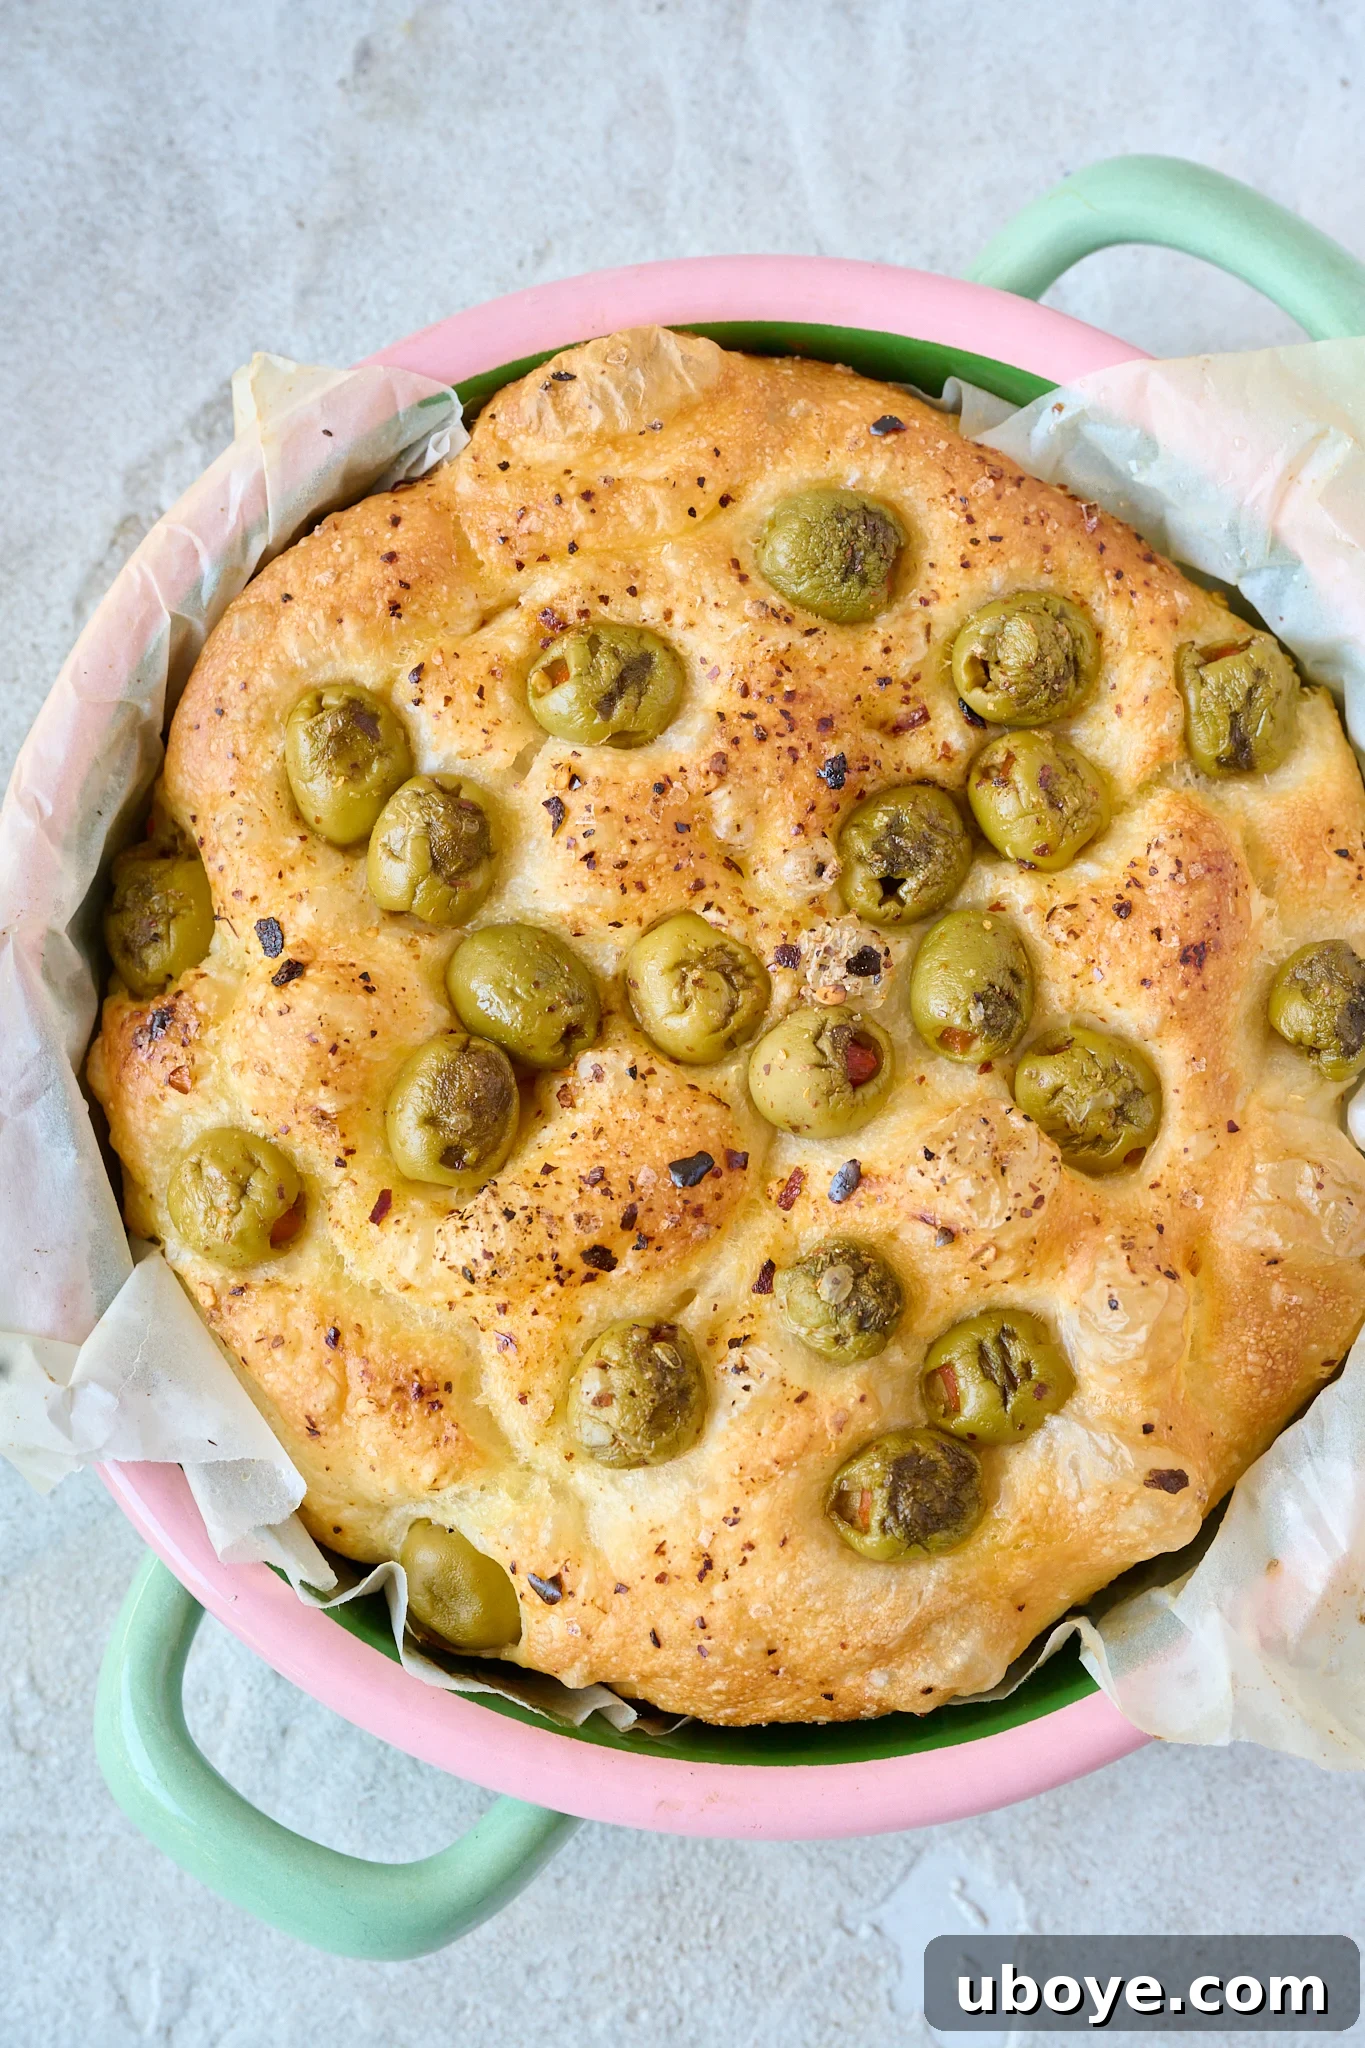
Effortless Olive No-Knead Focaccia: Your Go-To Mediterranean Bread Recipe
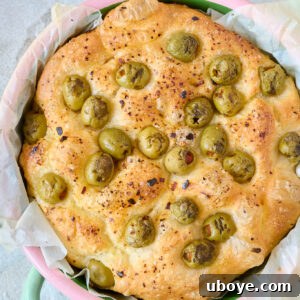
Craving an incredibly flavorful bread recipe that requires absolutely no kneading? Look no further! This **Olive No-Knead Focaccia** is a true culinary gem, promising a delightful baking experience with minimal effort. Infused with the rich, briny taste of green olives, the fragrant essence of fresh rosemary, and a sprinkle of flaky sea salt, all generously drizzled with premium olive oil, this golden, crusty focaccia transports you straight to the sun-drenched coasts of the Mediterranean.
If you’re already a fan of the simplicity and deliciousness of no-knead focaccia, then we highly recommend exploring our other tempting variations. Be sure to try our Fig & Goat’s Cheese Focaccia for a sweet and savory delight, or venture into the aromatic depths of our Wild Garlic Confit Focaccia for a truly unique flavor profile.
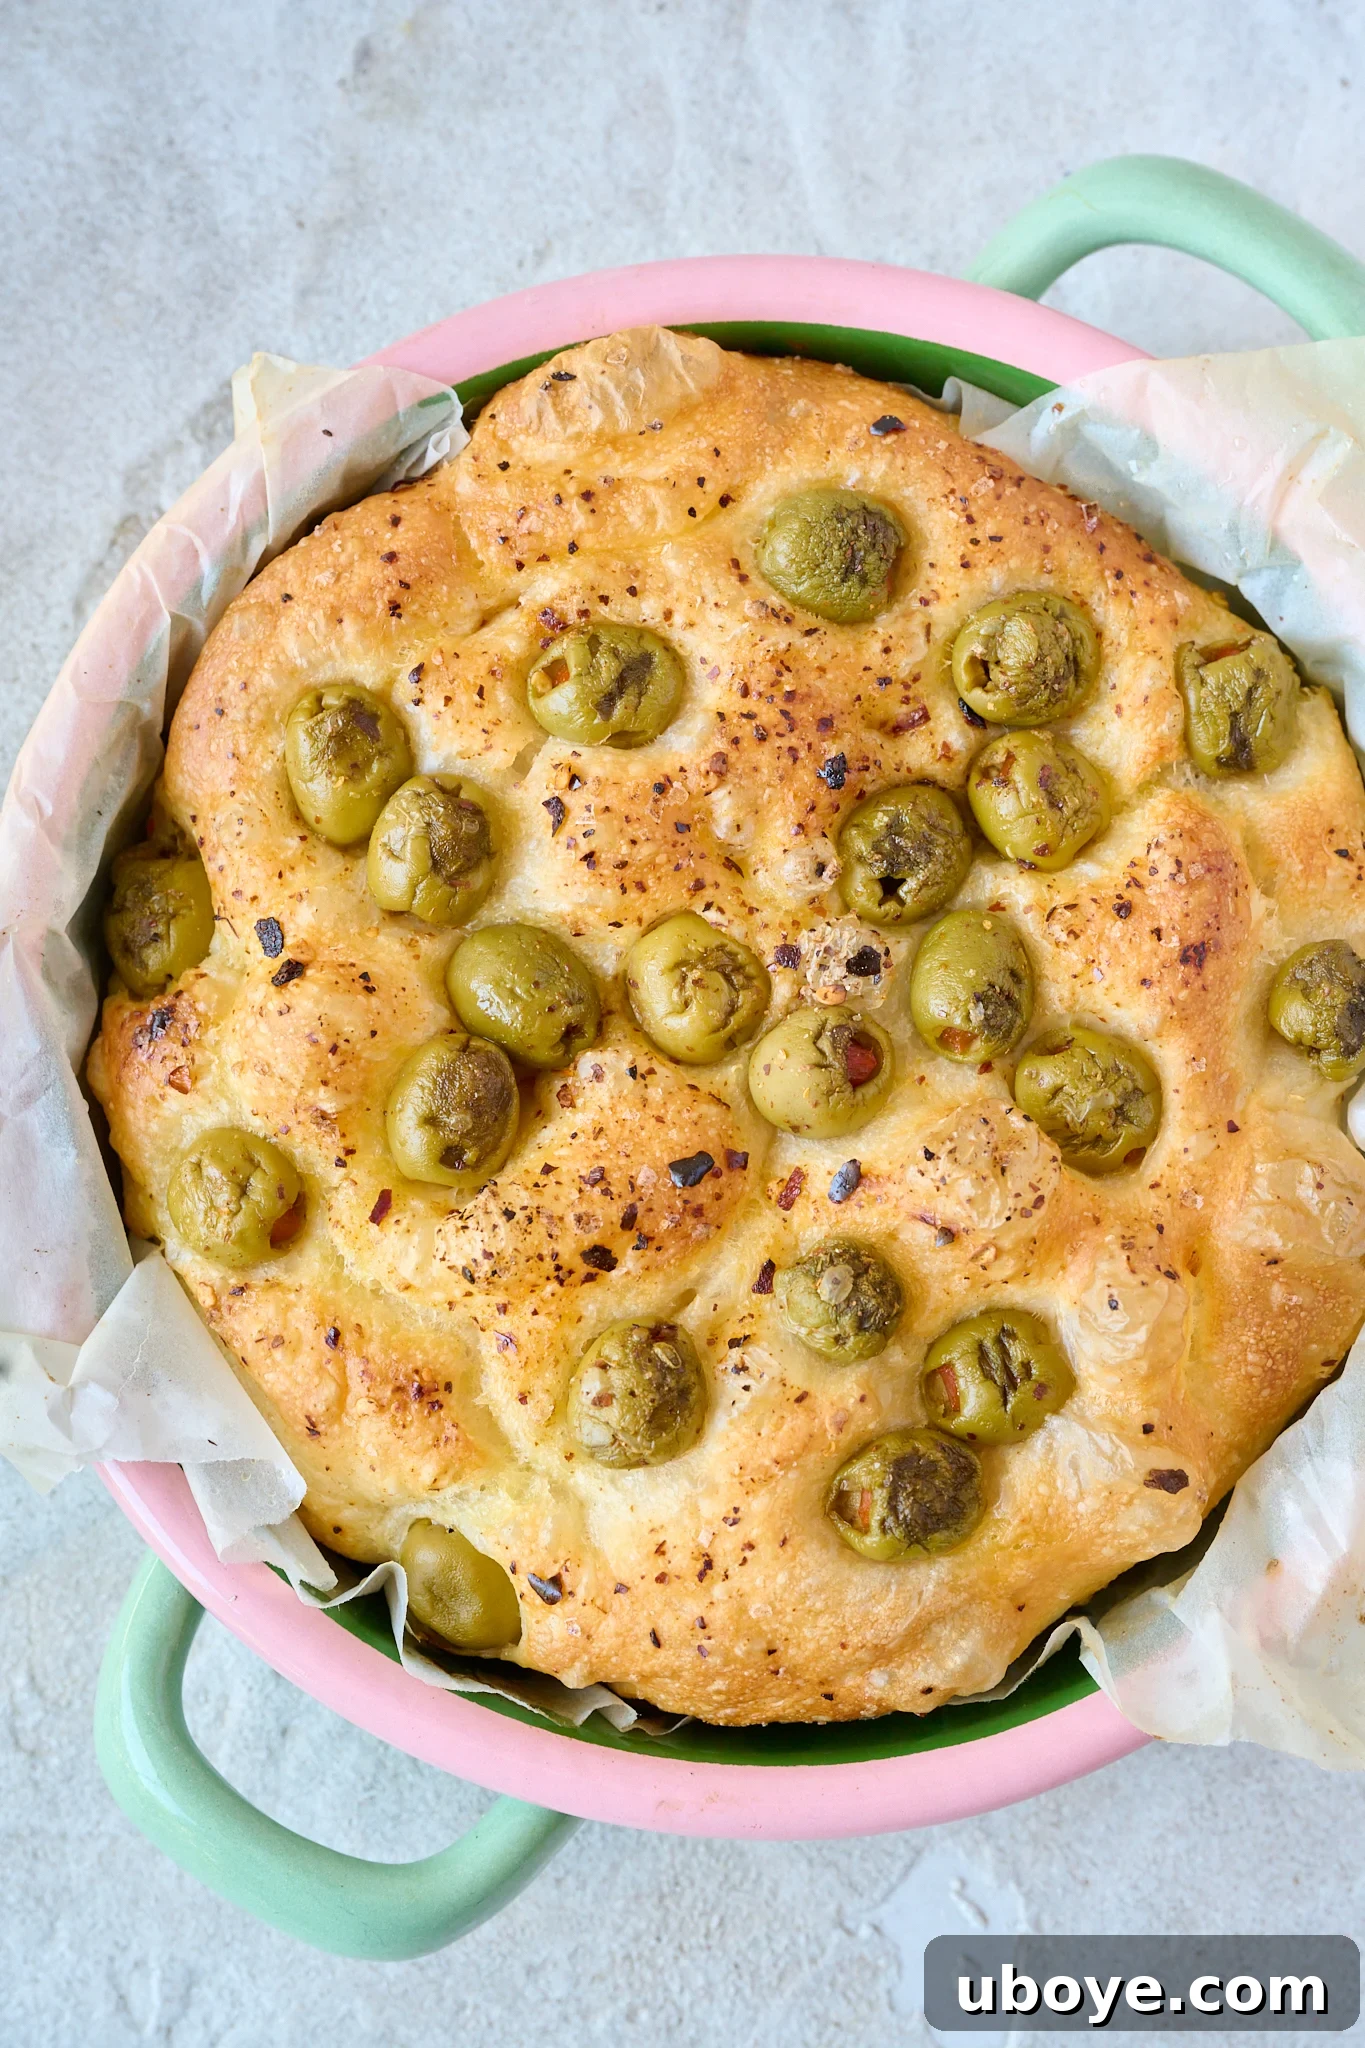
This recipe revolutionizes homemade bread-making by utilizing a simple, slow-rise dough. This extended fermentation process is the secret to developing a profound, complex flavor and an irresistibly airy, open texture within the focaccia. Forget about cumbersome stand mixers or exhaustive kneading; this method proves that exceptional bread is accessible to everyone.
The true highlight of this focaccia is the generous inclusion of both vibrant green and rich black olives. These briny gems are mixed throughout the dough, ensuring every bite is bursting with salty, savory goodness. Topped with fragrant fresh rosemary, a scattering of fiery chili flakes (optional, but highly recommended for a subtle kick), and a final flourish of flaky sea salt, the focaccia is then baked to golden perfection. The result is a bread with a wonderfully crisp crust and a pillowy-soft interior that’s utterly irresistible.
Whether you choose to serve this versatile focaccia alongside a simmering bowl of mussels in a rich tomato and chili broth, slice it open to create a hearty crispy eggplant sandwich, or simply enjoy it slathered with some fresh, homemade pesto, this no-knead olive focaccia is guaranteed to be a crowd-pleasing showstopper. Its minimal effort for maximum impact makes it a staple for any home cook looking to impress.
Why You’ll Adore This Olive No-Knead Focaccia
This olive focaccia isn’t just a recipe; it’s an invitation to effortless gourmet baking. Here’s why it will quickly become a favorite in your kitchen:
- Effortless No-Knead Method: Say goodbye to arduous kneading! This recipe simplifies bread-making by requiring only a quick mix, a patient rise, and a blissful bake. It’s an ideal project for beginners keen to dive into baking and a convenient solution for busy individuals who want homemade bread without the fuss. The stretch-and-fold technique replaces traditional kneading, developing gluten gracefully over time.
- Bursting with Bold Mediterranean Flavors: Every bite of this focaccia is a journey to the Mediterranean. The star is the generous blend of briny olives, which infuse the bread with their distinct salty and umami notes. Paired with the earthy, fragrant rosemary and the delicate crunch of flaky sea salt, the flavor profile is rich, balanced, and utterly addictive. For an extra layer of complexity, a pinch of chili flakes adds a subtle warmth.
- Perfect Texture: Golden Crust, Airy Interior: Achieve bakery-quality results with minimal effort. This focaccia bakes up with an exquisite golden, crispy crust that crackles with every bite. Beneath that satisfying exterior lies a soft, airy, and chewy center, riddled with beautiful air pockets. This contrast in textures is a hallmark of truly great focaccia, making it incredibly satisfying to eat, whether fresh from the oven or reheated.
Essential Ingredients for Your Olive Focaccia
Crafted from a handful of humble yet high-quality ingredients, this olive no-knead focaccia is a beautiful celebration of the simple, sun-kissed flavors inherent in Mediterranean cuisine. Each component plays a vital role in creating the bread’s irresistible taste and texture.
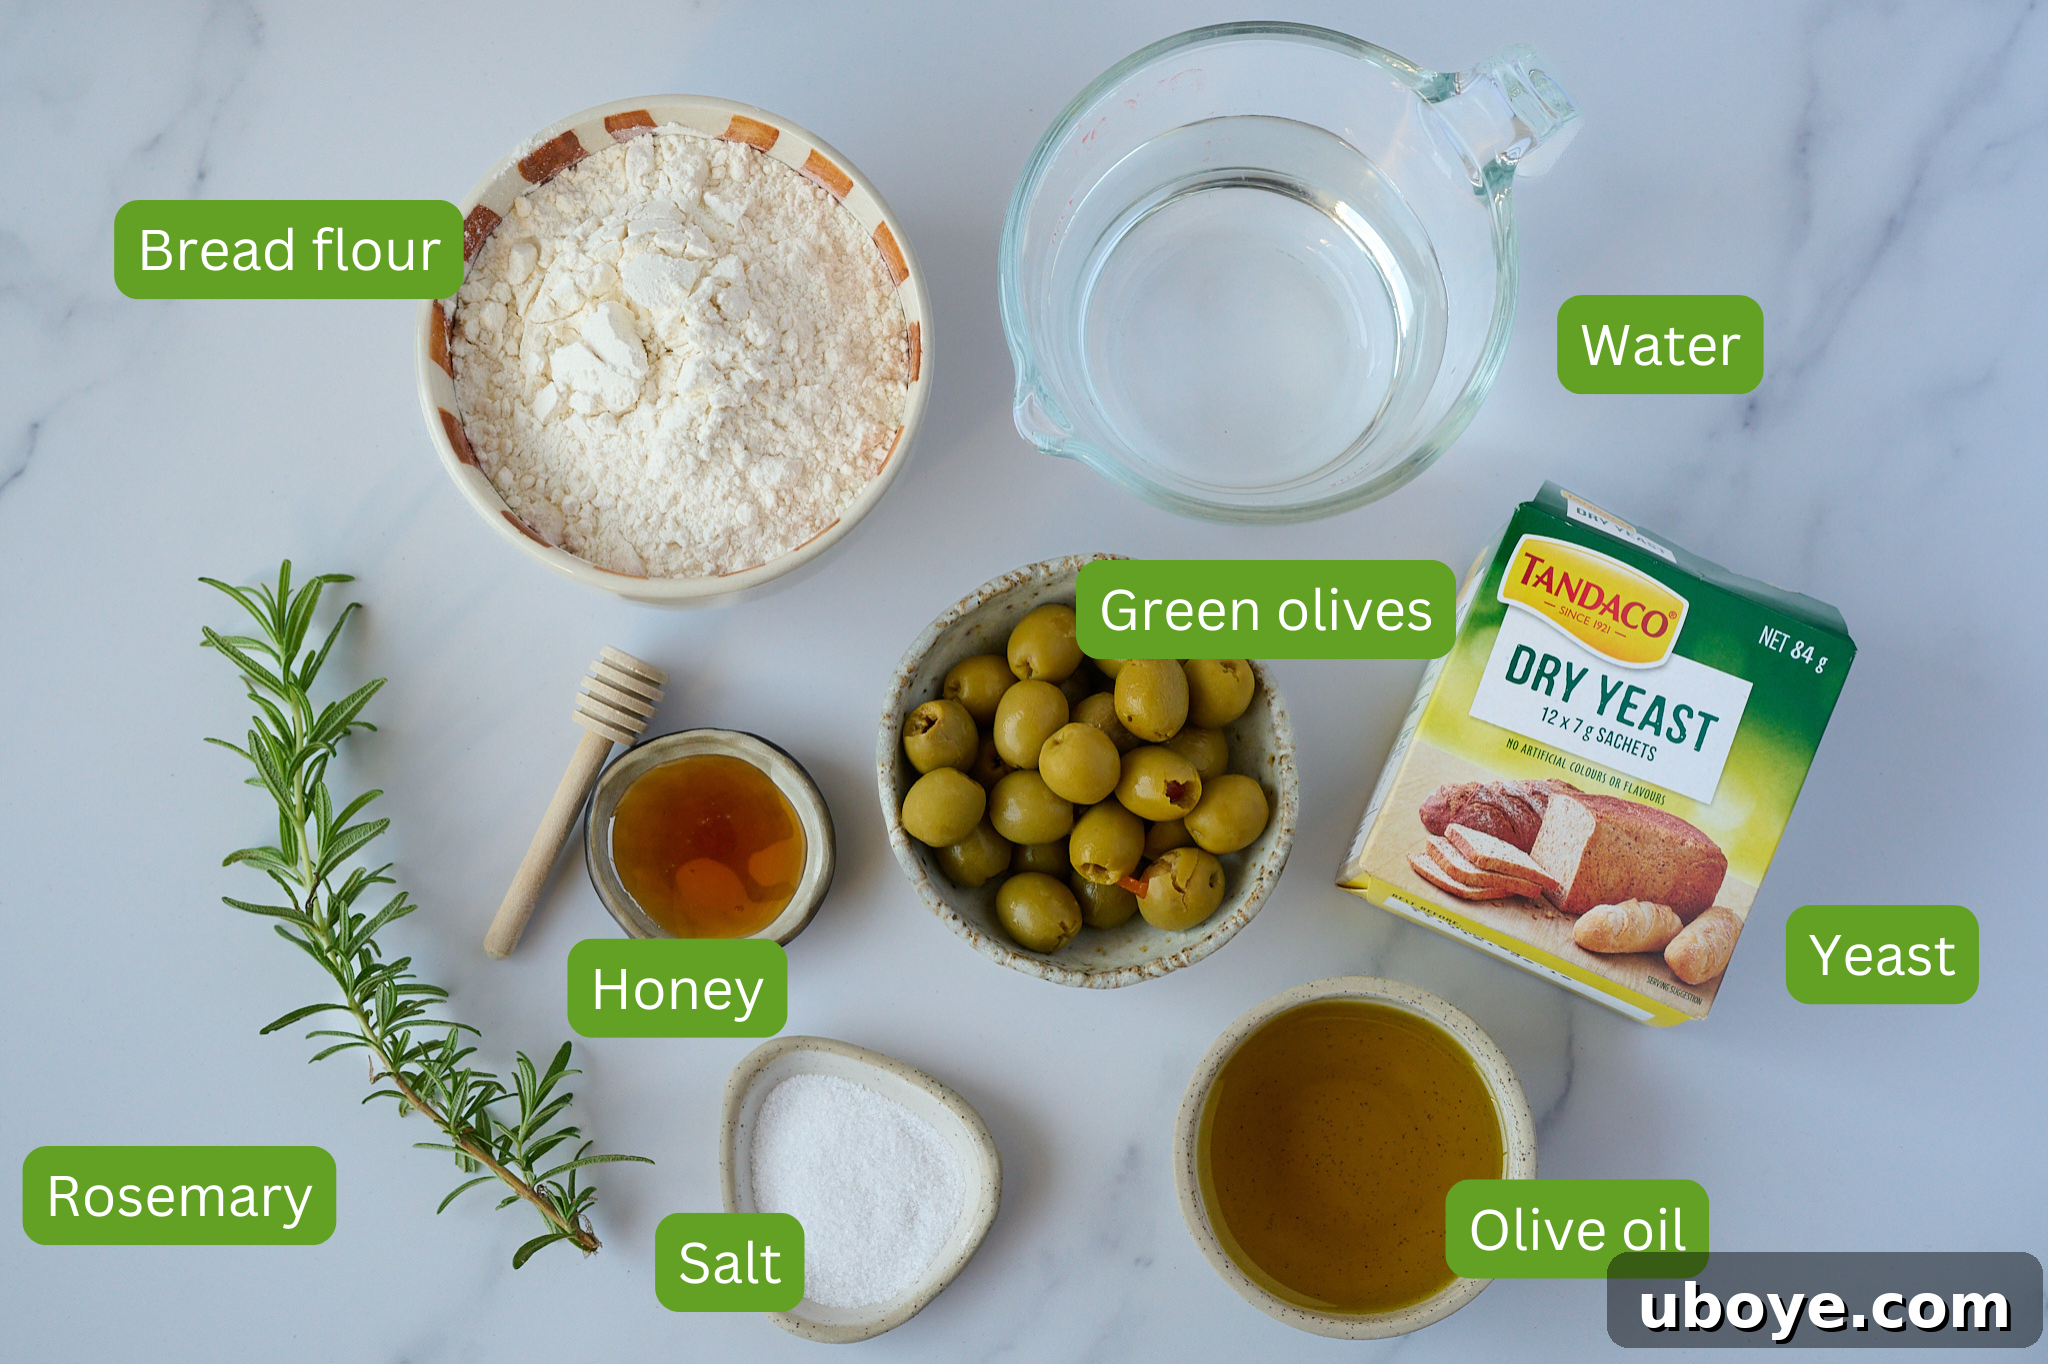
- Green Olives (and Black Olives): These are the undisputed heroes of this focaccia. Their intensely briny, salty, and slightly tangy flavor permeates the entire dough, providing a bold, savory counterpoint to the soft, airy crumb. While green olives are specified, feel free to use a mix of green and black olives for a more complex flavor profile. For an exciting twist, consider using red pepper-stuffed green olives, which add both color and an extra layer of piquant taste. Ensure all olives are pitted before use.
- Bread Flour: This type of flour is crucial for developing the robust gluten structure that gives focaccia its characteristic chewiness and open, airy crumb. Its higher protein content contributes to a perfectly chewy and satisfying texture. However, if bread flour isn’t readily available, all-purpose flour can be used as a suitable substitute. While it will yield a slightly softer result, your focaccia will still be wonderfully delicious and maintain its beloved airy qualities.
- Good Quality Extra Virgin Olive Oil: This isn’t just an ingredient; it’s a cornerstone of Mediterranean cooking and essential for authentic focaccia. A generous amount of high-quality extra virgin olive oil imparts a rich, fruity flavor, contributes to the focaccia’s beautiful golden color, and creates those irresistibly crisp, golden edges. Don’t shy away from using a good olive oil, as its flavor truly shines through in the final product.
- Lukewarm Water & Dry Yeast: The foundation of any great bread. Lukewarm water (around 100°F / 38°C) is key to activating the dry yeast, which is responsible for the dough’s magnificent rise and airy texture. A small amount of honey helps to “feed” the yeast, ensuring it’s active and robust.
- Fine Sea Salt: Essential for seasoning the dough, enhancing all the other flavors, and controlling yeast activity. Flaky sea salt is also perfect for sprinkling on top before baking, adding a delightful crunch and burst of saltiness to the crust.
- Honey: A small amount of honey not only adds a subtle sweetness that balances the savory notes but also acts as food for the yeast, helping it to activate and thrive.
- Fresh Rosemary: The aromatic, piney notes of fresh rosemary are a classic pairing with olives and olive oil, lending an authentic Mediterranean fragrance and flavor to the focaccia.
- Chili Flakes (Optional): For those who enjoy a little heat, chili flakes add a wonderful, subtle warmth that complements the briny olives beautifully.
A full ingredient list with exact amounts can be found in the recipe card below, ensuring you have everything you need for this delicious bread.
Crafting Your Homemade Olive No-Knead Focaccia: A Step-by-Step Guide
This green olive focaccia recipe walks you through the incredibly simple process of creating the no-knead focaccia dough from scratch. This dough is truly the heart and soul of your bread, while the toppings are the fun, fuss-free finishing touch that brings it all together. Follow these detailed steps to achieve focaccia perfection:
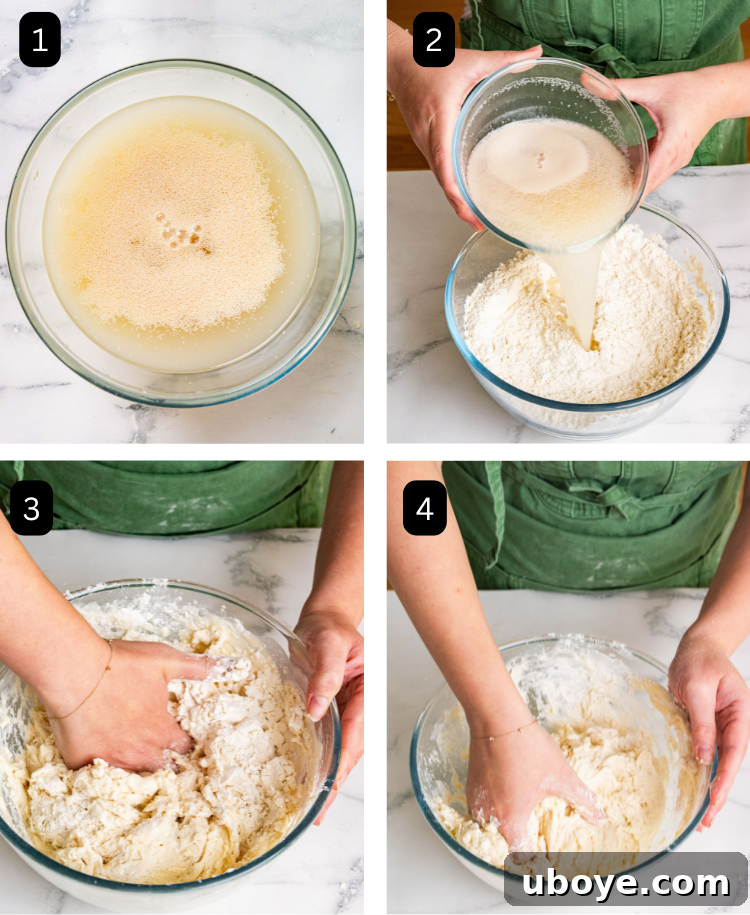
- Step 1: Activate the Yeast. In a medium-sized bowl, combine the lukewarm water, dry yeast, and honey. Whisk these ingredients gently until they are well combined. Set the bowl aside for approximately 5 to 10 minutes. During this time, the mixture should become frothy and bubbly, which is a clear indication that your yeast is active and ready to work its magic. If no froth appears, your yeast may be old or inactive, and it’s best to start again with fresh yeast.
- Step 2: Combine Dry and Wet Ingredients. In a separate, large mixing bowl, whisk together the bread flour and fine sea salt until evenly distributed. Once your yeast mixture is frothy, pour it directly into the bowl with the dry ingredients. This careful combination sets the stage for your dough.
- Step 3: Form the Shaggy Dough. Using a sturdy spoon or, even better, your hands, begin to mix the dry and wet ingredients together. Continue mixing until a wet, shaggy, and sticky dough forms. It’s crucial that there are no dry pockets of flour remaining. The dough will be very high in hydration, making it quite loose—this is exactly what you want for an airy focaccia. Cover the bowl tightly with plastic wrap or a damp kitchen towel and let it rest at room temperature for 10 minutes. This initial rest allows the flour to fully hydrate, making the subsequent stretch-and-fold process much easier.
- Step 4: First Stretch and Fold. After the 10-minute rest, lightly dampen your hands. Reach into the bowl, grab a section of the dough, gently stretch it upwards, and then fold it back over itself towards the center of the bowl. Rotate the bowl a quarter turn and repeat this stretching and folding action three more times. This technique helps to build gluten structure without traditional kneading. Cover the dough again and let it rest for another 10 minutes. Repeat this stretch and fold process a total of 3-4 times, with 10-minute rests in between, until the dough visibly begins to strengthen and form a cohesive ball, becoming smoother and more elastic.
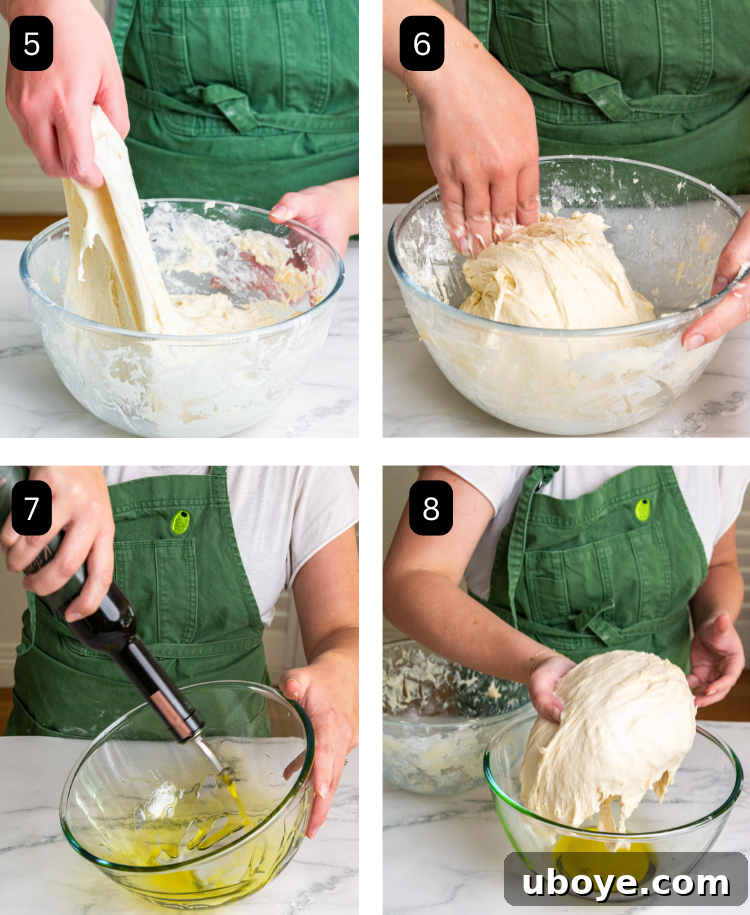
- Step 5: Prepare for the First Proof. Once your dough has undergone its stretch-and-fold routine and has gained some structure, it’s time for the first, long proof. Take a clean, large bowl and generously coat its interior with about 20g of extra virgin olive oil. Carefully transfer your dough into this oiled bowl, ensuring it is fully coated in oil. This prevents it from sticking and adds to the rich flavor.
- Step 6: The Extended Cold Proof. Cover the oiled dough tightly with plastic wrap or a secure lid. Place the bowl in the refrigerator for its first proof, which should last anywhere between 12 to 72 hours. This extended cold fermentation is crucial for developing the deep, complex flavors and beautiful internal structure that are characteristic of artisanal focaccia. The longer the proof, the more nuanced the flavor. When ready to bake, you will only need half of this dough, so you can slice it in half and reserve the other portion for another batch or a different recipe.
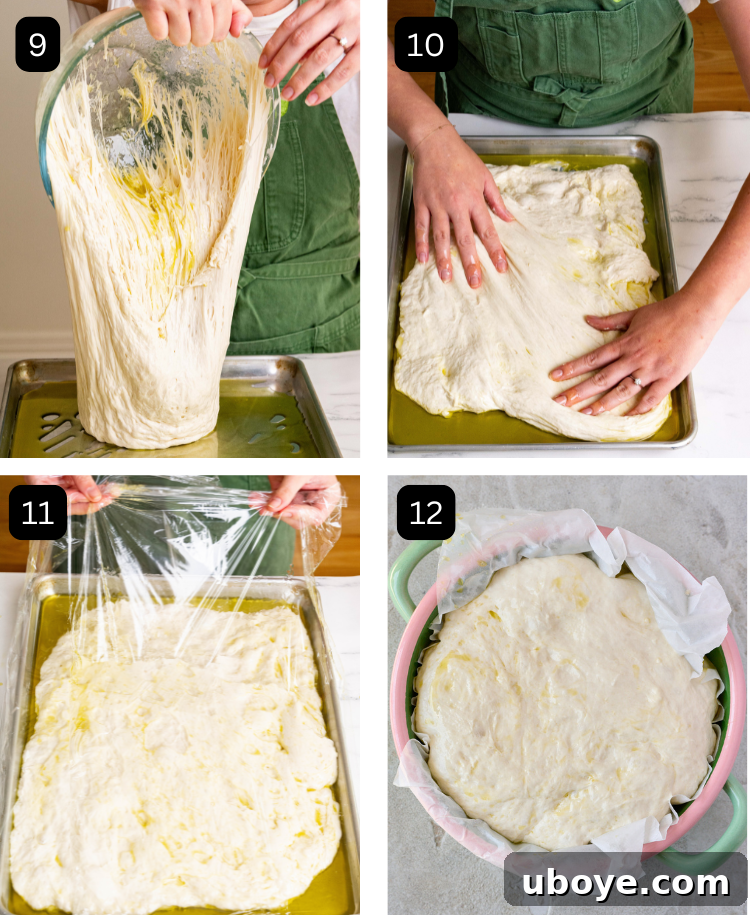
- Step 7: Prepare for the Second Proof. Once you’ve retrieved your dough from the fridge (and divided it if needed), prepare your baking tin. Generously coat the entire surface of your chosen baking tin (a 9×13 inch pan or a round pan works well) with another 20g of extra virgin olive oil. Carefully transfer one half of your cold focaccia dough into the prepared tin. Gently begin to stretch the dough into a rough rectangular or circular shape, depending on your pan. Do not try to force it to the very edges of the tin just yet, as it will naturally spread and relax as it undergoes its second rise.
- Step 8: The Second Rise. Cover the baking tin loosely with a damp cloth or plastic wrap. Place the dough in a warm spot in your kitchen to undergo its second proof. This rise will typically take about 2 hours, or until the dough has visibly doubled in size and looks noticeably puffy and aerated. A warm environment (around 75-80°F / 24-27°C) is ideal for this final rise. If your kitchen is cool, a good trick is to turn your oven light on for a few minutes, then turn it off and let the dough rise inside the slightly warmed oven.
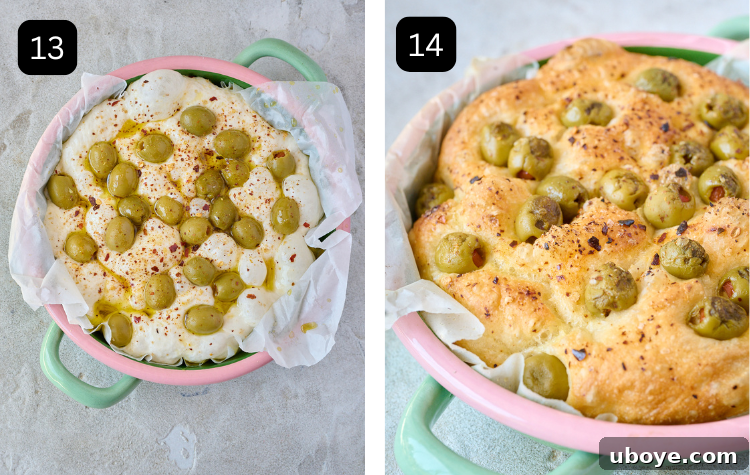
- Step 9: Add Toppings and Bake. Once the dough has completed its second rise and is beautifully puffed, gently preheat your oven to 400°F (200°C). With oiled fingertips, create characteristic dimples across the surface of the dough. These indentations hold the toppings and create pockets for the olive oil. Generously scatter your pitted green olives (and black olives, if using), finely chopped fresh rosemary, and chili flakes (if desired) over the entire surface. Finish with a generous sprinkle of flaky sea salt and a final drizzle of extra virgin olive oil.
- Step 10: Bake to Golden Perfection. Carefully transfer the baking tin to your preheated oven. Bake for approximately 30 minutes, or until the focaccia is beautifully golden brown on top, the crust is visibly crunchy, and the interior is cooked through. The wonderful aroma filling your kitchen will be your cue! Once baked, remove the focaccia from the oven and allow it to cool slightly in the tin before transferring it to a wire rack to rest for about 15 minutes. This resting period helps the internal structure set. Slice and serve your magnificent homemade focaccia warm, and enjoy every incredible bite.
Frequently Asked Questions About No-Knead Focaccia
Traditionally, many bread recipes, including some focaccia variations, do involve kneading to develop the gluten structure. However, with modern techniques, focaccia absolutely does not need to be kneaded, especially when following a no-knead recipe like this one. Instead, we rely on simple stretch-and-fold techniques performed over a period of time, combined with a slow, extended rise. This gentle process allows the gluten to develop naturally and slowly, resulting in a dough that is incredibly strong, elastic, and full of air bubbles. The outcome is a wonderfully light, airy, and chewy focaccia with a perfect texture every single time, without any of the strenuous work of traditional kneading.
Yes, absolutely! While bread flour is recommended for its higher protein content, which contributes to a chewier texture and a more robust gluten network, you can certainly make a fantastic focaccia using all-purpose flour. All-purpose flour will still yield a soft, fluffy texture with a delightful crisp, golden crust. The main difference you might notice is that the bread flour version tends to be slightly chewier, whereas all-purpose flour might result in a softer bite. For a no-knead recipe like this, all-purpose flour is a perfectly acceptable and delicious substitute that still delivers excellent results, making this recipe accessible to even more home bakers.
If your focaccia dough isn’t rising as expected, don’t despair! Several factors could be at play, and there are common troubleshooting steps you can take:
- Check the Temperature: Dough thrives in a warm environment. If your kitchen is cold, fermentation will be sluggish. Try placing the bowl in a slightly warmer spot, such as a turned-off oven with just the light on (which generates a little heat), near a sunny window, or on top of a warm appliance.
- Give It More Time: Sometimes, dough simply needs more time to rise, especially in cooler conditions or if your yeast isn’t super-active. Be patient and allow an extra 30–60 minutes (or even longer) for the dough to prove.
- Verify Your Yeast: Ensure your yeast is fresh and active. Expired yeast or yeast that has been improperly stored (e.g., exposed to moisture or extreme temperatures) will not activate properly. Always check the expiration date, and if unsure, bloom a small amount in warm water with a pinch of sugar to test its activity before adding it to your main dough.
- Warm Water Bath: For a gentle and consistent warmth, you can create a makeshift proofing box. Place your dough bowl inside a larger bowl or sink filled with warm water (ensuring no water gets into the dough). This helps to slowly and evenly warm the dough, kickstarting fermentation.
If none of these tips help, it’s highly probable that your yeast was inactive from the beginning. For future bakes, always activate your yeast in warm water with a little honey or sugar first to confirm its viability before combining it with the rest of your ingredients.
Proper storage is key to enjoying your focaccia for longer. To keep it fresh, store any leftover focaccia in an airtight container at room temperature for up to 2 days. This will help maintain its softness and prevent it from drying out. If you find that the focaccia has lost some of its initial crispness, simply reheat it in a preheated oven (around 350°F / 175°C) for a few minutes. This quick reheat will magically revive that wonderful crisp crust and warm the bread through. For longer storage, focaccia freezes exceptionally well. Slice the focaccia into individual portions, wrap them tightly in plastic wrap, and then place them in a freezer-safe bag for up to 2-3 months. When you’re ready to enjoy, you can pop them directly into a preheated oven or toaster oven from the freezer until warmed through and crispy.
Not at all! While green olives are specified in this recipe and contribute a wonderful briny flavor, the beauty of focaccia lies in its adaptability. You can absolutely customize the olive choice to your preference. We personally love using capsicum (red pepper)-stuffed green olives for an extra burst of flavor and a touch of color, but feel free to mix in black olives, Kalamata olives, or any other variety you enjoy most. Just remember that regardless of your choice, make sure they are pitted to ensure a pleasant eating experience. You can even experiment with other toppings entirely, such as sun-dried tomatoes, caramelized onions, or various herbs.
Expert Baking Tips for Perfect Olive Focaccia
- Embrace the Long Rest: For the absolute fluffiest, lightest, and most flavorful dough, commit to the long cold fermentation. Allowing the dough to rest in the fridge for 12 to 72 hours (or even up to 5 days!) makes a significant difference. This extended period allows the yeast to slowly develop complex flavors and creates that signature airy texture. If you’re short on time, aim for at least 8 hours, but know that patience truly rewards with superior results.
- Use an Ample-Sized Bowl: Remember, this dough will generously double, and often triple, in size during its rising periods. Ensure you use a large mixing bowl that provides plenty of space for expansion. Always cover the bowl tightly with plastic wrap or a secure silicone lid to prevent the dough from drying out and to encourage a good rise.
- Quality Olive Oil Makes a Difference: The quality of your extra virgin olive oil is paramount in this recipe. It’s not just a fat; it’s a key flavor component and contributes significantly to the focaccia’s golden color and irresistibly crisp crust. Invest in a good quality olive oil – your taste buds will thank you. Many bakers recommend oils like Rich Glen Olive Oil for their superior flavor.
- Find a Warm Spot for the Second Rise: While the first rise is cold, the second rise needs warmth to properly activate the yeast and achieve maximum puffiness. In cooler climates or during winter, finding a warm spot can be tricky. A great trick is to turn on your oven light for about 5-10 minutes, then turn it off and let your dough rise inside the slightly warmed oven. This creates an ideal, draft-free environment for proofing.
- Flour Flexibility: While bread flour is recommended for its high protein content, which yields a chewier result and stronger gluten structure, don’t worry if you only have all-purpose flour on hand. All-purpose flour works beautifully for this no-knead recipe, producing a wonderfully soft crumb. The primary difference will be a slightly less chewy texture, but the focaccia will still be absolutely delicious.
- Don’t Be Afraid of Dimples: When it’s time to add toppings, don’t hesitate to gently but firmly dimple the dough with your oiled fingertips. These indentations are characteristic of focaccia and help create those lovely olive oil pools and ensure the toppings adhere well.
Storing Your Freshly Baked Olive Focaccia
To preserve the deliciousness of your olive no-knead focaccia, proper storage is essential. Once cooled, keep it in an airtight container at room temperature for up to 2 days. This method helps to maintain its soft interior and prevents it from drying out. If the focaccia begins to lose its initial crispness, a quick reheat in a preheated oven for a few minutes will bring back that coveted golden, crunchy crust. For longer-term storage, focaccia freezes remarkably well. Simply slice the cooled focaccia into individual portions, wrap each slice tightly in plastic wrap, and then place them in a freezer-safe bag. It can be stored in the freezer for up to 2-3 months. When you’re ready to enjoy a piece, you can pop it directly into a hot oven (from frozen) for about 10-15 minutes, or until warmed through and crispy.
Creative Ways to Serve Your Olive Focaccia
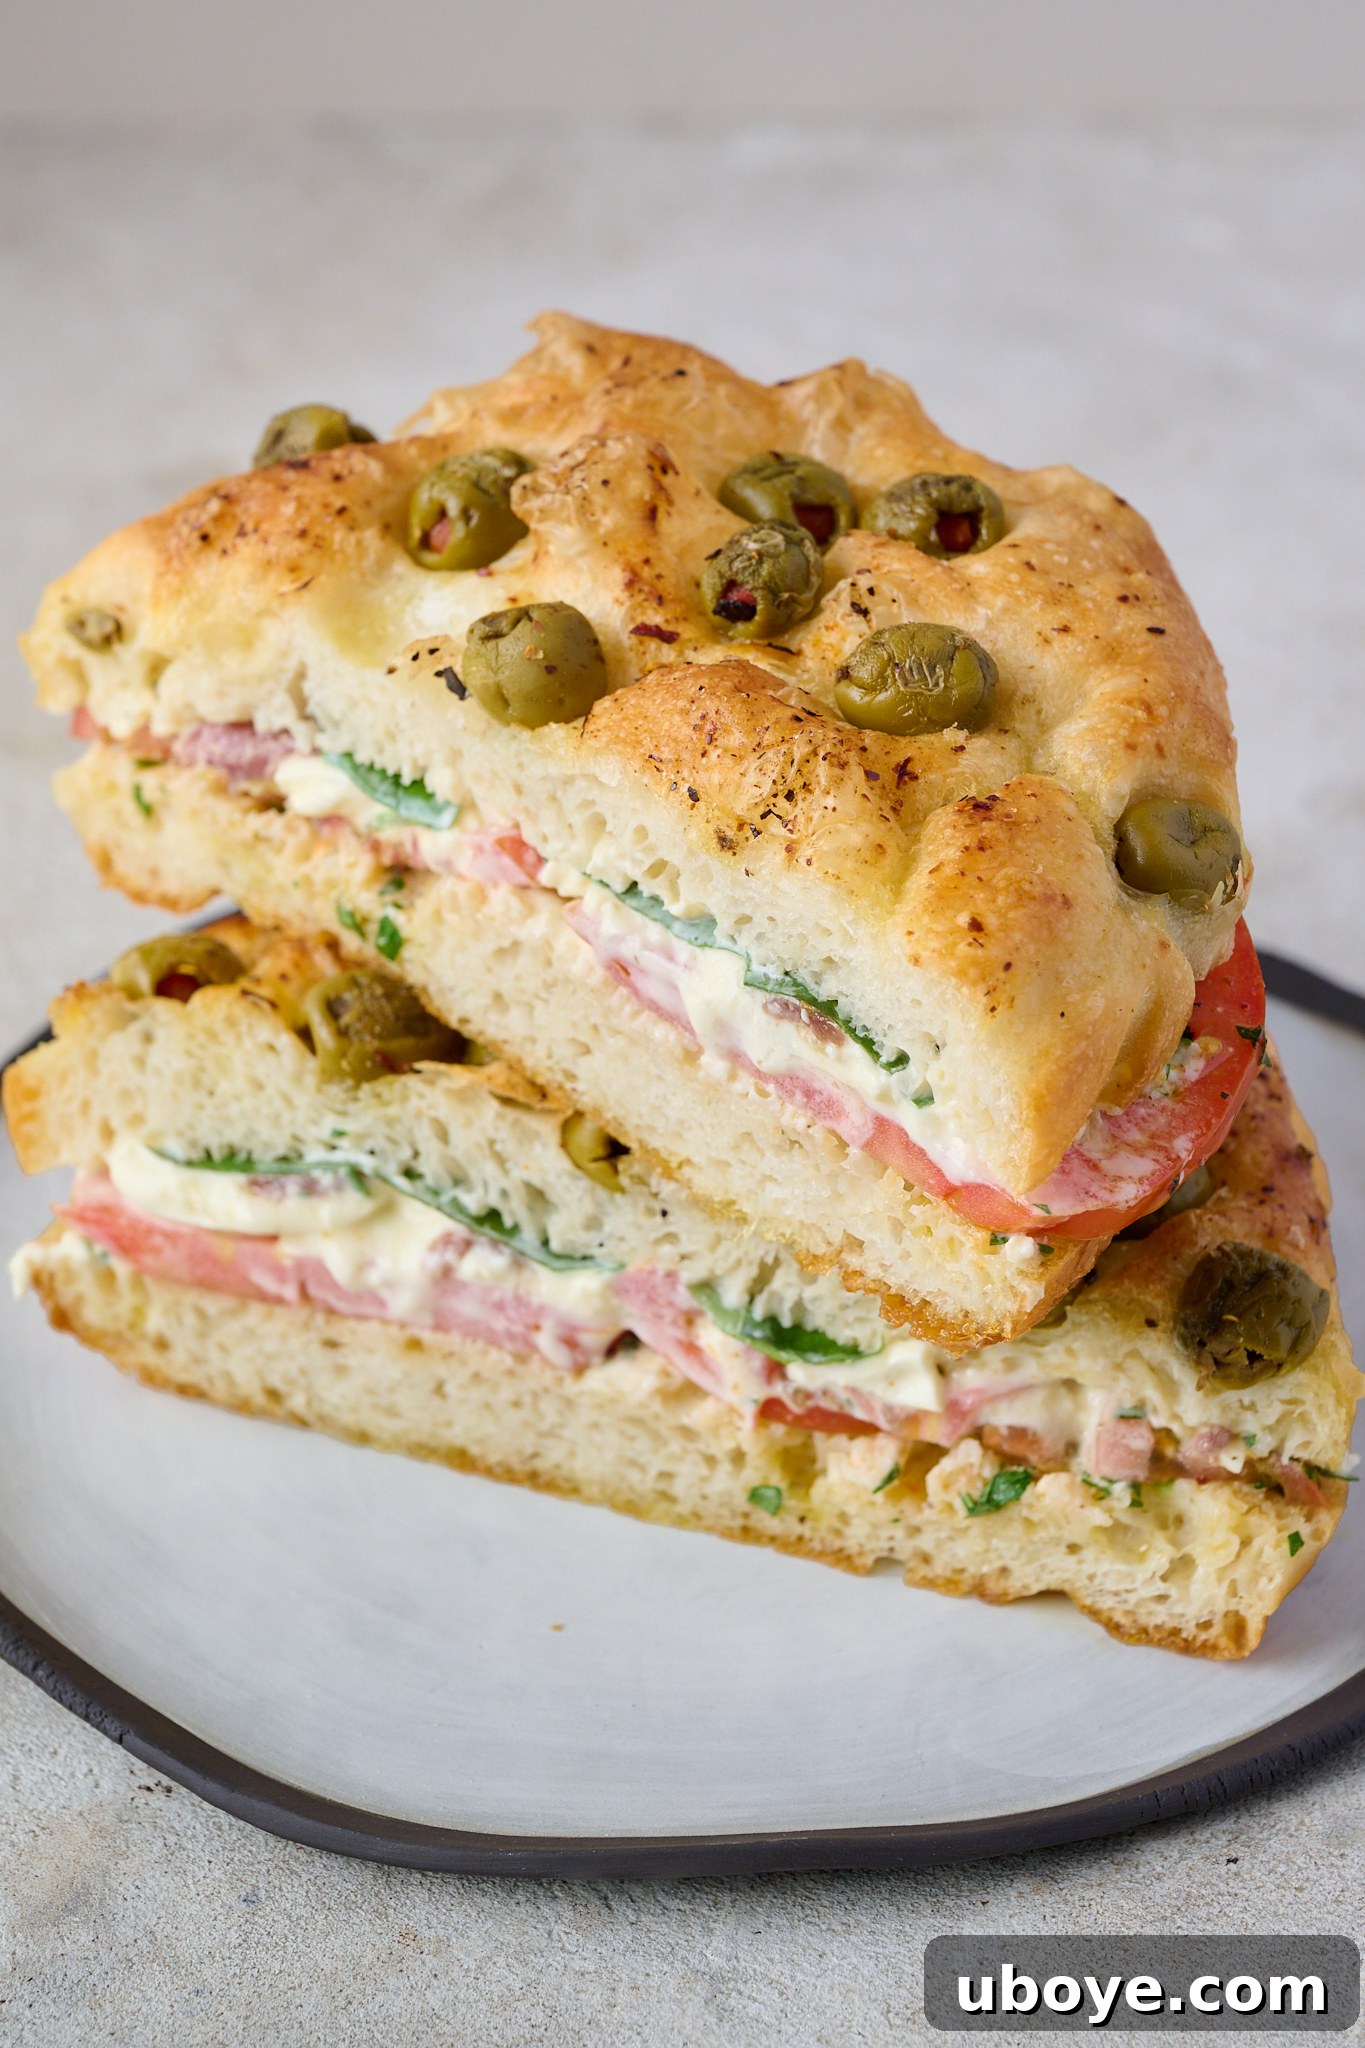
This olive no-knead focaccia is incredibly versatile and can be enjoyed in countless ways, either warm or at room temperature. It’s a fantastic standalone snack; simply tear off a piece and savor its rich flavors. For an elevated experience, dip it into a high-quality extra virgin olive oil, or pair it with a creamy, homemade garlic and herb dip. It also makes a superb accompaniment to a comforting bowl of potato and leek soup, complements fresh vibrant salads beautifully, or perfectly mops up the delicious sauce from a cherry tomato pasta dish. Furthermore, its sturdy yet airy structure makes it the ideal foundation for gourmet sandwiches—just slice it horizontally and generously fill it with your favorite meats, cheeses, roasted vegetables, or fresh greens for an unforgettable meal.
Explore More Focaccia Recipes!
Recipes
Garlic & Rosemary No-Knead Focaccia
Focaccia
Garlic Butter No-Knead Focaccia
Focaccia
Pizza Focaccia
Focaccia
Fig & Goat’s Cheese Focaccia
Have questions or want to leave a review about this incredible olive no-knead focaccia? We would love to hear from you! Please feel free to share your thoughts, ask questions, or provide feedback below the recipe card. We always enjoy connecting with our community and seeing your wonderful creations.
If you bake this recipe, don’t forget to **follow and tag us** on Instagram, TikTok, or Pinterest so we can admire your delicious focaccia!
Green Olive No-Knead Focaccia
Daen Lia
1 day
30 mins
30 mins
6
Ingredients
Focaccia Dough
- 700 g bread flour
- 680 g lukewarm water, (100°F / 34°C) – 95% hydration
- 7 g dry yeast
- 12 g fine sea salt
- 1 tsp honey
- 60 g olive oil, extra virgin
Olive Topping
- 4 oz green olives, pitted
- 1 tbsp olive oil, extra virgin
- 1 tbsp rosemary, finely chopped
- 1 tsp chili flakes, optional
- flaky sea salt
Instructions
Focaccia Dough
- Activate Yeast: Stir water, yeast, and honey in a medium bowl with a whisk. Wait for about 5 minutes until the mixture becomes frothy, signaling that the yeast is ready.
- Dry Ingredients: In a different large bowl, whisk flour and salt. Then, pour in the yeast mixture, stirring with a spoon or your hands to form a wet, sticky dough without dry spots. Cover the bowl with plastic or a damp cloth for 10 minutes.
- Stretch and Fold: Afterward, with damp hands, stretch a piece of the dough and fold it across itself. Turn the bowl and repeat this action three more times, covering the dough again for another 10 minutes. This is the stretch and fold method and it will strengthen your dough. On the final stretch and fold, continue until the dough shapes into a ball.
- 1st Proof: Coat a new bowl with 20g of olive oil, place the dough inside, and cover it tightly with plastic. Let it rest in the fridge between 12 to 72 hours; this is the first proof. We only need half of the dough for this recipe so slice the dough in half and use the second half for a different recipe.
- 2nd Proof: Oil a baking tin with another 20g of olive oil. Move the dough there, gently stretching it to a rough rectangle, but not to the tin’s edges—it will spread as it rises. Protect it with a damp cloth and let it rise for 2 hours in a warm spot.
Olive Focaccia
- Preheat Oven: Preheat your oven to 200°C (390°F).
- Toppings: After the rise, dimple the dough with your fingers. Scatter the olives, rosemary and chili flakes, if using, all over. Season with salt and drizzle over olive oil.
- Bake & Rest: Bake for 30 minutes until golden on top. Allow the focaccia to cool slightly before transferring it to a wire rack to rest for 15 minutes. Slice into it and serve immediately.
Video
Notes
- Dough: We only need half of the dough for this recipe, so slice the dough in half and use the second half for a different recipe or another batch of focaccia. Feel free to experiment with a variety of focaccia toppings!
- Yeast: I prefer using dry yeast that needs to be activated in water as detailed in the instructions. However, you can also use instant yeast if that’s what you have. If using instant yeast, there’s no need to activate it separately; simply add it directly to the dry ingredients along with the water and honey.
- Flour: If bread flour is not available, all-purpose flour will work effectively as a substitute, yielding a slightly softer but equally delicious focaccia.
Nutrition
Carbohydrates: 94g
Protein: 16g
Fat: 16g
Saturated Fat: 3g
Polyunsaturated Fat: 2g
Monounsaturated Fat: 10g
Cholesterol: 4mg
Sodium: 819mg
Potassium: 197mg
Fiber: 4g
Sugar: 8g
Vitamin A: 234IU
Vitamin C: 1mg
Calcium: 42mg
Iron: 2mg
Nutrition information is automatically calculated, so should only be used as an approximation.

Enjoyed this recipe? Leave a comment below!