
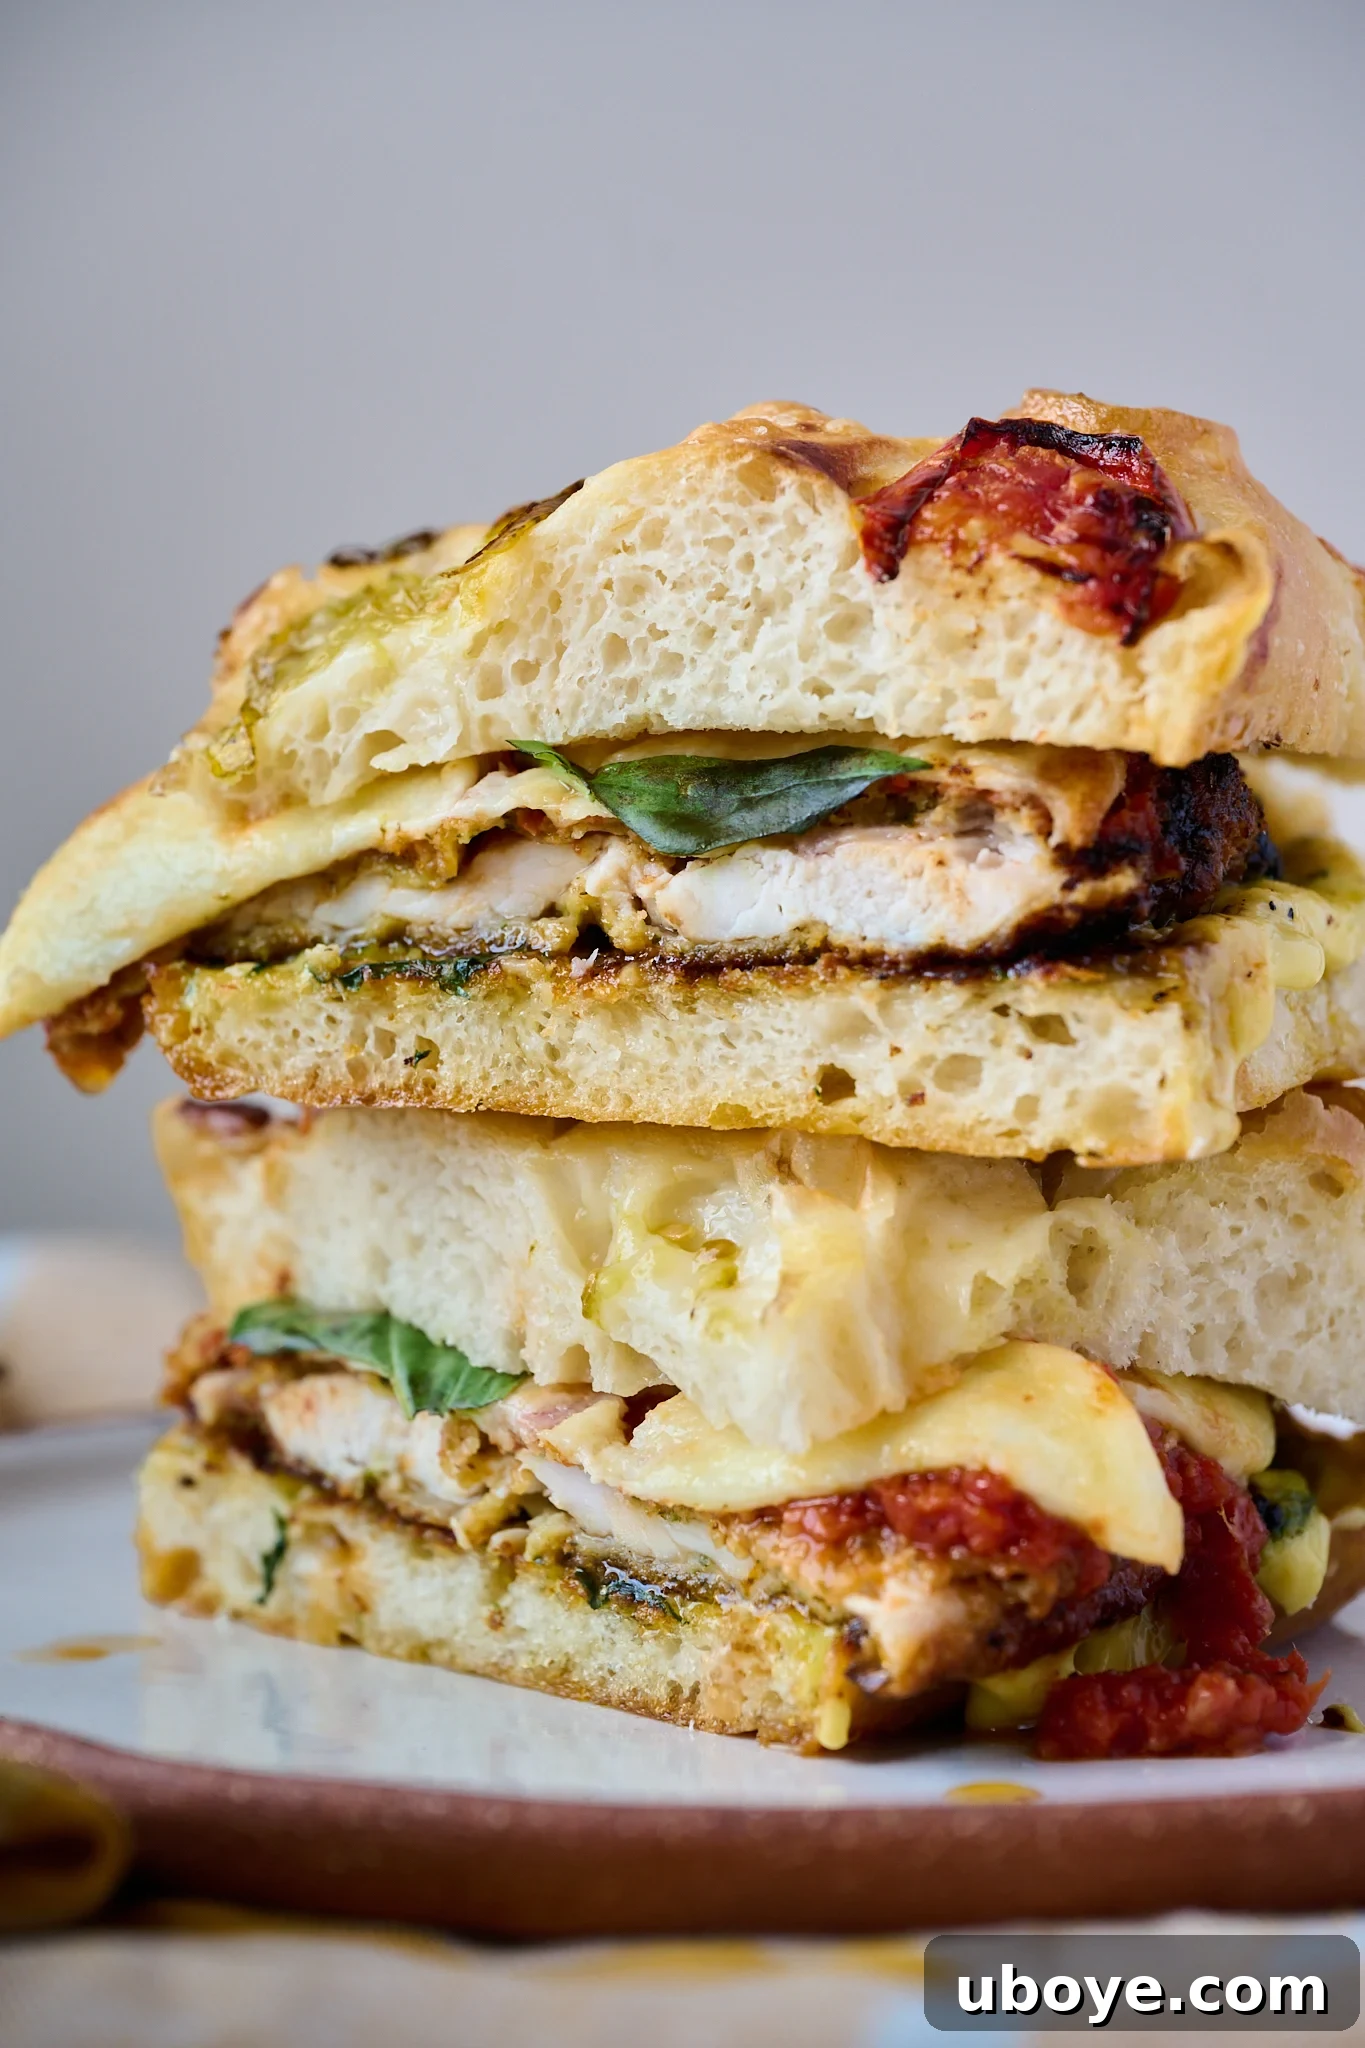
The Ultimate Chicken Parmesan Focaccia Sandwich: A Culinary Masterpiece
Prepare yourself for a culinary journey that marries two beloved Italian classics into one extraordinary creation: the Chicken Parmesan Focaccia Sandwich. Imagine sinking your teeth into layers of golden, exquisitely crispy chicken schnitzel, generously coated in parmesan, and bathed in a vibrant, rich tomato and basil sauce. This savory delight is then crowned with perfectly melted cheese, a dollop of intensely flavorful garlic confit aioli, and a verdant swirl of homemade pesto. All these magnificent ingredients are lovingly tucked between two slices of heavenly, pillowy homemade focaccia, creating a sandwich experience unlike any other. It’s an indulgence, a comfort, and truly, a dream come true for anyone who appreciates bold Italian flavors and irresistible textures. This is not just a sandwich; it’s an event.
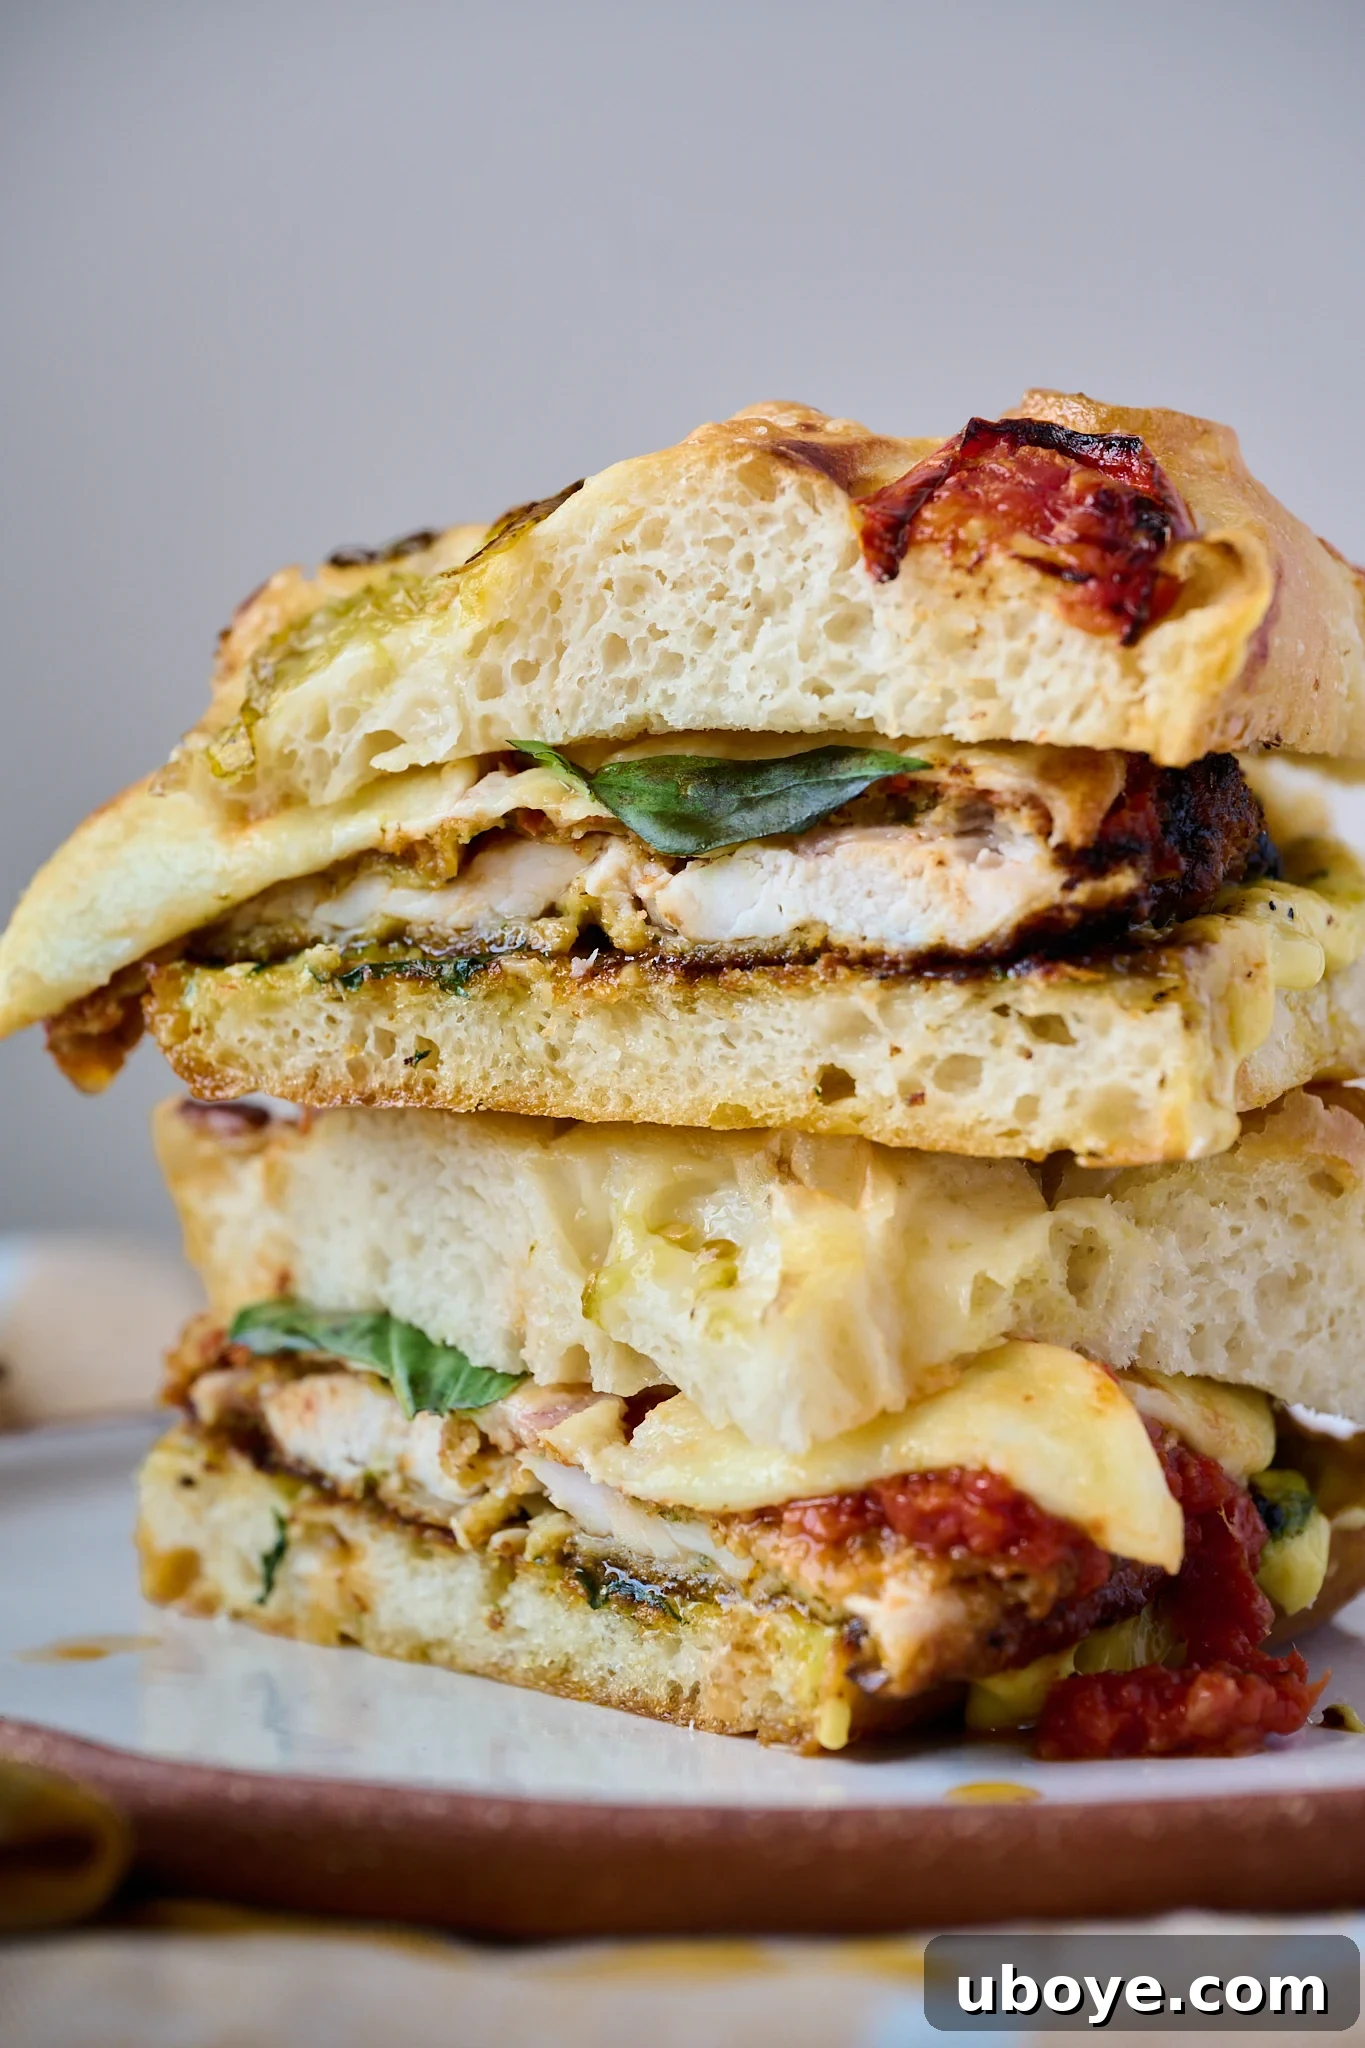
If you’re anything like me, a truly exceptional sandwich holds a special place in your heart, especially when it’s bursting with the vibrant tastes of Italy. This chicken parm focaccia sandwich elevates the concept of comfort food to an art form. It’s an homage to authentic flavors, meticulously crafted for the ultimate gastronomic pleasure. Each component, from the celebrated crispy crumbed chicken (inspired by my mum’s iconic recipe) to the luscious tomato and basil sauce, the aromatic homemade pesto, the creamy garlic confit aioli, and the generous layer of melted cheese, is designed to deliver maximum impact. And it all comes together, held perfectly by that glorious slab of focaccia. Yes, bringing this masterpiece to life requires a dash of time, a sprinkle of love, and a good measure of care, but with the very first bite, you’ll understand that every moment spent crafting it was absolutely worth it.
And for those busy days when time is a luxury, please know there’s absolutely no judgment if you opt for quality store-bought alternatives for bread, condiments, or even breadcrumbs. The spirit of this sandwich lies in its incredible flavor profile, which can still shine through with a few clever shortcuts. However, if there’s one component you absolutely must try making from scratch, it’s the garlic confit aioli. Its rich, mellow garlic flavor is truly transformative and elevates the entire sandwich experience!
Why This Chicken Parmesan Focaccia Sandwich Will Become Your New Favorite
This isn’t just another sandwich recipe; it’s an experience waiting to happen. Here’s why this Chicken Parmesan Focaccia Sandwich is destined to become a beloved staple in your culinary repertoire:
- A Quintessential Daen’s Kitchen Creation: This recipe embodies the very essence of Daen’s Kitchen – a celebration of bold, comforting flavors and thoughtfully crafted components. It’s packed with signature elements you’ve come to love, including perfectly crispy crumbed chicken, the luxurious depth of garlic confit, vibrant pesto, creamy aioli, and a thick, golden slice of our irresistible homemade focaccia. Each element is perfected to create a harmonious and unforgettable bite.
- Crafted from Scratch, Yet Wonderfully Adaptable: We believe in the unparalleled taste of homemade, and this recipe guides you through creating every delicious part from scratch – from the airy focaccia to the rich sauces. This dedication ensures the freshest, most authentic flavors possible. However, we understand that life gets busy. This recipe is also incredibly flexible; feel free to incorporate store-bought versions of certain ingredients. Whether you go fully homemade or blend with smart shortcuts, the result will always be absolutely delicious and satisfying.
- The Epitome of Comfort Food: If comfort food had a definitive form, this sandwich would be it. It delivers an incredible medley of textures and tastes: gooey, melted cheese, succulent and saucy chicken, the pungent warmth of garlic, the satisfying crunch of fried chicken, and the cloud-like softness of focaccia. Every bite is an explosion of savory goodness that wraps you in warmth and contentment. It’s more than just a meal; it’s a moment of pure culinary bliss that you’ll want to recreate again and again.
The Star-Studded Lineup: Essential Ingredients for Your Focaccia Sandwich
This Chicken Parmesan Focaccia Sandwich is a true testament to using high-quality ingredients, many of which are beloved Daen’s Kitchen all-stars. We’ve meticulously chosen components that, when brought together, create an unparalleled symphony of flavor and texture. Think of it as a “greatest hits” album of deliciousness, all rolled into one epic bite.
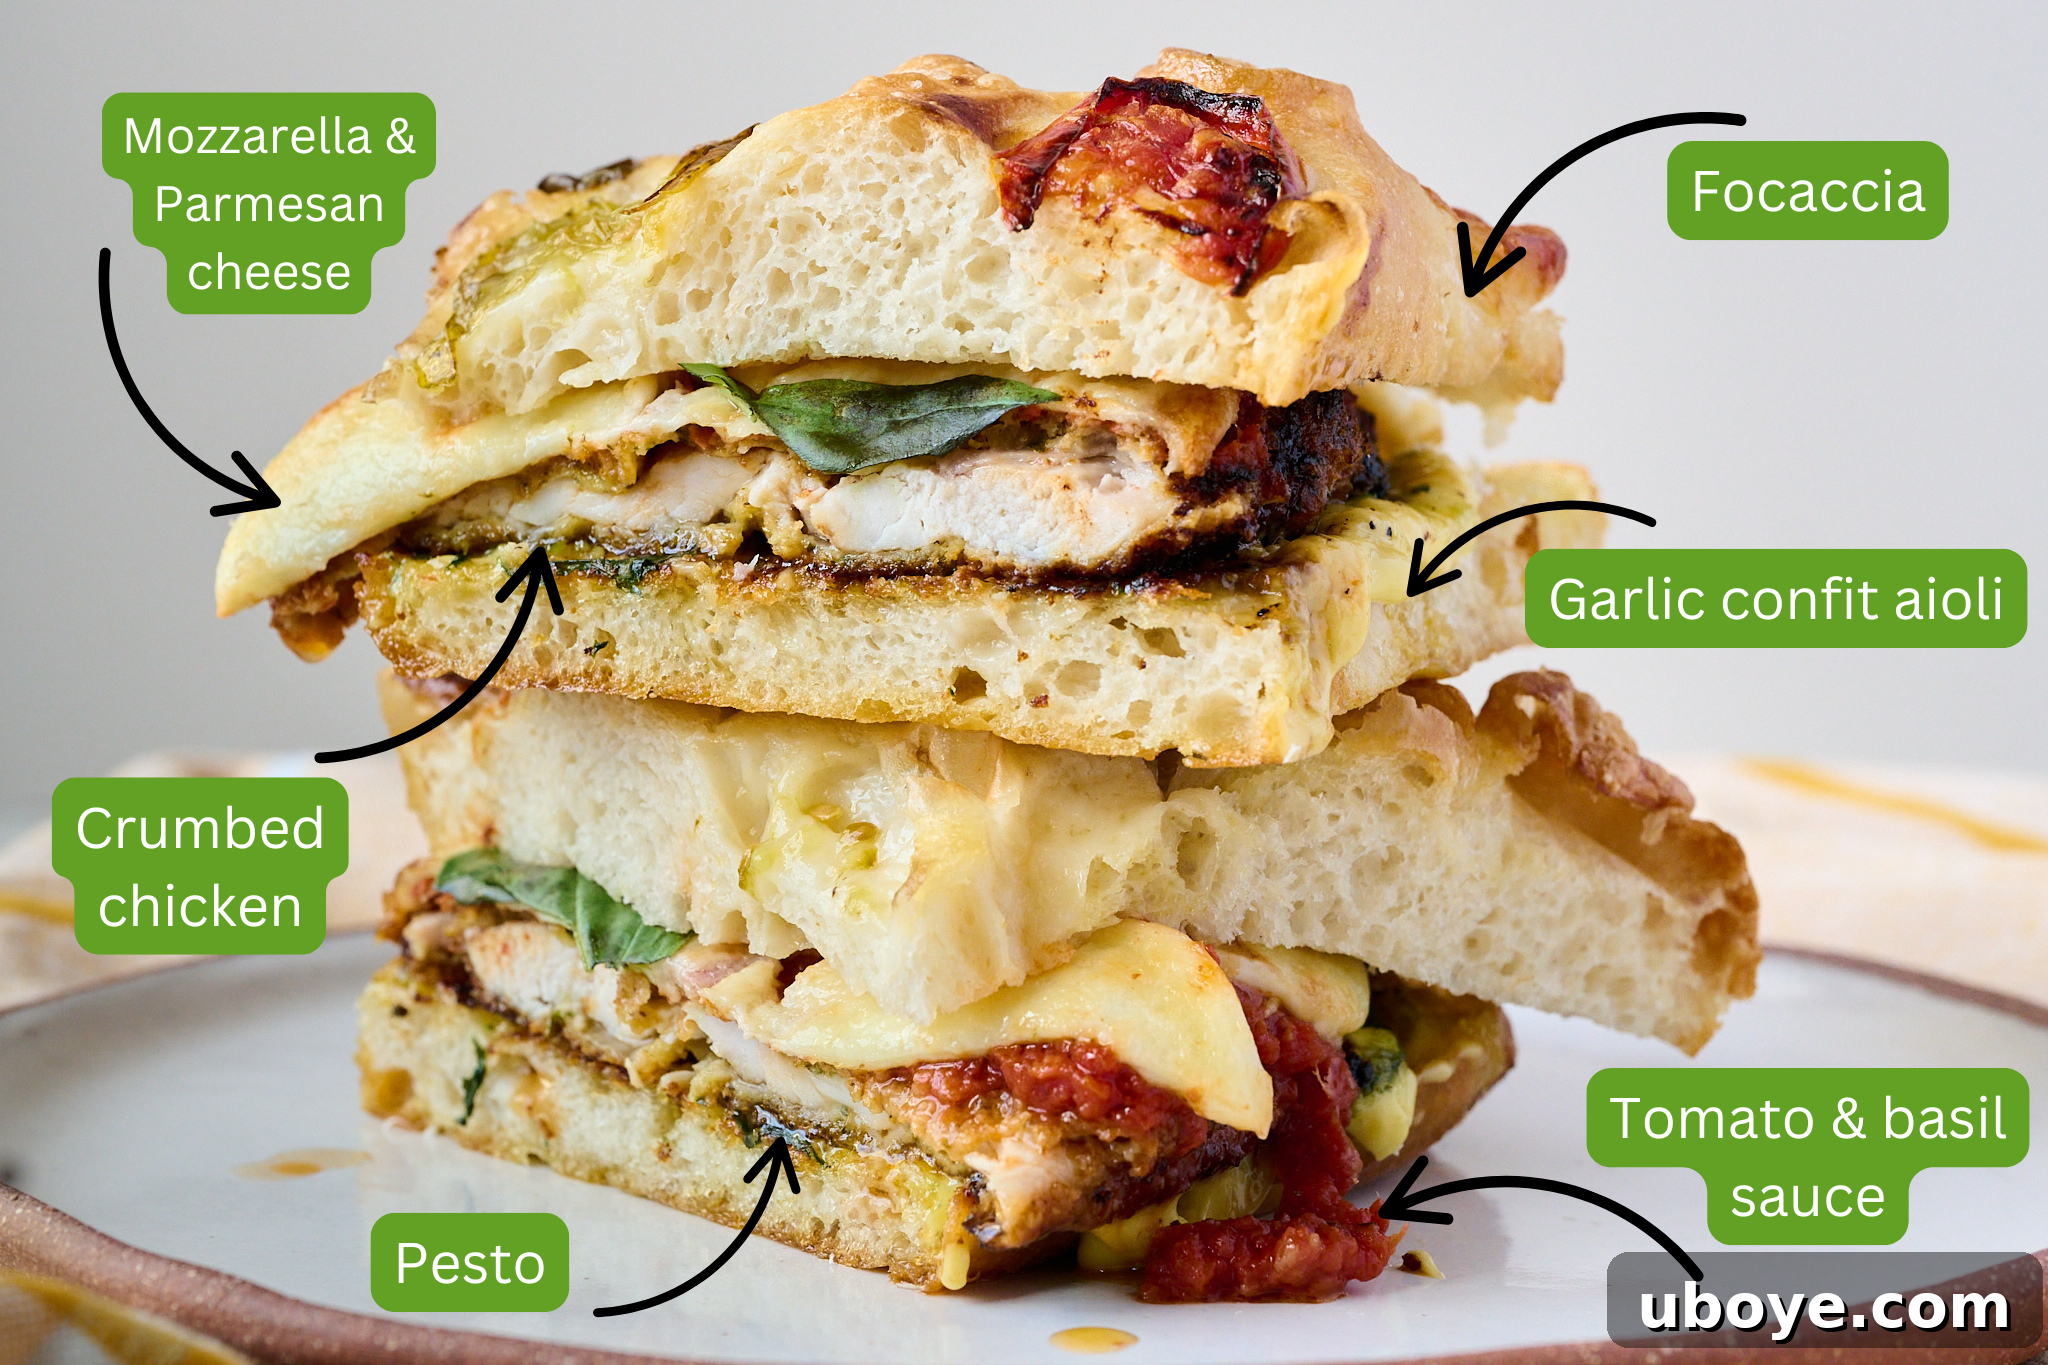
- Fluffy Focaccia – The foundation of our sandwich, this focaccia is soft, golden, and features those irresistible crispy edges. We recommend our no-knead focaccia recipe, known for its pillowy perfection and incredible ability to hold all the generous fillings without becoming soggy. You can even experiment with various toppings to add an extra layer of flavor!
- Crispy Crumbed Chicken – Our legendary recipe, proudly inspired by my mum’s cooking! Juicy chicken breasts are tenderized, then lovingly coated in homemade, herbed breadcrumbs and pan-fried to a stunning golden-brown crispness in olive oil. This chicken forms the hearty, savory core of the sandwich.
- Rich Tomato and Basil Sauce – A robust, garlicky sugo crafted from the finest tinned tomatoes, fresh basil, and aromatic garlic. This sauce provides the essential tangy, sweet, and herbaceous counterpoint, ensuring every bite is bursting with authentic Italian zest.
- Authentic Mortar & Pestle Pesto – This homemade basil pesto delivers an unparalleled burst of fresh, herby, and nutty flavor. Made traditionally, it adds a vibrant green hue and a rich, aromatic complexity that brightens the entire sandwich.
- Creamy Garlic Confit Aioli – Smooth, profoundly garlicky, and utterly addictive, this aioli is the secret weapon that brings all the diverse flavors of the sandwich into perfect harmony. Its rich creaminess and mellow garlic notes are simply irresistible.
- Premium Cheese Blend – We layer both parmesan and mozzarella to achieve that quintessential melty finish and savory depth. The mozzarella offers stretch and mild creaminess, while the parmesan adds a sharp, salty tang. Feel free to use your favorite melty cheese or a combination that you love!
A complete ingredient list with precise measurements for each component can be found in the detailed recipe card below.
Crafting Your Culinary Masterpiece: How To Make The Chicken Parmesan Focaccia Sandwich
While this sandwich may appear to have several intricate components, rest assured that each step is straightforward and contributes to a seriously special outcome. The process involves lovingly preparing each element — the light and airy focaccia, the perfectly crispy chicken, and the vibrant, flavorful sauces and aioli — before layering them up to create the most unforgettable sandwich of your life. Whether you embark on the full homemade journey or cleverly integrate a few store-bought shortcuts, this is one recipe that promises a rewarding experience with every single, glorious bite.
Assembling Your Chicken Parmesan Focaccia Sandwich
Once all your delicious components are ready, the magic truly happens as you layer them into a magnificent sandwich. Follow these simple steps for assembly:
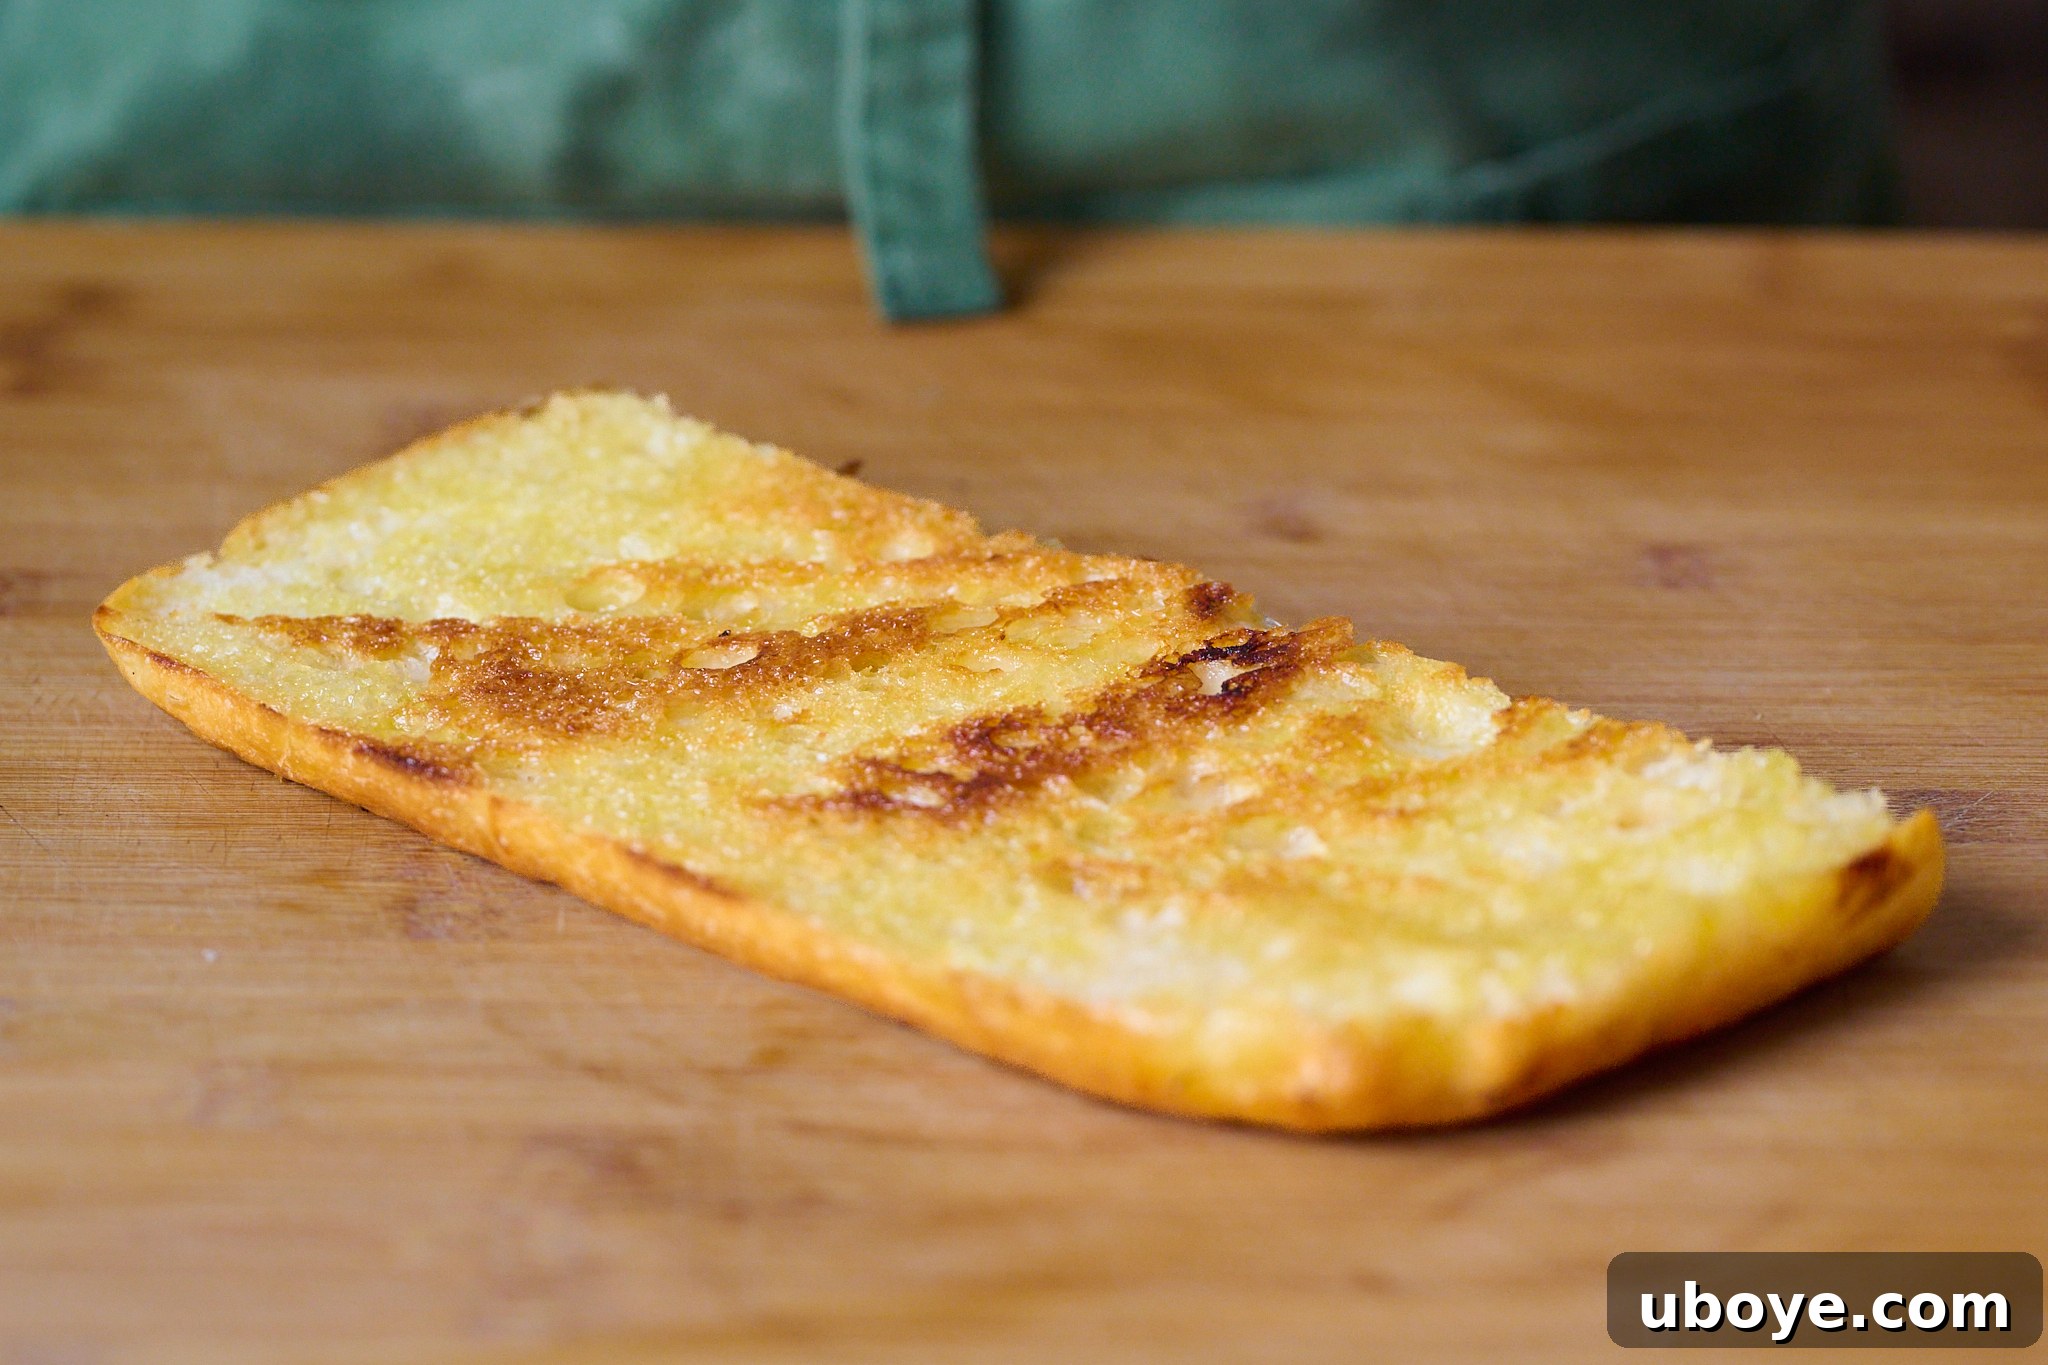
Step 1: Toast the Focaccia. Begin by slicing your homemade focaccia bread in half horizontally. Drizzle the cut sides generously with high-quality olive oil. In a frypan set over low to medium heat, lightly toast the focaccia until it’s warmed through and boasts a beautiful, golden-brown crust. This step adds a wonderful textural contrast and enhances the bread’s flavor, providing a sturdy base for your fillings.
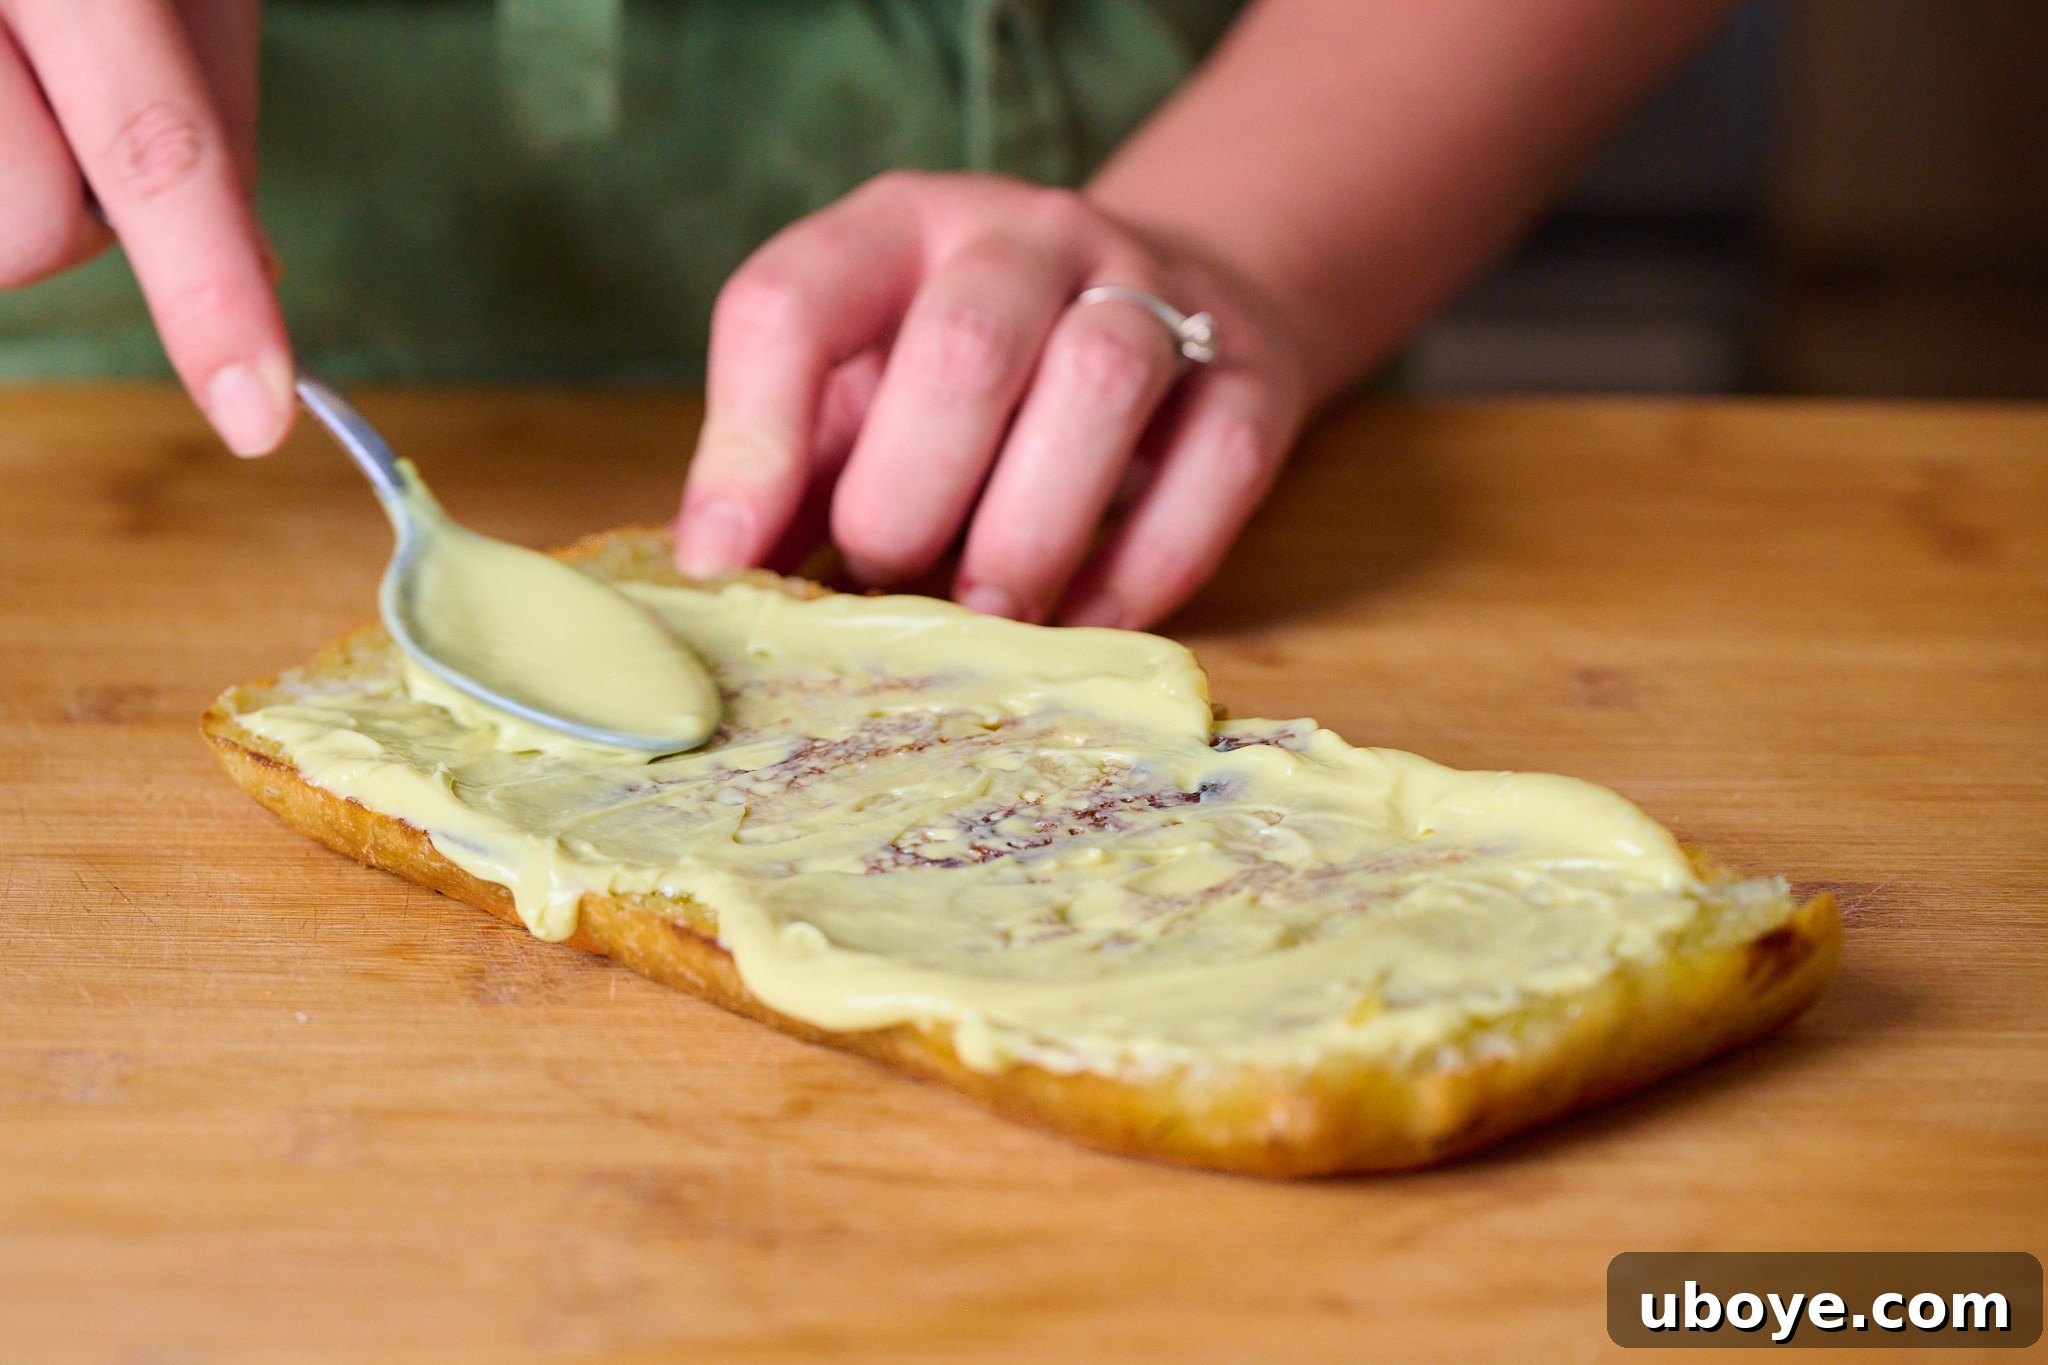
Step 2: Apply the Garlic Confit Aioli. On the toasted bottom half of your focaccia, spread a generous and even layer of the creamy, aromatic garlic confit aioli. Its rich, mellow garlic flavor and luxurious texture will provide a fantastic base and complement the other bold flavors.
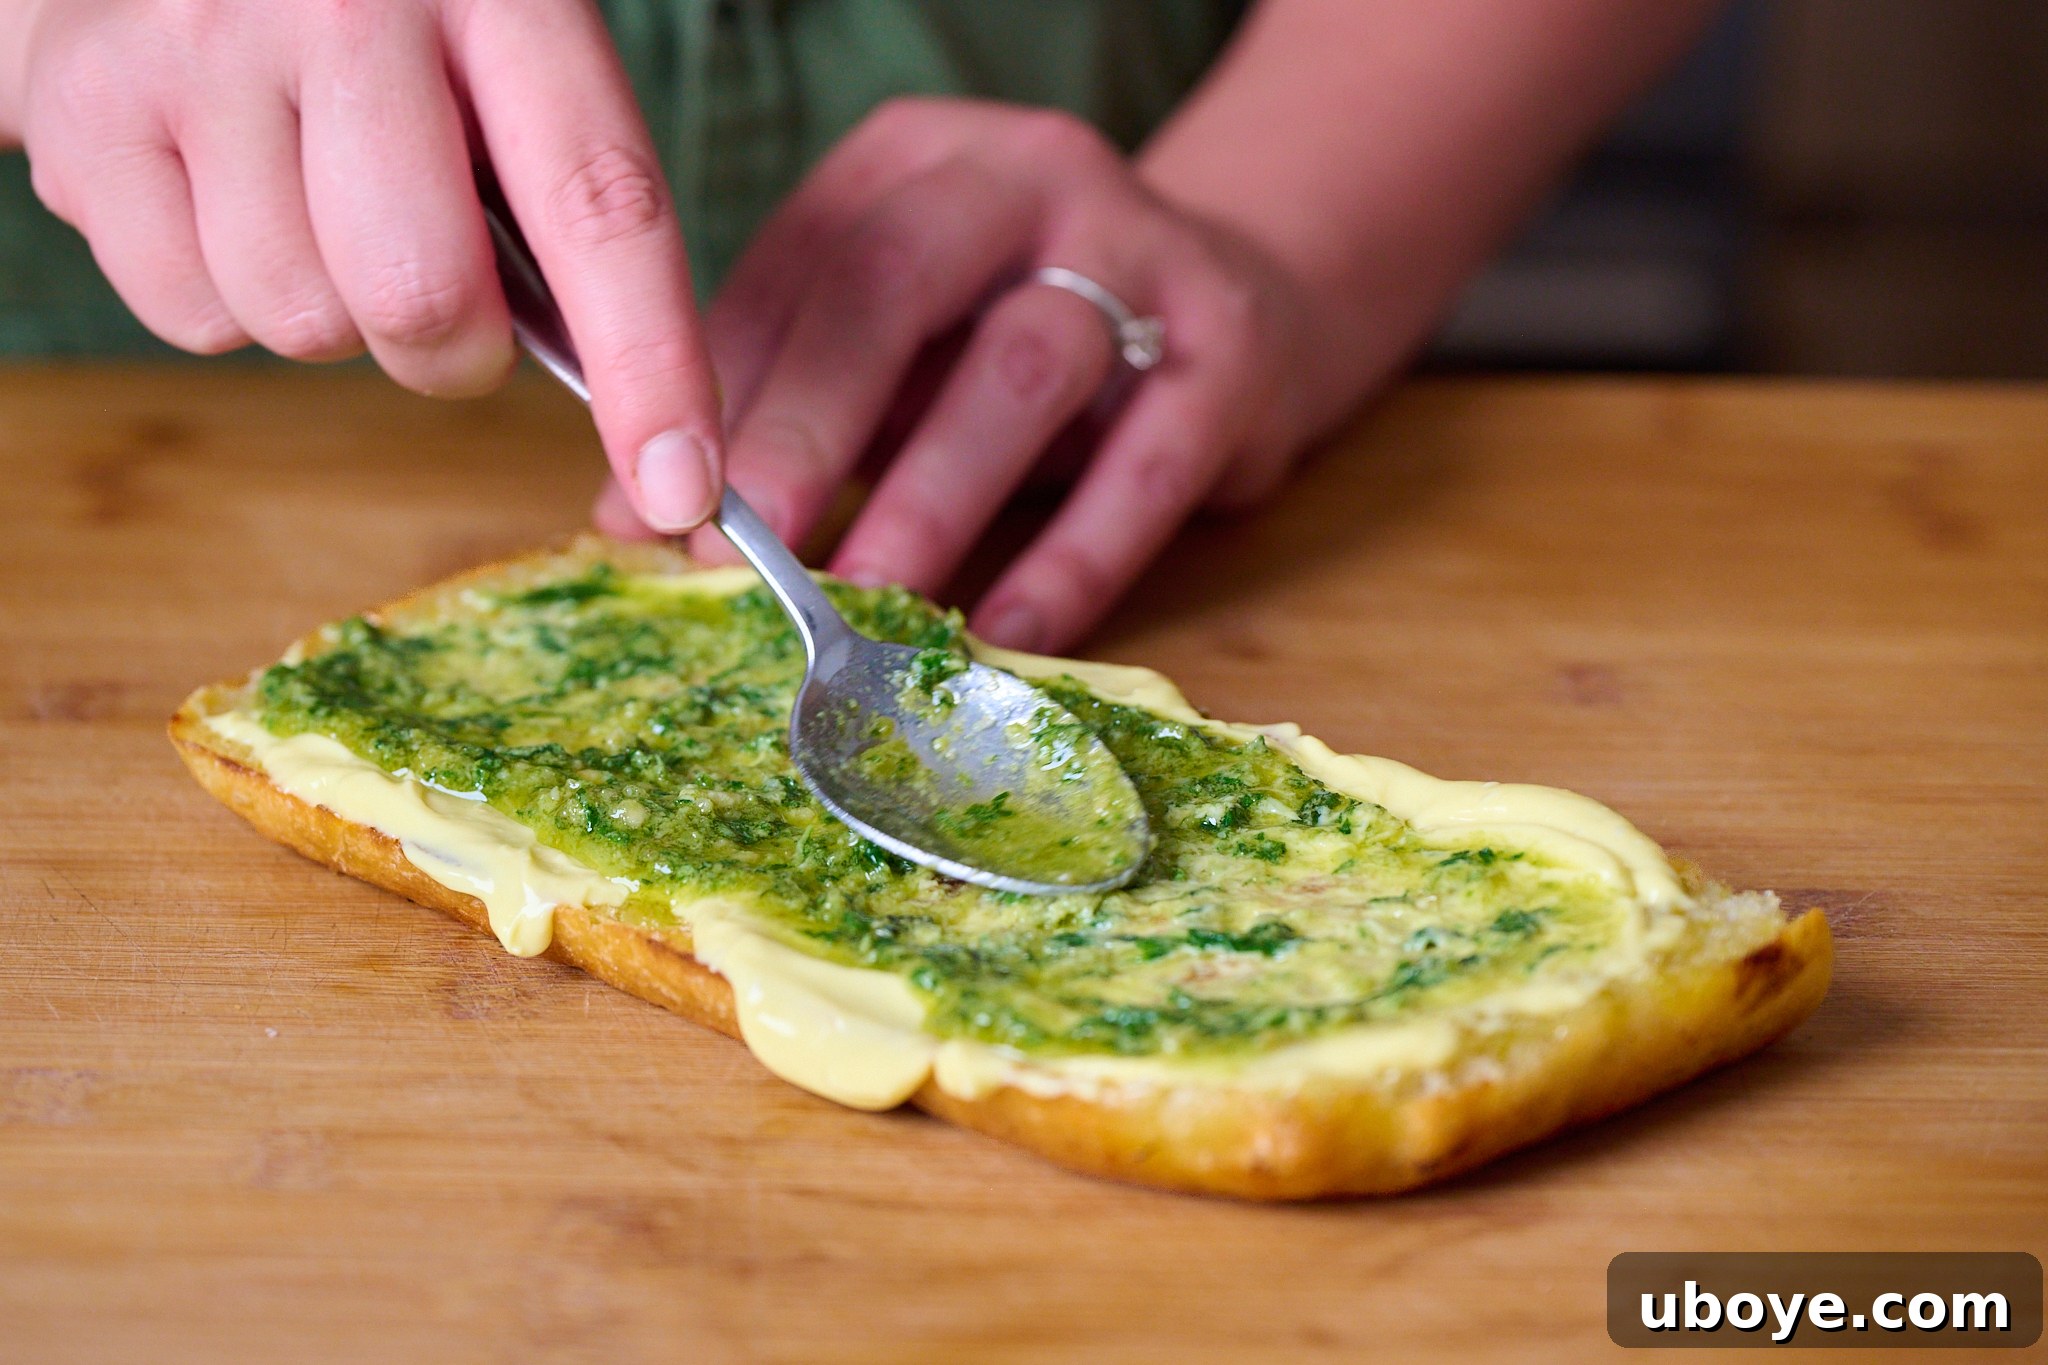
Step 3: Add a Layer of Pesto. Next, delicately spread a vibrant layer of your authentic homemade pesto over the garlic confit aioli. The fresh basil, nutty pine nuts, and savory cheese in the pesto add a bright, herbaceous counterpoint that perfectly balances the richer flavors to come.
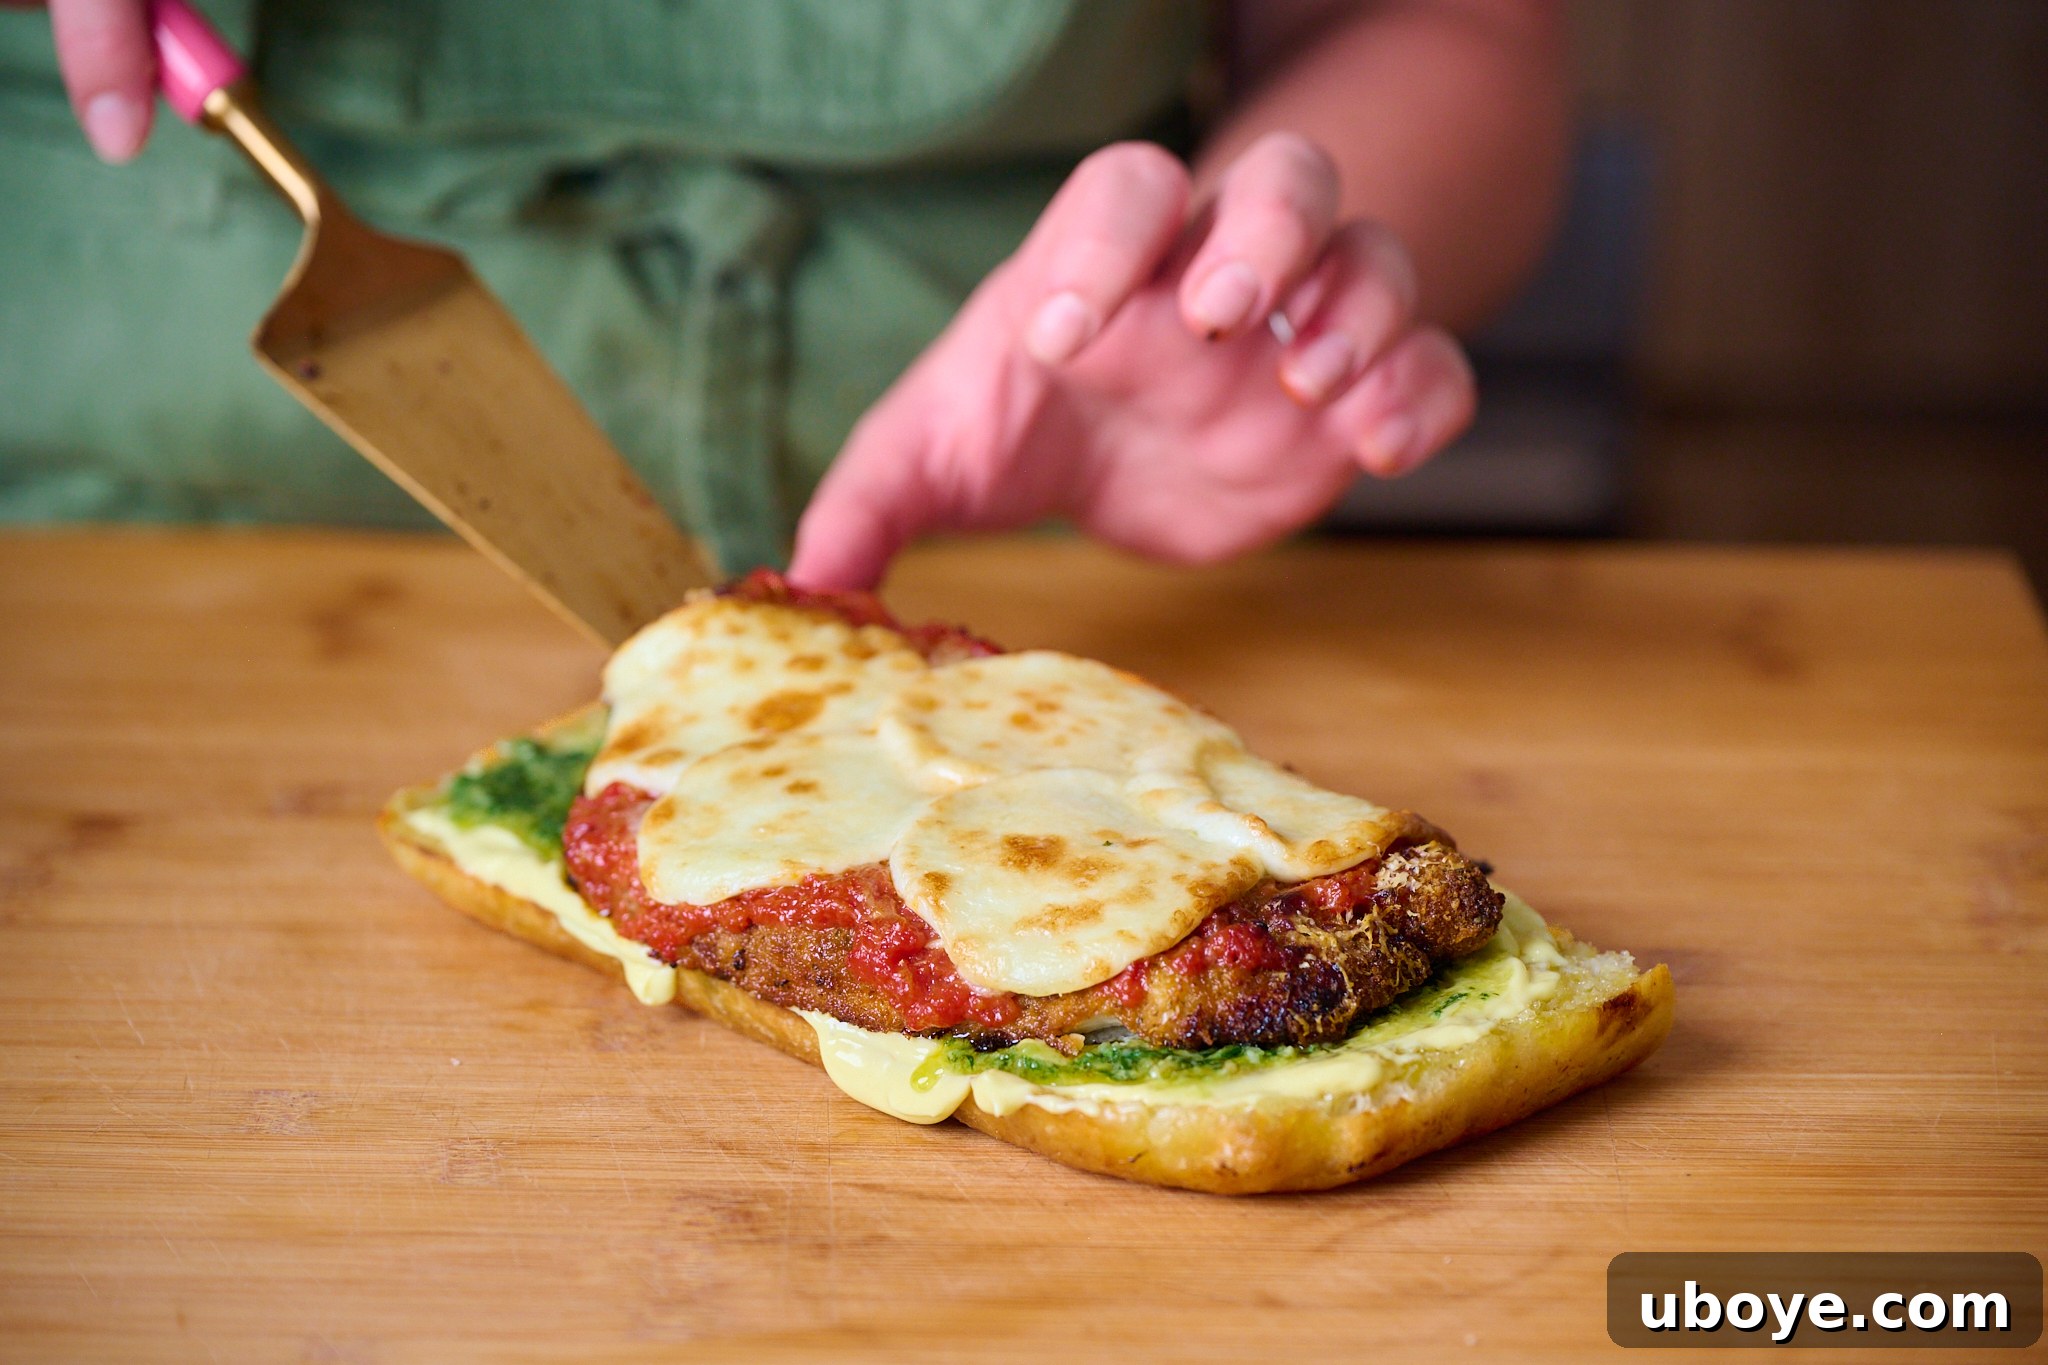
Step 4: Position the Chicken Parma. Carefully place the cooked chicken parma, with its crispy coating and rich tomato sauce, directly on top of the aioli and pesto layers. Ensure it’s centered to allow for even distribution of flavors in every bite. The warmth of the chicken will slightly melt the layers beneath, enhancing the overall experience.
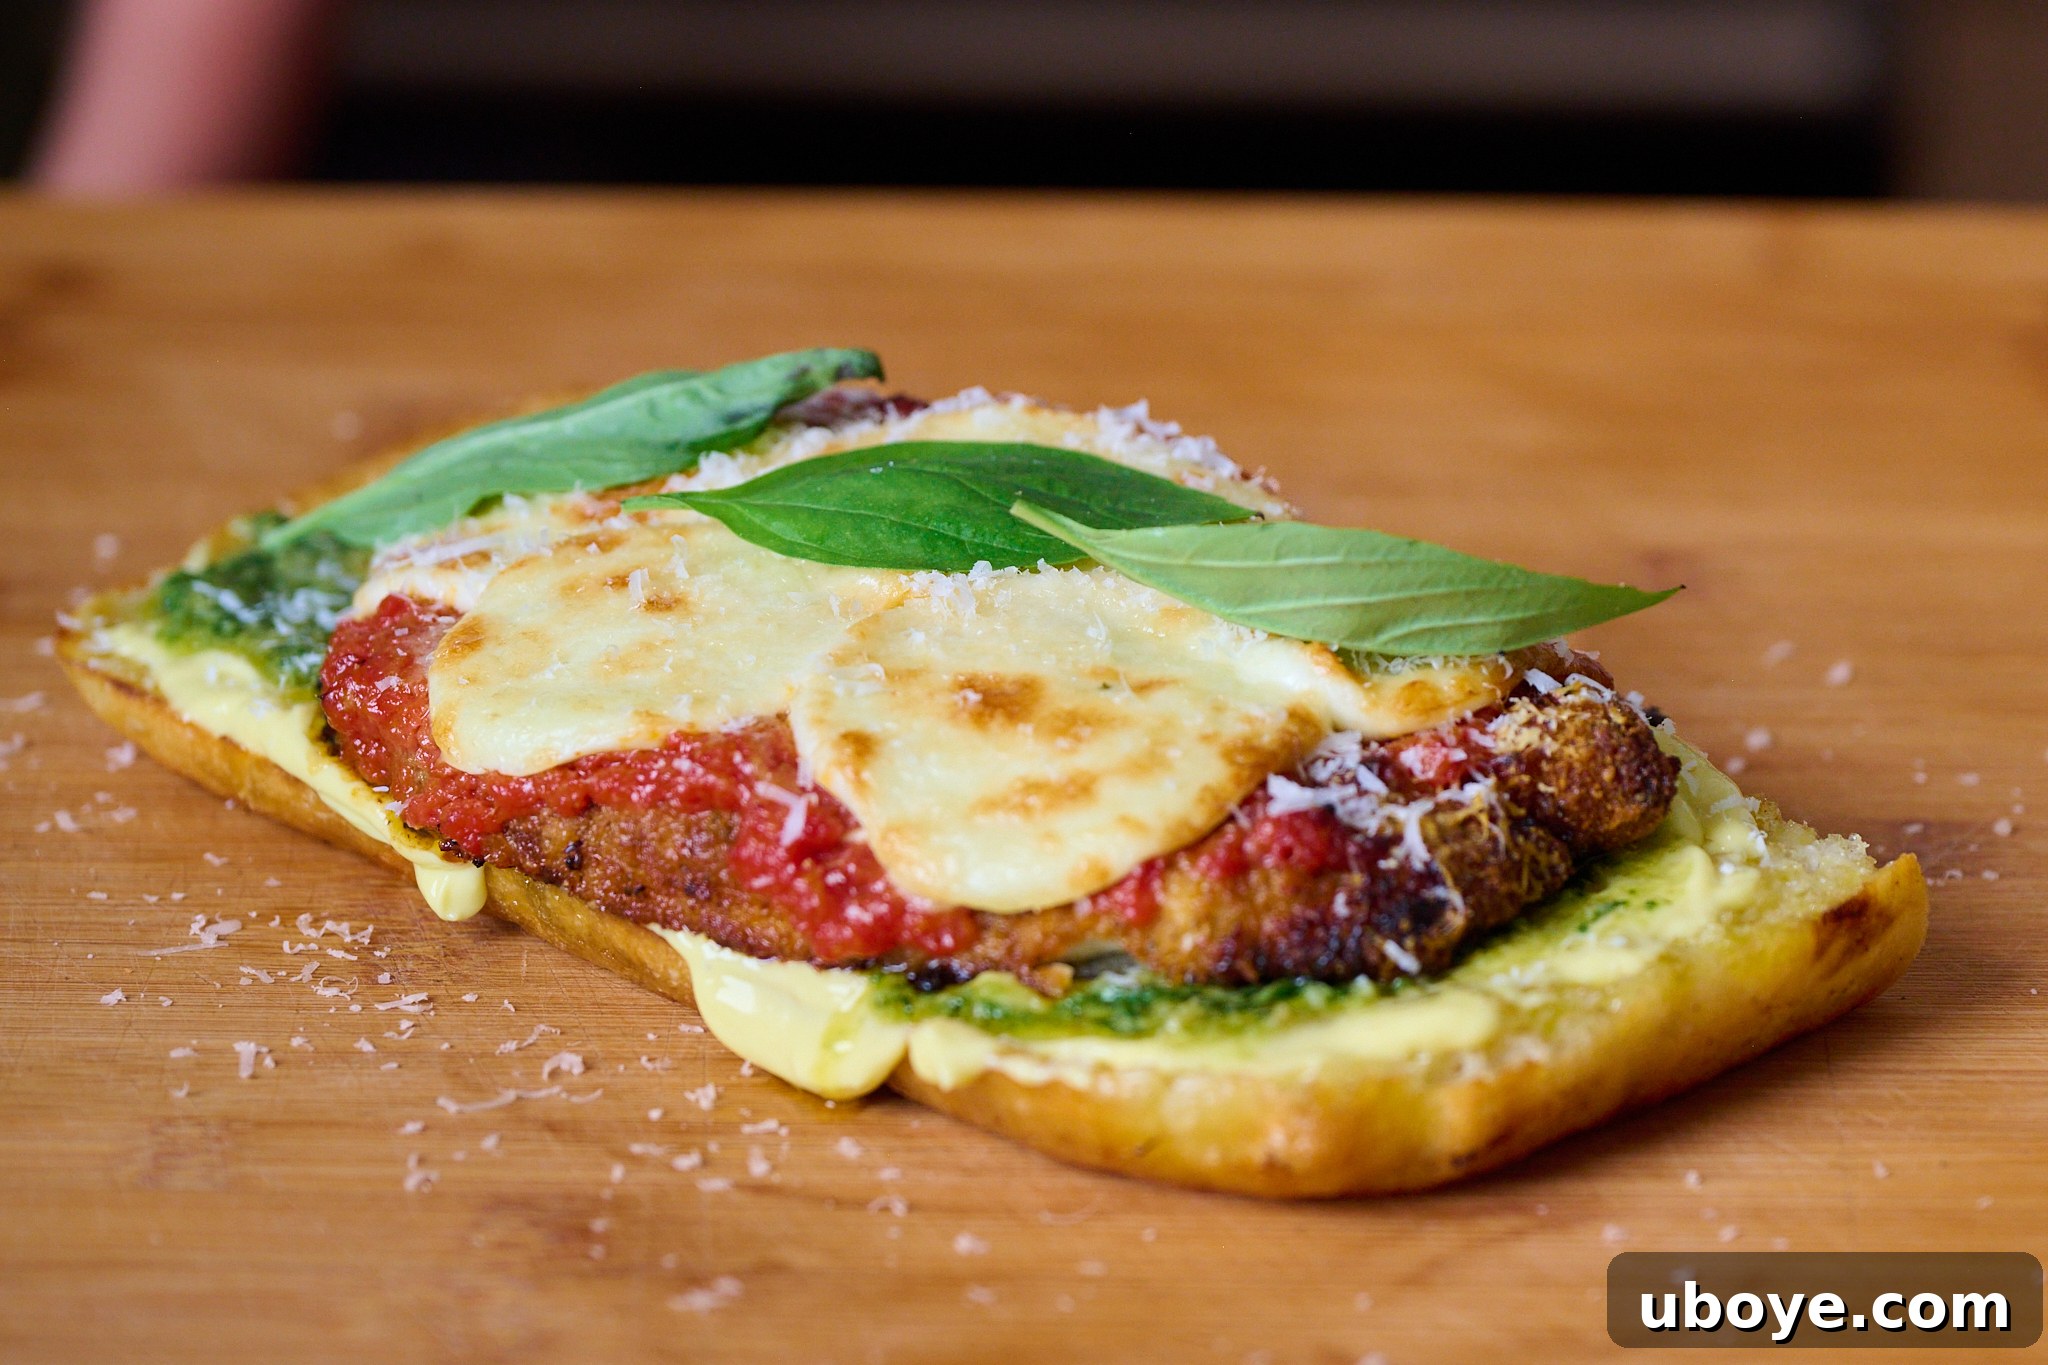
Step 5: Garnish with Parmesan and Basil. To complete the savory heart of the sandwich, sprinkle a little extra freshly grated parmesan cheese over the chicken parma. The parmesan adds an extra layer of salty, umami flavor. Finish with a few fresh basil leaves, which provide a beautiful aromatic lift and a touch of vibrant green.
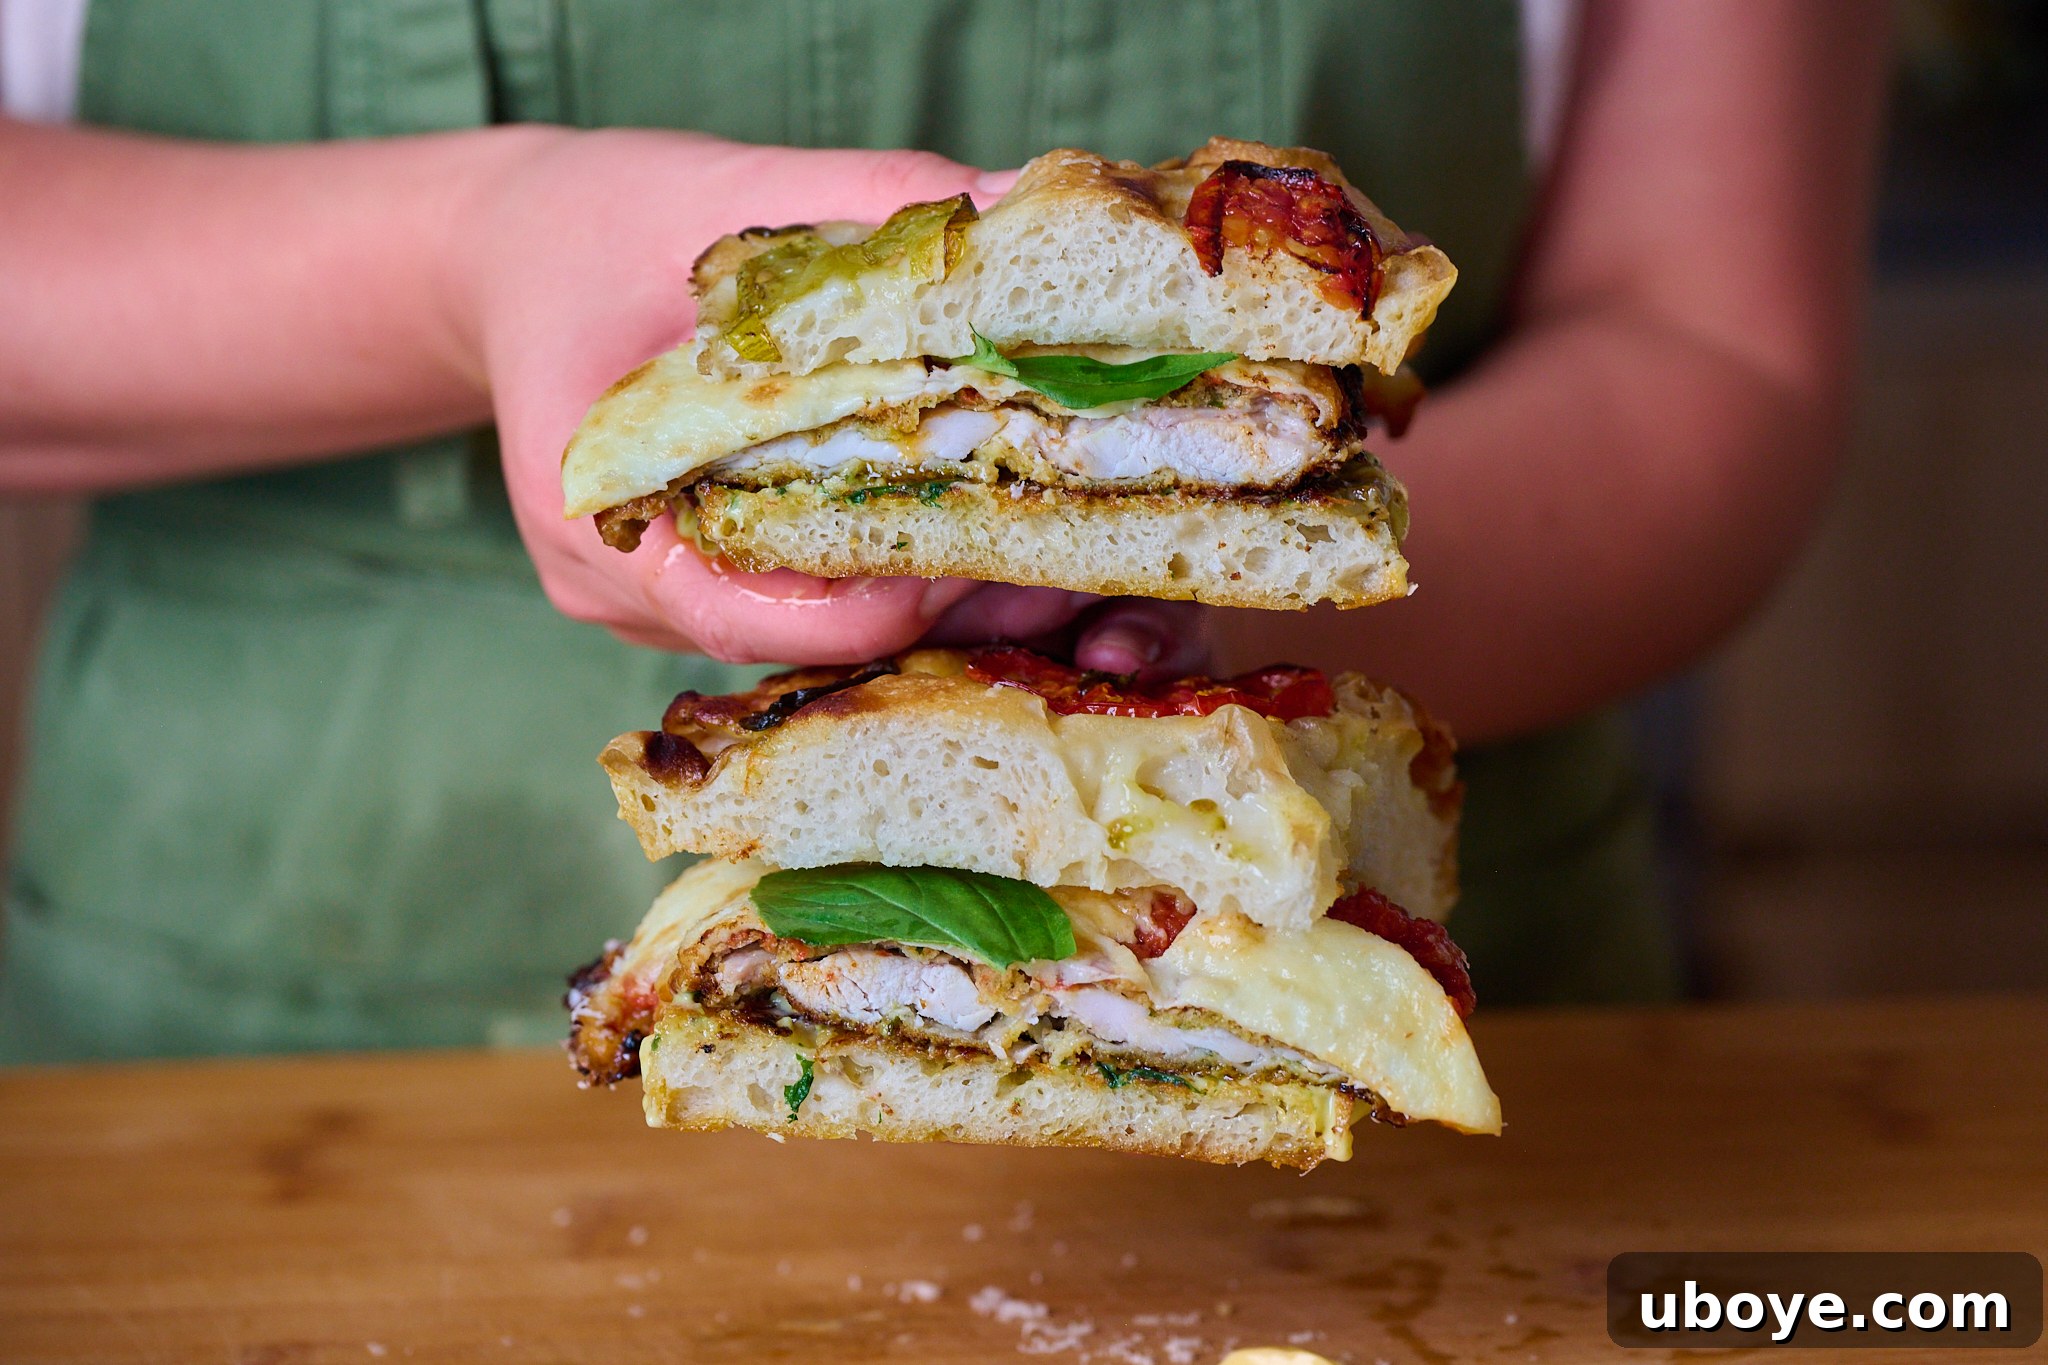
Step 6: Finalize and Slice. Carefully place the remaining toasted half of the focaccia on top of the assembled layers, gently pressing down to secure everything. For the best eating experience, slice the large sandwich in half (or into individual portions) using a sharp, serrated knife. This reveals all the gorgeous layers and makes it easier to handle. Serve immediately and prepare for an explosion of flavor!
Frequently Asked Questions About the Chicken Parmesan Focaccia Sandwich
Absolutely! While assembling it fresh for optimal crispiness and melty cheese is recommended, you can efficiently prepare all the individual components in advance. Bake the focaccia, prepare the crispy chicken, whip up the sauces, and make the garlic confit aioli, then store them separately. The focaccia can be stored at room temperature for a day or two, or refrigerated for up to five days. The chicken keeps well in the fridge for 3-4 days, and the sauces and aioli can last up to a week. When you’re ready to enjoy, simply reheat the chicken and sauce, toast the focaccia, and assemble for a fresh-tasting meal with minimal effort.
Our top recommendation for this recipe is definitely homemade focaccia. Its unique texture – soft and airy on the inside with a golden, slightly crispy crust – provides the perfect balance and structural integrity to hold all the rich, saucy, and cheesy fillings. If you’re pressed for time or prefer a store-bought option, excellent alternatives include hearty ciabatta bread or fluffy Turkish bread. Both offer a good crust and a substantial crumb that stands up well to the moisture of the fillings, ensuring your sandwich remains delicious and easy to eat.
Yes, this recipe is incredibly versatile and can be easily adapted to a delicious vegetarian version! Instead of crumbed chicken, consider using thick slices of crispy pan-fried eggplant, robust grilled portobello mushrooms, or even a hearty paneer or halloumi steak. Ensure your chosen substitute is well-seasoned and cooked until golden and tender. All the other sensational fillings – the vibrant pesto, rich tomato sauce, and creamy garlic confit aioli – remain the same, ensuring your vegetarian focaccia sandwich is still packed with incredible, satisfying Italian flavors.
For that iconic chicken parma experience, provolone and mozzarella are classic choices. They melt beautifully, creating that desirable gooey, stretchy texture that is incredibly satisfying. A combination of both offers the best of mild creaminess from mozzarella and a slightly sharper, nuttier note from provolone. Additionally, incorporating freshly grated parmesan cheese in the breading or as a topping adds an extra punch of salty, umami flavor that deepens the overall taste profile. Feel free to experiment with other good melting cheeses like fontina or even a mild cheddar if you’re looking for a slight variation.
Storage and Leftovers: Savoring Your Chicken Parmesan Focaccia Sandwich
One of the best aspects of this Chicken Parmesan Focaccia Sandwich recipe is that many of its components are designed for batch preparation and convenient storage. This allows you to enjoy freshly assembled sandwiches throughout the week or repurpose elements into other delicious meals. From the aromatic garlic confit aioli to the fluffy focaccia and crispy chicken, each element maintains its quality when stored correctly and can be reimagined in countless culinary creations – think pasta dishes, delectable toasties, vibrant salads, or even as toppings for homemade pizza.
- The focaccia, once baked and cooled, can be wrapped tightly in plastic wrap or an airtight container and kept at room temperature for 1-2 days. For longer storage, it can be refrigerated for up to 5 days. Reheat gently in the oven or a toaster oven to revive its soft interior and crispy crust.
- The crispy crumbed chicken should be stored in an airtight container in the refrigerator for 3-4 days. To bring back its crispness, reheat in an oven or air fryer at 180°C (350°F) until thoroughly warmed and golden.
- Your homemade sauces – the garlic confit aioli, basil pesto, and tomato sugo – will keep beautifully in separate airtight containers in the refrigerator for up to a week.
When you’re ready to indulge, simply reheat the chicken and sauce until piping hot, toast your focaccia until it’s perfectly crisp, then layer all the components together as if it were fresh out of the kitchen. This meal prep approach ensures you can enjoy this spectacular sandwich with minimal fuss on demand.
How To Serve Your Delectable Chicken Parmesan Focaccia Sandwich
This Chicken Parmesan Focaccia Sandwich is undeniably a meal in itself, substantial and satisfying. However, if you’re aiming to create a complete and unforgettable Italian-inspired dining experience, consider pairing it with a few delightful sides. The key is to complement its rich flavors and textures without overpowering them.
- For a classic pairing: Serve alongside a generous portion of crispy triple-cooked fries or golden potato wedges. The crunchy potatoes provide a wonderful contrast to the soft focaccia and juicy chicken.
- For a lighter touch: A fresh, simple green salad dressed with a light vinaigrette is perfect for cutting through the richness. Alternatively, a Caprese salad with ripe tomatoes, fresh mozzarella, and basil offers a burst of freshness.
- For an authentic Italian café vibe: Pair your sandwich with some marinated olives or a bowl of bruschetta. The tangy, briny olives and garlicky bruschetta will enhance the Italian theme.
- Complementary beverages: Enjoy your sandwich with a glass of sparkling water infused with lemon, a light Italian soda, or for adults, a crisp, dry white wine like a Pinot Grigio or a light-bodied red like a Sangiovese.
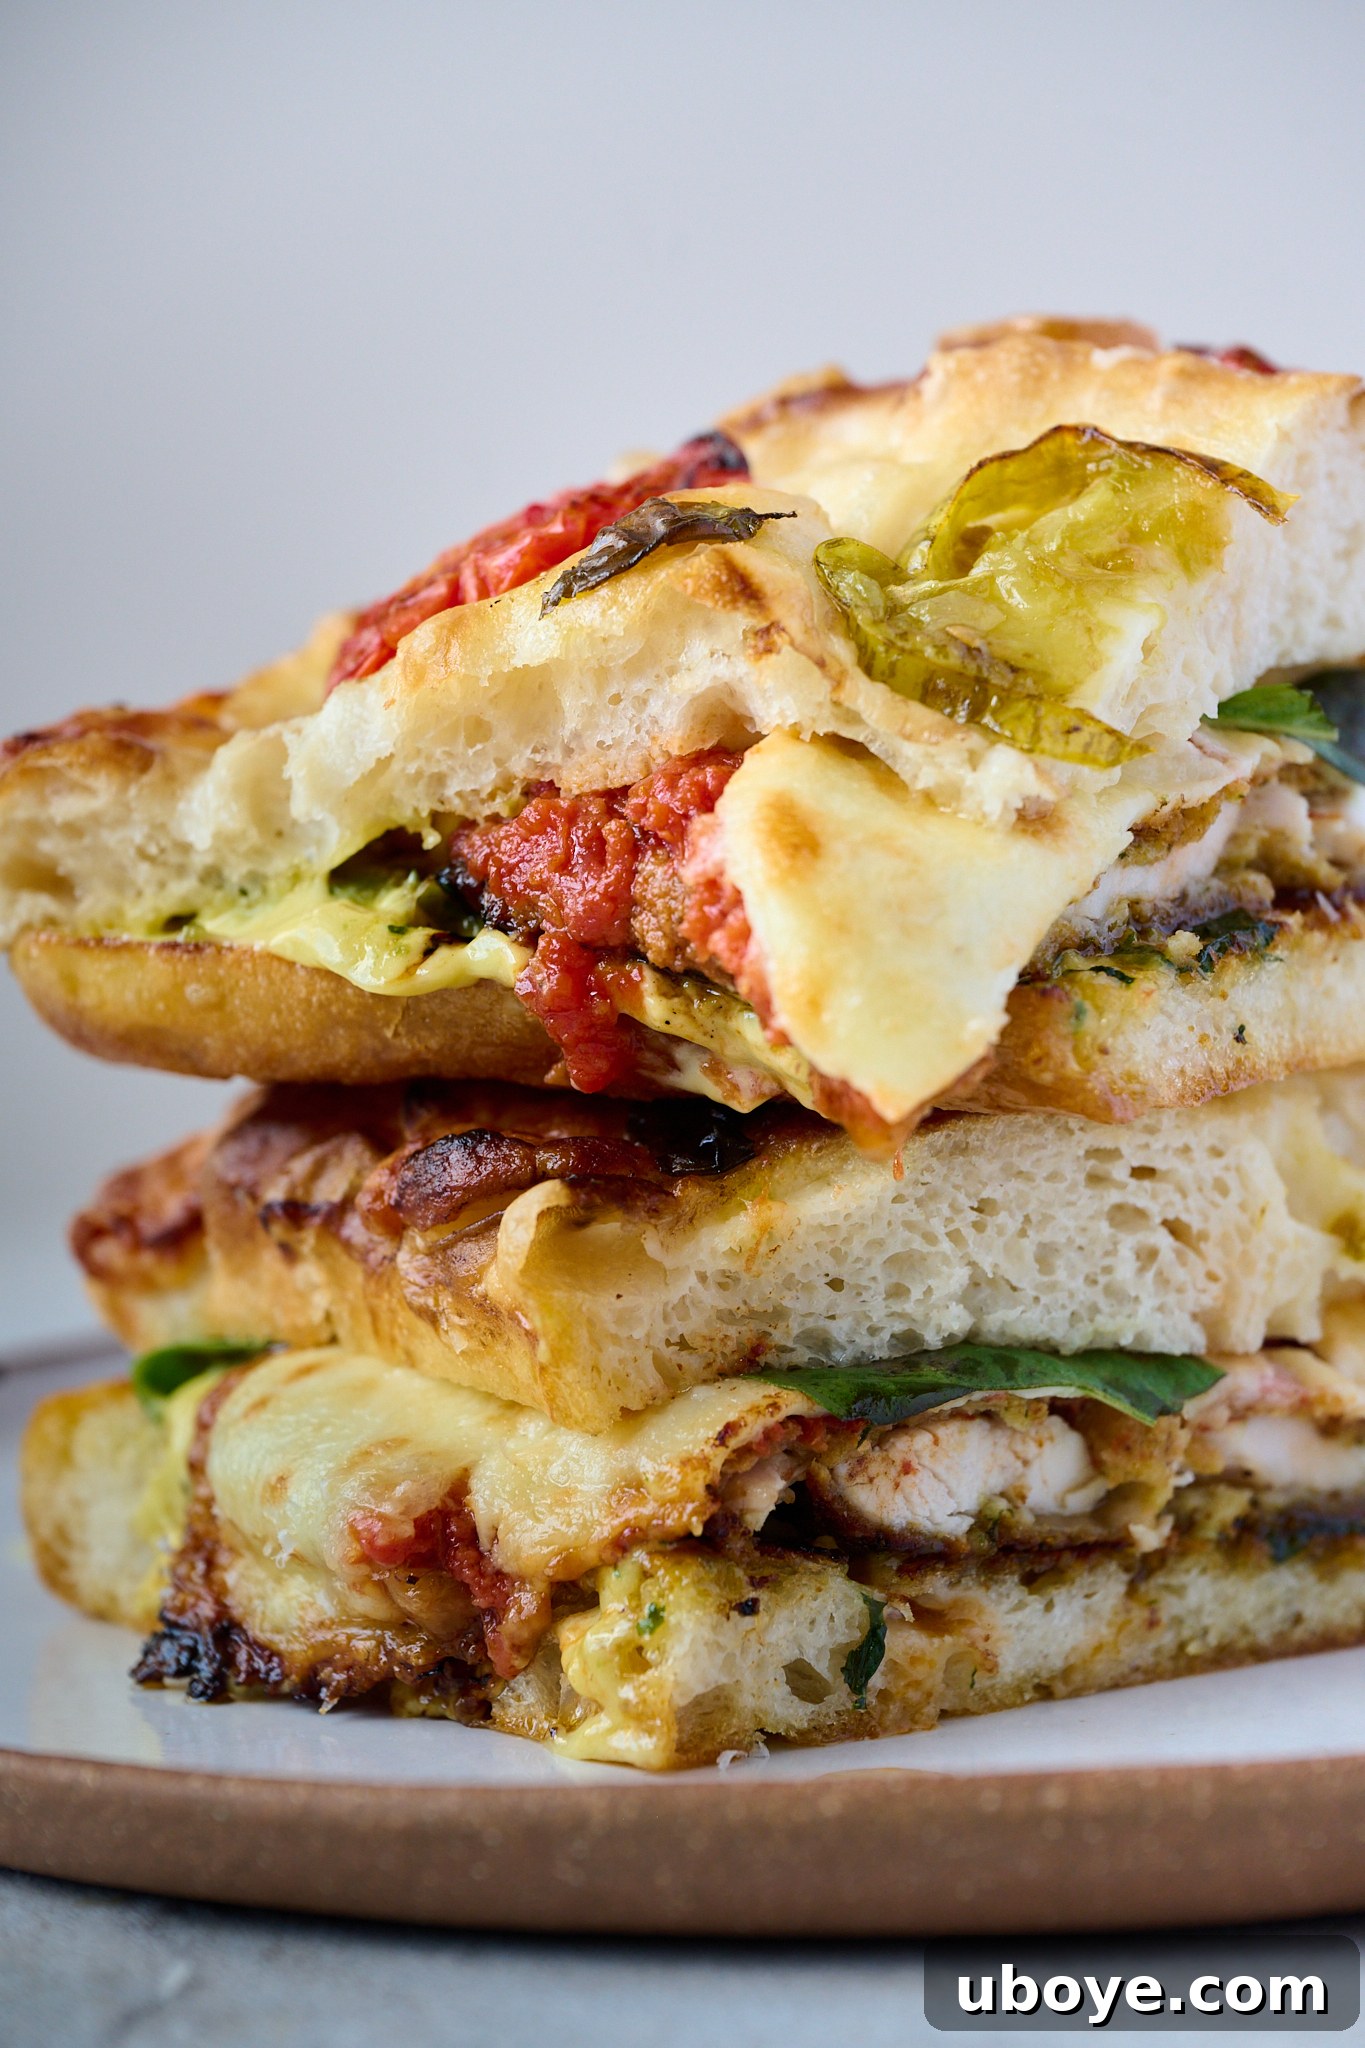
This sandwich is truly best enjoyed warm, when the cheeses are wonderfully gooey and stretching, the garlic aioli is softly melted, and the focaccia retains its delightful crispness around the edges. Gather your loved ones, assemble your masterpiece, and savor every magnificent bite!
Explore More Irresistible Sandwiches to Love
Bread, Pizza, Sandwiches
Crispy Eggplant & Roasted Capsicum Focaccia Sandwich
Bread, Pizza, Sandwiches
Ultimate Deluxe Steak Sandwich
Meat
Veal Schnitzel Focaccia Sandwich
Meat
Mortadella, Burrata & Pesto Focaccia
If you create this incredible recipe, we’d absolutely love to see your culinary masterpieces! Please tag us on Instagram, TikTok, or Pinterest so we can admire your wonderful creations and share in your delicious journey.
Should you have any questions about the recipe, require further guidance, or wish to share your invaluable feedback and reviews, please don’t hesitate to leave a comment below! We always enjoy engaging with your food and recipe-related inquiries and appreciate hearing about your experiences with our dishes.
Chicken Parmesan Focaccia Sandwich
Daen Lia
1 day 1 hr 30 mins
1 hr
8
Ingredients
Focaccia
- 700 g bread flour
- 680 g lukewarm water, (100°F / 34°C) – 95% hydration
- 7 g dry yeast
- 12 g fine sea salt
- 1 tsp honey
- 60 g olive oil, extra virgin
- 1 tbsp rosemary, finely chopped
- 1 tsp flakey sea salt
Garlic Confit Aioli
- 10 garlic confit cloves
- 1 cup olive oil
- 1 egg
- 1 tbsp lemon juice
- pinch of flakey sea salt
Pesto
- 1 garlic clove
- 1/2 tsp salt
- 1/4 cup pinenuts
- 1 cup basil
- 1.4 ounces pecorino romano, grated
- 0.7 ounces parmesan, grated
- 3/4 cup olive oil, extra virgin
Tomato & Basil Sauce
- 3 tbsp olive oil, extra virgin
- 4 garlic cloves
- 14 ounces tinned tomatoes
- 1 bunch fresh basil
- 1/2 cup water
- salt and pepper
Chicken Parma
- 2 lbs chicken breast
- 1.7 lbs sandwich loaf
- 4 eggs
- 4 garlic cloves, minced
- 1 cup flour, white all purpose
- 1 tsp salt
- 1 tsp black pepper
- 1 tbsp rosemary, finely chopped
- 1.4 ounces parsley, finely chopped
- 2 cups olive oil, extra virgin
- 1 cup tomato and basil sauce
- 1.4 ounces mozzarella, sliced
- 1.4 ounces parmesan, grated
- fresh basil leaves, to serve
Instructions
Focaccia Dough Preparation
-
Activate Yeast: In a medium-sized bowl, gently whisk together the lukewarm water, dry yeast, and honey. Allow the mixture to rest for approximately 5 minutes. You’ll know the yeast is active and ready when a frothy layer appears on the surface.
-
Combine Dry Ingredients & Mix: In a separate large bowl, whisk together the bread flour and fine sea salt. Pour the activated yeast mixture into the dry ingredients. Using a spoon or your hands, stir until a wet, sticky dough forms, ensuring there are no dry pockets of flour remaining. Cover the bowl with plastic wrap or a damp cloth and let it rest for 10 minutes.
-
Perform Stretch and Folds: With damp hands, gently stretch a portion of the dough upwards and fold it back over itself towards the center. Rotate the bowl and repeat this stretching and folding action three more times. Cover the dough again and let it rest for another 10 minutes. This “stretch and fold” method is crucial for developing the dough’s gluten structure and strength. Continue this process until the dough begins to form a cohesive ball.
-
First Proof (Cold Fermentation): Lightly coat a clean bowl with 20g of olive oil. Transfer the dough into this oiled bowl, turning it once to coat, then cover it tightly with plastic wrap. Place the bowl in the refrigerator for a slow first proof, lasting anywhere from 12 to 72 hours. This long, cold fermentation develops incredible flavor. For this recipe, you’ll only need half of the dough; carefully slice it in half and reserve the other half for another delicious focaccia creation.
-
Second Proof (Room Temperature): Generously oil a baking tin with another 20g of olive oil. Gently transfer one half of your cold-proofed dough into the tin, delicately stretching it into a rough rectangular shape. Avoid stretching it all the way to the edges, as it will naturally expand as it rises. Cover the tin with a damp cloth and allow the dough to rise in a warm spot for 2 hours.
-
Preheat Oven: While the focaccia is undergoing its second proof, preheat your oven to 200°C (390°F).
-
Add Toppings: After the dough has risen beautifully, use your fingers to gently create dimples all over its surface. Evenly scatter the finely chopped rosemary and flakey sea salt across the top. Drizzle the remaining olive oil over the entire surface, ensuring it pools in the dimples for extra flavor.
-
Bake & Rest: Place the focaccia in the preheated oven and bake for approximately 30 minutes, or until the top is gloriously golden brown and the crust is crisp. Once baked, remove it from the oven and allow it to cool slightly in the tin before transferring it to a wire rack to rest for another 15 minutes. Slice into generous portions and serve immediately for the best experience.
Garlic Confit Aioli Instructions
-
Blend Ingredients: Place the garlic confit cloves, olive oil, egg, lemon juice, and a pinch of flakey sea salt into a tall, narrow glass container or jug. Ensure the container is just wide enough to snugly fit an immersion blender. Insert the immersion blender, making sure it’s pressed firmly to the bottom. Begin blending on high speed without moving the blender up and down. As the ingredients start to emulsify and thicken from the bottom, slowly lift and lower the blender, gradually incorporating all of the oil. Continue blending until you achieve a thick, creamy, and smooth aioli consistency.
Pesto Instructions
-
Prepare Basil: Carefully remove the basil leaves from their stems. Submerge the leaves in a bowl of iced water for 5 minutes; this helps them retain their vibrant color. Remove the basil leaves and thoroughly pat them dry with paper towels to eliminate any excess moisture.
-
Create a Paste: Place the garlic clove and salt into a sturdy mortar and pestle. Crush and grind them until they form a smooth paste. Add the pine nuts and continue to pound until they are broken down, but still retain a slight texture – avoid making a completely smooth paste at this stage. Add the prepared basil leaves in three or four batches, pounding each addition until you achieve a beautiful, bright green, fragrant paste.
-
Incorporate Cheese & Oil: Gradually add the grated Pecorino Romano and Parmesan cheese in three separate batches, thoroughly mixing after each addition to ensure it’s well incorporated. Slowly drizzle in the extra virgin olive oil while continuously stirring until the pesto reaches your desired consistency – a rich, vibrant, and emulsified sauce.
Tomato & Basil Sauce Instructions
-
Sauté Aromatics: In a large, deep frypan, heat the extra virgin olive oil over low to medium heat. Add the crushed garlic and cook gently for 2-3 minutes, stirring frequently to prevent burning, until the garlic becomes fragrant and soft. If you prefer a milder garlic flavor, add whole cloves, cook until lightly browned, then remove them with a slotted spoon and set aside.
-
Prepare Tomatoes: If using whole tinned tomatoes, gently squeeze them with your hand directly into the pan to slightly crush and puree them. This ensures a smoother sauce consistency.
-
Simmer the Sauce: In the same pan, combine the prepared tinned tomatoes, water, a pinch of salt and pepper, and three-quarters of the fresh basil leaves. Bring the mixture to a gentle boil, then reduce the heat to very low and let it simmer, uncovered, for 30 minutes. The flavors will deepen and meld beautifully. Taste the sauce as it cooks and adjust seasoning with more salt or pepper if needed, or a touch of sugar if your tomatoes are particularly acidic.
Chicken Parma Instructions
-
Prepare Breadcrumbs (Day Before): If you’re using fresh sandwich bread for your breadcrumbs, lay the slices out onto a baking tray and leave them exposed overnight. This allows them to dry out and become perfectly stale, which is ideal for creating crispy breadcrumbs.
-
Preheat Oven & Pan: Preheat your oven to 400°F (200°C). Place a cast-iron frying pan (or a heavy, oven-safe pan) inside the oven while it preheats. This crucial step ensures the pan is piping hot when the chicken is added, guaranteeing an extra-crispy bottom crust for your chicken parma.
-
Prepare Egg Wash: In a wide, shallow bowl, whisk together the eggs and minced garlic until well combined. Set this mixture aside; allowing it to sit for a while gives the garlic time to infuse its wonderful flavor into the eggs.
-
Prep Chicken Breasts: Using a sharp knife, carefully slice each chicken breast horizontally through its thickest part, creating two thinner cutlets. Let the knife do most of the work, applying gentle pressure as you glide it through. Place each chicken cutlet between two sheets of plastic wrap or baking paper. Using the smooth side of a meat mallet, pound the chicken gently from the center outwards until each piece is approximately 2cm (about 3/4 inch) thick and has a uniform thickness throughout. Transfer the flattened chicken onto a large baking tray and season generously with salt and pepper on both sides.
-
Make Breadcrumbs: Roughly tear apart your stale bread and place it into a food processor or blender along with the finely chopped parsley and rosemary. Pulse until the bread forms coarse, chunky breadcrumbs, and the herbs are evenly distributed. Avoid over-processing; we want some texture. Transfer the breadcrumbs to a shallow baking tray.
-
Season Flour: In another shallow baking tray, whisk together the all-purpose flour with a generous amount of salt and black pepper.
-
Set Up Dredging Station: Arrange your breading station in a logical sequence: first, the seasoned flour; second, the garlicky egg wash; third, the herb-infused breadcrumbs; and finally, a large clean plate or tray to place the coated chicken.
-
Bread the Chicken: Take one chicken breast cutlet and coat both sides thoroughly and evenly with the seasoned flour, shaking off any excess. Next, dip it into the egg wash, ensuring both sides are fully coated. Finally, place the chicken into the breadcrumb mixture, applying firm pressure with your hands as you flip and press to ensure the breadcrumbs adhere perfectly and evenly all over. Transfer the breaded chicken breast to your clean plate and repeat this process for all remaining chicken cutlets.
-
Fry Chicken: In a large frying pan, add enough extra virgin olive oil to generously coat the bottom. Heat the olive oil over low to medium heat. You can test if the oil is hot enough by inserting a wooden skewer; if bubbles form around it, it’s ready. Fry 1-2 pieces of chicken at a time for 2-3 minutes on each side, or until they are beautifully golden brown and crispy. Avoid overcrowding the pan. Place the cooked chicken onto a plate lined with absorbent paper or a cooling rack to drain any excess oil.
-
Broil to Finish: Carefully remove the hot cast-iron pan from the oven. Change your oven setting to broil (grill). Very carefully place the fried chicken cutlets into the hot cast-iron pan. Generously spoon the prepared tomato and basil sauce over each piece of chicken, covering most of its surface. Layer with grated parmesan cheese first, followed by slices of mozzarella. Place the pan under the broiler for approximately 4 minutes, or until the cheese has completely melted, is bubbling, and slightly golden. Allow it to cool for a moment, then scatter with fresh basil leaves if desired, and serve immediately.
Sandwich Assembly Instructions
-
Toast Focaccia: Slice your prepared focaccia bread horizontally in half. Drizzle the cut sides with a little olive oil. In a frypan set to low-medium heat, lightly toast the focaccia until it’s golden and warmed through, creating a sturdy yet soft base.
-
Assemble Layers: Begin building your sandwich by spreading a generous layer of creamy garlic confit aioli onto the bottom half of the toasted focaccia. Follow this with a vibrant layer of homemade pesto. Carefully place a hot, saucy chicken parma cutlet on top of the spreads. For an extra touch of flavor and freshness, sprinkle a little additional parmesan cheese and a few fresh basil leaves over the chicken. Finally, crown your masterpiece with the remaining toasted slice of focaccia. Slice the assembled sandwich in half for easy handling and immediate enjoyment.
Video Tutorial
Helpful Notes & Tips
- Dough Usage: This recipe often yields more focaccia dough than needed for a single sandwich. Feel free to slice the dough in half after the first proof and save the second half for another recipe. You can get creative with various other delicious focaccia toppings!
- Yeast Type: We prefer using dry yeast that requires activation in water, as outlined. However, if instant yeast is more convenient, simply add it directly to your dry ingredients along with the water and honey – no prior activation is needed.
- Flour Alternatives: While bread flour provides the best chewy texture, all-purpose flour can be used as a substitute if bread flour isn’t available. The result will still be wonderfully delicious, just with a slightly different crumb structure.
Pesto Perfection:
- Mortar and Pestle vs. Food Processor: Using a mortar and pestle, as suggested, truly brings out the nuanced flavors and textures of the pesto. It can take a bit of patience to achieve a fine paste, but this texture is key for it to evenly coat all components. If you’re short on time or lack a mortar and pestle, a food processor is a perfectly acceptable alternative. Just be mindful not to over-process, as too much heat can dull the basil’s vibrant flavor.
Garlic Confit Aioli Insights:
- Oil Choice: For an intensely garlicky and robust aioli, consider using the very oil in which the garlic confit was roasted. This infused oil adds an incredible depth of flavor. Olive oil is a popular and heart-healthy choice for aioli, lending a rich, sometimes slightly peppery finish. While traditional aioli often uses neutral oils for a milder taste, extra virgin olive oil creates a more authentic, Mediterranean-inspired profile. If the flavor of extra virgin olive oil is too strong for your palate, you can blend it with a neutral oil or opt for a lighter olive oil.
Chicken Parma Pro-Tips:
- Best Bread for Breadcrumbs: For the crispiest, most flavorful breadcrumbs, a cheap white sandwich loaf that is a few days old or stale works best. If your bread is fresh, you can toast it lightly and let it cool completely, or lay it out on cooling racks overnight to dry out.
- Breadcrumb Texture: We’re aiming for chunky, rustic breadcrumbs, not a fine powder. These larger, crusty pieces are what provide that exceptional crunch and texture to the chicken. If using a smaller blender or food processor, process the bread and herbs in batches to ensure an even, chunky texture.
- Shallow Frying Technique: To ensure your olive oil is at the perfect temperature for frying, insert the tip of a wooden skewer into the hot oil. If tiny bubbles form steadily around the skewer, your oil is ready. This prevents soggy breading and ensures a golden, crispy crust.
- Optimal Chicken Cooking: It’s always a good practice to test cook one piece of chicken first. This allows you to accurately gauge your cooking time and adjust heat levels as needed, ensuring perfect doneness. Remember that chicken will continue to cook for a few seconds after it’s removed from the heat, so take it off just a moment before you believe it’s fully ready to prevent overcooking.
Nutrition Information (Approximate Per Serving)
Carbohydrates: 82g
Protein: 46g
Fat: 130g
Saturated Fat: 21g
Polyunsaturated Fat: 15g
Monounsaturated Fat: 88g
Trans Fat: 0.02g
Cholesterol: 169mg
Sodium: 1750mg
Potassium: 719mg
Fiber: 4g
Sugar: 3g
Vitamin A: 1012IU
Vitamin C: 12mg
Calcium: 236mg
Iron: 4mg
Nutrition information is automatically calculated and should only be used as an approximation. Values can vary based on specific ingredients and preparation methods.